Michael has recently created this beautiful article on procedural shading using Maya & Vray and we asked him to share it with our community. Enjoy it!

Procedural shading is something I have taken an interest in quite a lot recently and I have used fully procedural shaders for my recent 'Still life' project. This tutorial will only cover basic principles and problems you may encounter when you start out!
Much of what I'm going to cover can be found in Grant Warwick's 'mastering vray' series, his videos are incredibly informative however he works exclusively in 3ds max in his videos. So I figured I could do a little translating for you guys to help you learn the basics!
Procedural shaders within Maya have a multitude of uses, the primary advantage to procedural work is how easy it is to re-use them on different projects or multiple objects in one scene, they are also incredibly quick to create iterations with! Using procedural shaders allows you to test lots of ideas quickly before you take the time to paint a final version of all the texture maps.
When approaching the creation of a procedural shader you must first breakdown what makes that material, if you wanted to create a painted wood or metal for example, it would be very difficult to capture all the effects within one material. Instead, try creating several materials (one for each element) and put them all together using a blend material (Such as 'vrayBlendmtl') and use the blend amount to define where that element is visible.
One aspect of shading that I see is most often overlooked is the refractive/fresnel IOR values, the index of refraction is a material quality that dictates how light interacts with the surface/volume of that object, the default value is 1.6 which gives a slightly plastic feel to many materials.
The best resource I can recommend is Refractiveindex.info as it has everything laid out very clearly and even has a '3D' shelf dedicated to helping us 3D artists along by giving us values for common materials.
Within Maya there are two methods to place textures on your material that come built into the program.
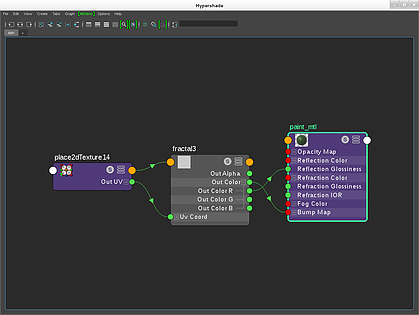
The first of which is the 'place2Dtexture' node which comes pre attached when you create any 2D effect such as 'fractal', 'noise', 'cloth' and so on. The main thing to keep in mind about 2d textures is that they are dependant on your objects UV's for placement meaning if your uvs are bad, the texture will be bad, it also means that seams in your uv are visible (So keep them uv's clean!).
However, its not all bad to use 2d texture projects since the objects position in space is not important, this means you can animate the mesh and your textures remain constant which is great for obvious reasons.
The second method of texture projection is the 'place3Dtexture' node which overcomes the problems mentioned with the 2d texture placement. First of all it does not rely on uv's at all, which is fantastic if you don't want texture seams, tiling artefacts and texture stretching/compression. However this comes with a catch, since the 'Place3dtexture' node rely's on world space moving the object will change the resulting texture on the object, as you can imagine this looks weird in animation (That's not to say its useless though, you just have to think outside the box!). Also, when working with volumetric effects it is easy to use the 'place3dtexture' node to create much more interesting looks when rendered, it even allows you to fake attributes like uneven density within your effects if used correctly.
Sadly, using this projection type means you cant input 2d images. if you want to paint a texture or project an image using this you have to instead use a camera projection. Camera projects are very powerful and often used for matte painting and are not entirely uv dependant despite using a 2d image.
Finally, there is a third type of texture projection that you can use which was added in vray 3.3 which combines both of the above techniques. This is called 'tri-planar' projection and it allows 2D images to be projected in 3d space without the use of a specific camera, also due to the way its algorithm works it also eliminates texture seams and uv artefacts like stretching and compression.
How this work in an animation pipeline? well to be honest I have no idea, since I don't have vray 3.3 I haven't been able to test it to see what happens but I assume that it has the same problem as the 'place3dtexture' node when objects are moved. Still though, its cool stuff!
At first the hypershade is a confusing place but with maya 2016 it got a lot more friendly to use with the visible node connection points on display.
The most important new feature (in my opinion) is the material viewer, by default maya 2016 comes with its own little lookdev environment with different geometries and HDR environment lights to try out which is great for testing you material on its own without fancy geometry to distract you, typically I like to use the shader ball with the Interior2 colour light set-up for most of my shader development. One cool little feature with this window is the solo button on the top of every node in your hypershade, this allows you to use the material viewer as a media display so you can see what you are doing to the textures directly without the distractions that may be on your material itself (like bump or specular).
Another little time saver is when you're in the hypershade node graph you can press the TAB key which will open a small text box allowing you to type the node you want to use. This saves you more time the more you use it as you start to understand what you want, there's no scrolling though menus and sub-menus until you find what you were looking for, its just there (if you're used to using NUKE then this will make you feel right at home!).
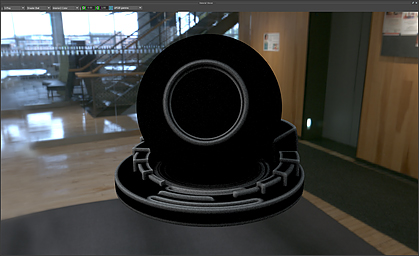
When creating material effects or masks it is often very helpful to preview how it looks on a plain black material with no specular value. Just take your mask and plus it on top of your material in the diffuse attribute (you could use a layered texture node with a flat black ramp for this).
I tend to use this method whenever I am creating a material mask or bump map as subtle opacity changes can be very hard to detect on your mask if you're using your final material to test it on. It's also a lot easier to use if you are creating effects that rely on Vraydirt or curvature as when these are plugged into a materials bump attribute it often makes some very strange looking effects that really don't represent the final rendered product.
When using textures to drive shader attributes it is always important to know what/how many channels you are using. Most material attributes use RGB colour to drive the strength of that particular setting even if the effect you are trying to drive is a black and white map (for example, opacity, for which the alpha value is determined by averaging the R, G and B values together on each pixel)
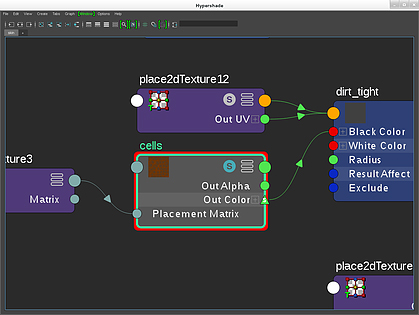
However not all attributes are this kind to us, as seen on the image to the left reflection glossiness can only take one channel (note the lack of a plus simple next to its connection dot). By default, when dragging a texture onto this node it will try to connect the alpha channel of your texture as both this alpha and what the glossiness is looking for is just one channel. This would be great if the alpha worked as you expected, but by default, the alpha is a flat white colour on most textures which results in a very polished material. In this kind of situation it is best to connect a single channel of your RGB instead by clicking on the plus simple next to the out colour, and then middle mouse clicking on the green dot next to it to drag out the connection manually.
One thing I learned the hard way is that a nodes name is not its only use, many of the nodes that come with maya (and Vray) seem to be named way to specifically for beginners to really think about their potential. For example, during some early testing of mine I spent days trying to find a "cell noise" node as this is what the effect I wanted was called in many other 3d and rendering packages, turns out what I was looking for was just called "leather" in maya! I mean, it does make a pretty leather effect with the right settings I suppose... but you can also use it for scratches, cracking, dents, holes and flakes too. I'm not going to list all the possible uses for every node here since that would take WAAAAAYYYY to long and I would probably miss 90% of them. I guess its just helpful to test every option when you are trying for a certain look!
These are just a few little nodes that are great for procedural shading or showreel work
VrayDirt:
Vraydirt is a ambient occlusion node and because of this you cant preview its effects in the viewport so you'll have to use the material viewer or do render tests to see its effects. I personally like to use Vray dirt as a mask for other nodes or materials to get a dirty effect, rather than just using Vray dirt on its own. It's also great for making your geometry "pop" if you give it a small radius value as it deepens shadows within the model (great for showreel renders for modellers)
Within Vraydirts' settings you will also find the button "invert", clicking this inverts the normals of your geometry when the node is calculating the ambient occlusion. By doing this Vray dirt begins to act as an edge detector and becomes great for doing different wear effects in your material!
VrayCurvature:
VrayCurvature checks your geometry to find any peaks or dents by analysing the normals of the model, it then returns a greyscale map for you to use either for a mask or anything else you may want. This map can be used to find edges and dent in a model but I personally prefer to use two vray dirt nodes (one inverted and one not ) and combine them as this gives more fine control over the final result.
Vrayedges:
Vrayedges is a nice little feature for modellers as when use one the diffuse channel of a material it shows the wireframe of that object. Super easy to setup and lots of control over the look you get!
SamplerInfo:
SamplerInfo - although not used in this tutorial - is a great node to learn if you want to create real life effects in your materials, it can give you information about normal direction and position which is particularly good if you want to create fabrics in particular. The most common use is using samplerinfo to place a ramp texture to act as a custom fresnel effect, to do this just connect the facing ratio attribute to the V co-ordinate of your ramp (if you are using a vramp).
Definatly worth learning this one!
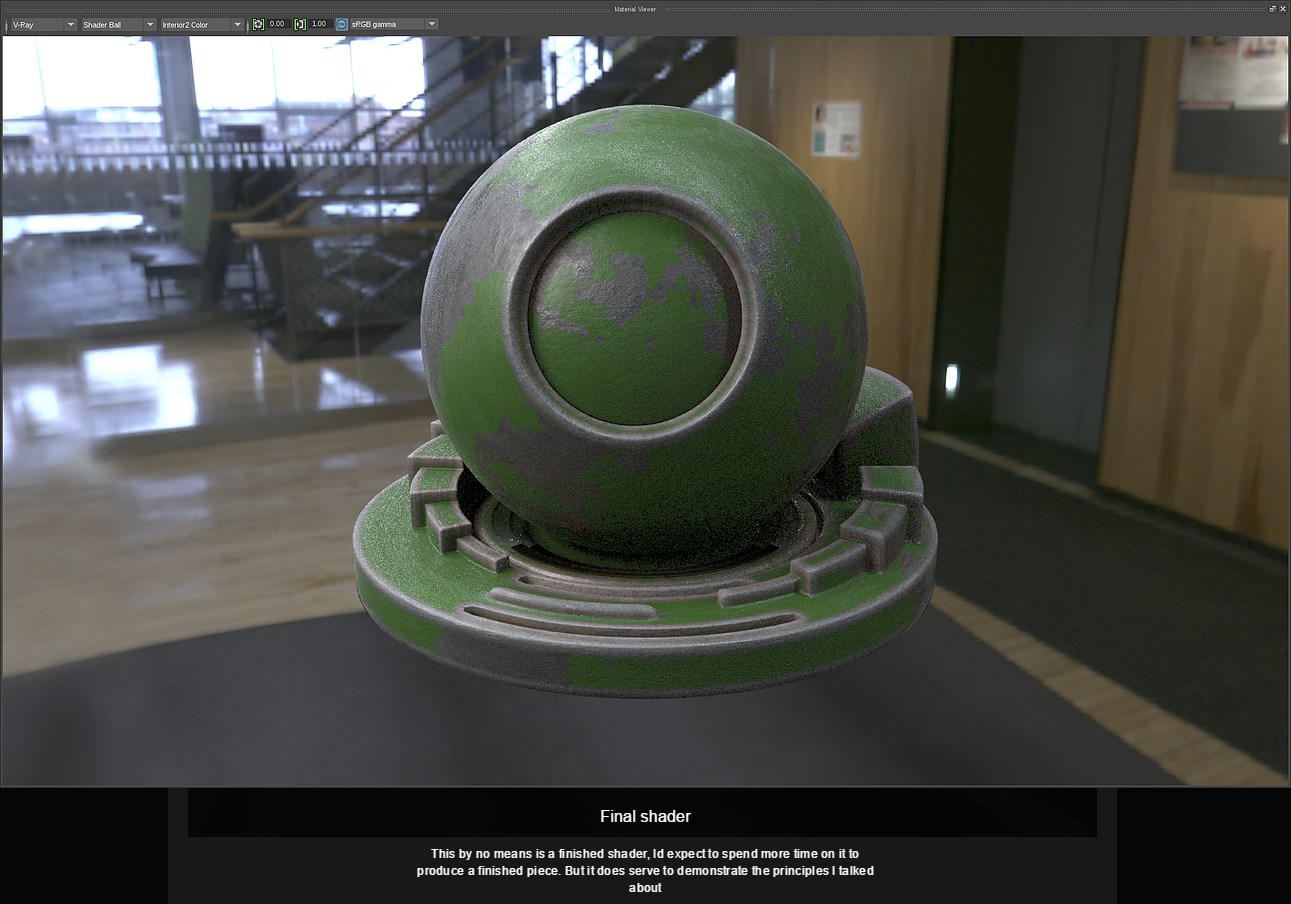
Before I start explaining what I did I should probably say this is not a finished shader, I would expect to spend a much larger amount of time on this before I could call it done. However, it does show all the principles I talked about earlier. I also wont be telling you exact values and settings for all the nodes as this wont teach you anything, its best to try playing with all the settings to see what happens so that you gain a stronger understanding about the nodes and how you may want to use them.
First off, we need to break the material down into its primary features, we know its a painted metal so we would first have to create a metal base on which paint could be added. We also need a paint shader and a flaky mask to separate the two materials.
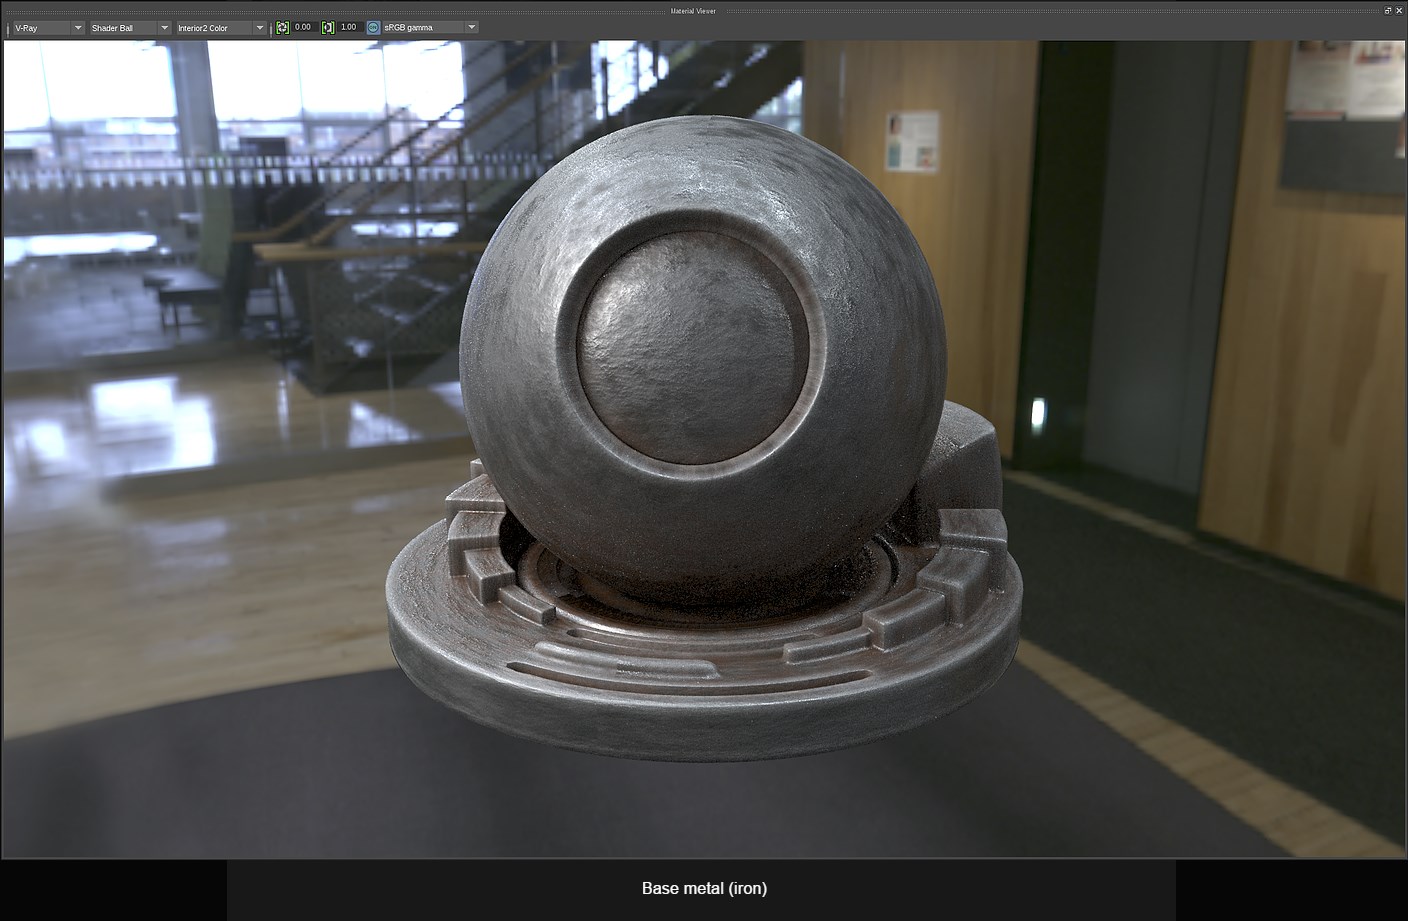

For the base metal material I started with a standard 'vrayMtl' node and set the refractive index to 1.9076 to be consistent with that of lead. When blocking out metal materials I like to start with a black (or near black) diffuse value as I find this gives great results with a correct specular map, its also worth noting that metal materials are able to have coloured spec maps unlike other materials like plastic or wood.
To create the spec gloss map I use a 'fractal' node as this is great for grease effects and old material warping/denting, because of this I often like to connect this same map to the bump channel, it's not a 'correct' way of working but I think it looks nice and it really make the details pop out.
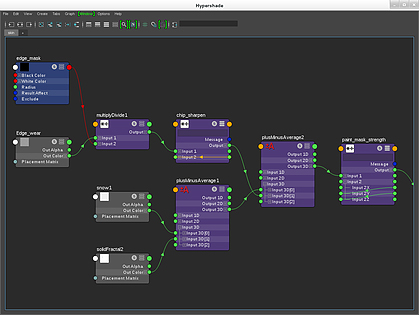
I then moved onto creating the edge wear on my metal, in the image to the left I did this with a fractal, an inverted vray dirt and a multiply divide node.
As explained in the know your nodes section a Vraydirt with invert enabled acts like an edge detector, it's not great but it is far easier than other methods and this is only a basic tutorial but feel free to follow this link to look into more depth (link: http://www.neilblevins.com/cg_education/vertex_map_wear/vertex_map_wear.htm)
The fractal simply serves to add variation into the edge wear so that it doesn't look perfectly even, to apply the fractal I used a Multiplydivide node.
A multipydivide node takes the first input and performs your requested operation using the second input, this is great for applying a mask to textures in a very quick to calculate method!
After the edge wear I created a very simple rust/dirt effect which was done by connecting a leather node to the occluded colour of a vraydirt.
As before the method I used was a very simplified way to work. It would have been much better to create a separate material for the rust which would have gave much a better look.
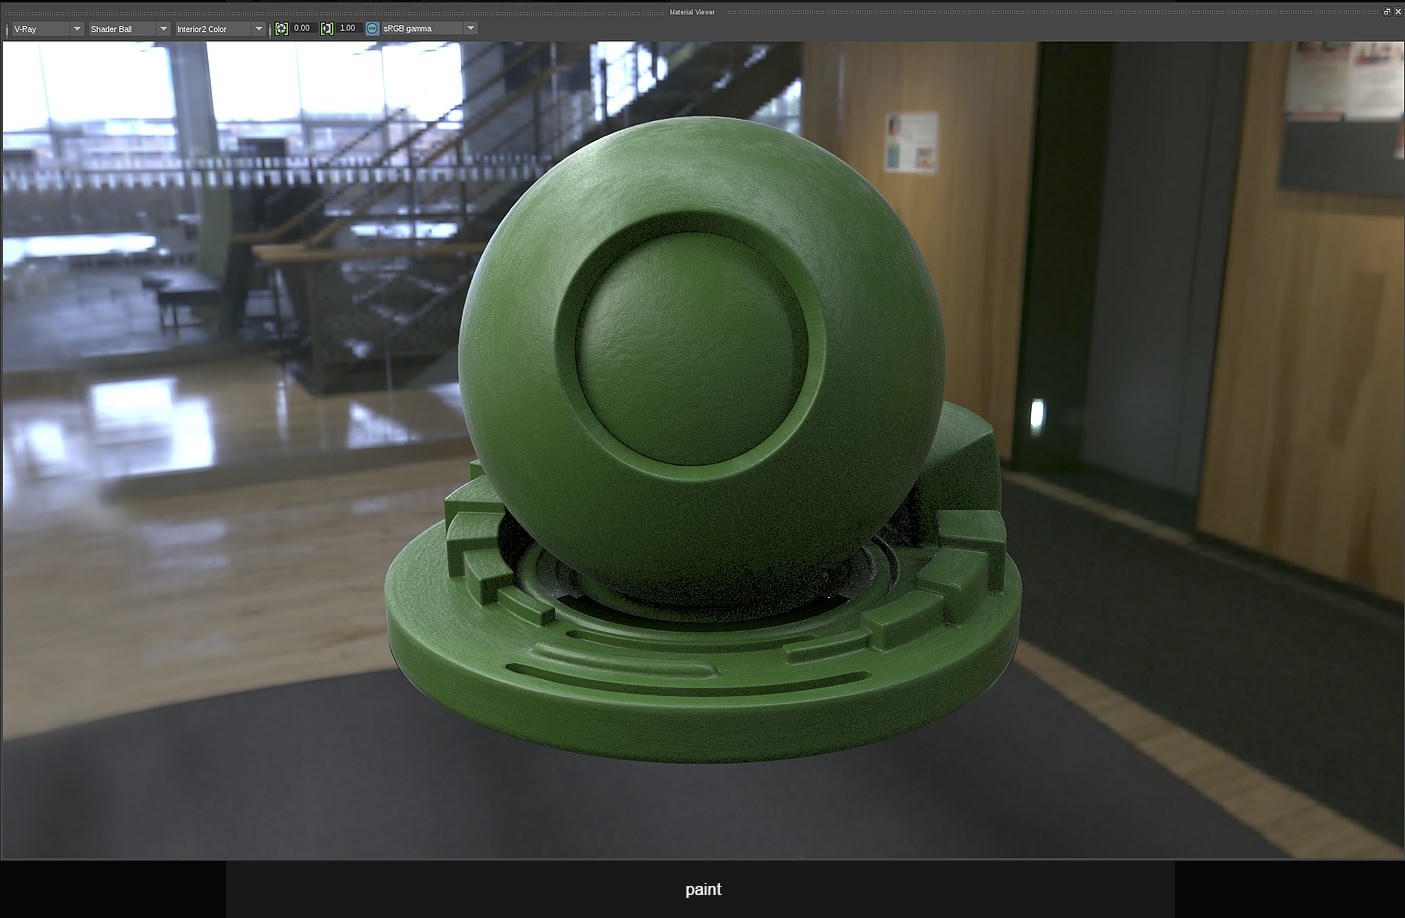
The paint as - you can see - was pretty simple to create!
I set the IOR to 1.517 to give it a nice plastic feel and attached a fractal to the gloss and bump channels as I did before with the metal material. Really not much else to say, just have a play around with this one to get the effect you want.
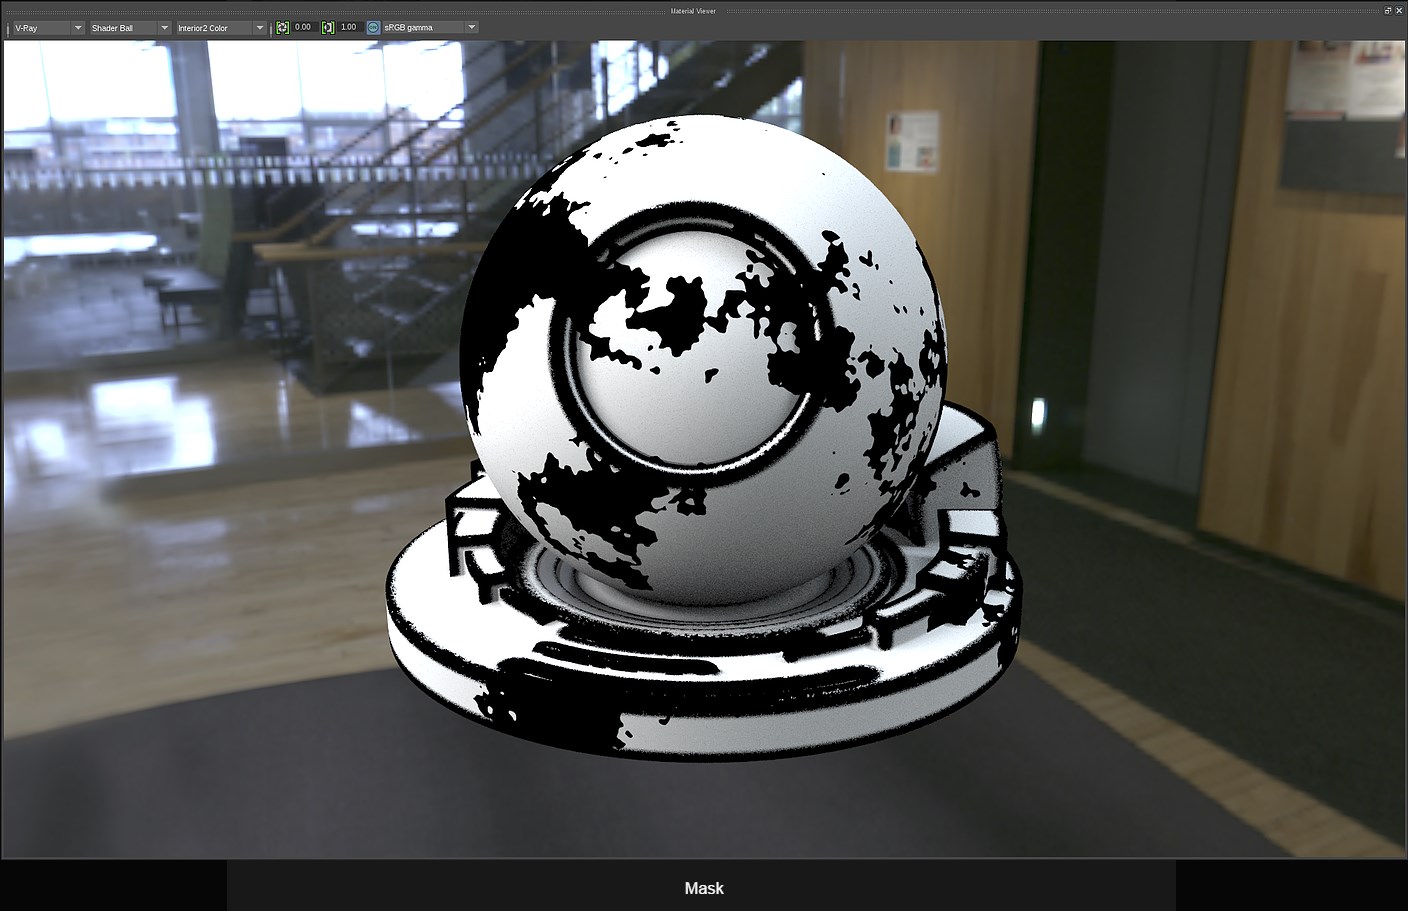
This is where creating a test material will come in handy as procedural masking (in my experience) isn't often strong enough to be noticeable with many material combinations, just just connect your mask to a diffuse channel in your test material. This way, it is much easier to see what you are making!
Anyway, what you see on your right is actually a hell of a lot more simple than it looks as there are only 4 nodes that were actually used to create the mask, the rest were just simply adjusting the map to look the way I wanted (two of which we used earlier to create the metal edge wear earlier! so its only really two new nodes.)
To begin creating the mask I started by using a 3D 'SolidFractal' and a 'snow' node to block out areas that I wanted the paint to remain in the final shader, to combine these together I summed the two values using a 'PlusMinusAverage' node ( I could have also used a layeredTexture node but I felt a PlusMinusAverage node would be much more simple to set up).
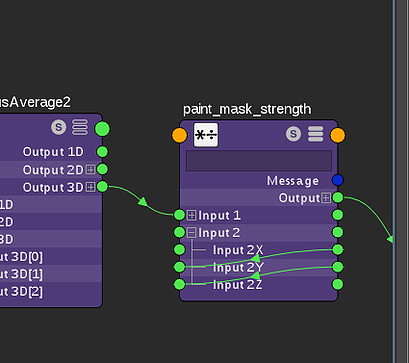
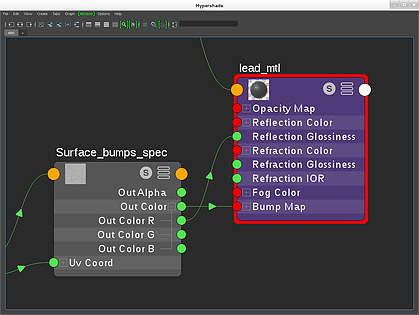
Once I had this I taken the edge wear graph from the metal material and tried badding this to the other map. However, I quickly discovered is was far to weak to be seen in this new map. To get around this problem I used a 'MultiplyDivide' node which allows you to amplify a values that you add to input 1, it even allows you to change the R, G and B values independently which is great if you want to do so. In this case though that was rather annoying because that meant that if I wanted to multiply the whole thing by 100 I would have to input 100 three times - one for each RGB channel - which was really annoying for a lazy person like myself. So, I used a simple little trick that meant that I only had to input the value once, I did this by connecting the output of 'input2X' into the input of 'input2Y' and then the same again for 'input2Z' (as seen on the image to your right). It's pretty cheap and looks weird on the graph but it worked great!
I then repeated this process after combining both of the mask maps together to sharpen the mask to give it a more harsh edge.
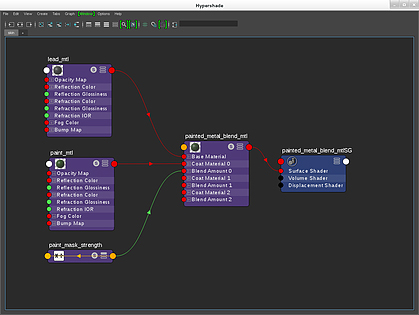
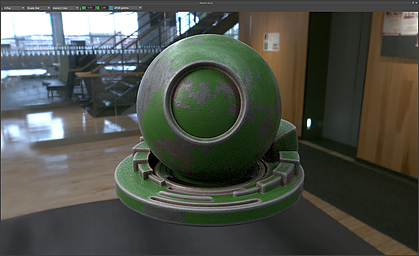
The final step in creating our procedural texture is to put everything back together.
To do this you have a two primary options, LayeredShader or the VrayBlendMtl, in this case I used the VrayBlendMtl.
First off, decided which order you want the materials to be layered, for this shader the base material would be the metal with the first coat material being the paint and the blend amount for the paint will be the mask we created earlier.
And thats it, we're done. If you wanted to take this a little further you could use the Mask we made as a displacement for your object which would make the paint have a "real" thickness and would add to the realism greatly. However, this would not show up in the material viewer so I did not do it for this tutorial.
I hope you gained some new info out of this little write-up, this was my first tutorial and it was a lot of fun to make but if you have any ideas about how I can improve the tutorial please let me know (we're all learning here )!
Also, if you have any questions about what was shown here, don't hesitate to contact me directly or check the resources listed below for more clarification or more advanced topics.
See ya
Grant warkicks "mastering vray" series:
Grant Warwicks mastering vray series is a fantastic source of information about the process behind creating procedural shading, he goes into great depth about the hows and whys surrounding the topic.
Refractiveindex.info:
Refractiveindex.info is a great website that is one of - if not the - best resources for physical information about various materials. Its quite complex at times an you need to know the scientific name for the material you're searching for but once you found it you can get any information you want!
Vray/Autodesk docs:
Every node you may want to use will have been documented in at least one of these, this is the best resource for know what each value actually means in real terms and they often come with images showing the range of values and how they look which is great if you're a visual learner.
curvature based edge wear - CG education:
Just in case you wanted to go into more depth with edge wear
http://www.neilblevins.com/cg_education/vertex_map_wear/vertex_map_wear.htm
GOOGLE:
THE SINGLE MOST UNDER UTILIZED RESOURCE IN HUMAN HISTORY (maybe)... Chances are if you're having a problem with your shader, someone else had had/fixed that exact problem before and chances are that fix was posted on CGsociety forums. Just google your problem and you should have some luck.
If not, well, just talk to people or post your issue on forums and within hours you should be given a fix.