Hi everyone! First of all I would like to thank VWArtclub for inviting me to write this making of article and giving me the opportunity to present a peace of my work, it’ s an honor.
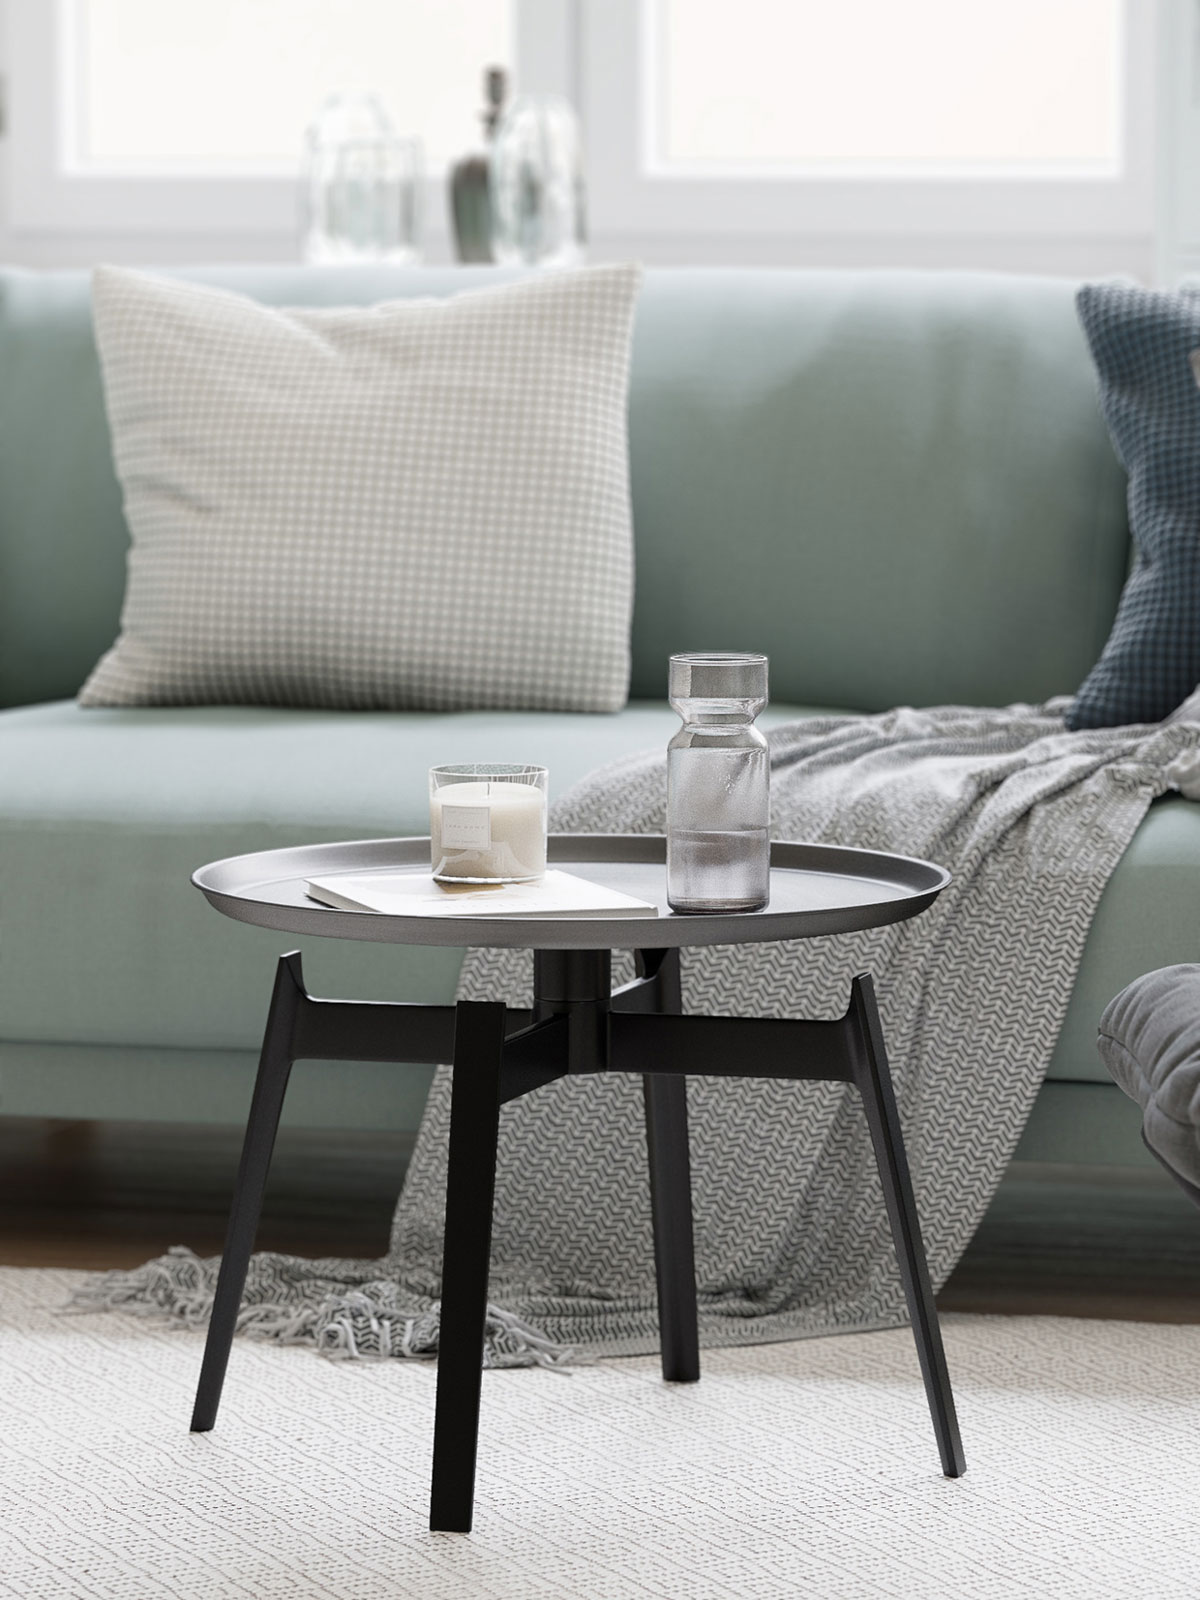
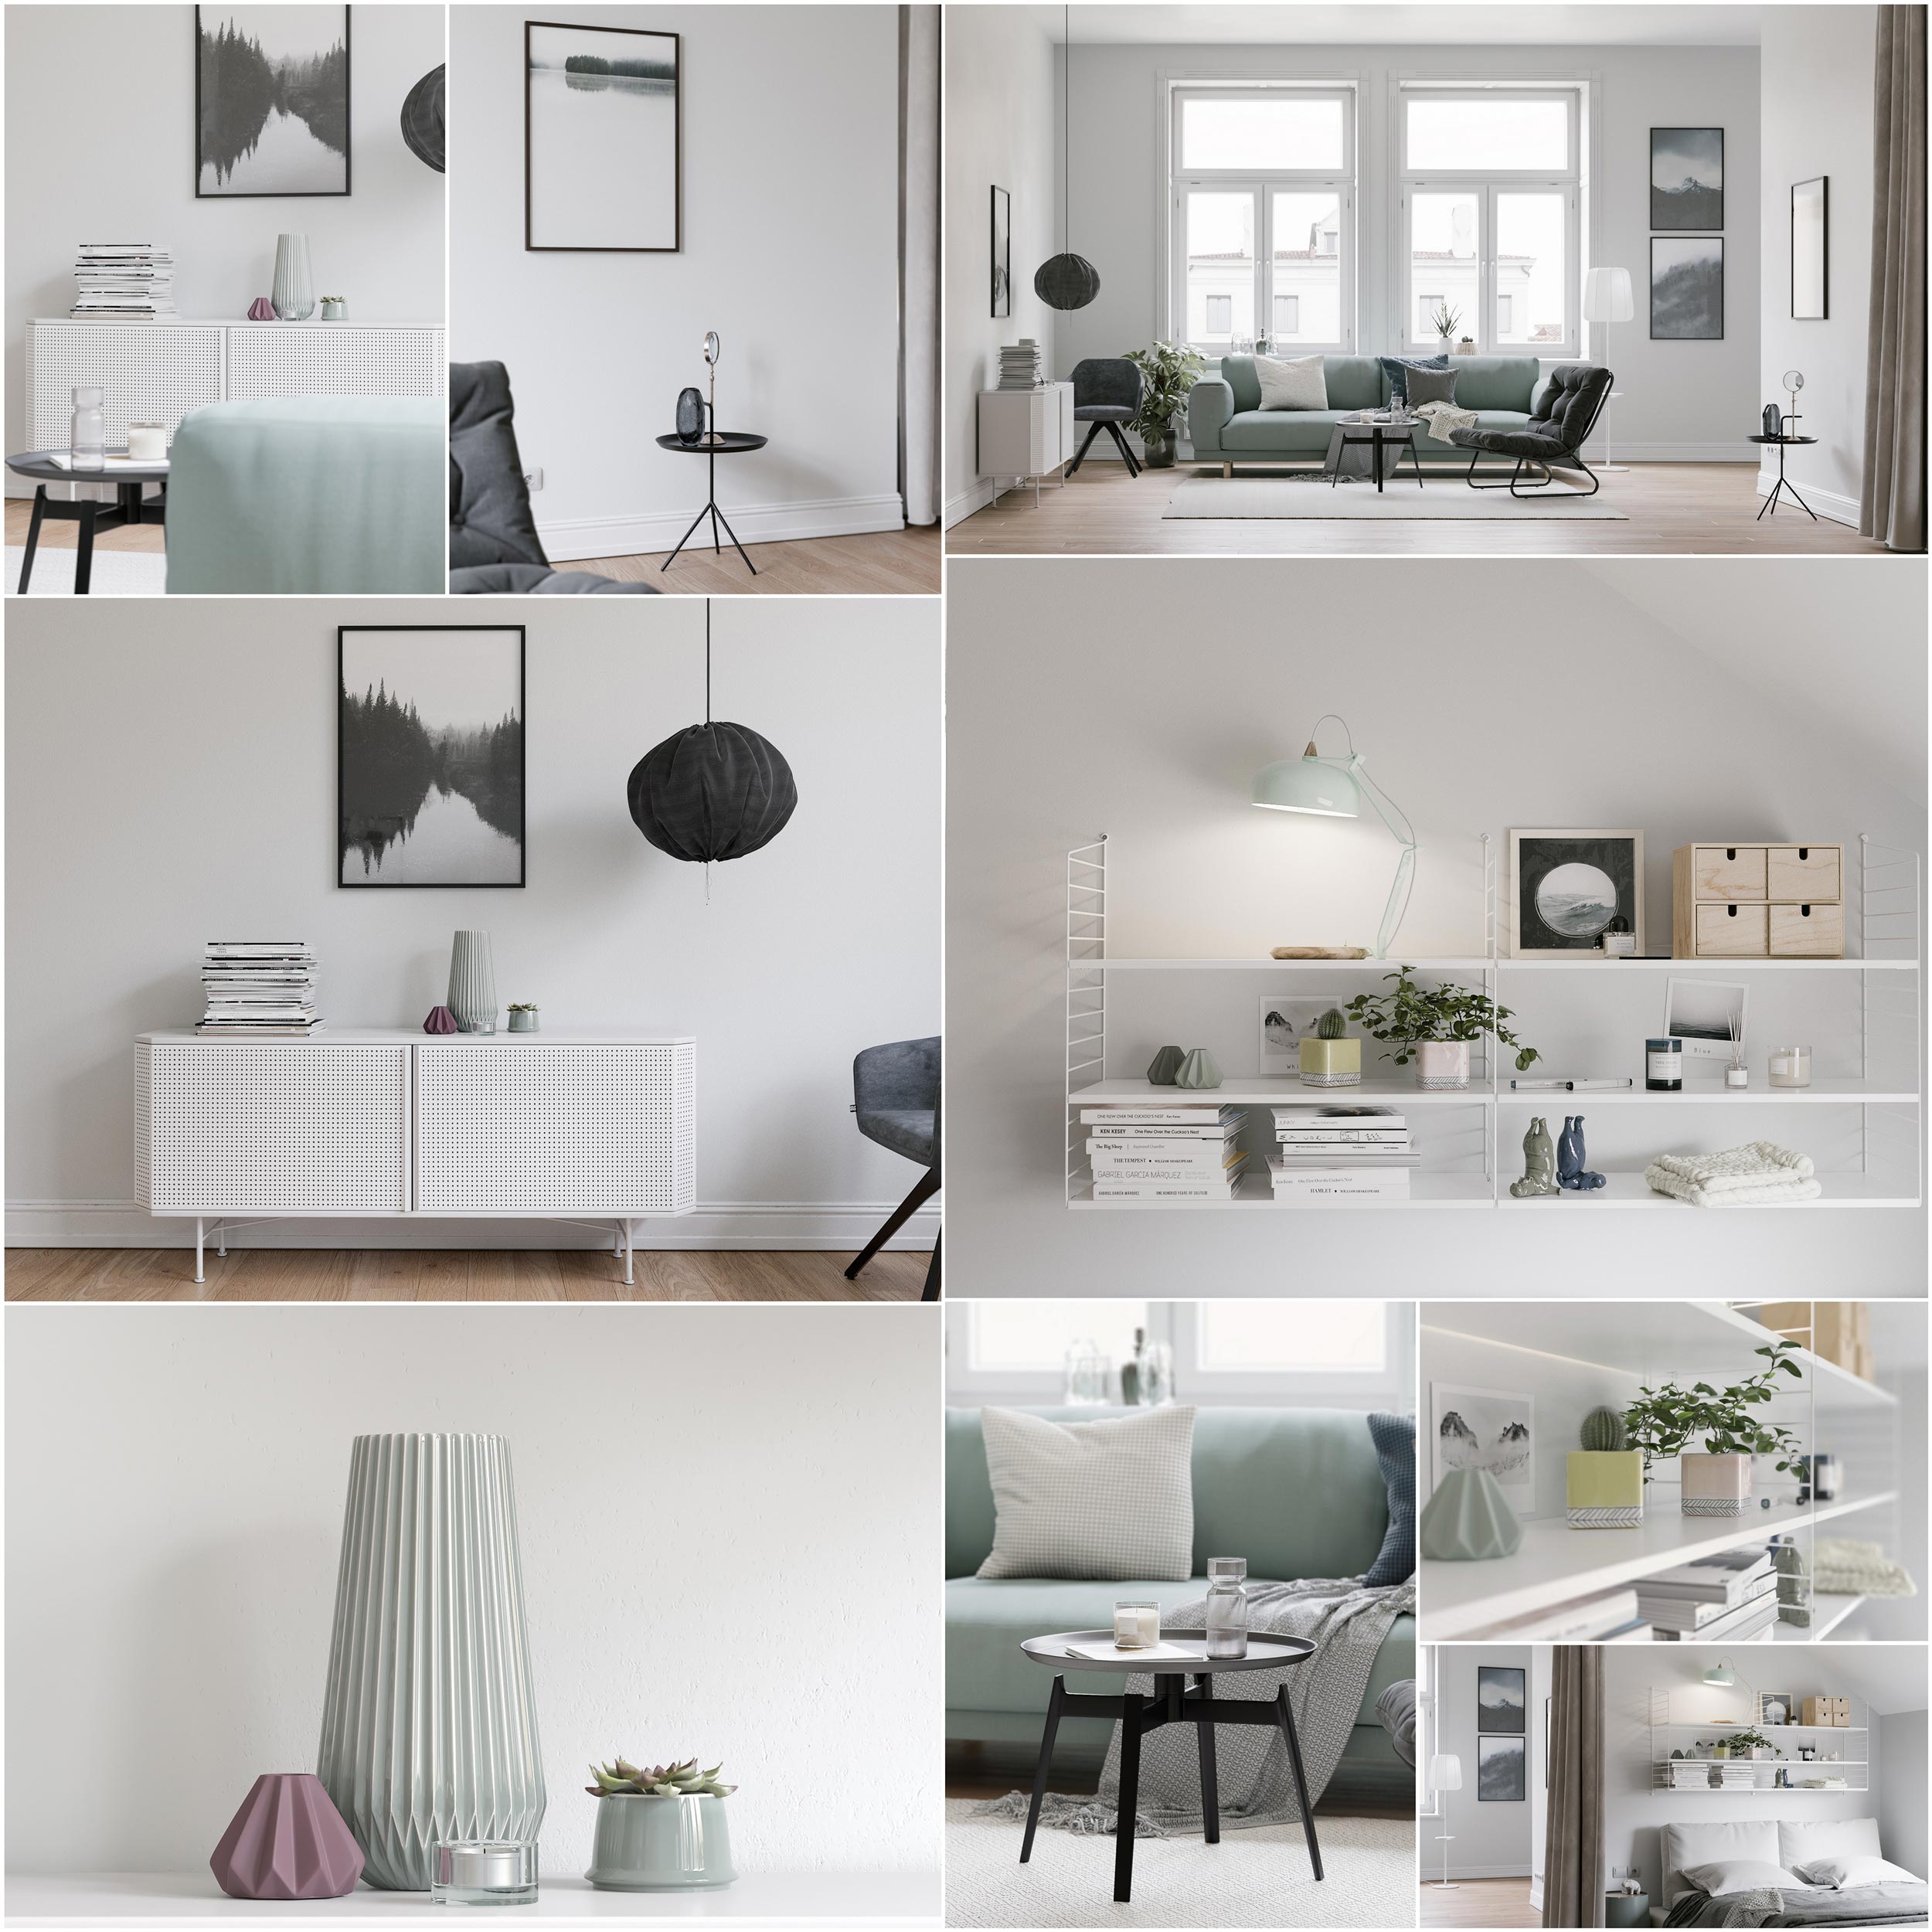
Please let me introduce myself , my name is Nefeli Kallianou, I’ m an interior Designer and 3d artist based in Athens, Greece. I've been working as a freelancer the past year. The following project “Apartment 5th floor” is a personal project that I created in my free time. I was trying to achieve a realistic mood with simple but interesting Scandinavian style, focusing more on the props and the general mood of the space.
The project was made with 3ds max, Corona renderer, Photoshop for the post process and After Effects for adding some DOF.
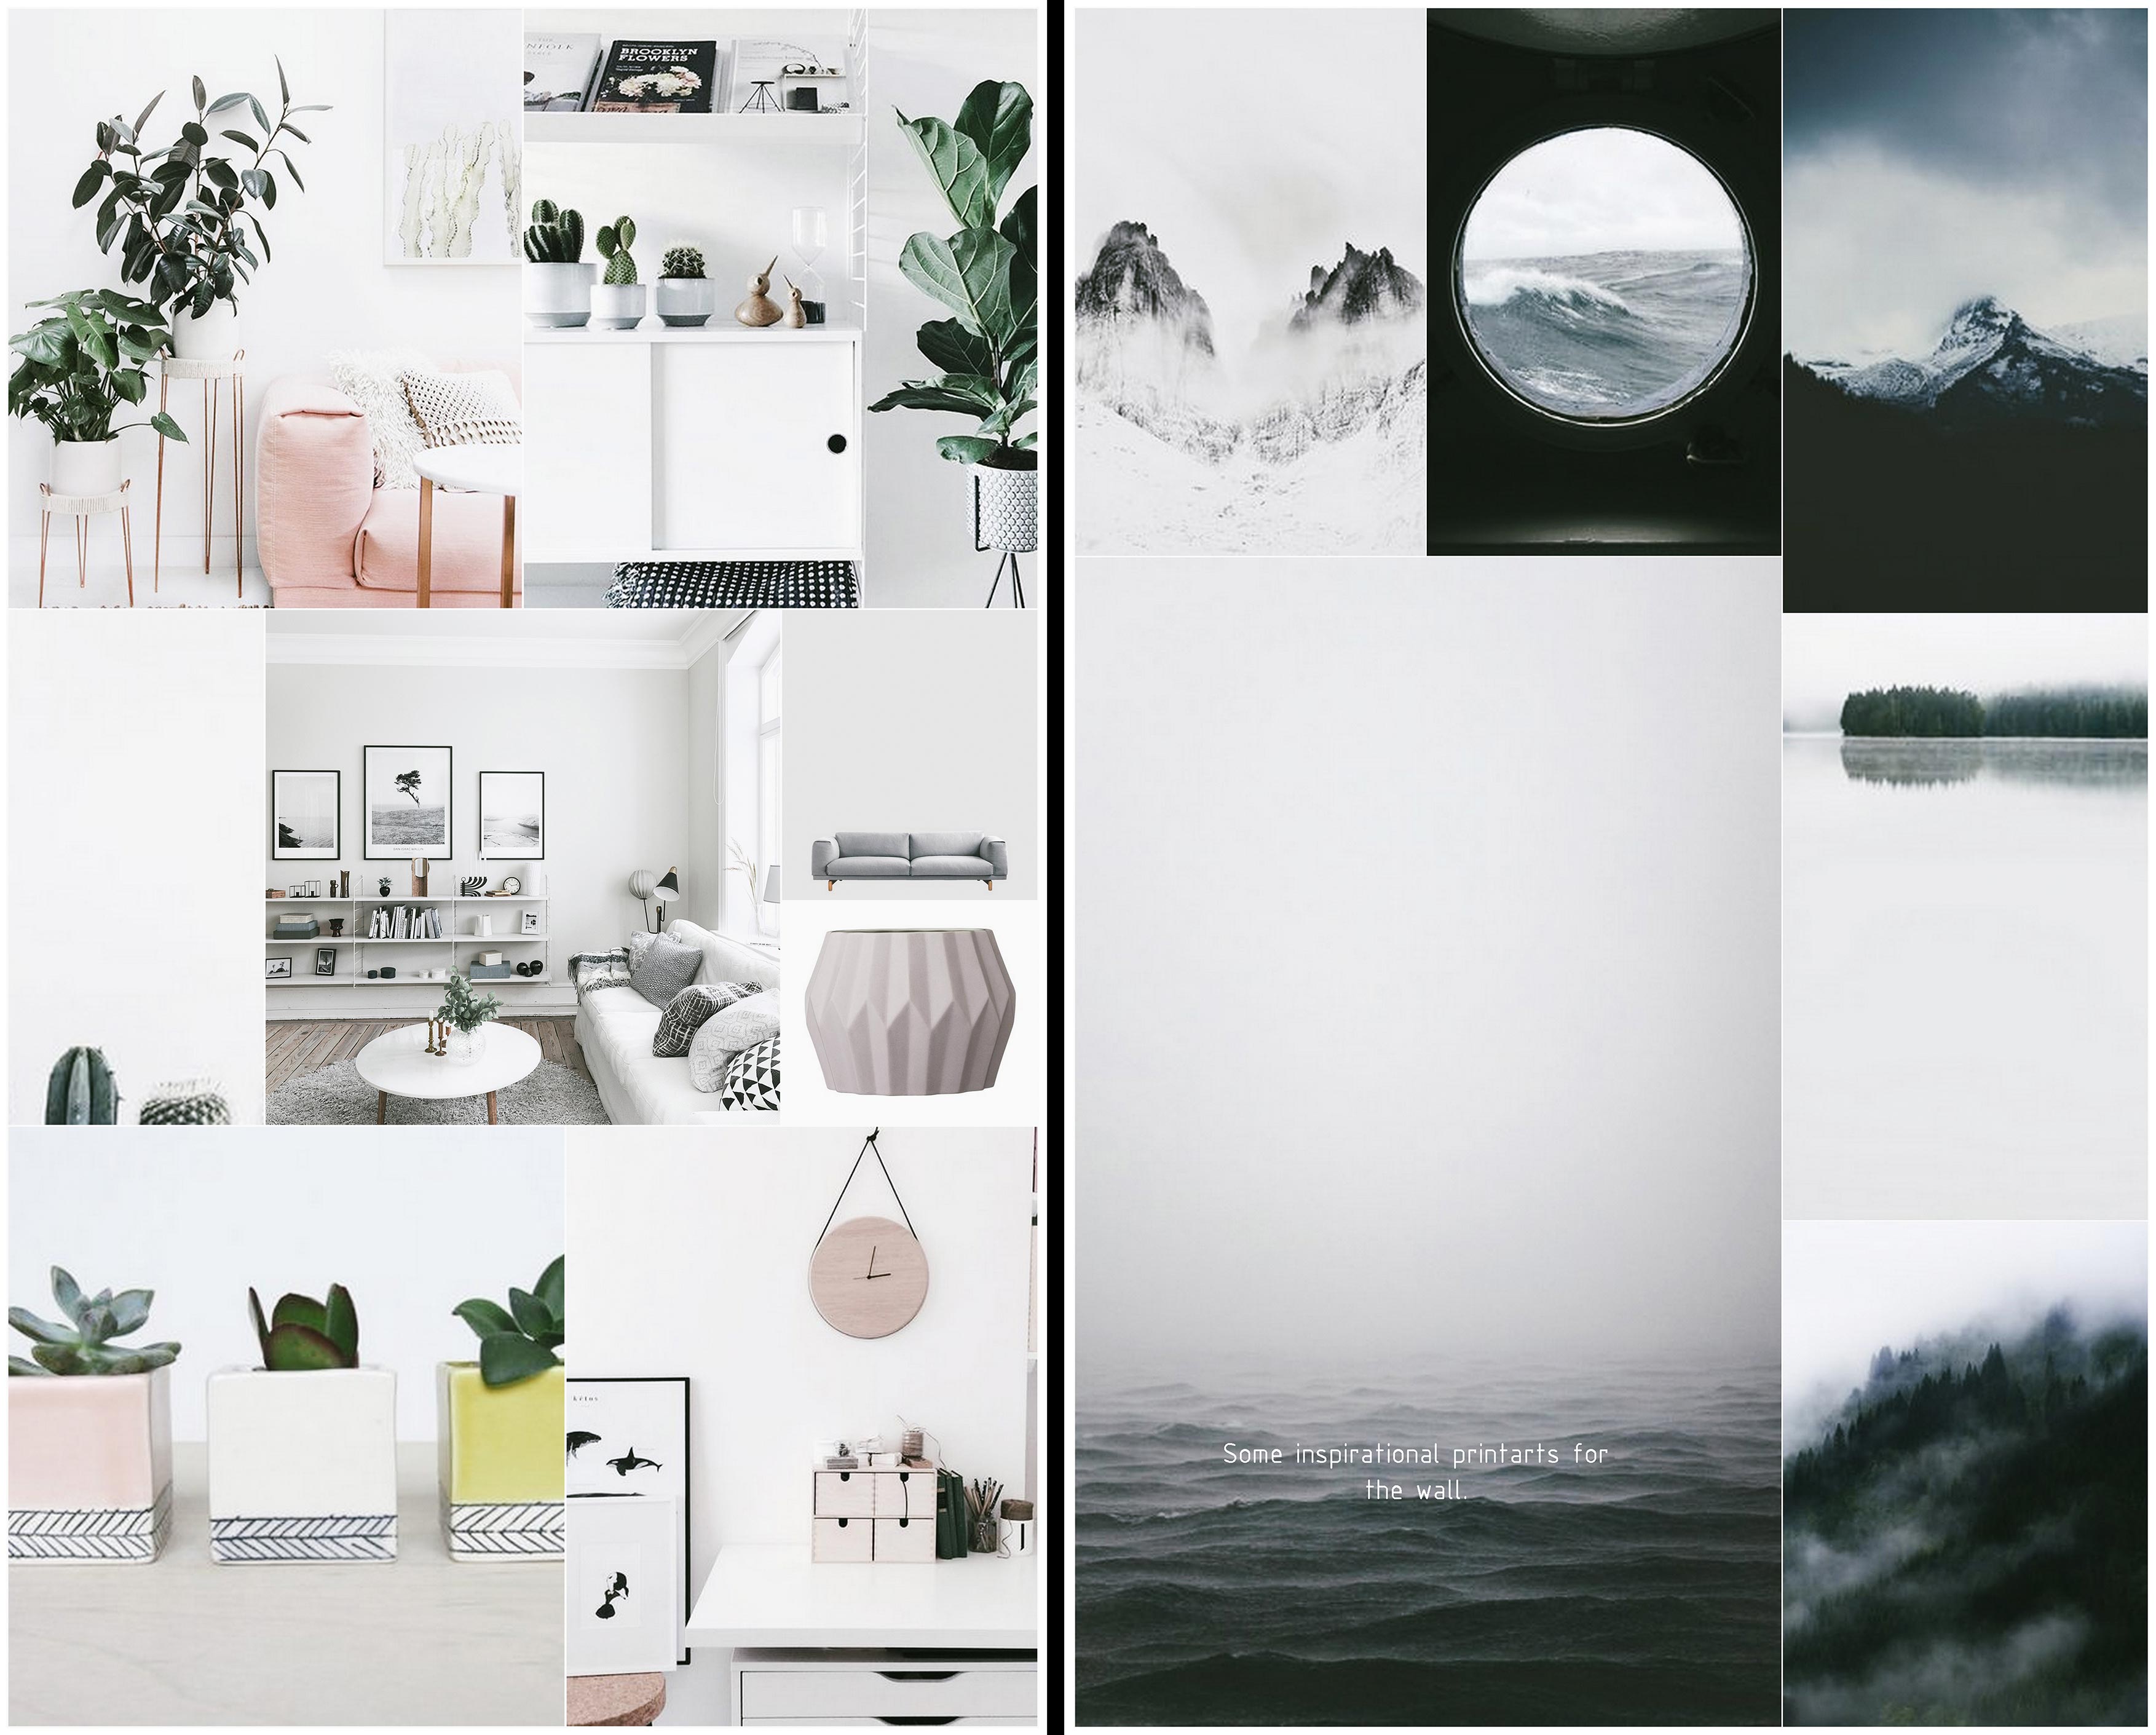
As an inspiration I used some images with Scandinavian style, clean lines and warm atmosphere. Most of the reference images are taken from Pinterest, Stylizimoblog and DesignMilk which I use most of the time as a base for setting up my mood board. I put a lot of emphasize on collecting great pictures from photographers and graphic designers around the web, which inspires me and help me to express the general feeling of the space.
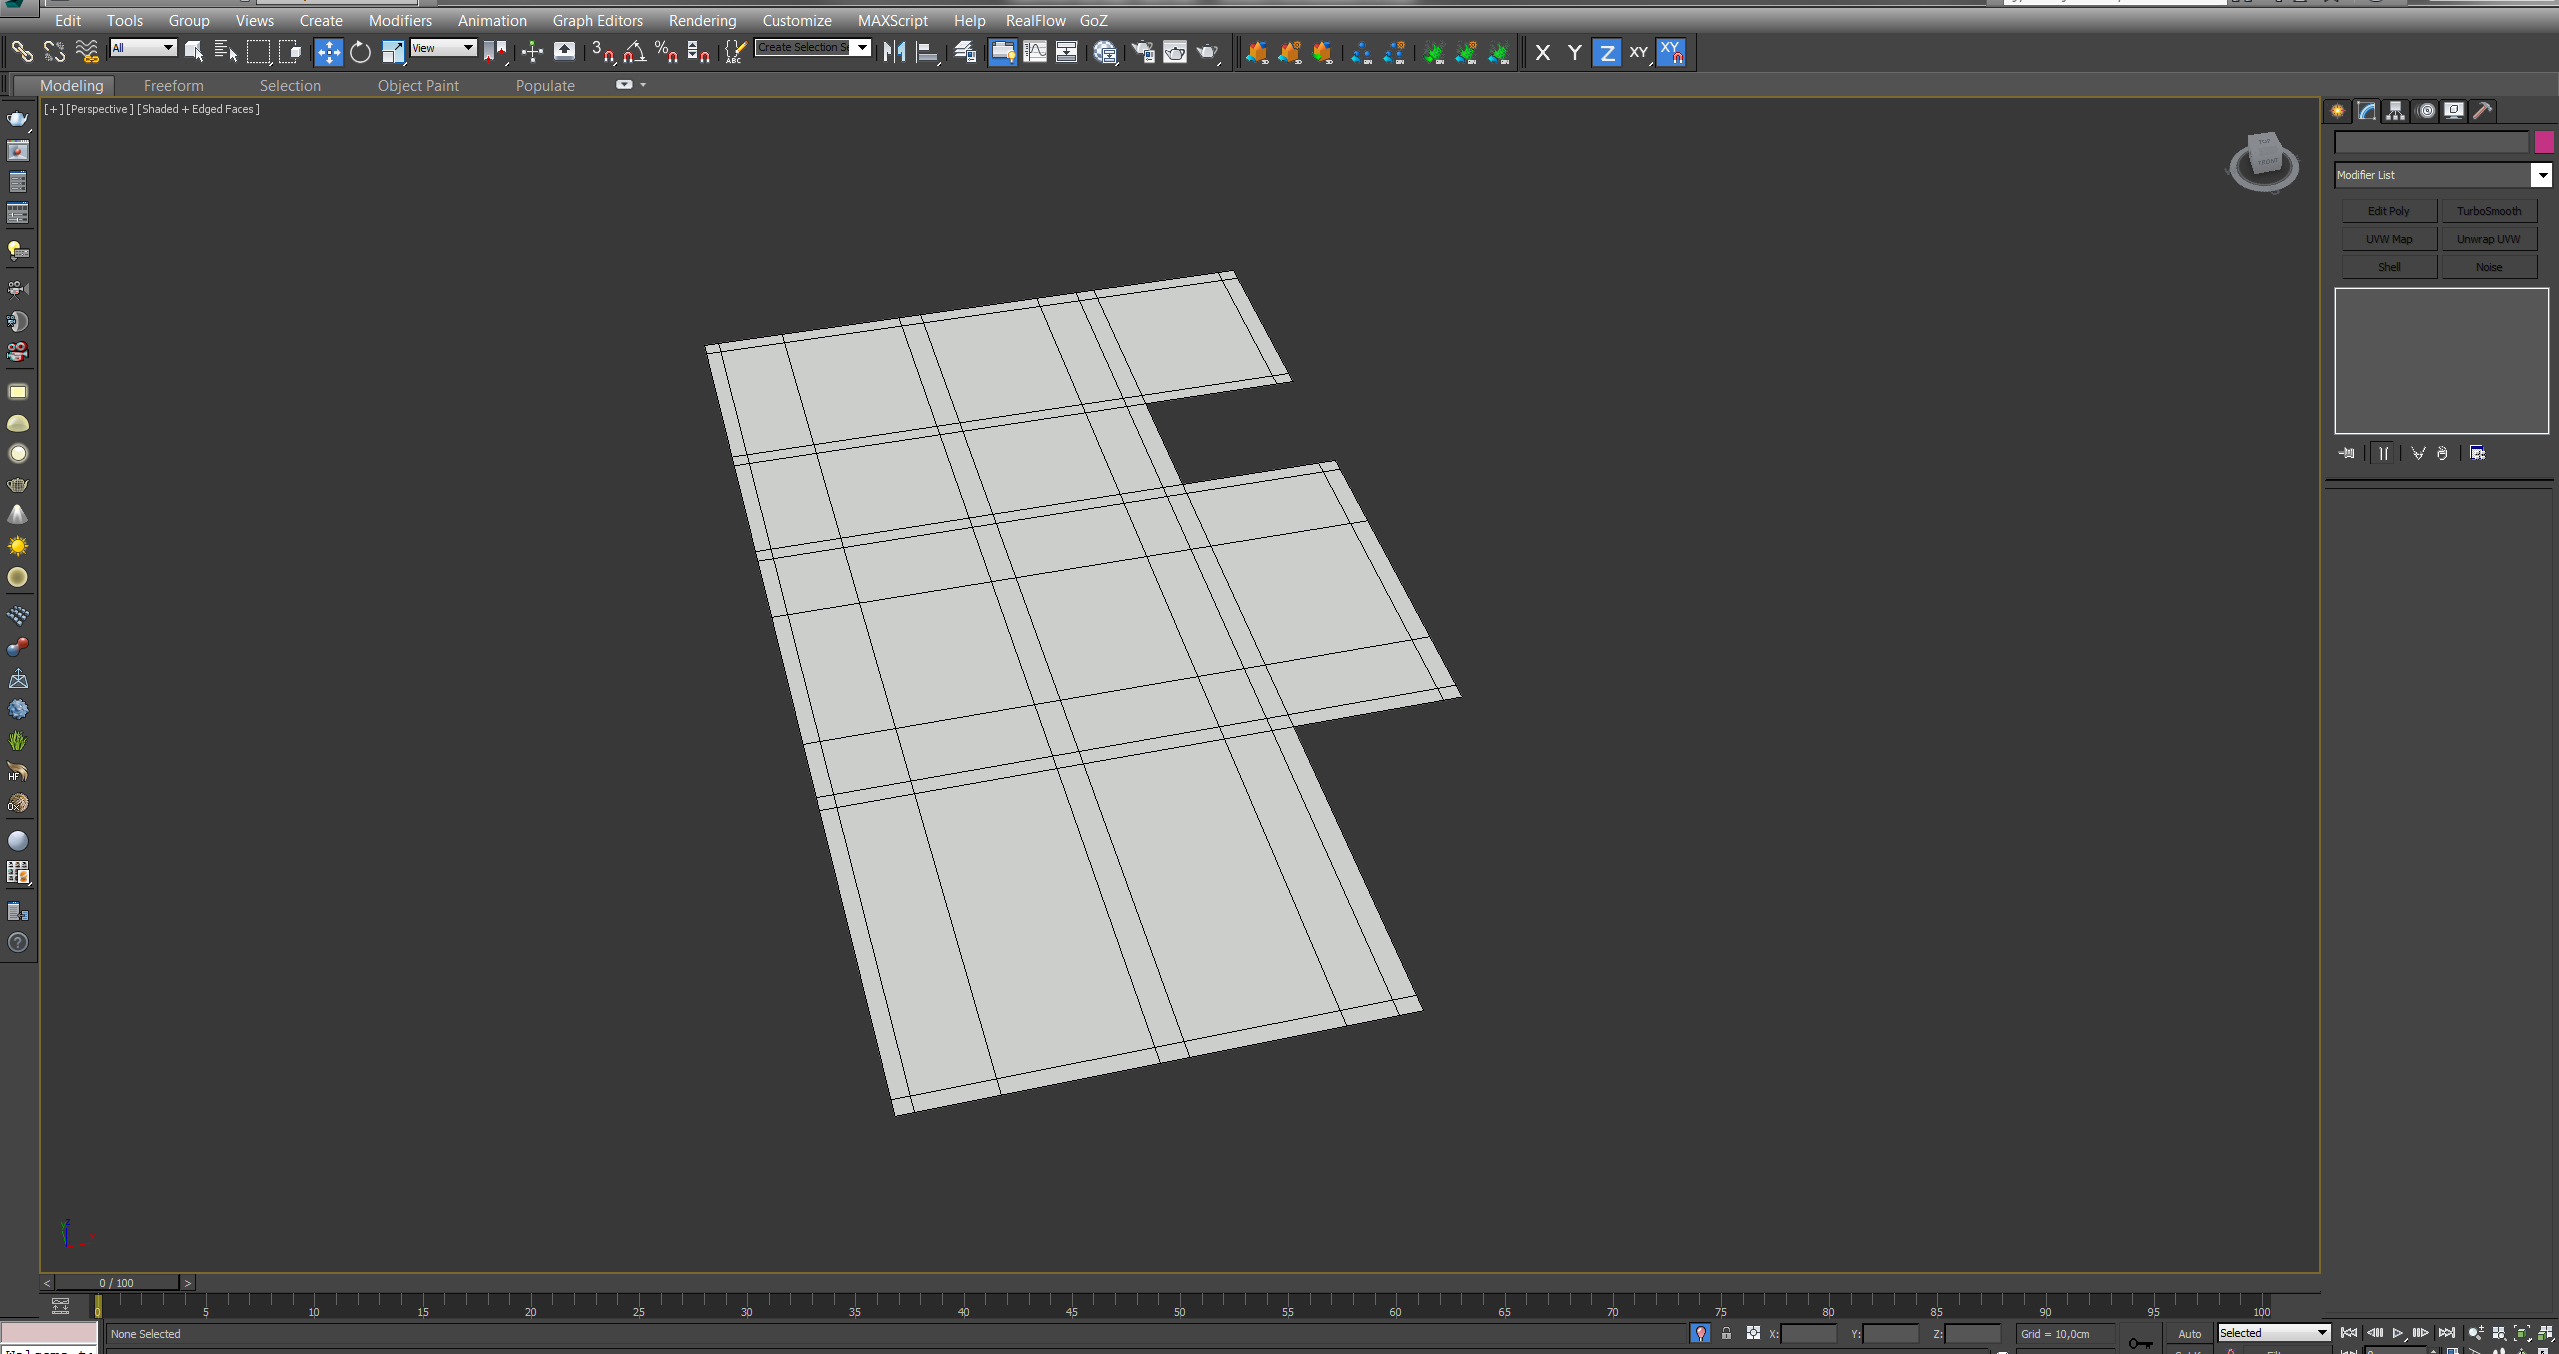
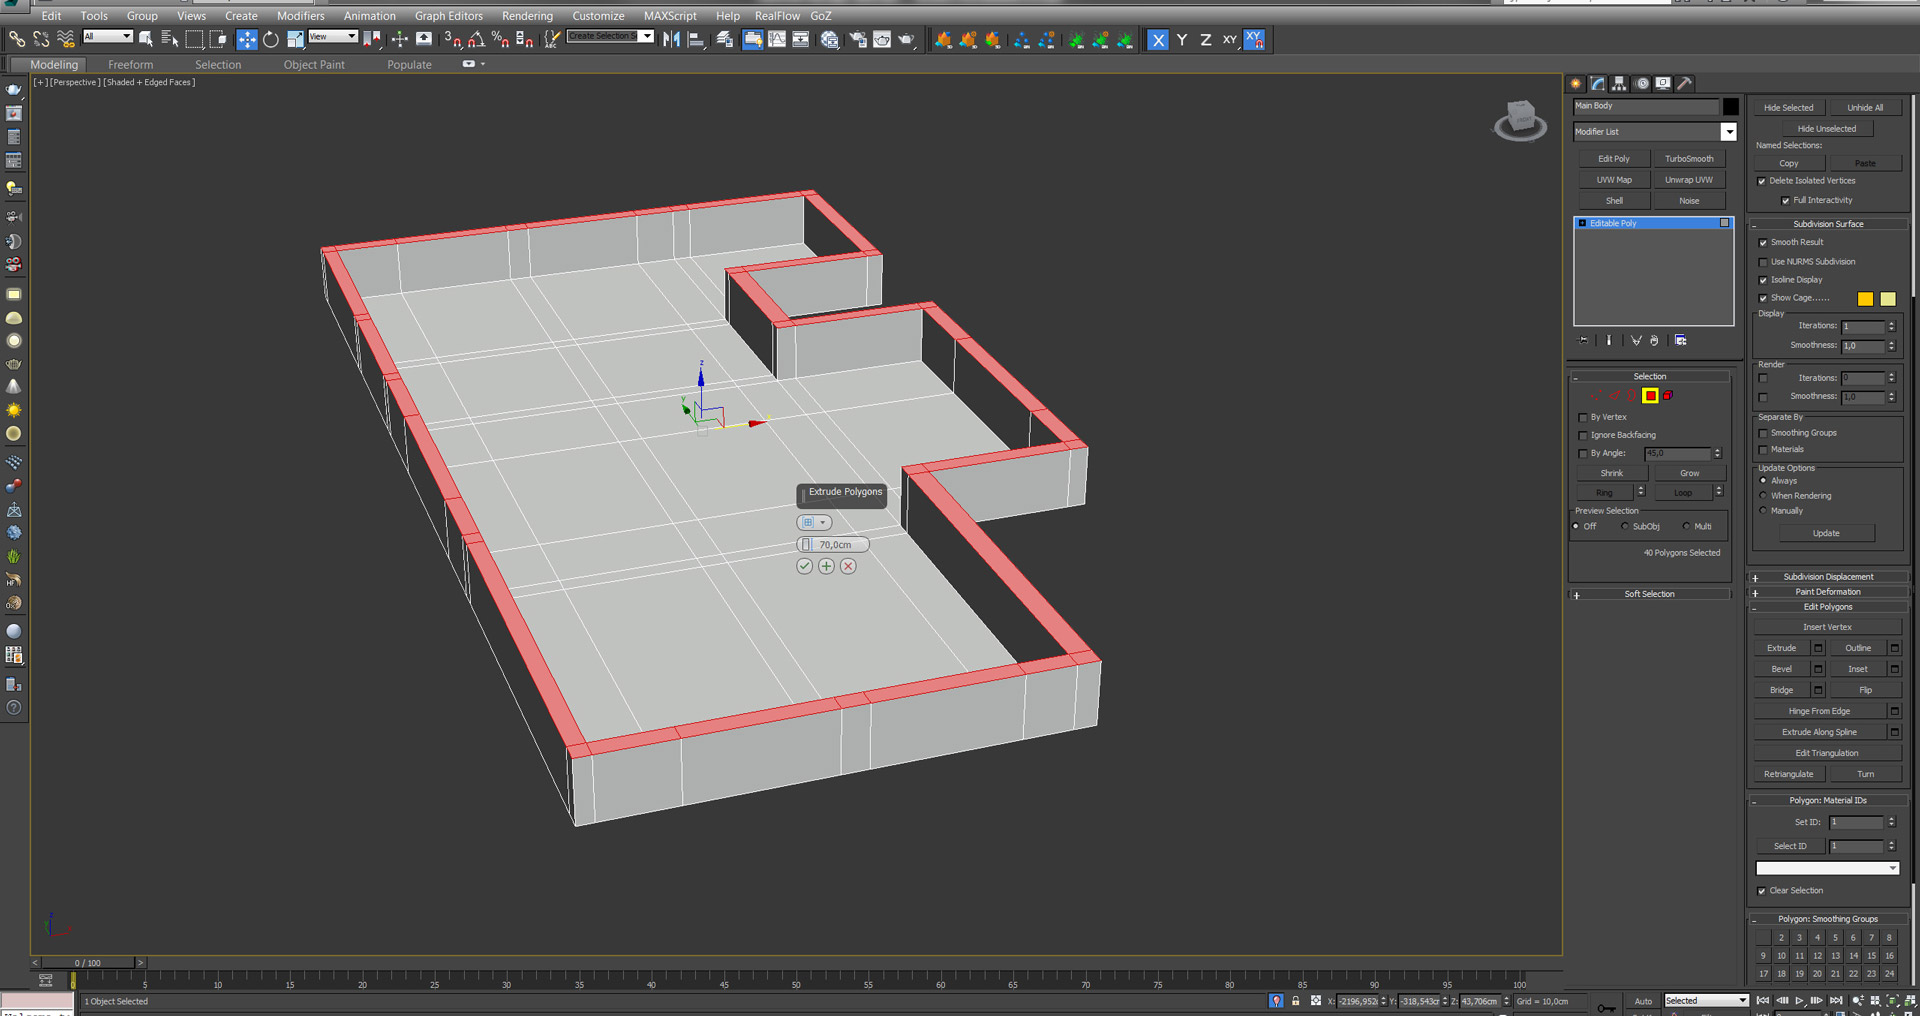
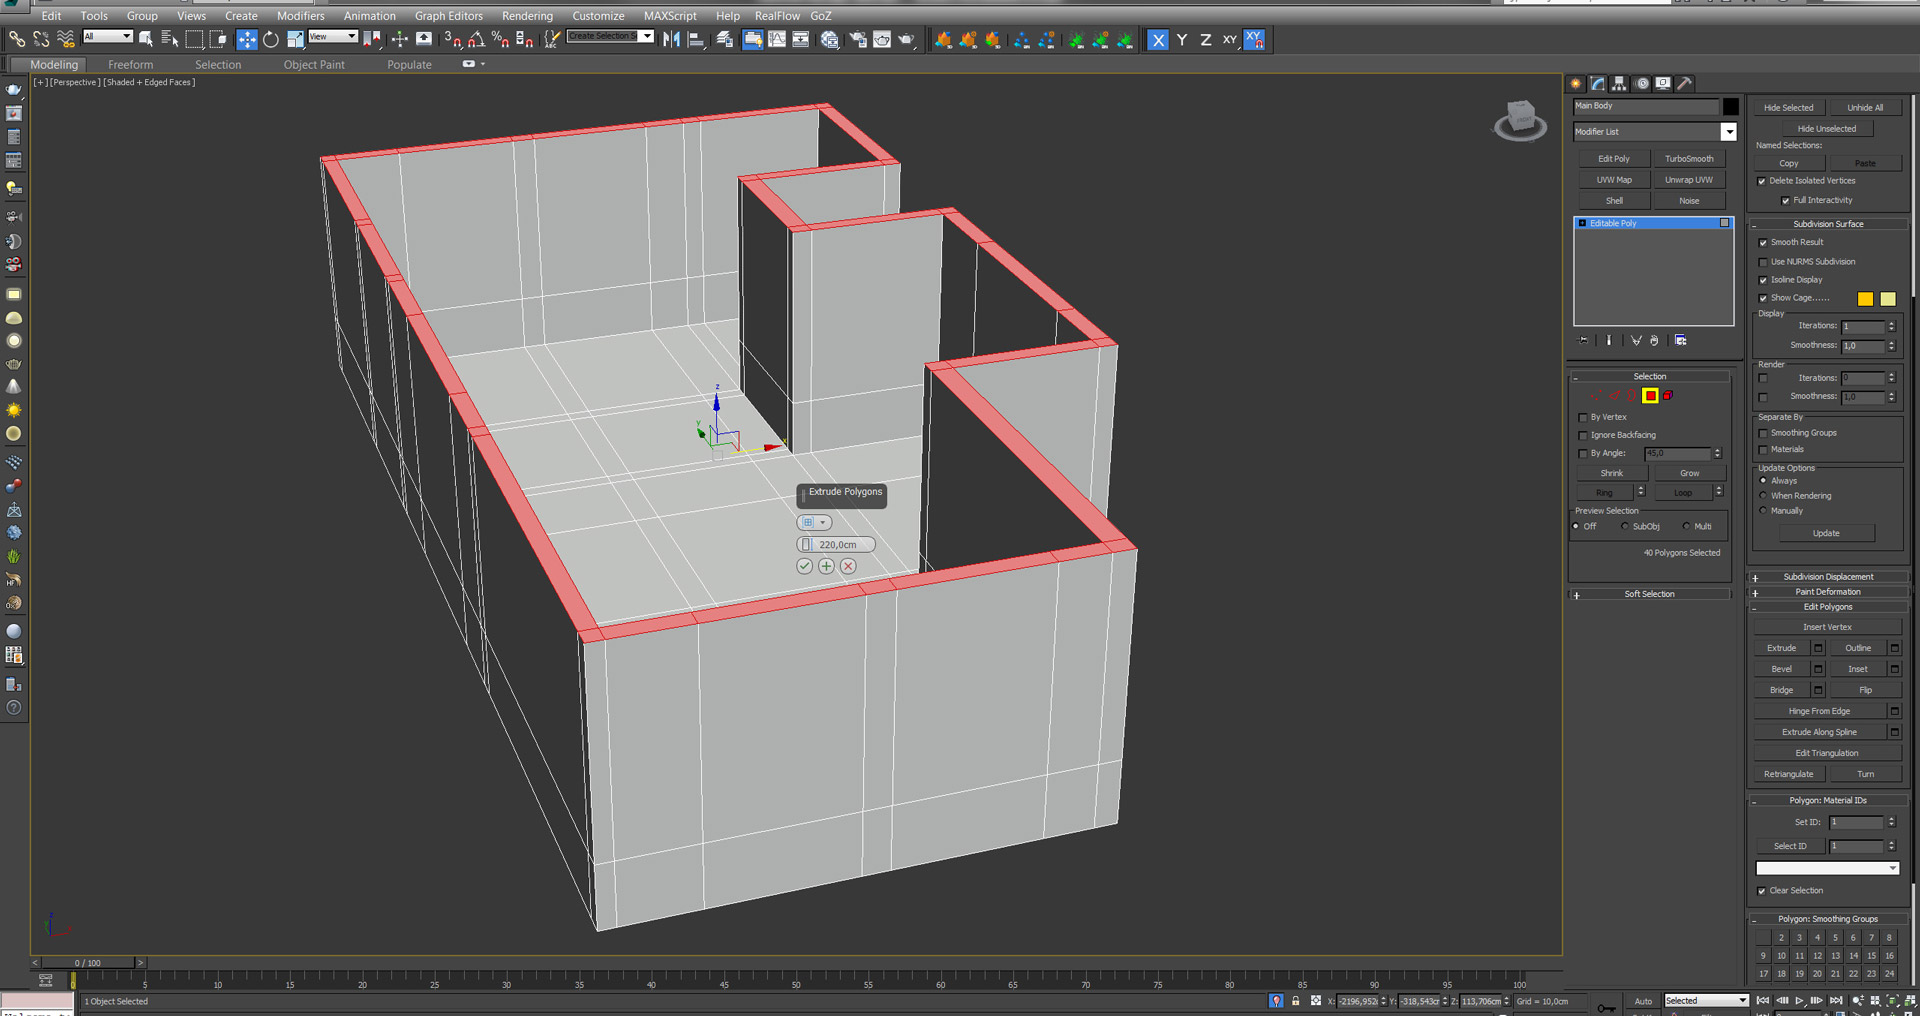
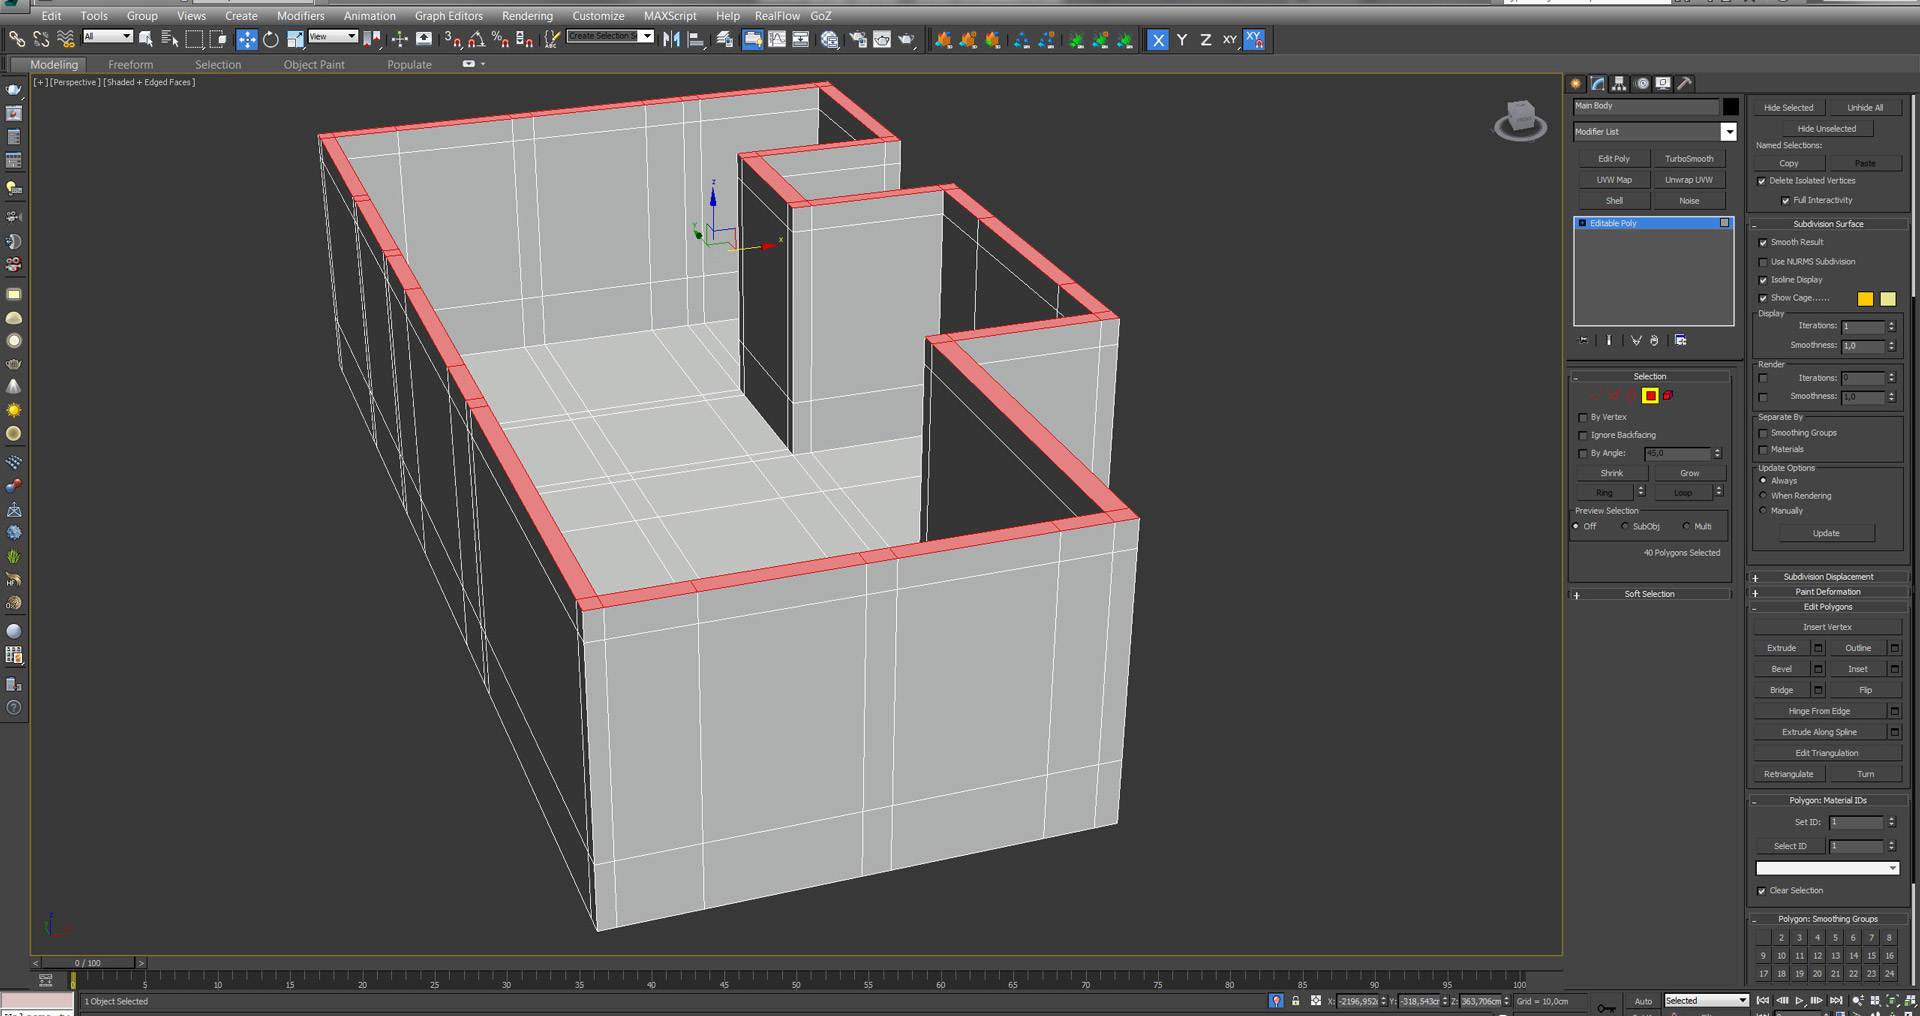
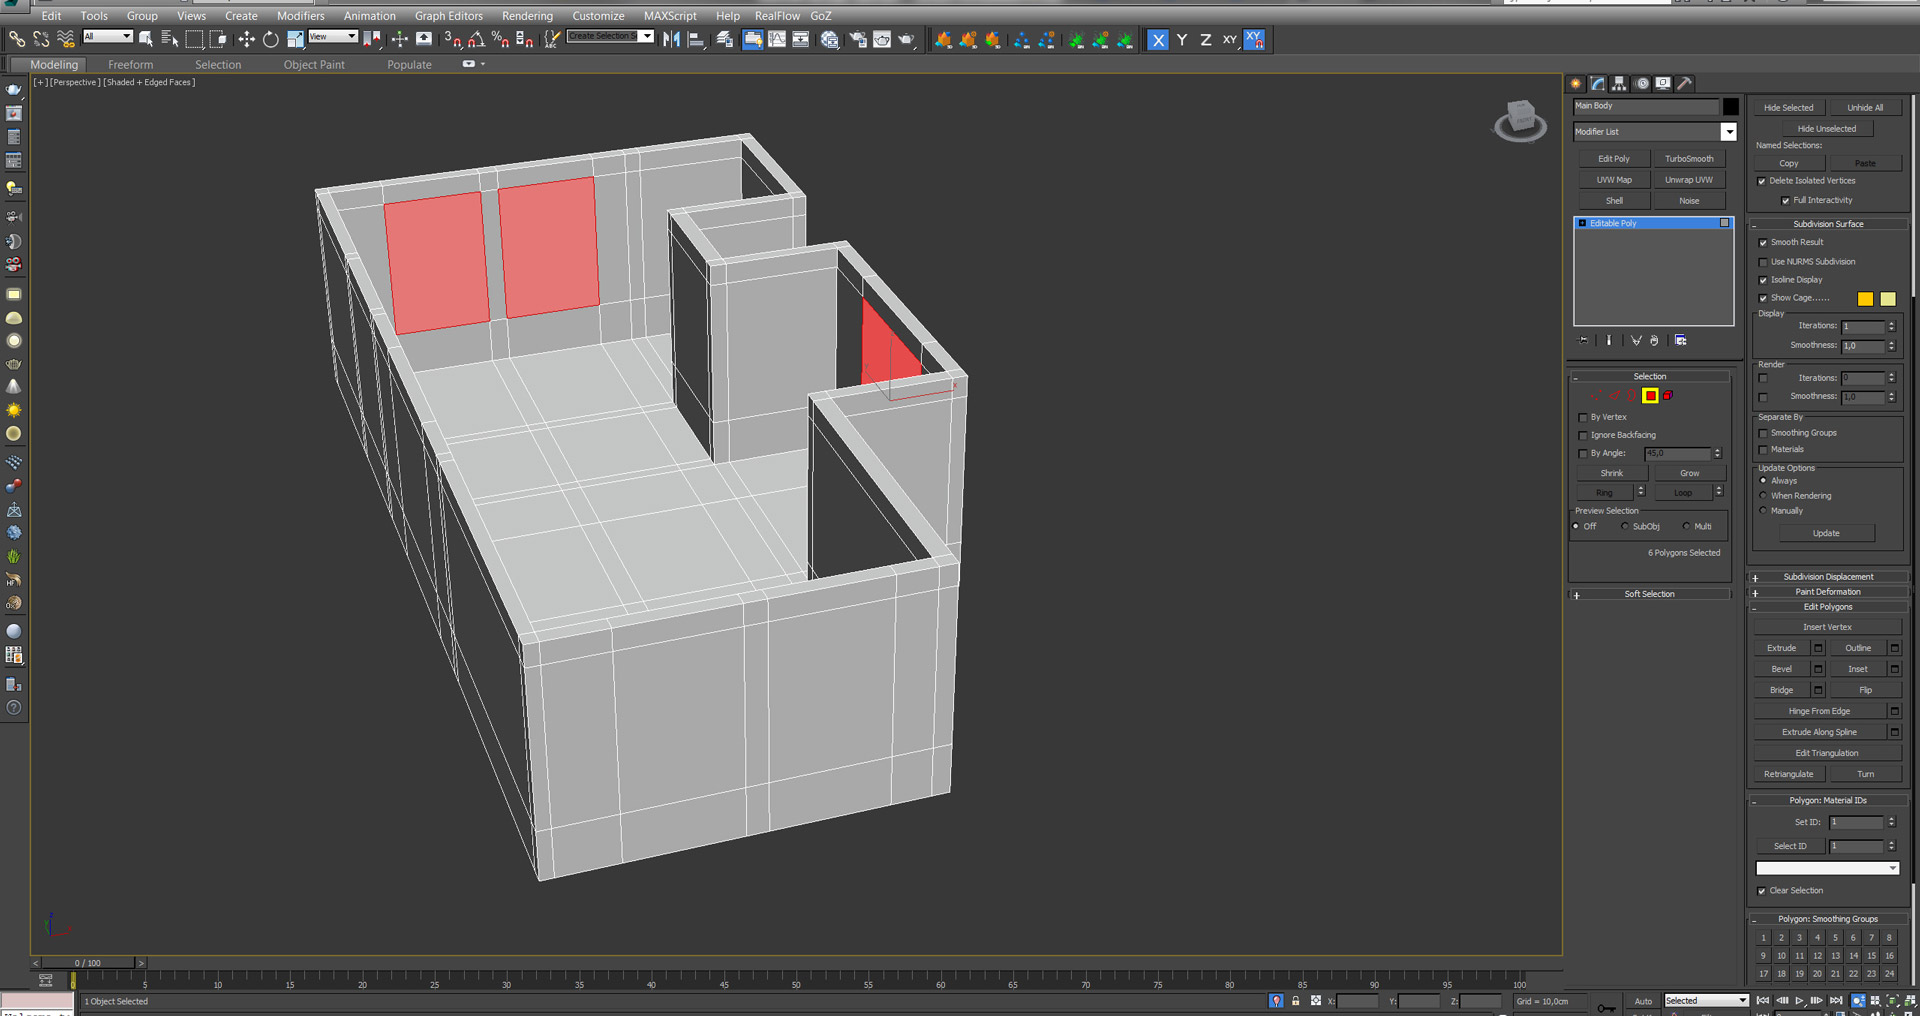
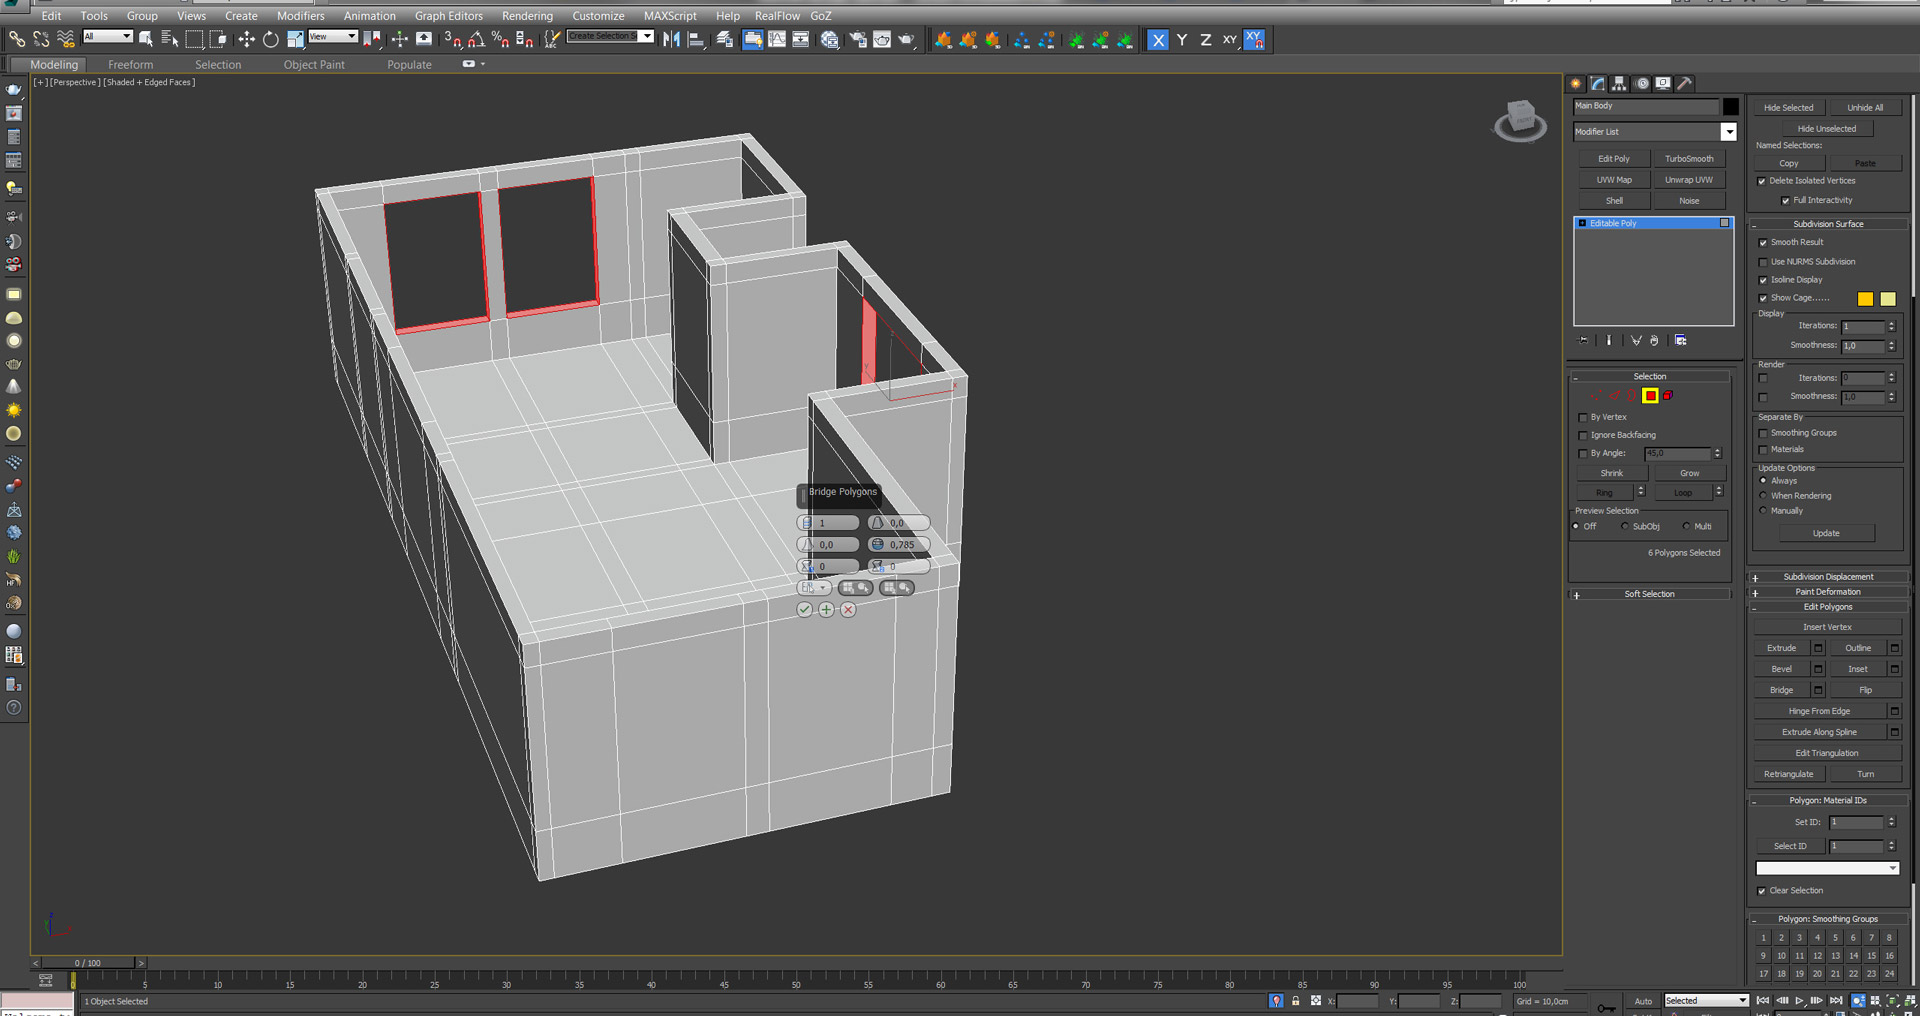
The modeling process was really fast, as I used a draft hand drawing floor plan that I made as a guide. I started with a base plane and I extended the edges to give the specific shape according to my guide. Then I extruded the external and internal walls and made the openings using the bridge command. These are some really simple steps that can make your workflow extremely fast. At this point I have to thank Johannes Lindqvist for his helpful livestreams on twitch.tv where I found these nice tips. You can find more on his YouTube channel.
Most models that I used, were from my personal database, 3dsky and Dimensiva. After the basic set up of the scene, I focused on adding some details. Here is an example of a quick prop I created for the shelves above the bed.
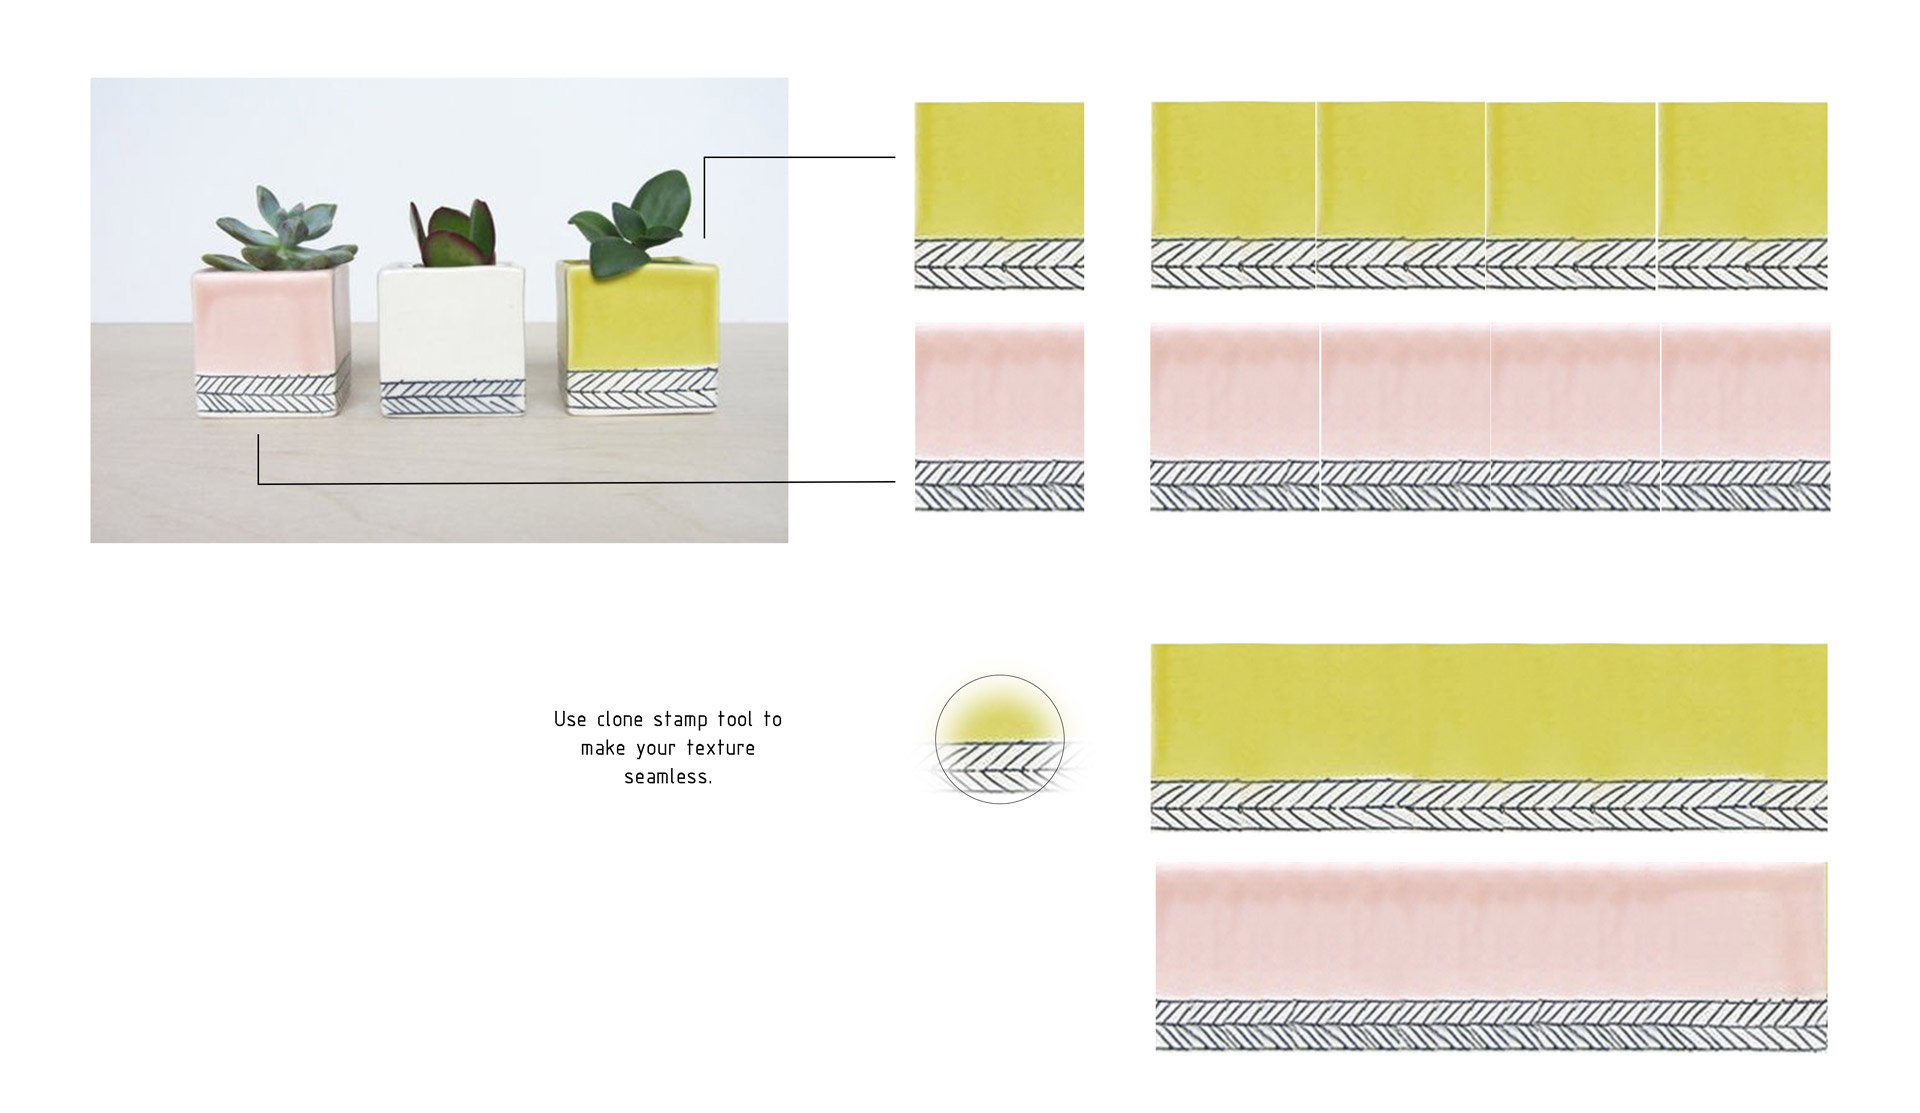

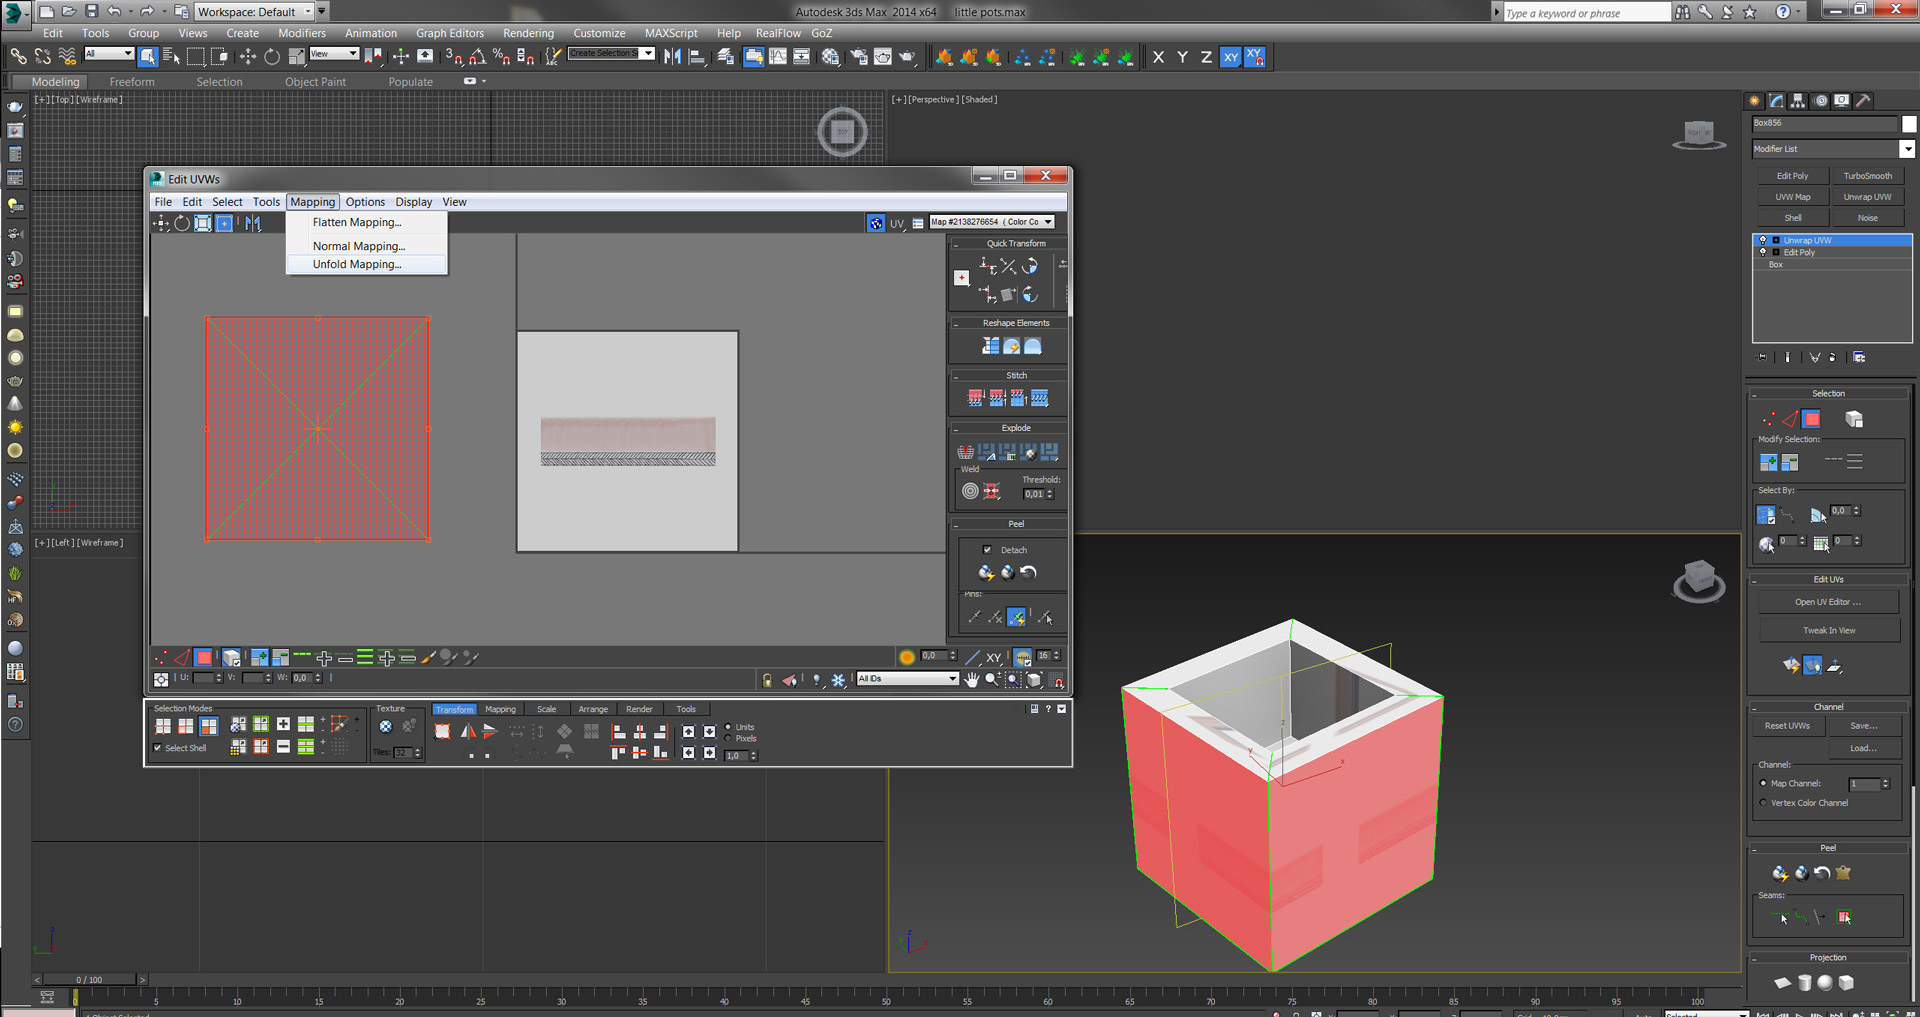

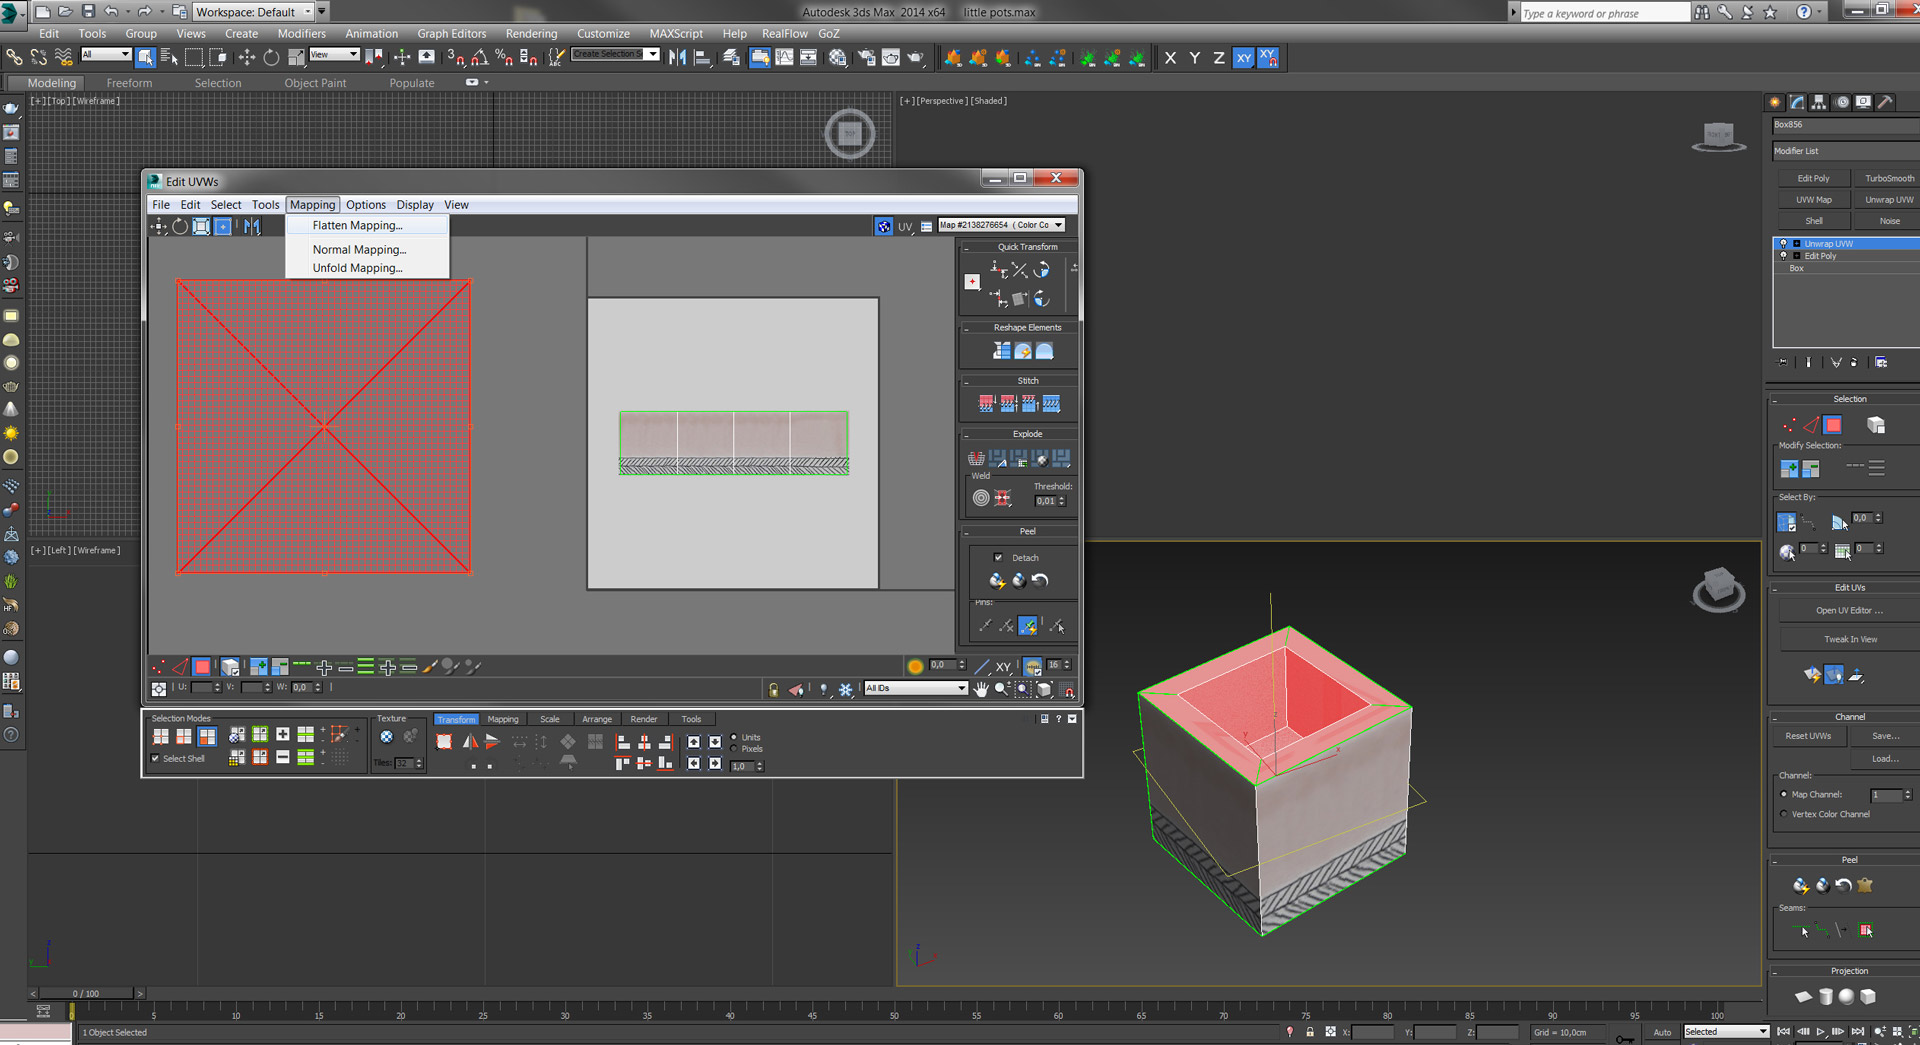
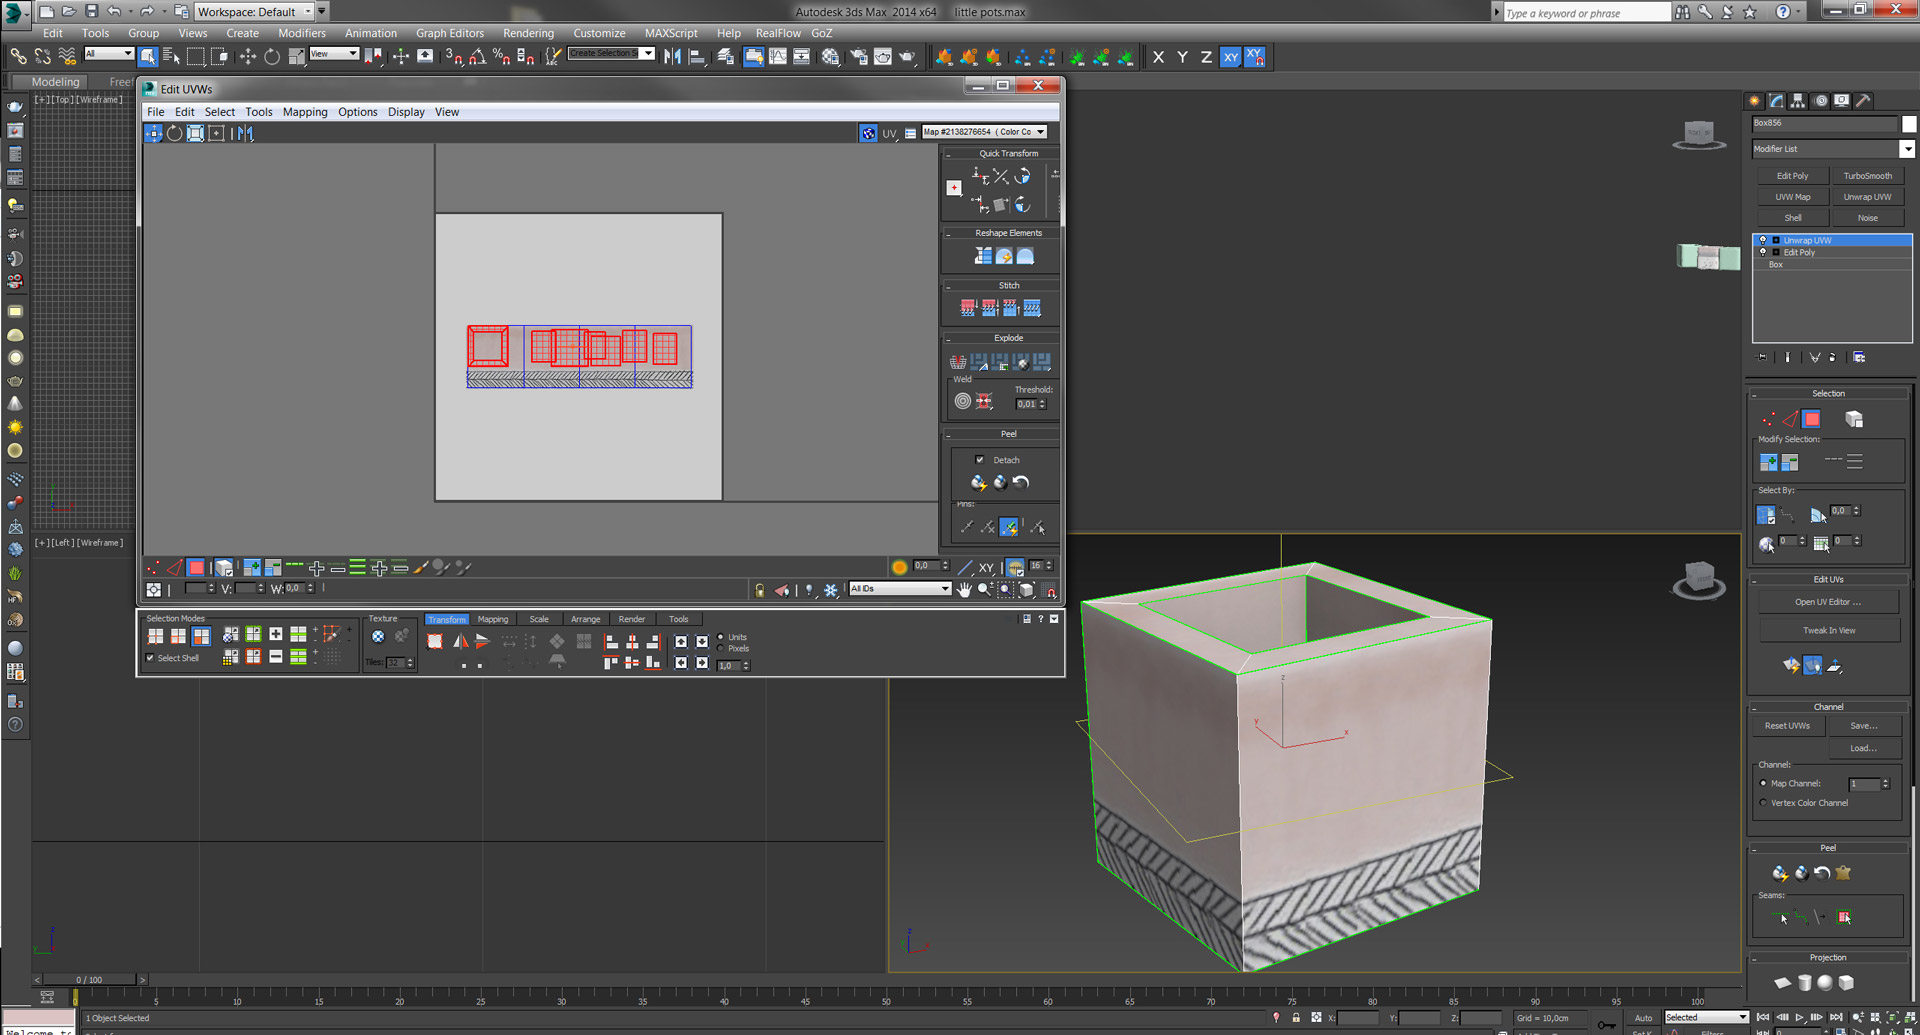
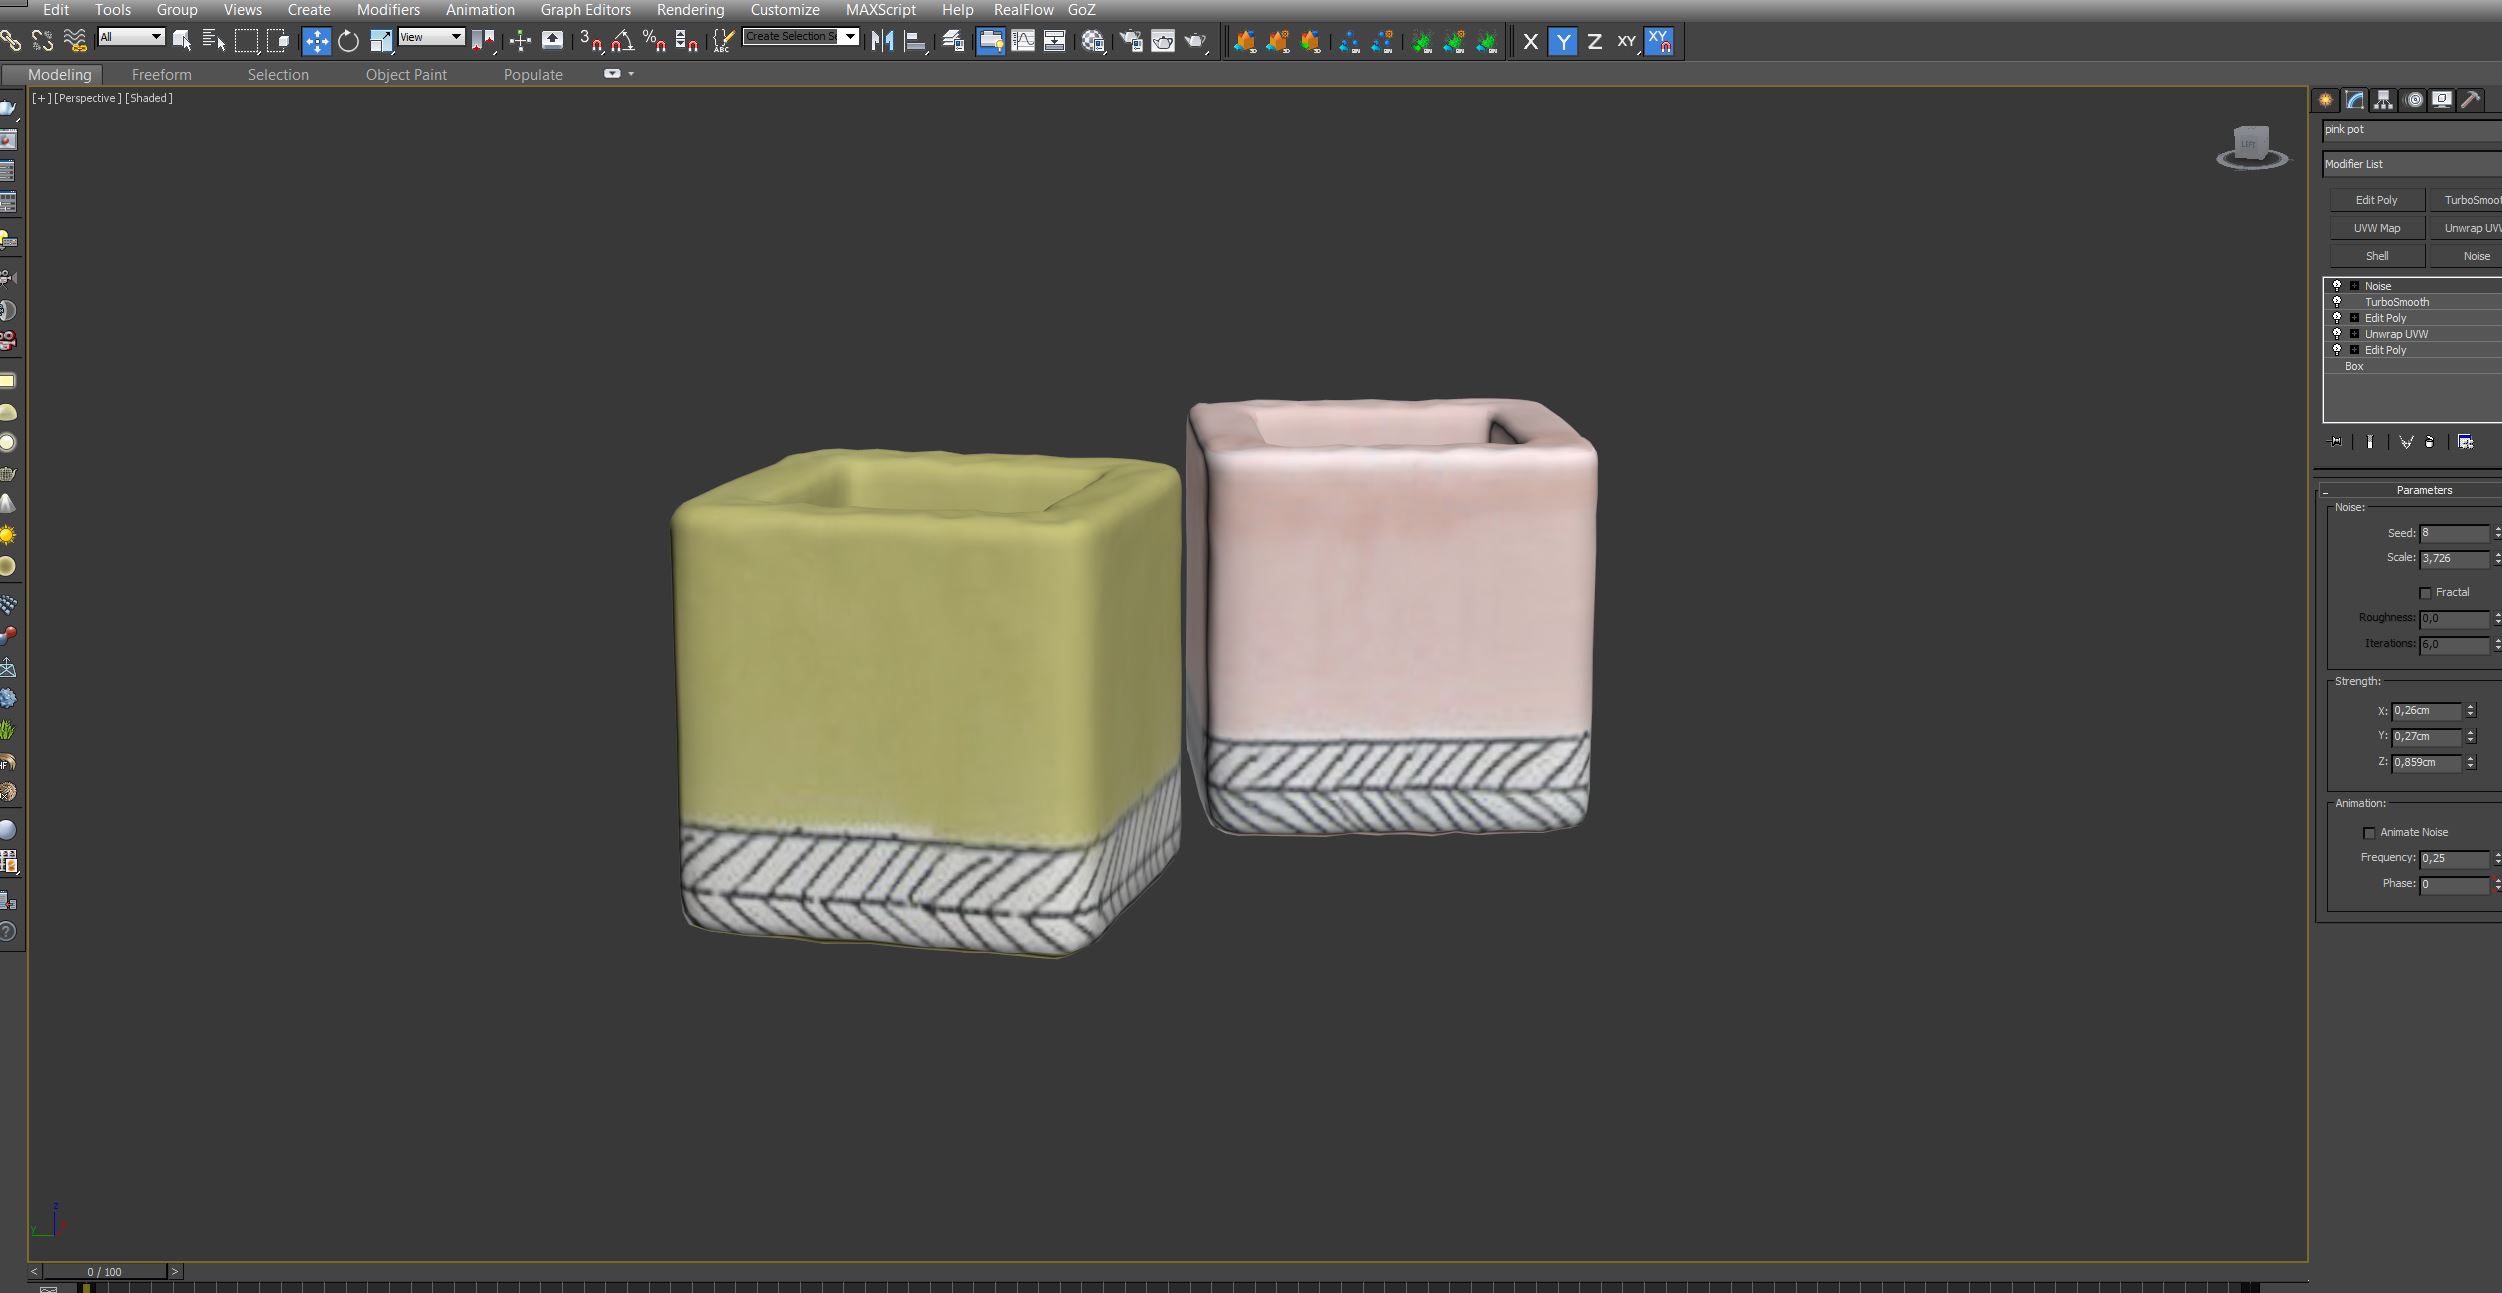
As you can see, I made a square pot using poly modeling and then I used a very simple Unwrap so I can place the texture as I wanted. Inside Unwrap everything that I done is pretty basic, I took the outer polygons and unfold them so the image fits without seams. Then I put all the other polygons by flatten them to have a nice tiling of the texture. Finally, after finishing with the UVs I add Turbosmooth and Noise to achieve the ceramic look.
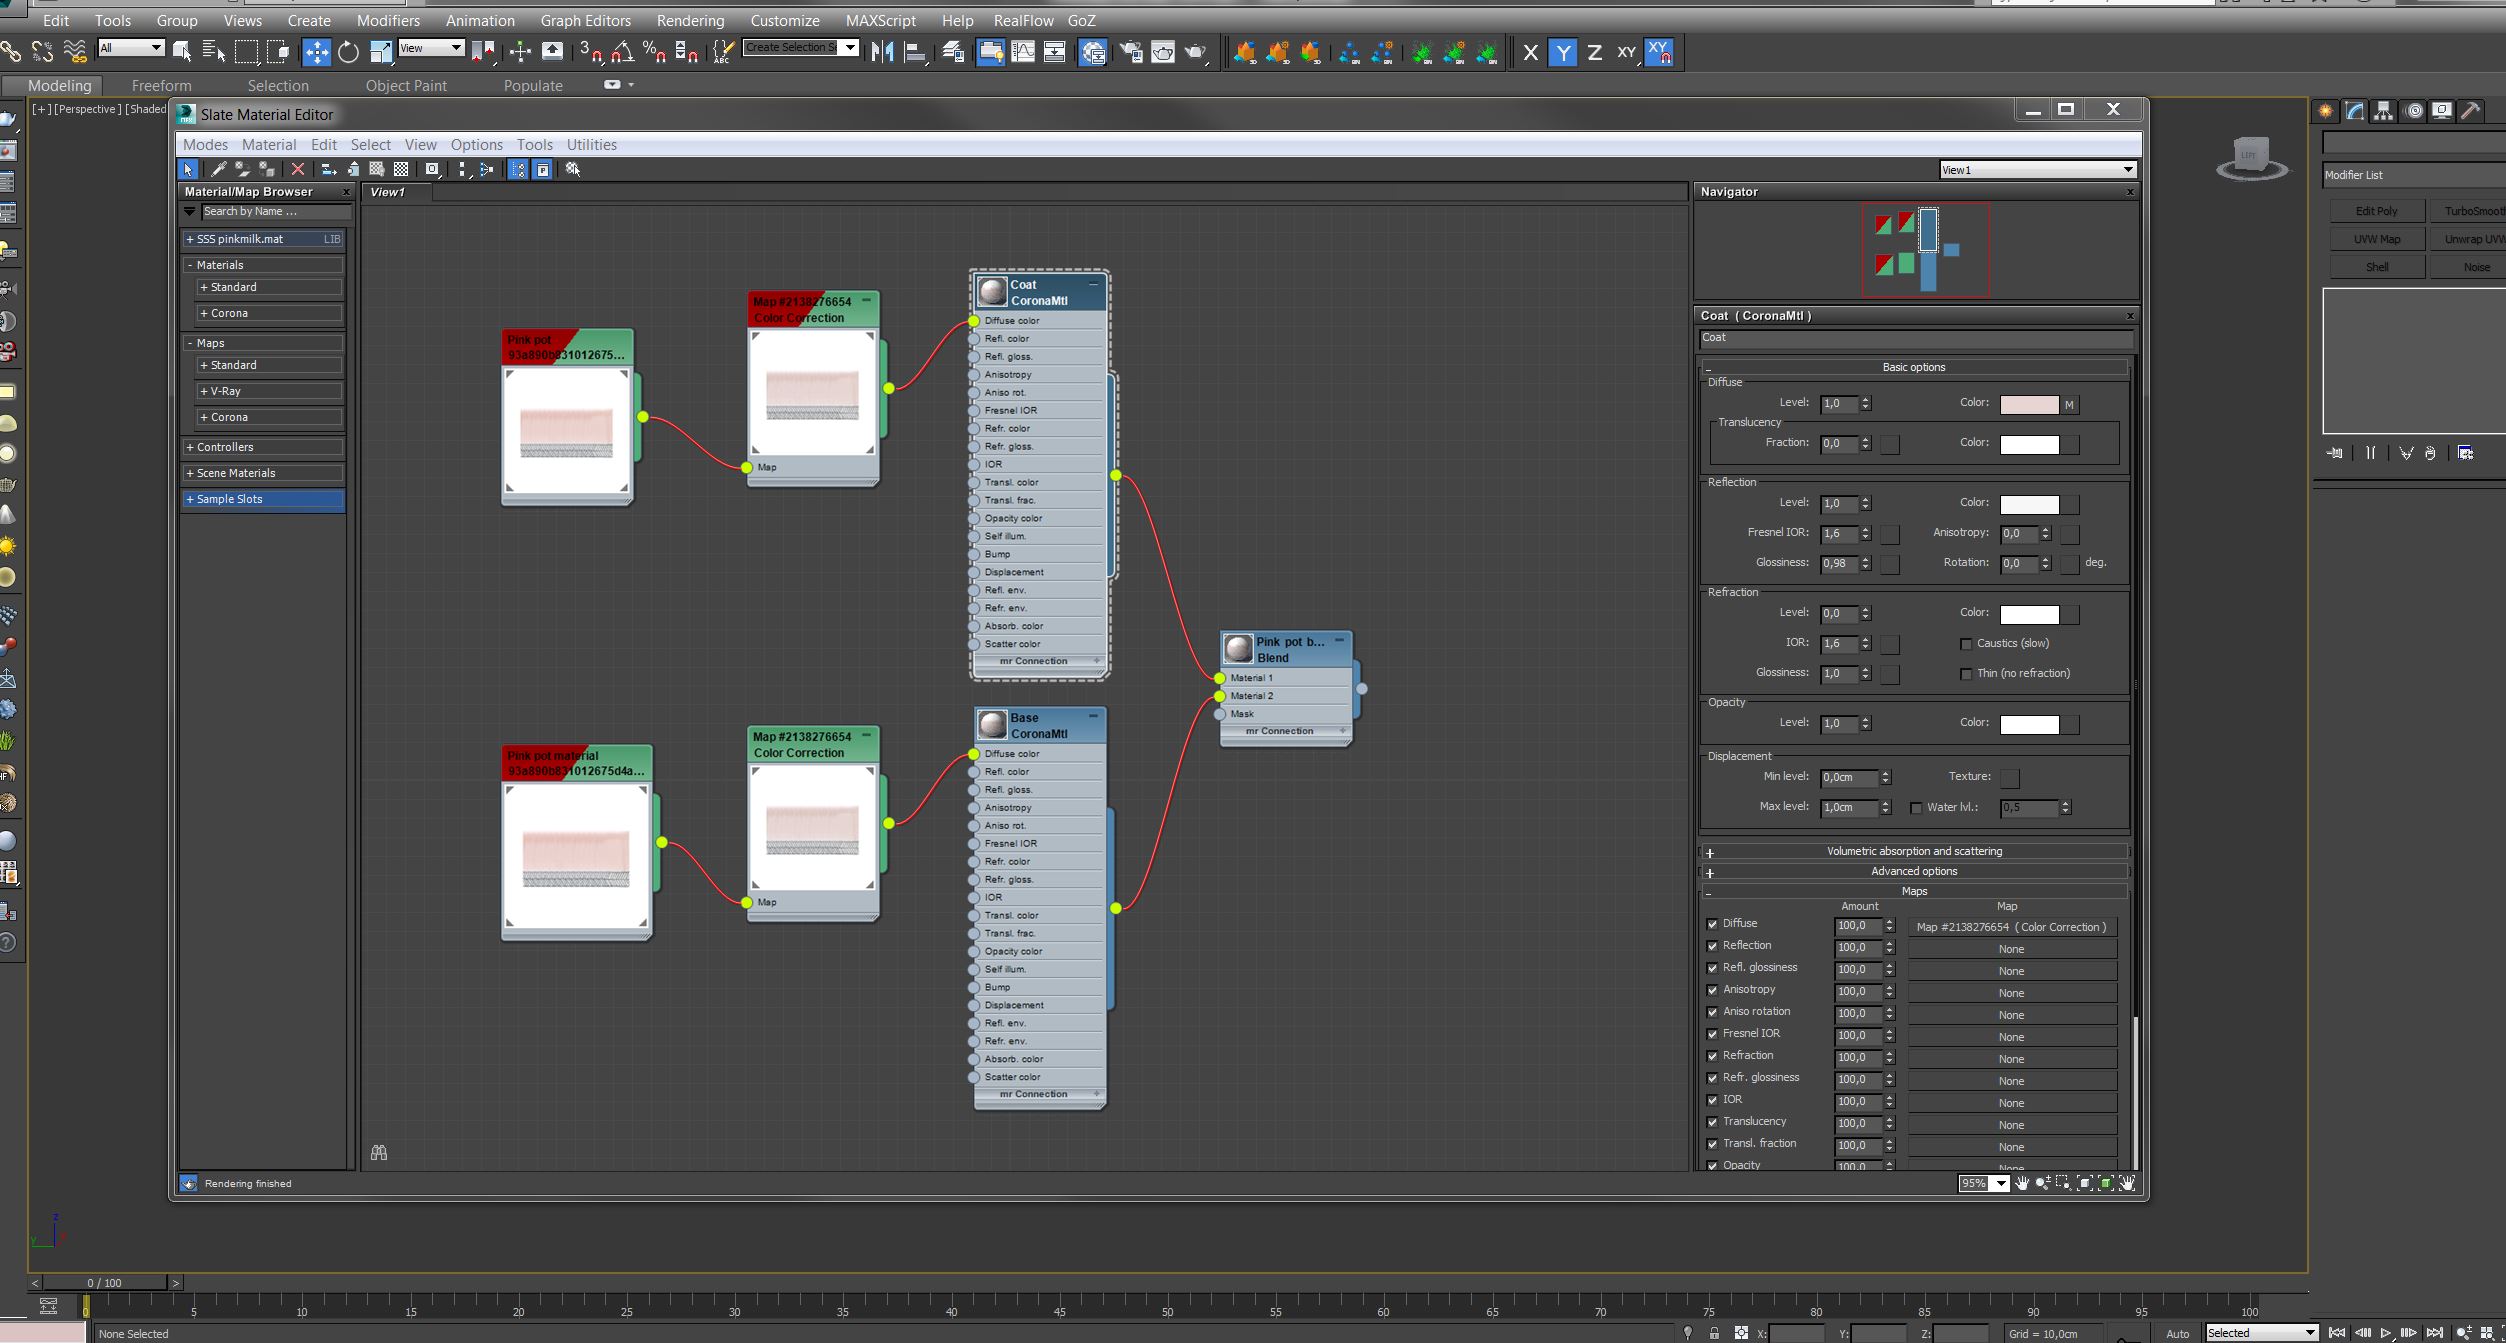
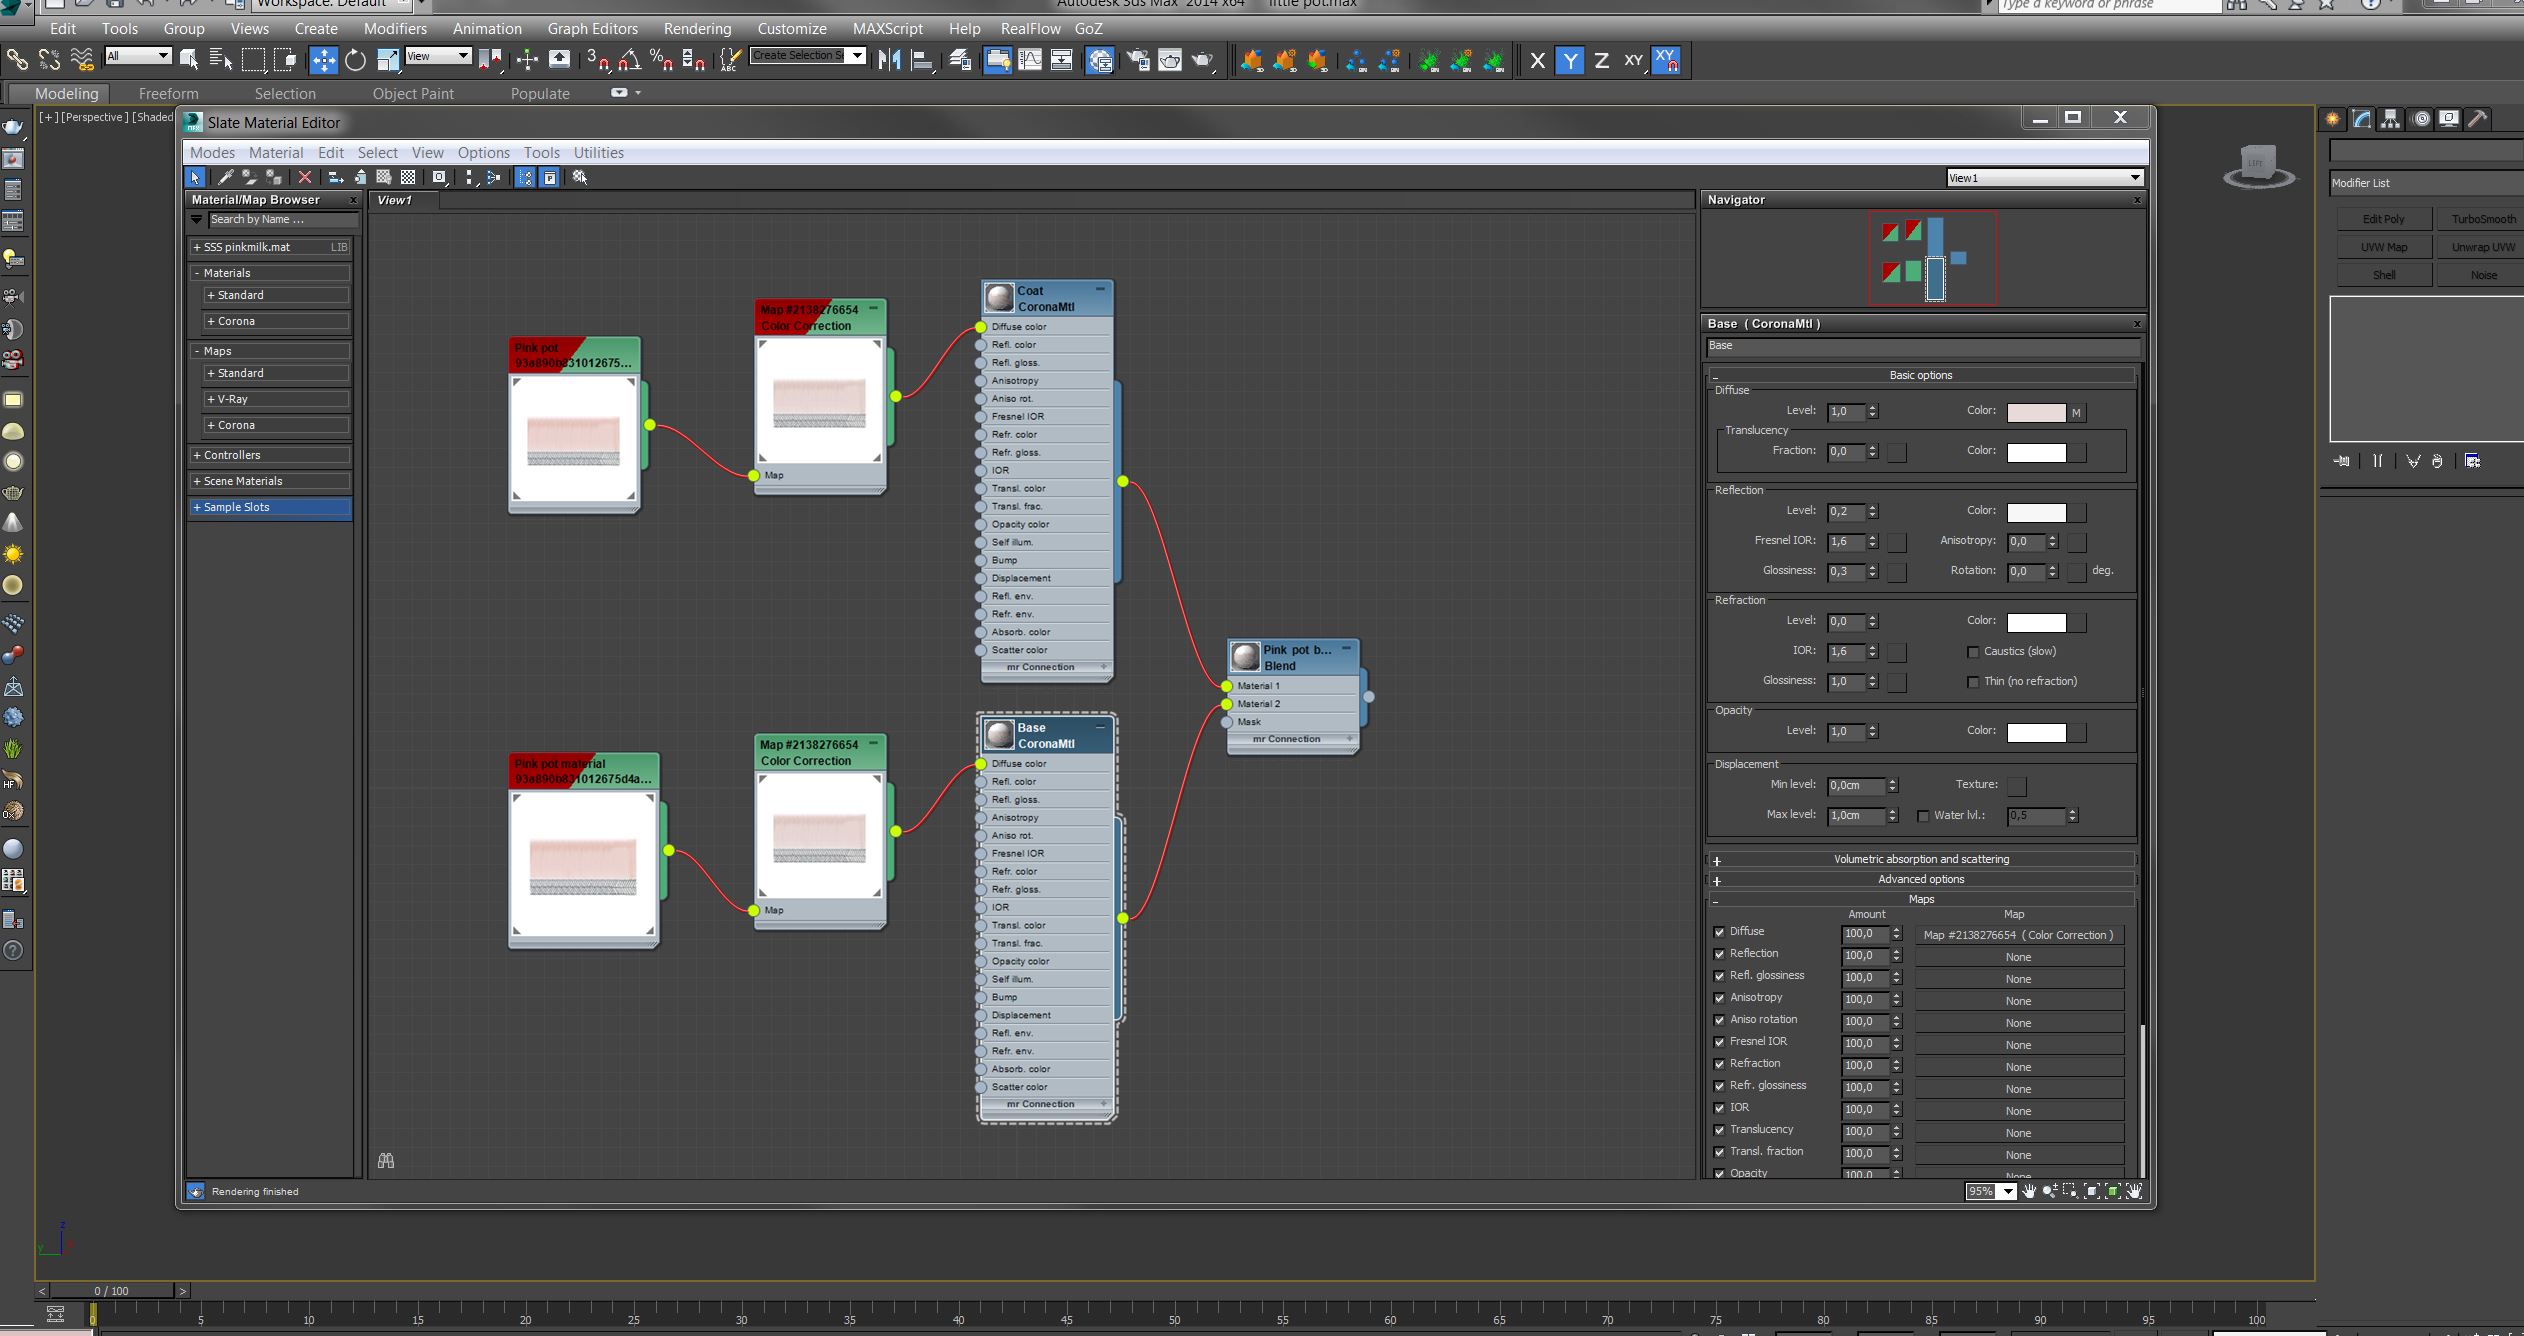
For the ceramic material I made a blend material, the first one is the base which is a low reflective matte material and the second one is the coat material which represents the lacquer of the ceramic, reflective and glossy.

The most materials of the props I used them as a base and then I tweaked almost all of them to achieve a more realistic result. I tried to make some of them to have imperfections. I used dirt maps blended with CoronaAO, some scratches and fingerprints maps as well as some distortion for the reflections by putting procedural noise on the bump slot.
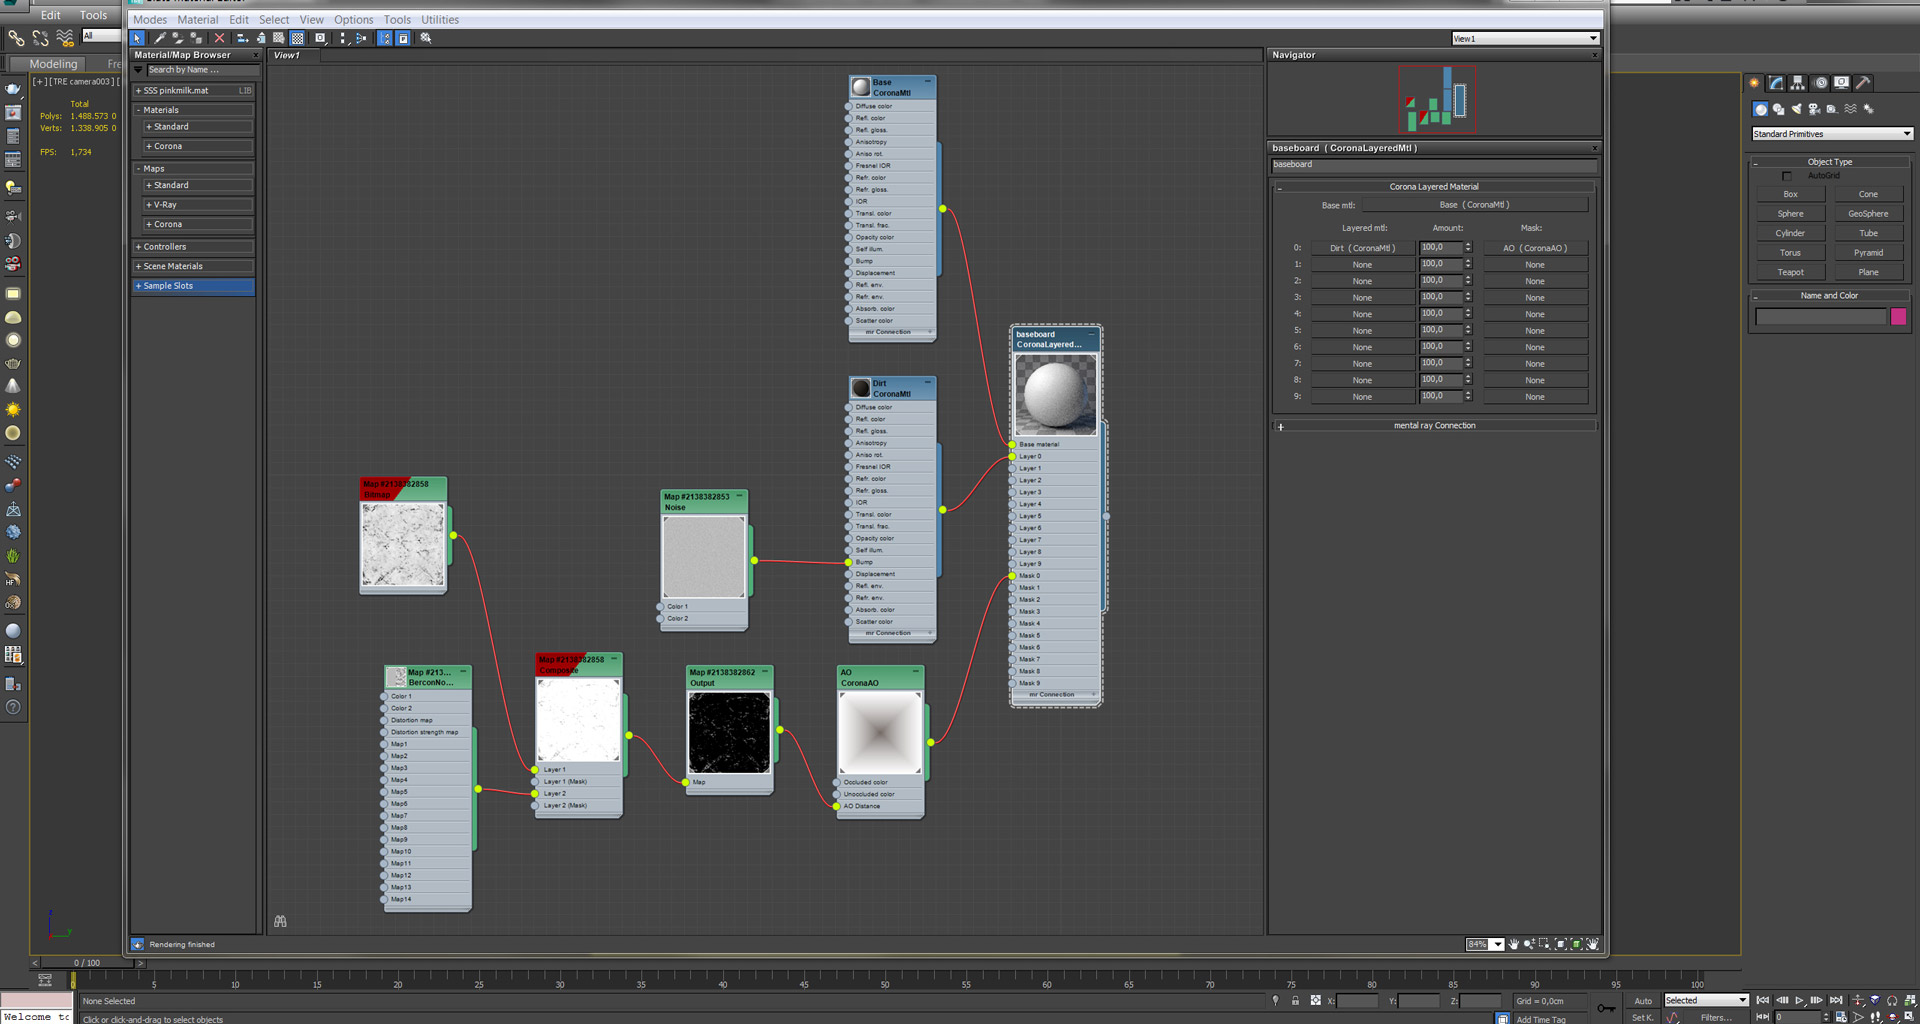
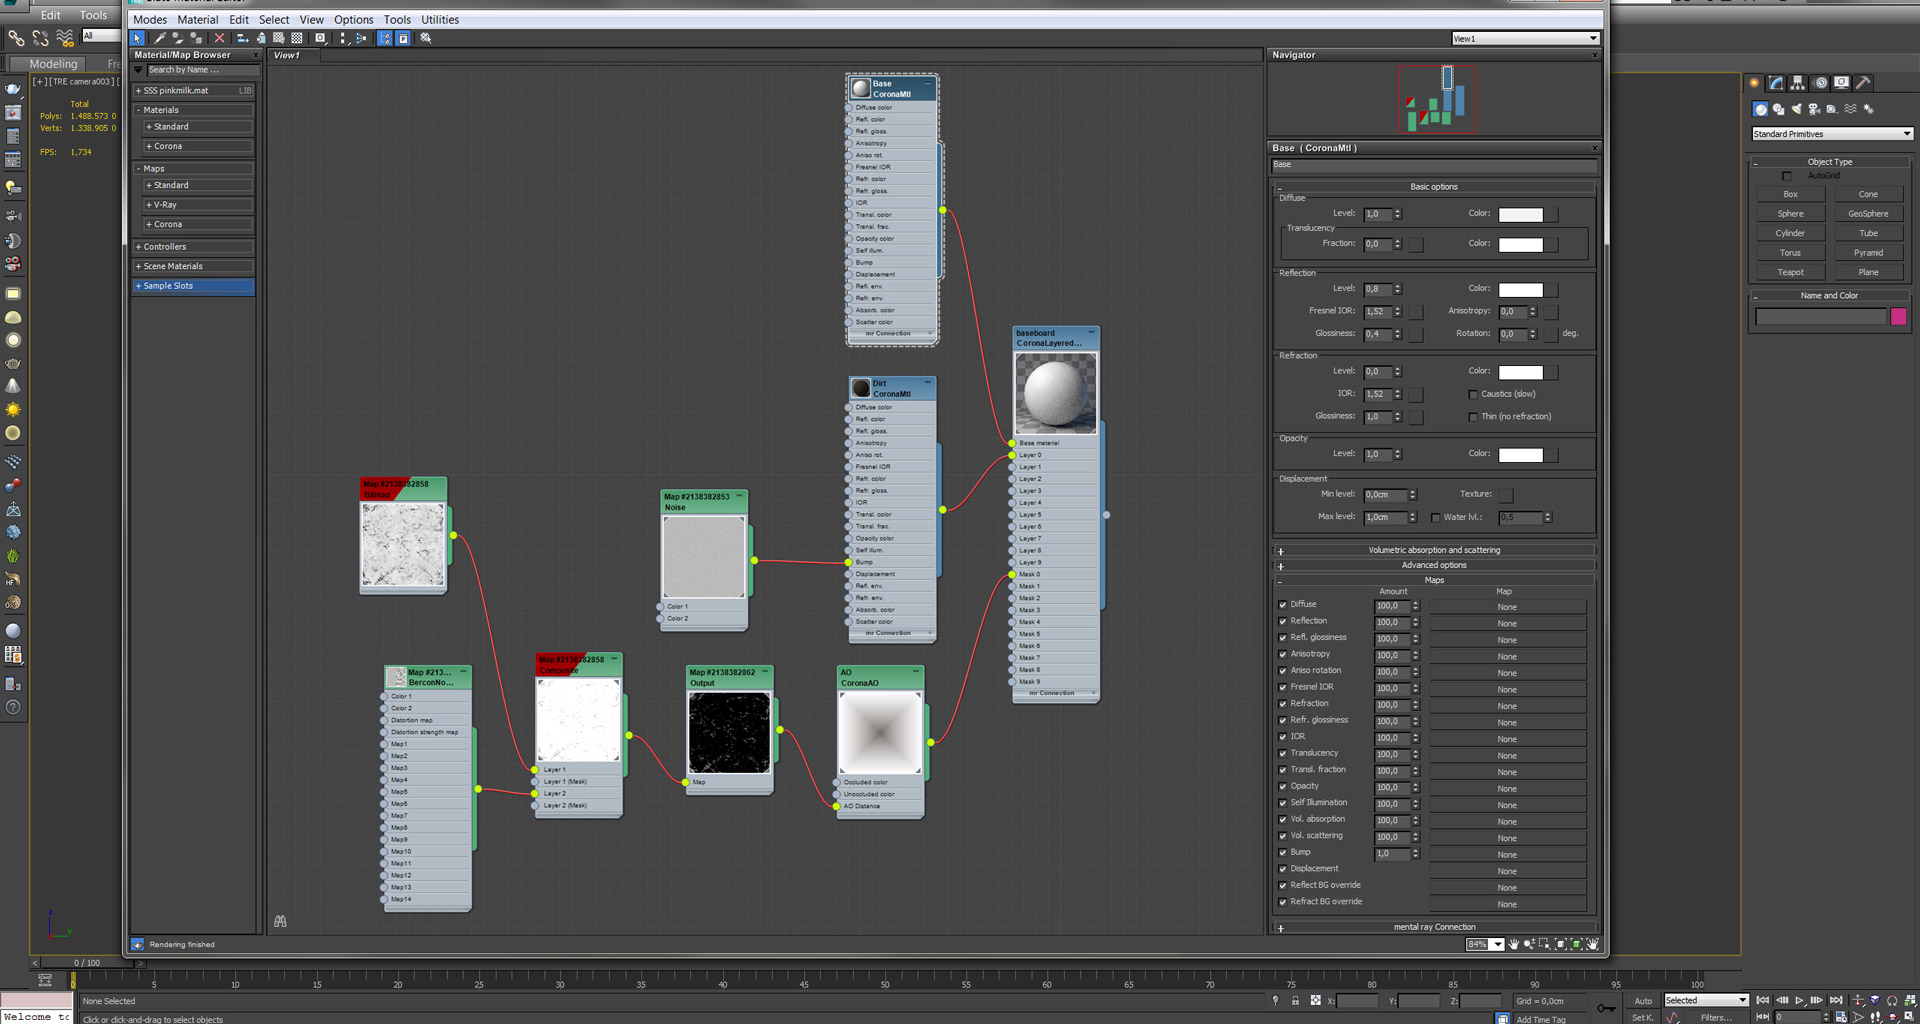
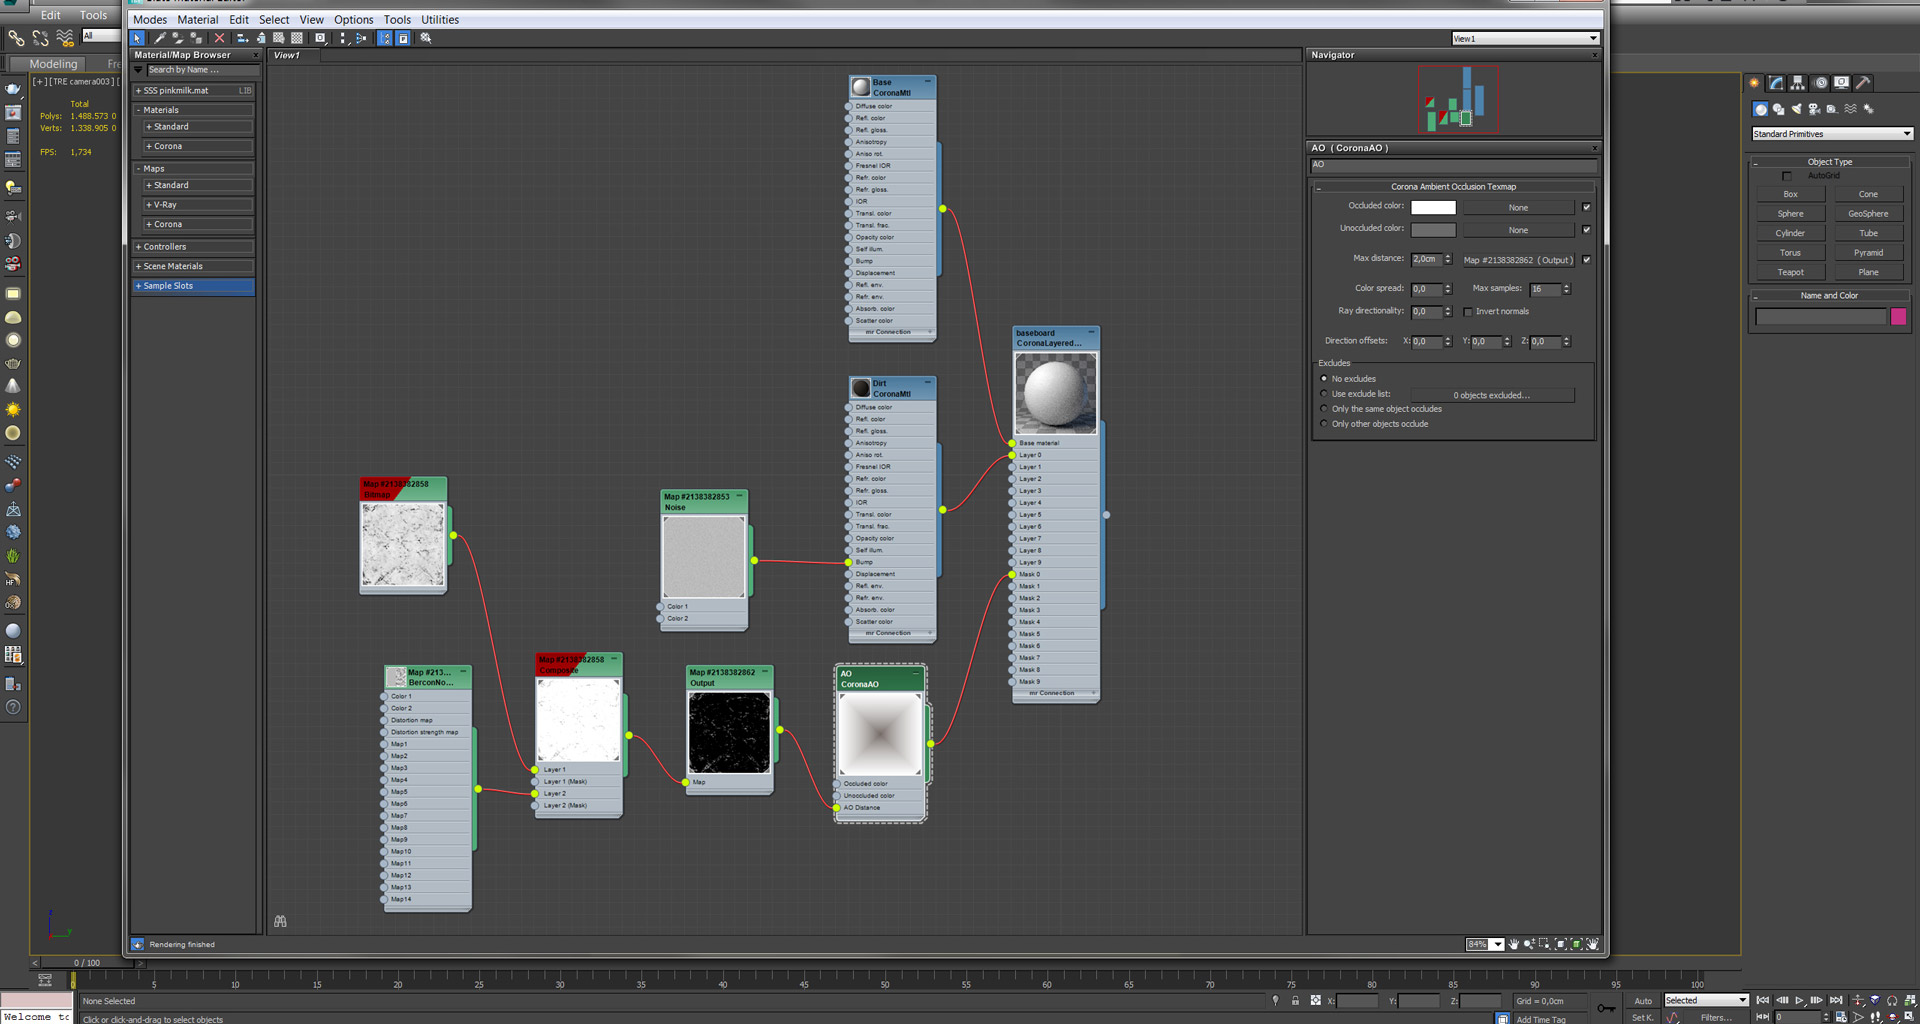
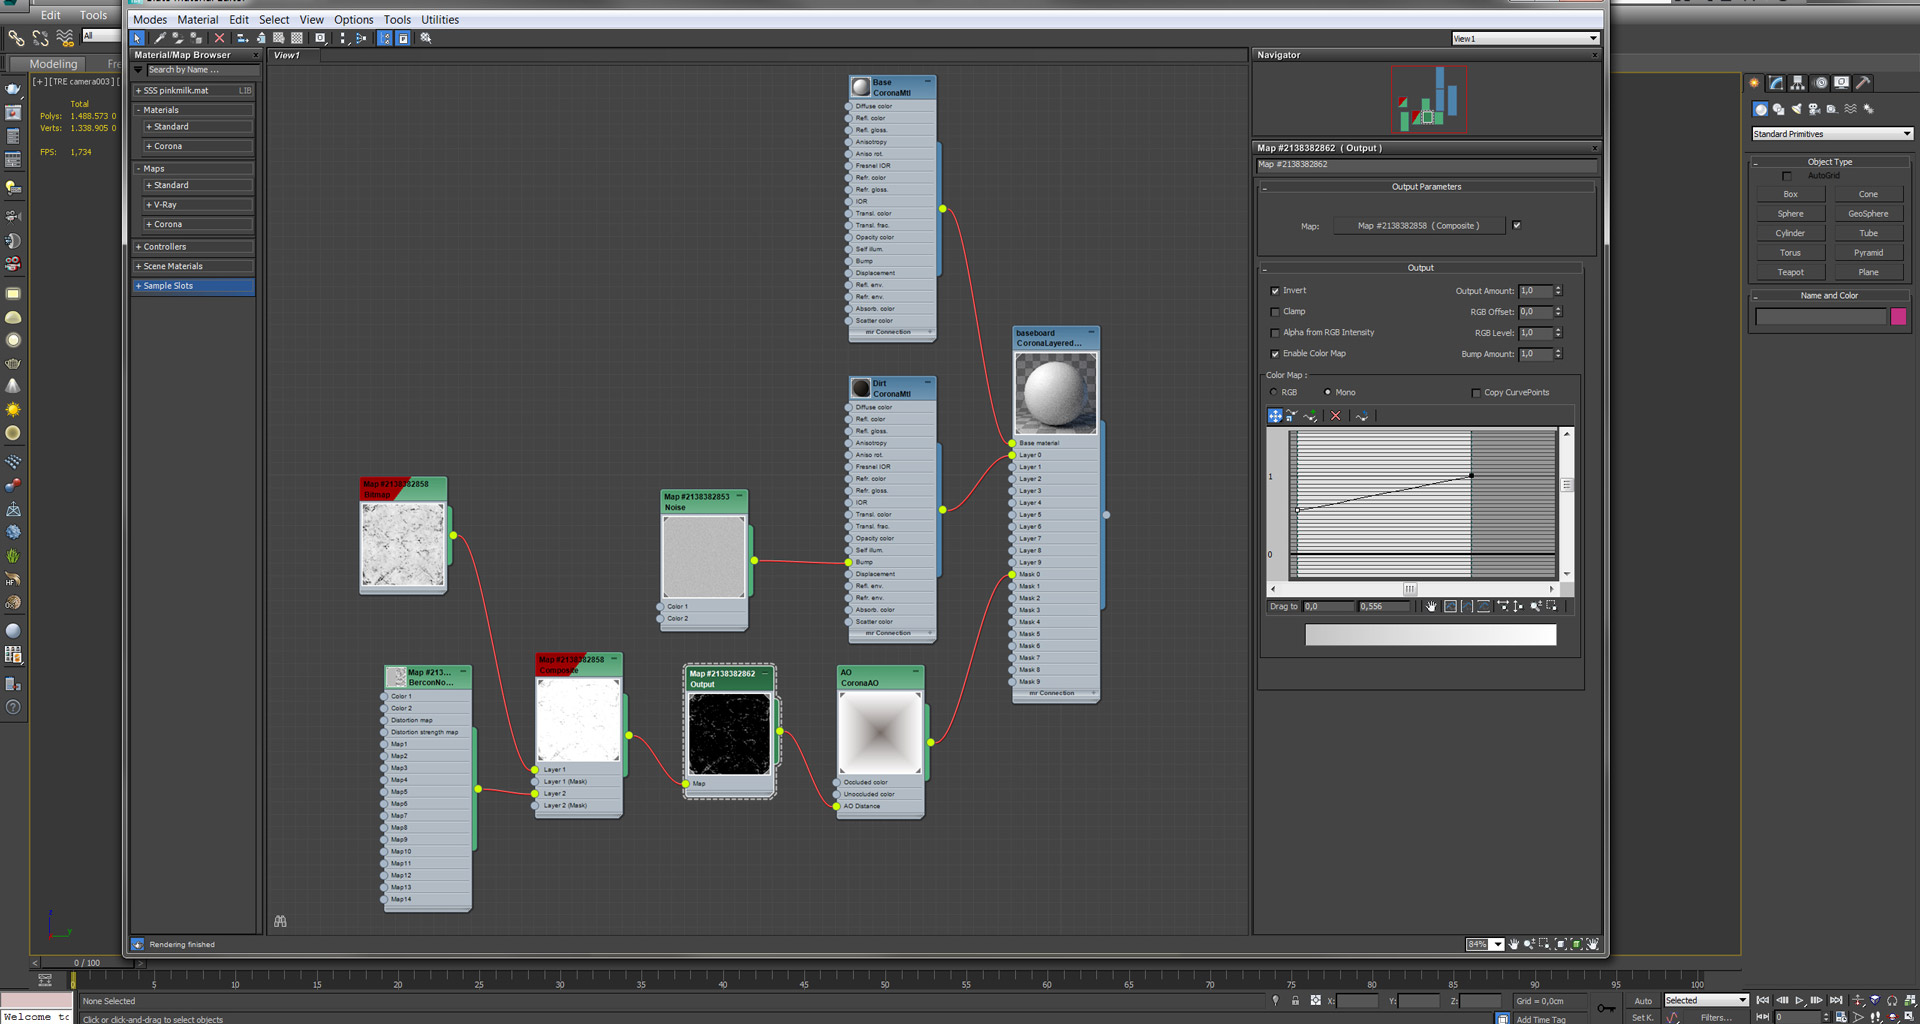
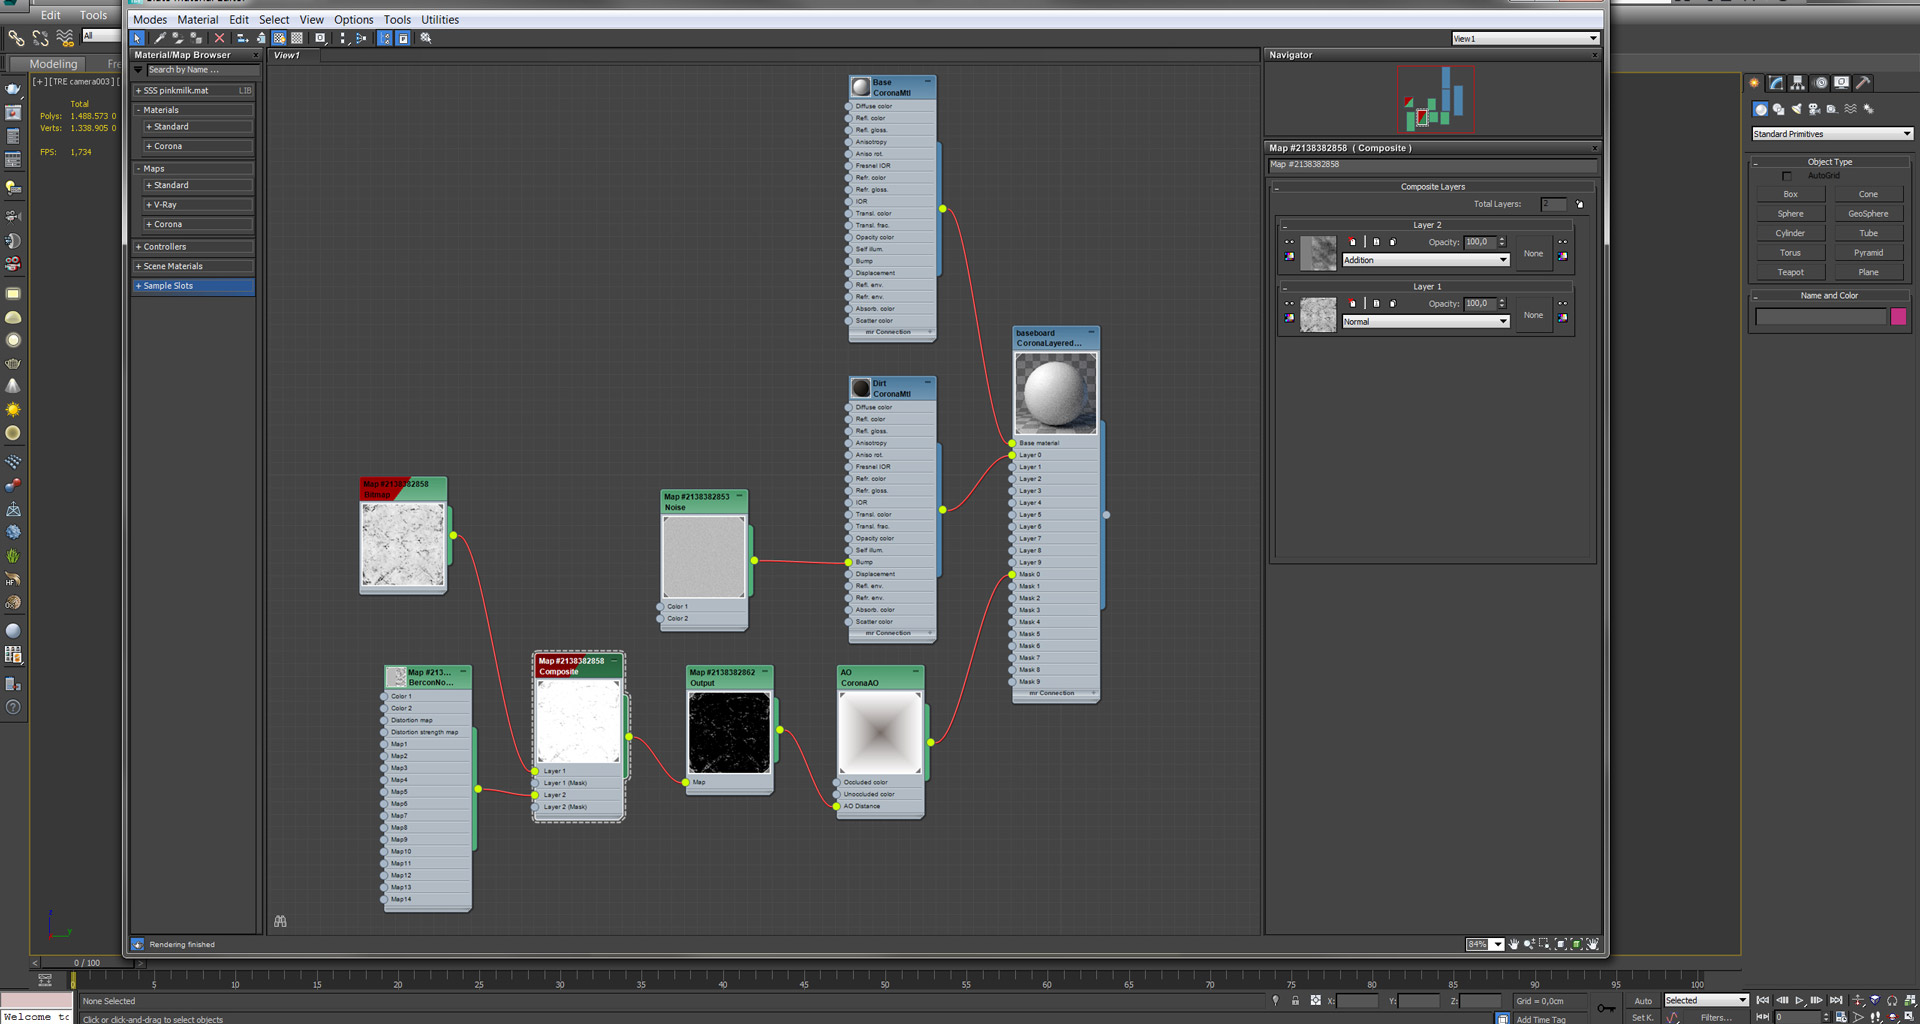
Below is one of the materials that I made from scratch.
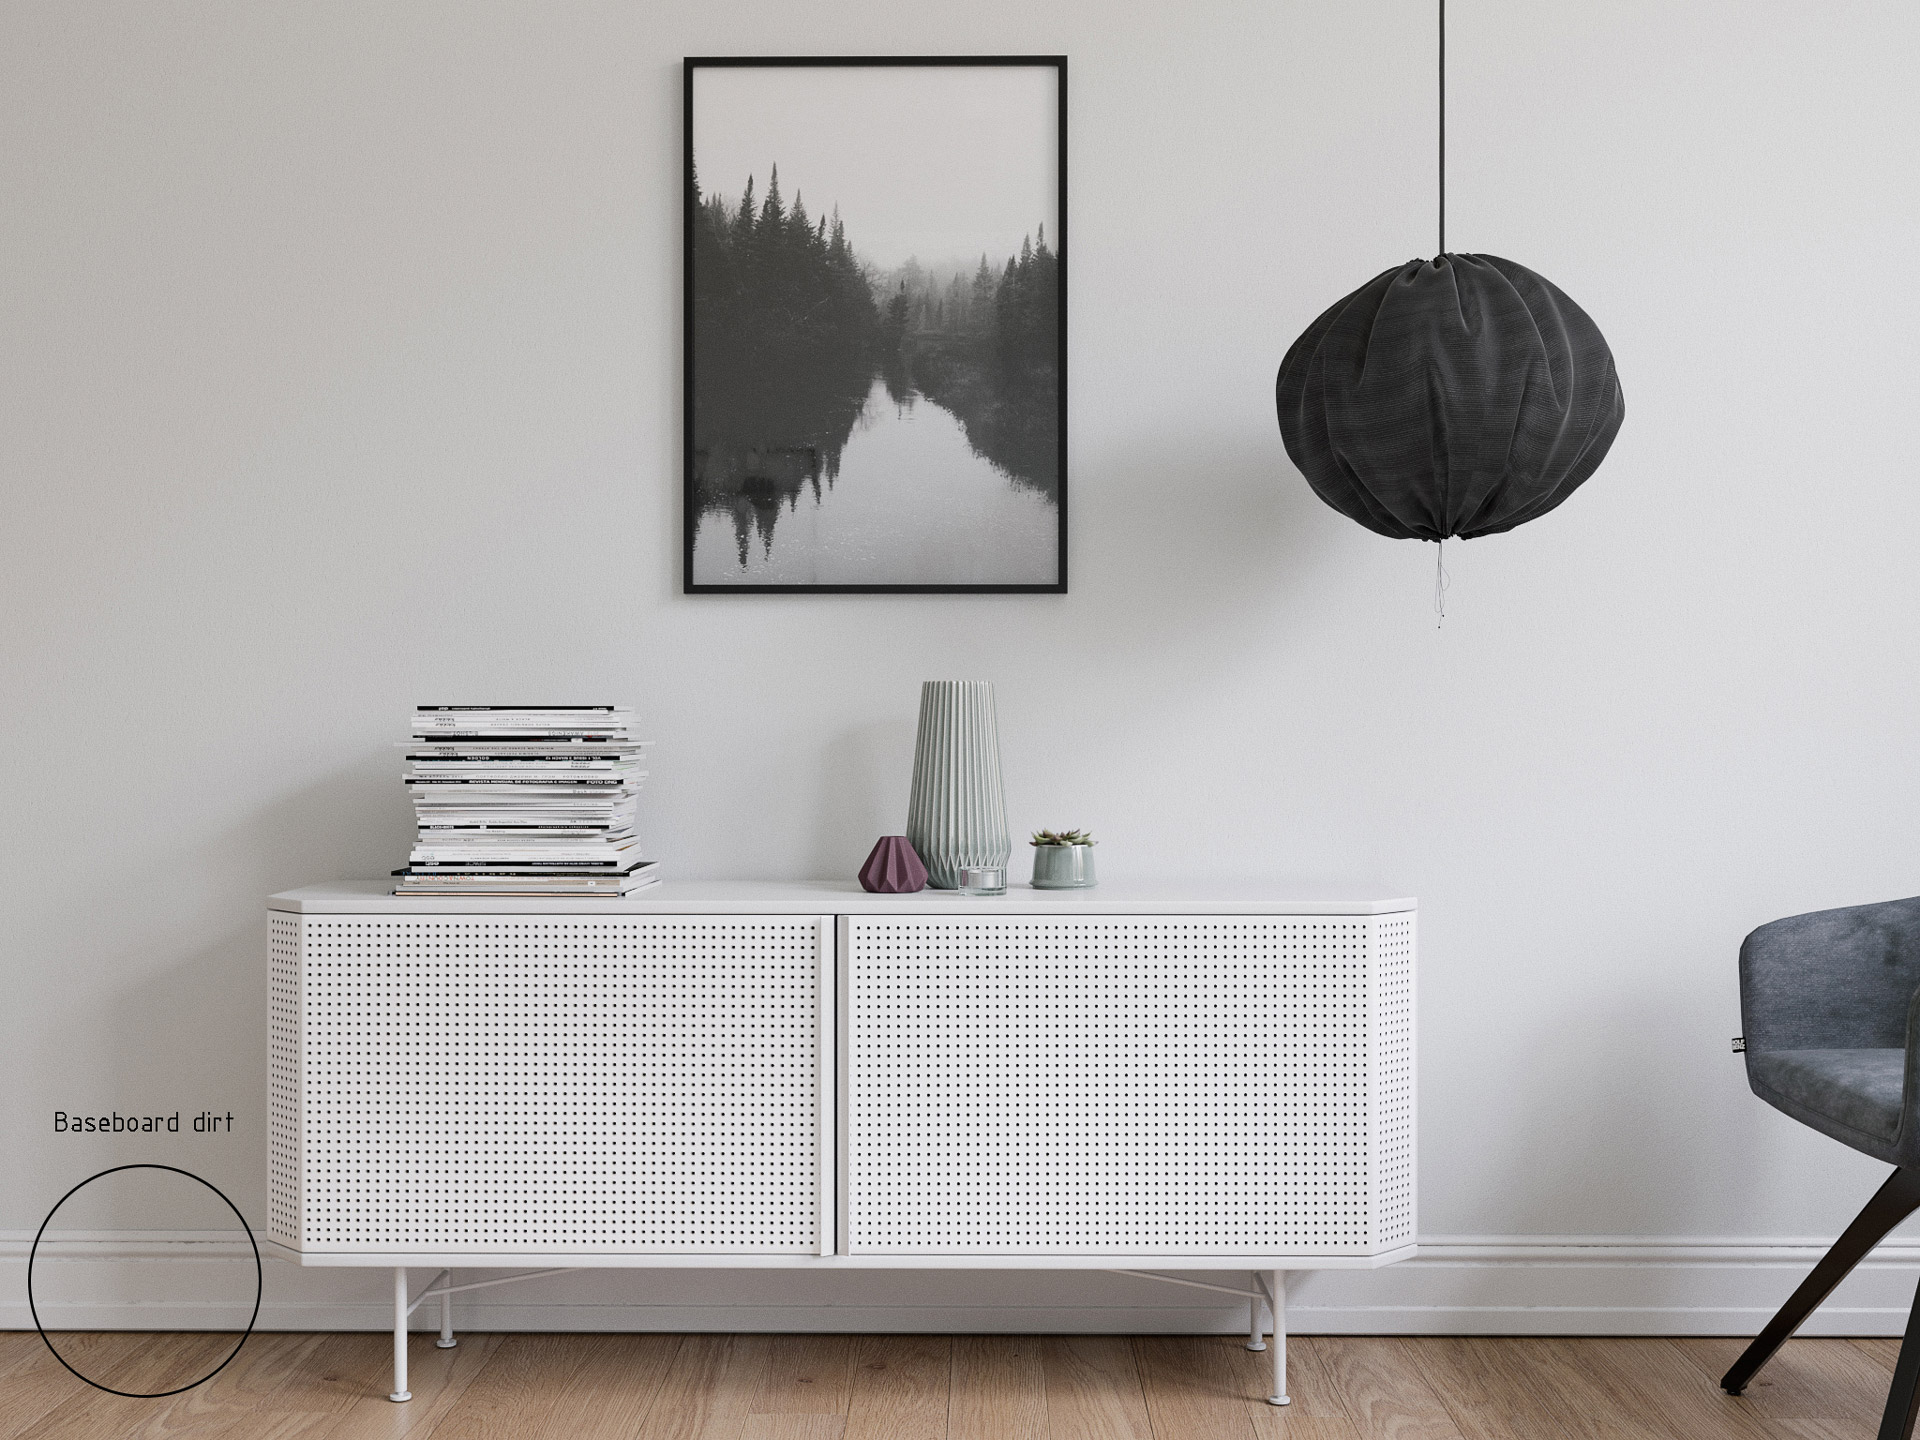
The baseboard material is a CoronaLayered Material and it consist of a white base material quite reflective and medium glossy as a matte paint material. On the first Layer I made a shader to represent the dust, very dark grey-brown diffuse, zero reflection and a bit of bump using 3dsmax noise with very small tiling. Finally I blend them with a CoronaAO map with a maximum distance of 2,0 cm and with an unoccluded color of medium grey because black was too strong. For making a bit more variation I used a composite map inside CoronaAO with a BecronNoise and a Dirt map.


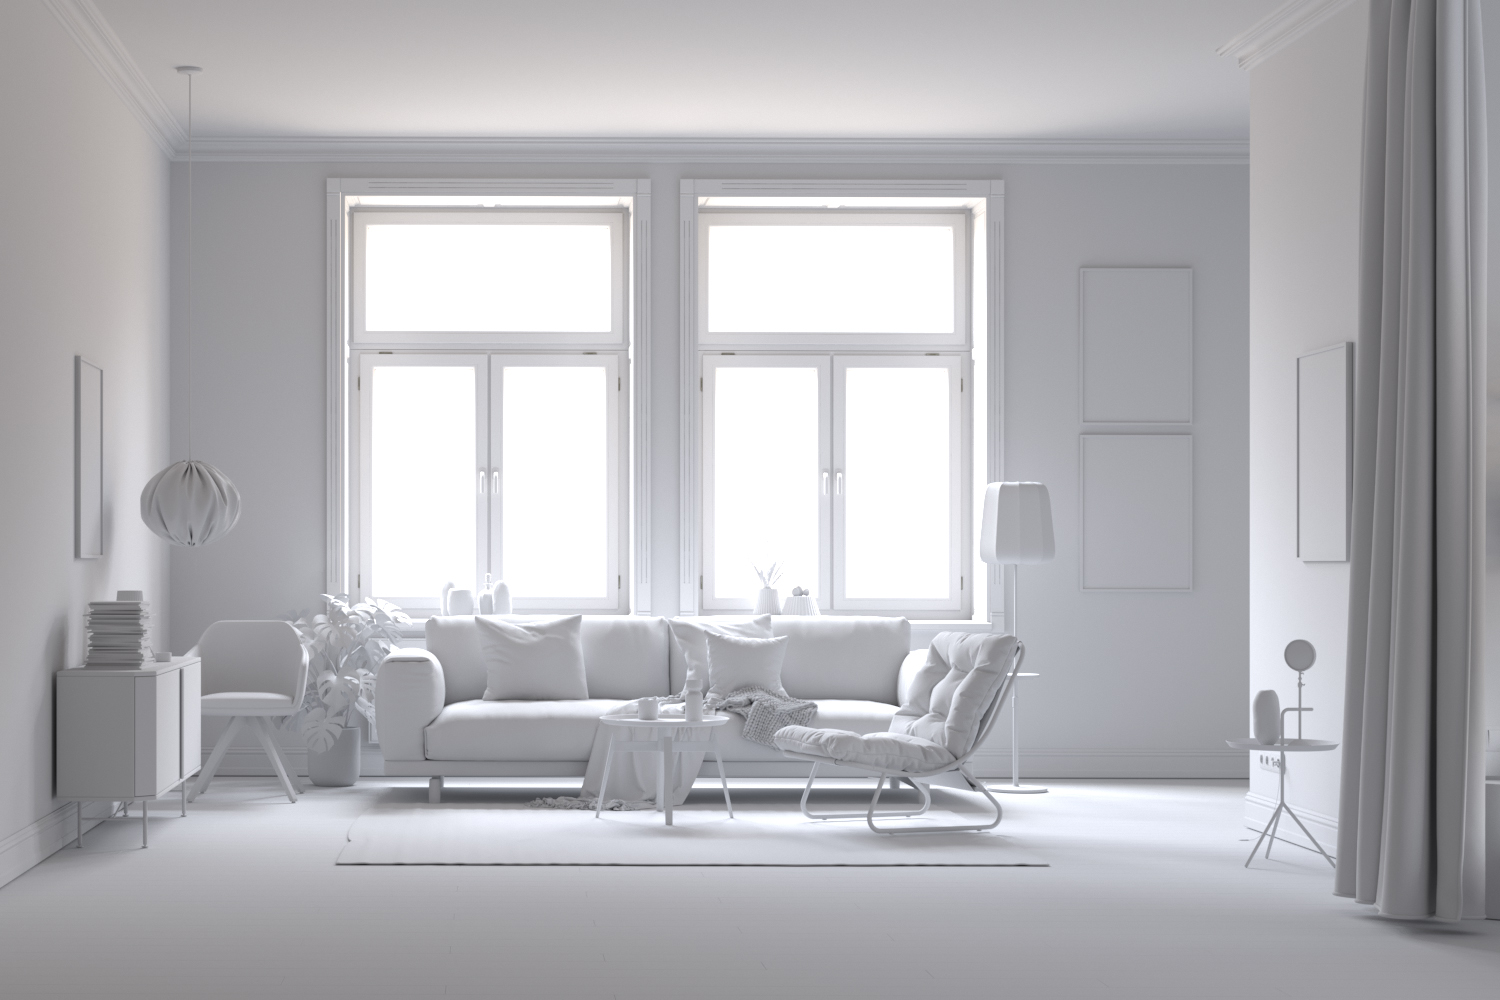
For the lighting I mostly give bright preference to HDRI lighting as it produce the most physically accurate results. Except of the High Dynamic Range Image for the environment I used artificial lights for the lamps and planes with Corona Portal Material for each window to speed up a little bit the GI procedure. About the cameras adjustments I set it to be physically correct for shooting interiors ( ISO 100 | 1/8 shutter speed | 2.8 f-number ). I am generally leaving the camera exposure values somewhere there and I make some small adjustments if needed before the final render. For the DoF I use AfterEffects and a specific plug-in with a z-depth of it called frischluft because adding DoF inside 3ds max makes render times almost double.
This is the most important part of my process because here I can give the clear, overcast and warm atmosphere that I aimed from the beginning. All the render image outputs were saved in 32bit openEXR format (fullfloat) so I could change the exposure and the highlights without losing any detail. Here i can balance the overexposed areas mostly those near the light source. So some steps that i usually do for final renders are to open the 32bit render image inside camera raw filter and adjusting the parameters. In this step everything is eyeballed so there is nothing special that i have to say just go with your taste! Some tip here, the camera raw filter by default adds sharpness to the image so i suggest before do anything else, go to the Sharp tab and put the value back to zero, its easier to make the image sharper as an independent layer. After fixing the exposure of the render i add some reflect and refract passes by lowering the opacity and playing with the blend modes that Ps offers you. Finally, I add some color corrections and some filters for the final touches and the atmosphere.
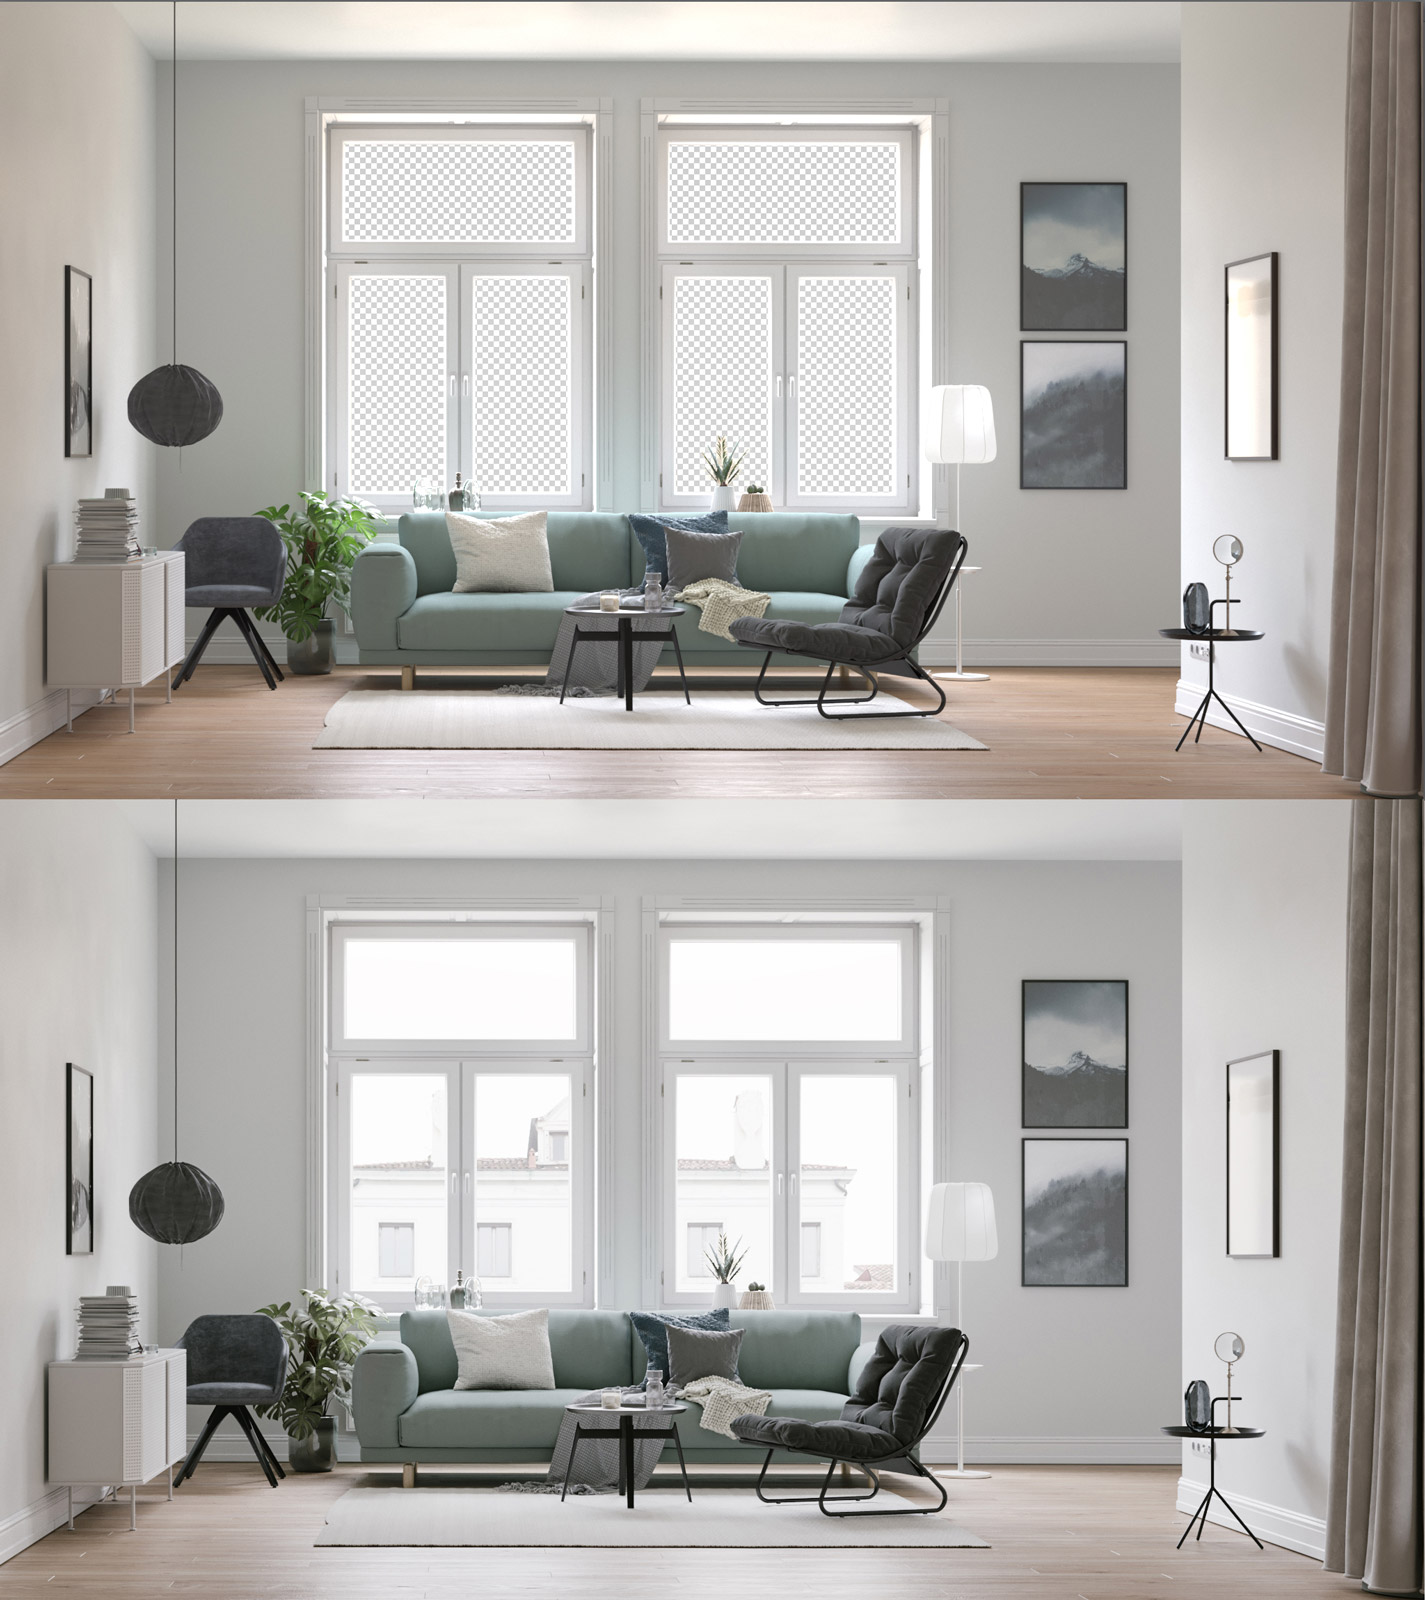
Finally, for the environment I used to make a plane outside the windows with lightmaterial but now I prefer doing this process inside Photoshop so I can make some quick tests of the outside buildings. Then I use the alpha channel as a mask and with some color corrections and curve adjustments I make the image to achieve the desired mood.
Thanks for your time I hope that you will find my making of somehow useful :)