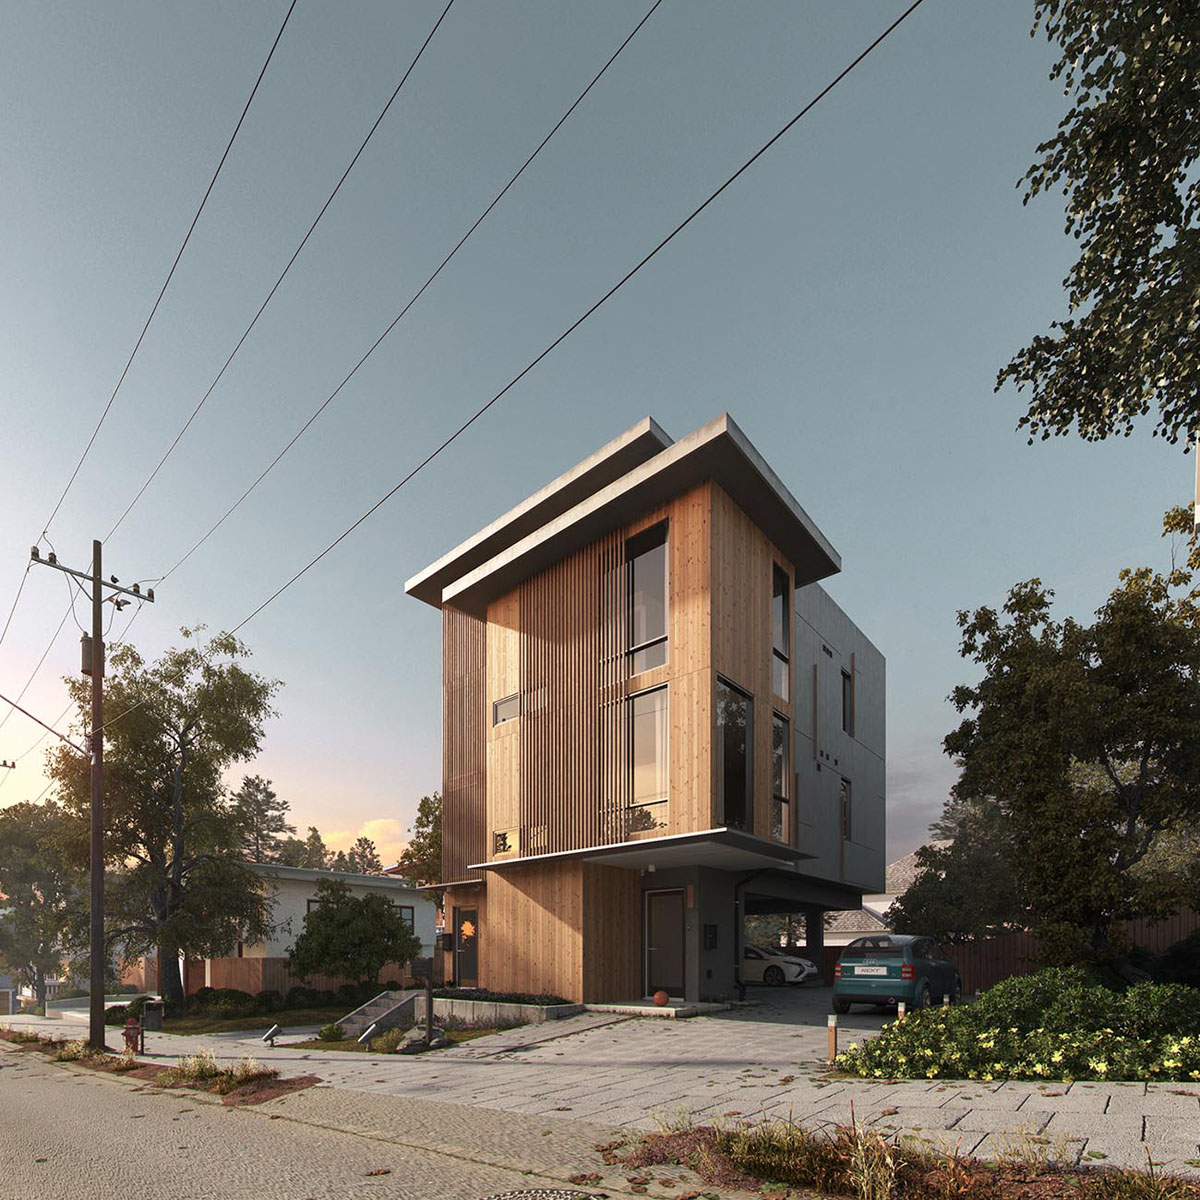
Sonny presented Ballard Aperture House designed by First Lamp Architecture as a personal 3d architectural visualization project. The photo-realistic level of this project is pretty nice, that's why we asked him to share with us his workflow. Enjoy it!
Hi everyone!! Let me say thank you to vray world for the chance that was given to make this “the making” of ballard aperture house. My name is Sonny Ferian and this was my own personal project after I went for the class in 2G ACADEMY . From this class I found my passion in 3D, moreover after I met in person with the teacher in 2gacademy, I believe right away that I love this job. (and this is my hobby).
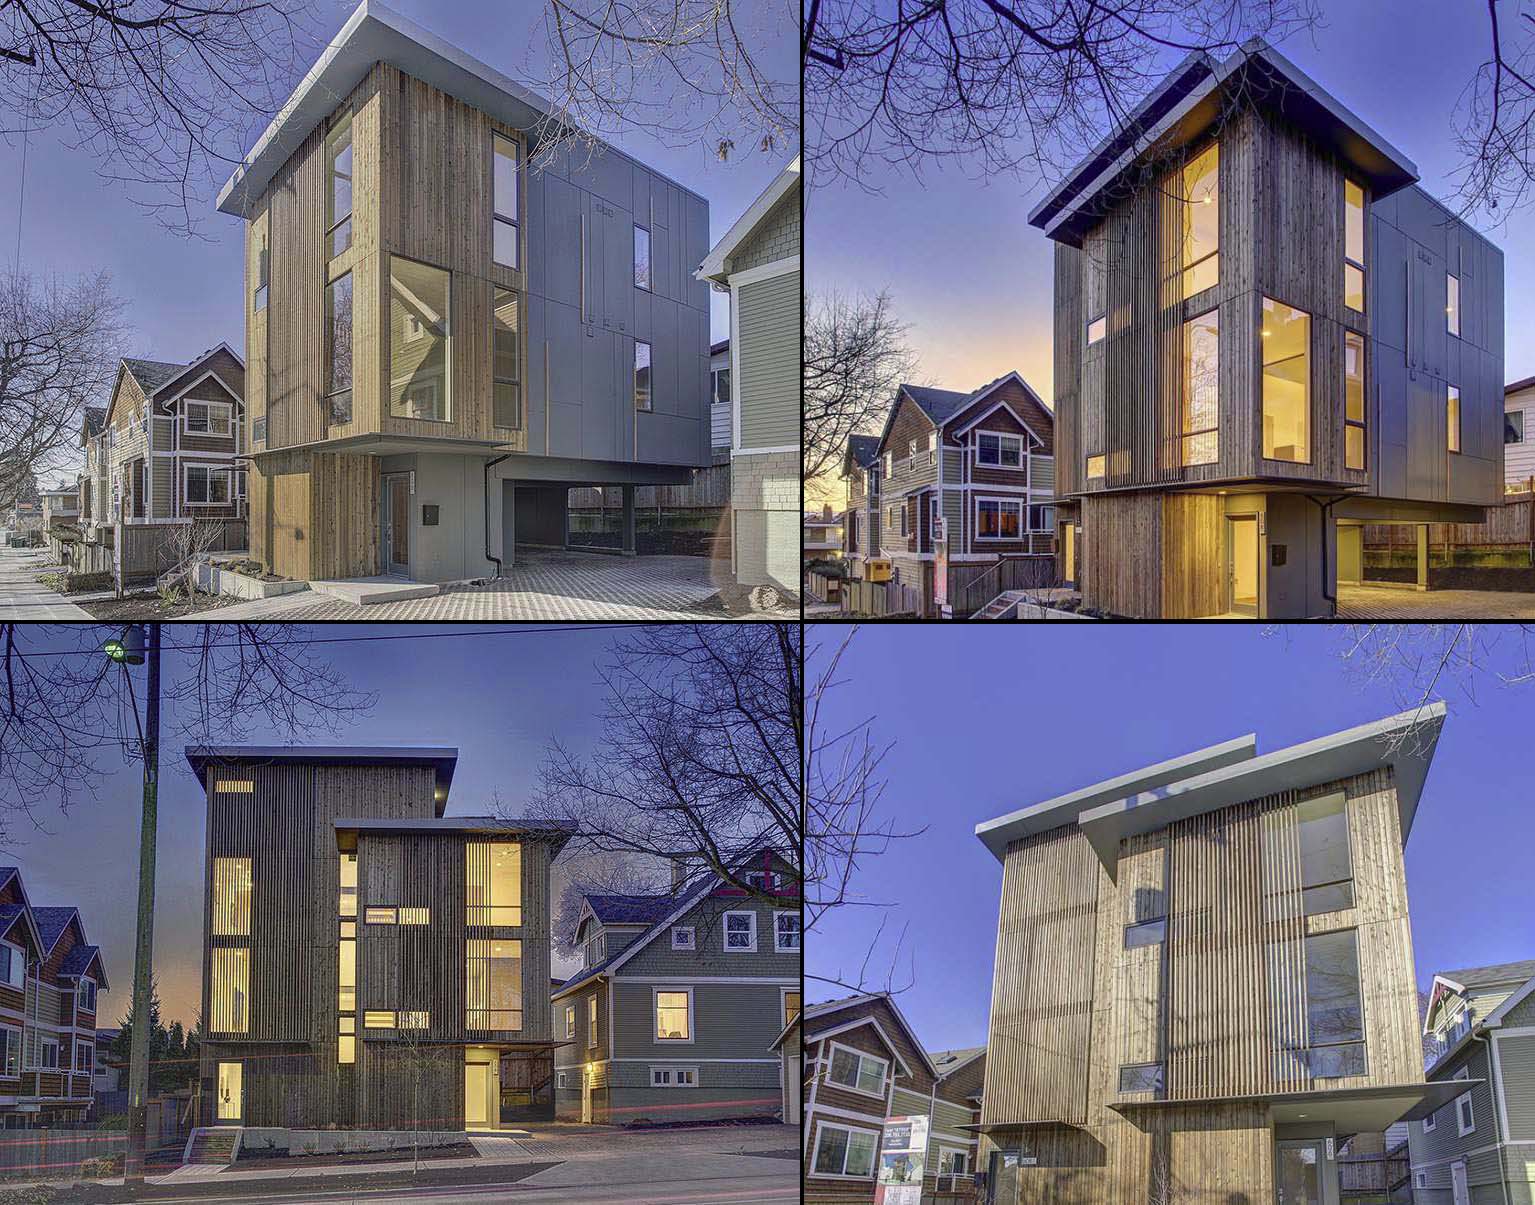
Now, this is my reference which I used for my own personal project, ballard aperture house. I chose this house just because I like it and no other reasons. I finished this project about 2 or 3 weeks long. This is the pictures that I took from Archdaily.
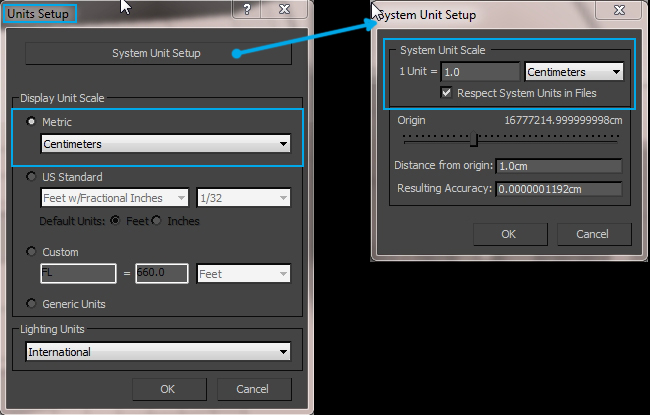
Alright then, let's begin with the first step in the making of ballard aperture house. First, what I do when open up the 3ds Max is checking the unit setup and gamma. I always use centimeters. Units setup and system unit setup must both using the same unit, which in my case, centimeters.
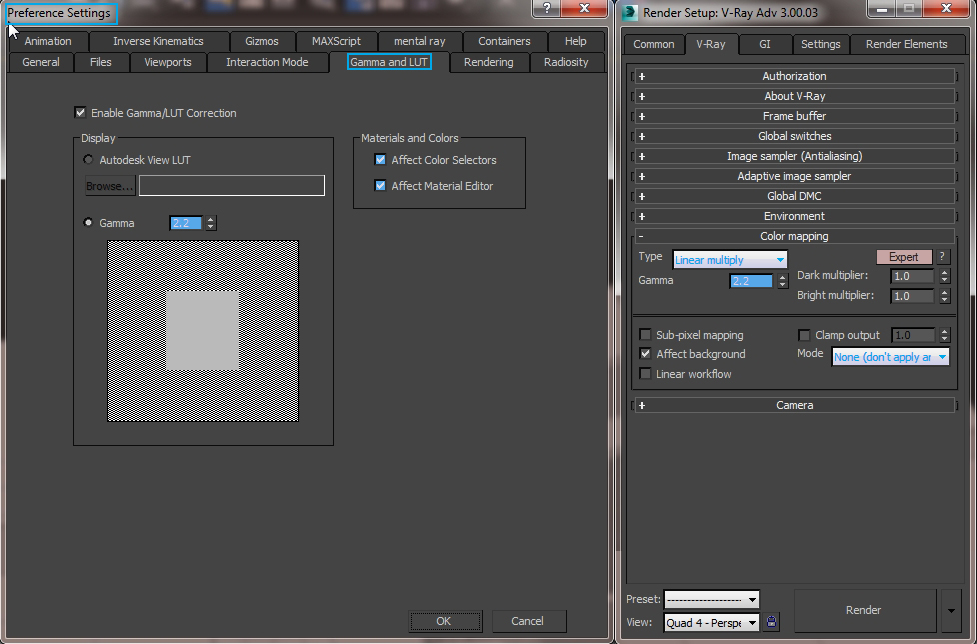
And this is my gamma settings which I always use in every single project I've done. I use gamma 2.2 and linear multiply.
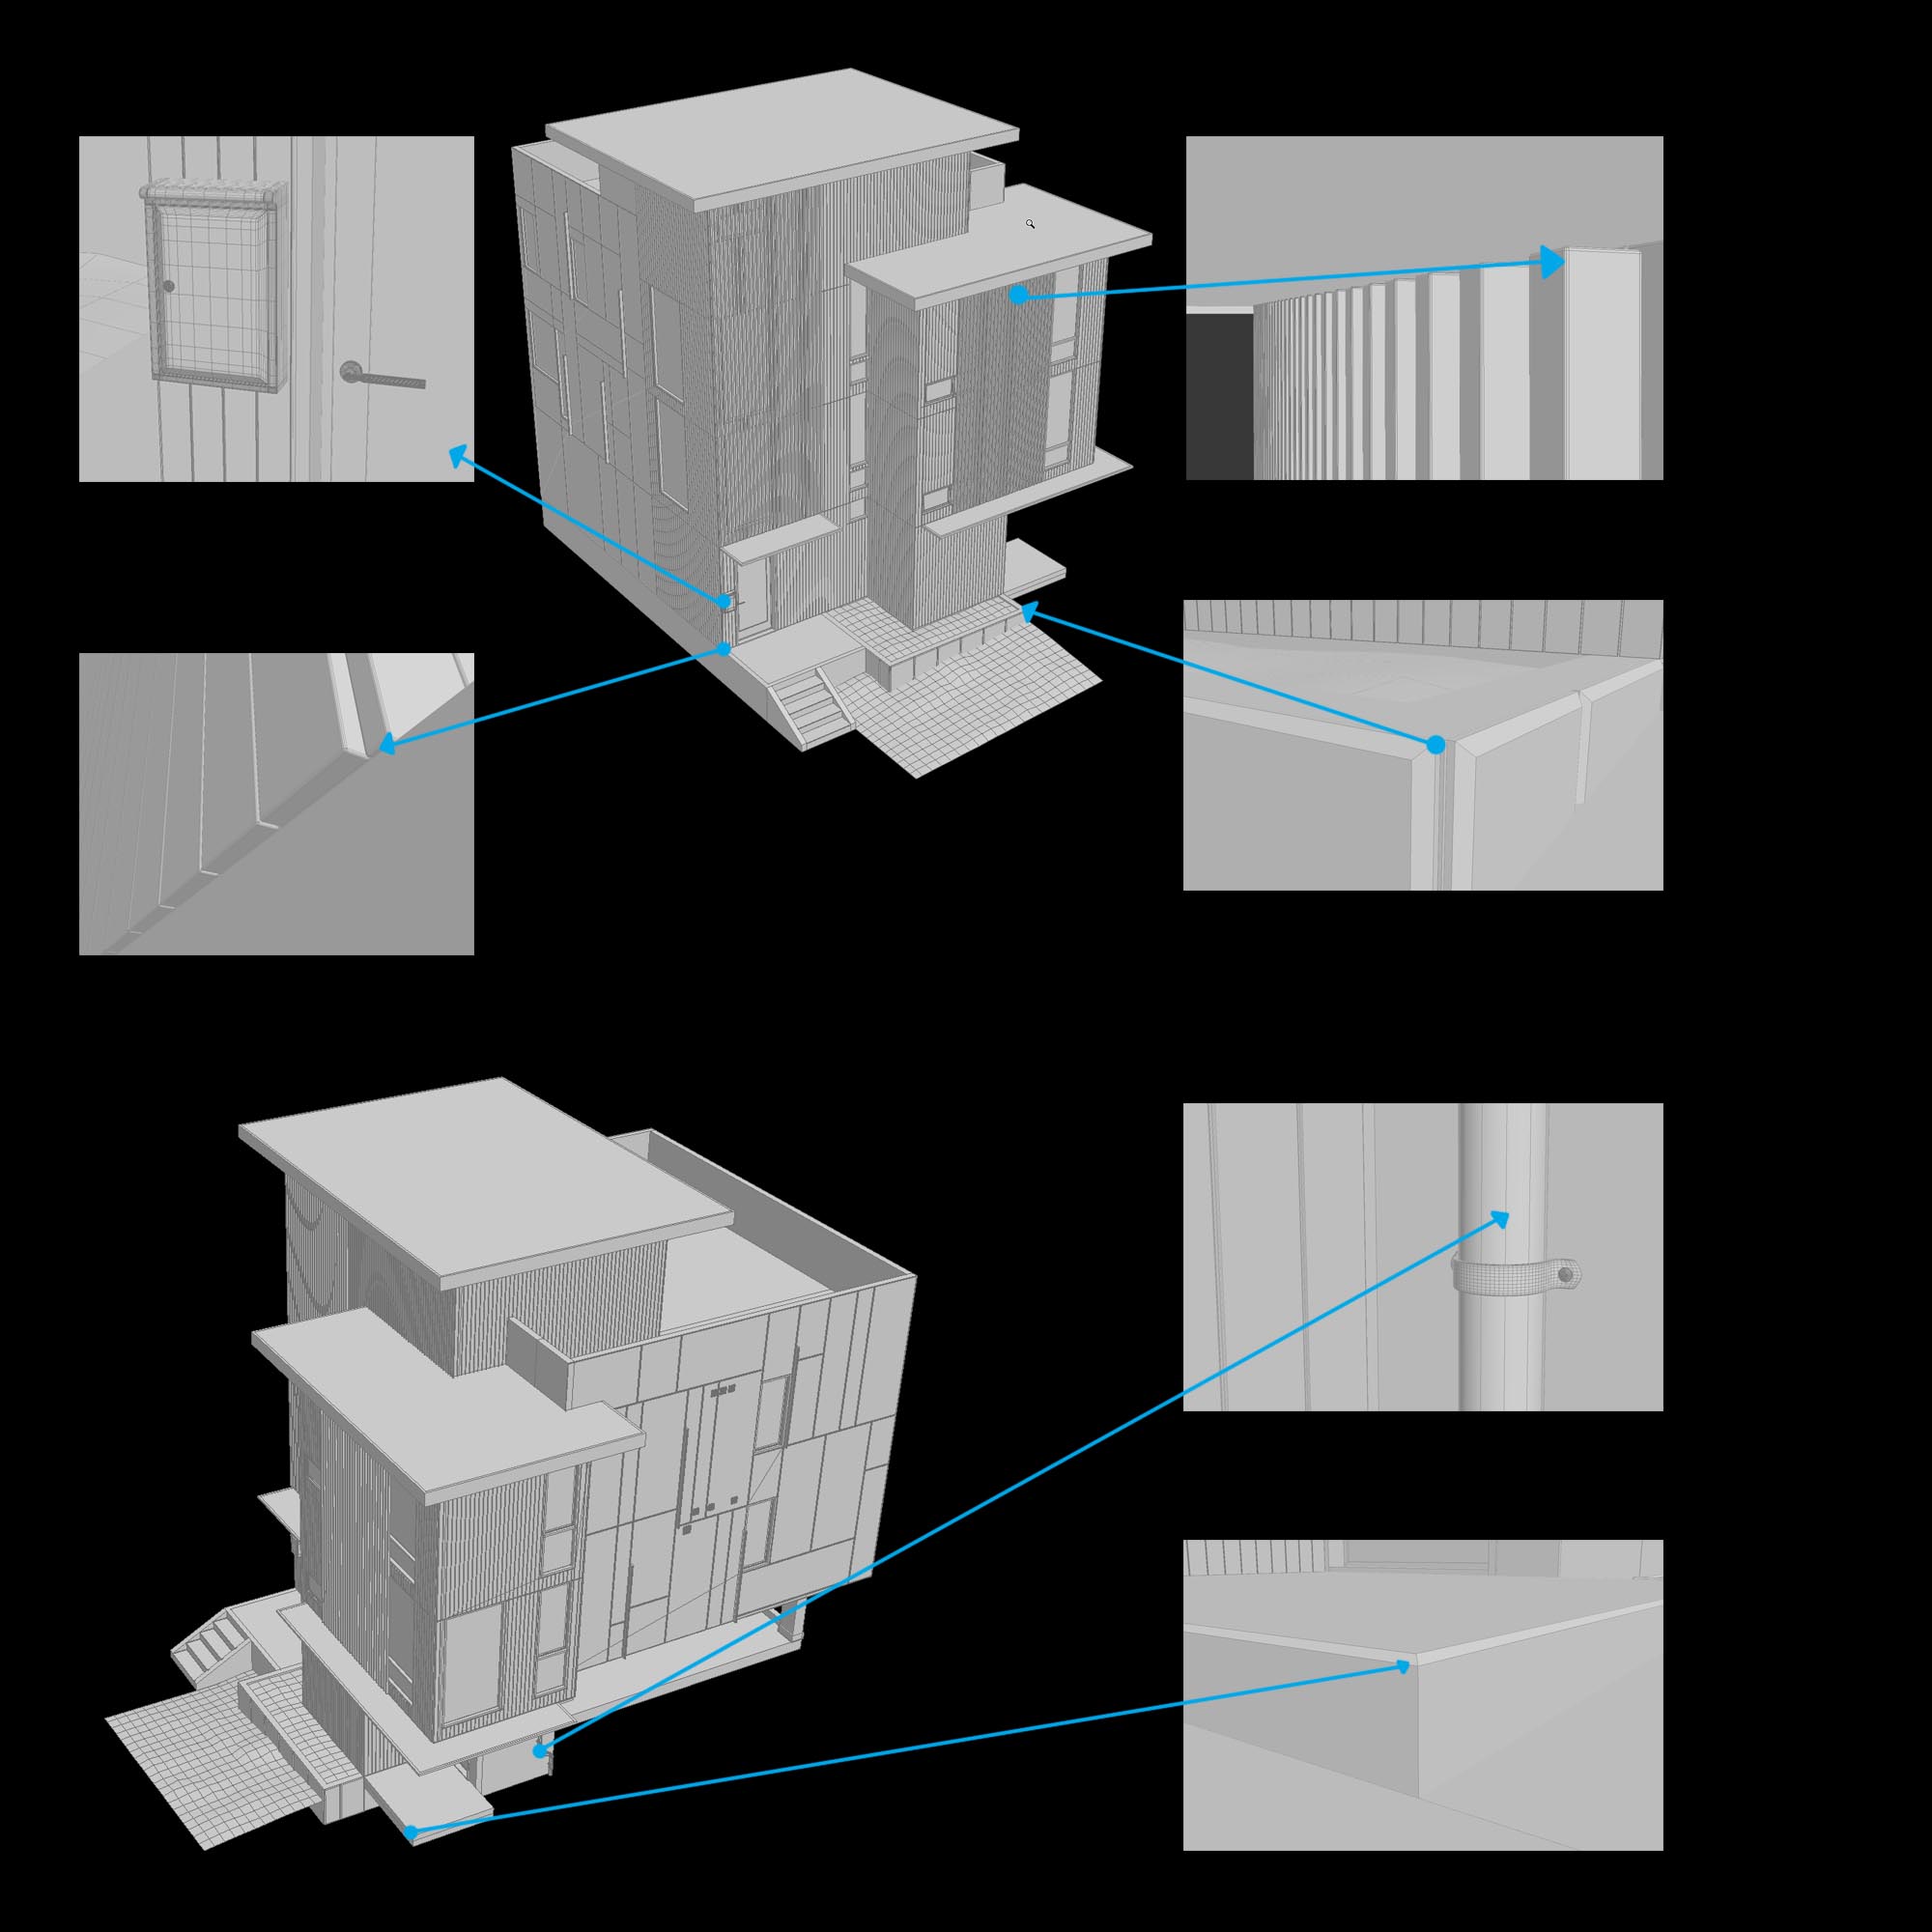
After finishing the modeling for the building, I gave some pretty important details to the model for the finishing. In every wooden object, I gave chamfer in the every end of the object so it didn't look pointy in face of the building (because in my opinion, every thing that used by human it won't be pointy / sharp) and this give much deep realism effect in the final result of this drawing.
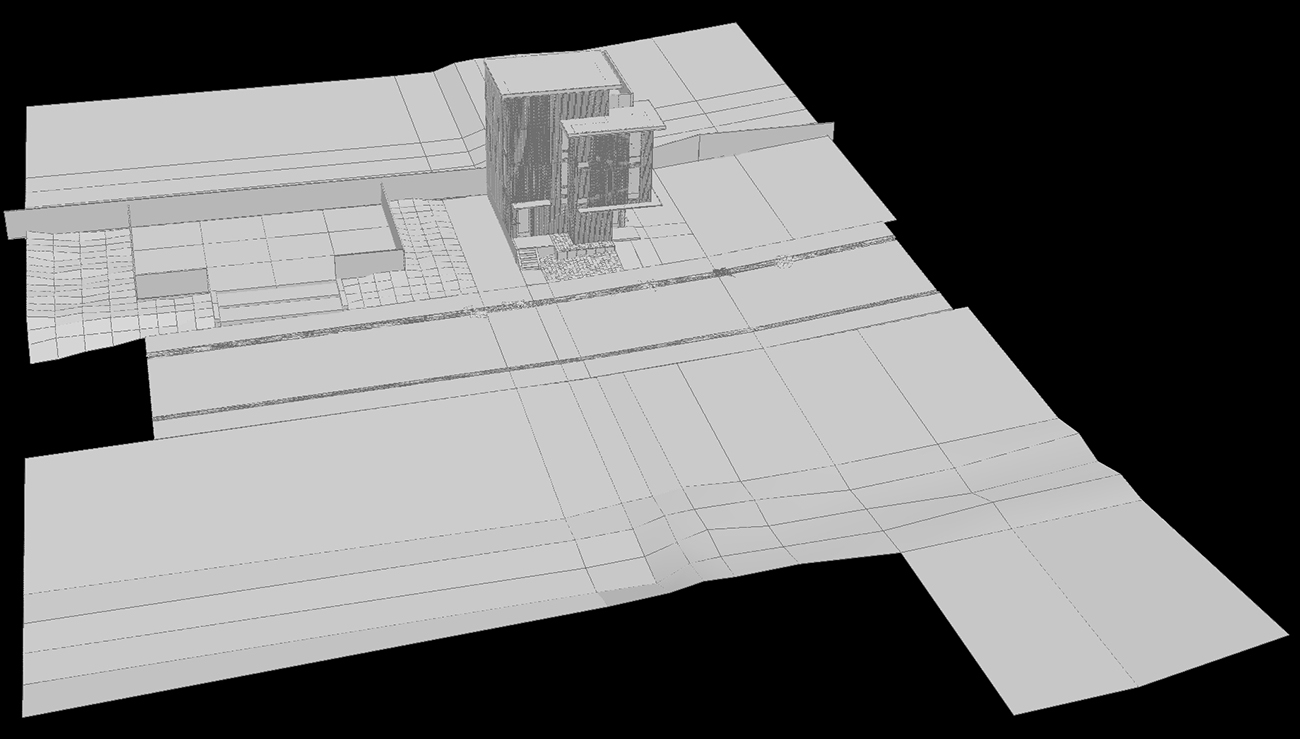
Again, after finishing the modeling for building, I made the modeling for environment. And this is the first shape which I made for the environment, I feel that this was not good enough, and so I change the road shape and add more environment around it.
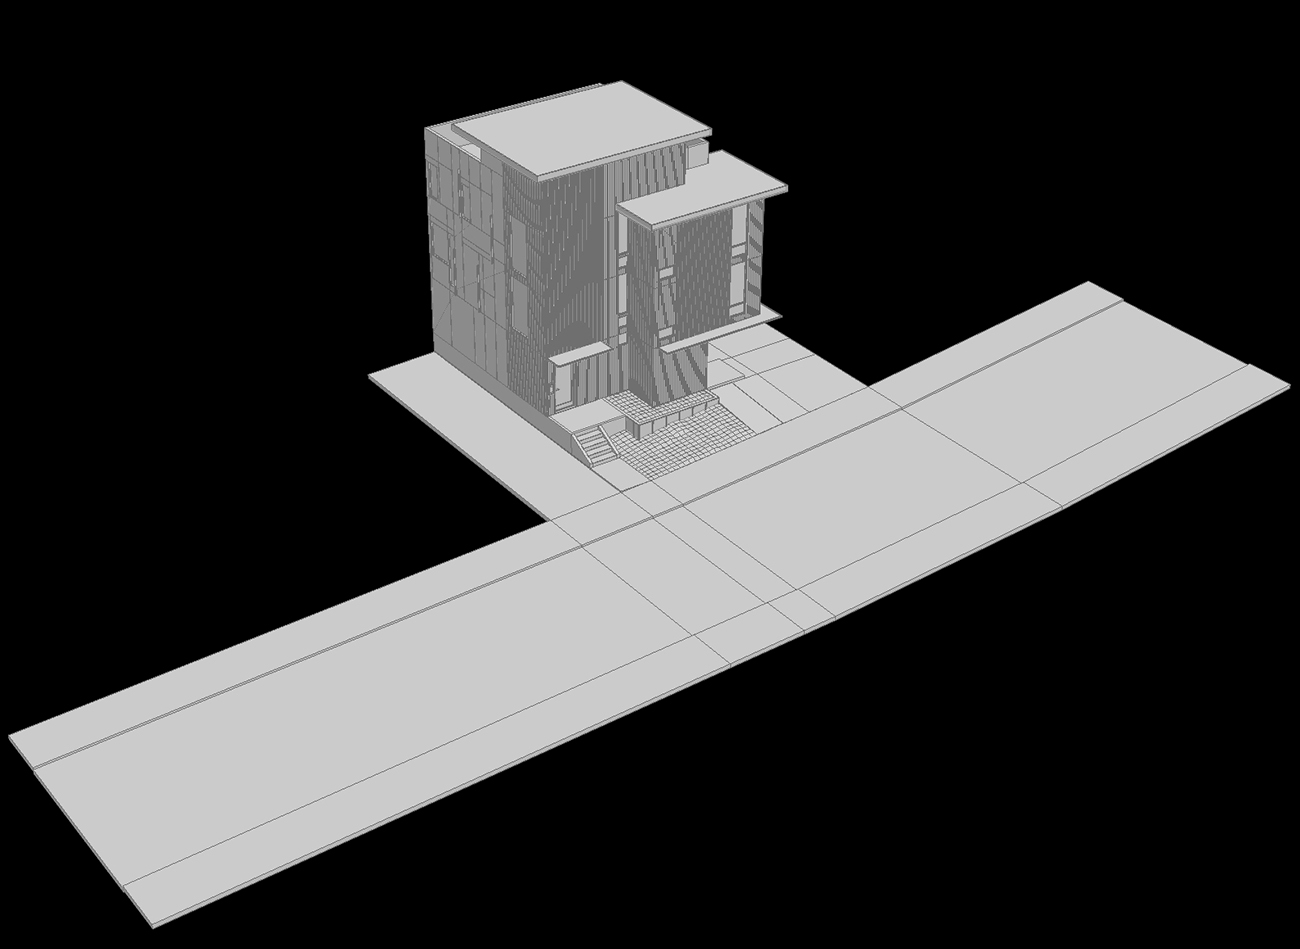
And this is the final images for modeling and environment modeling.
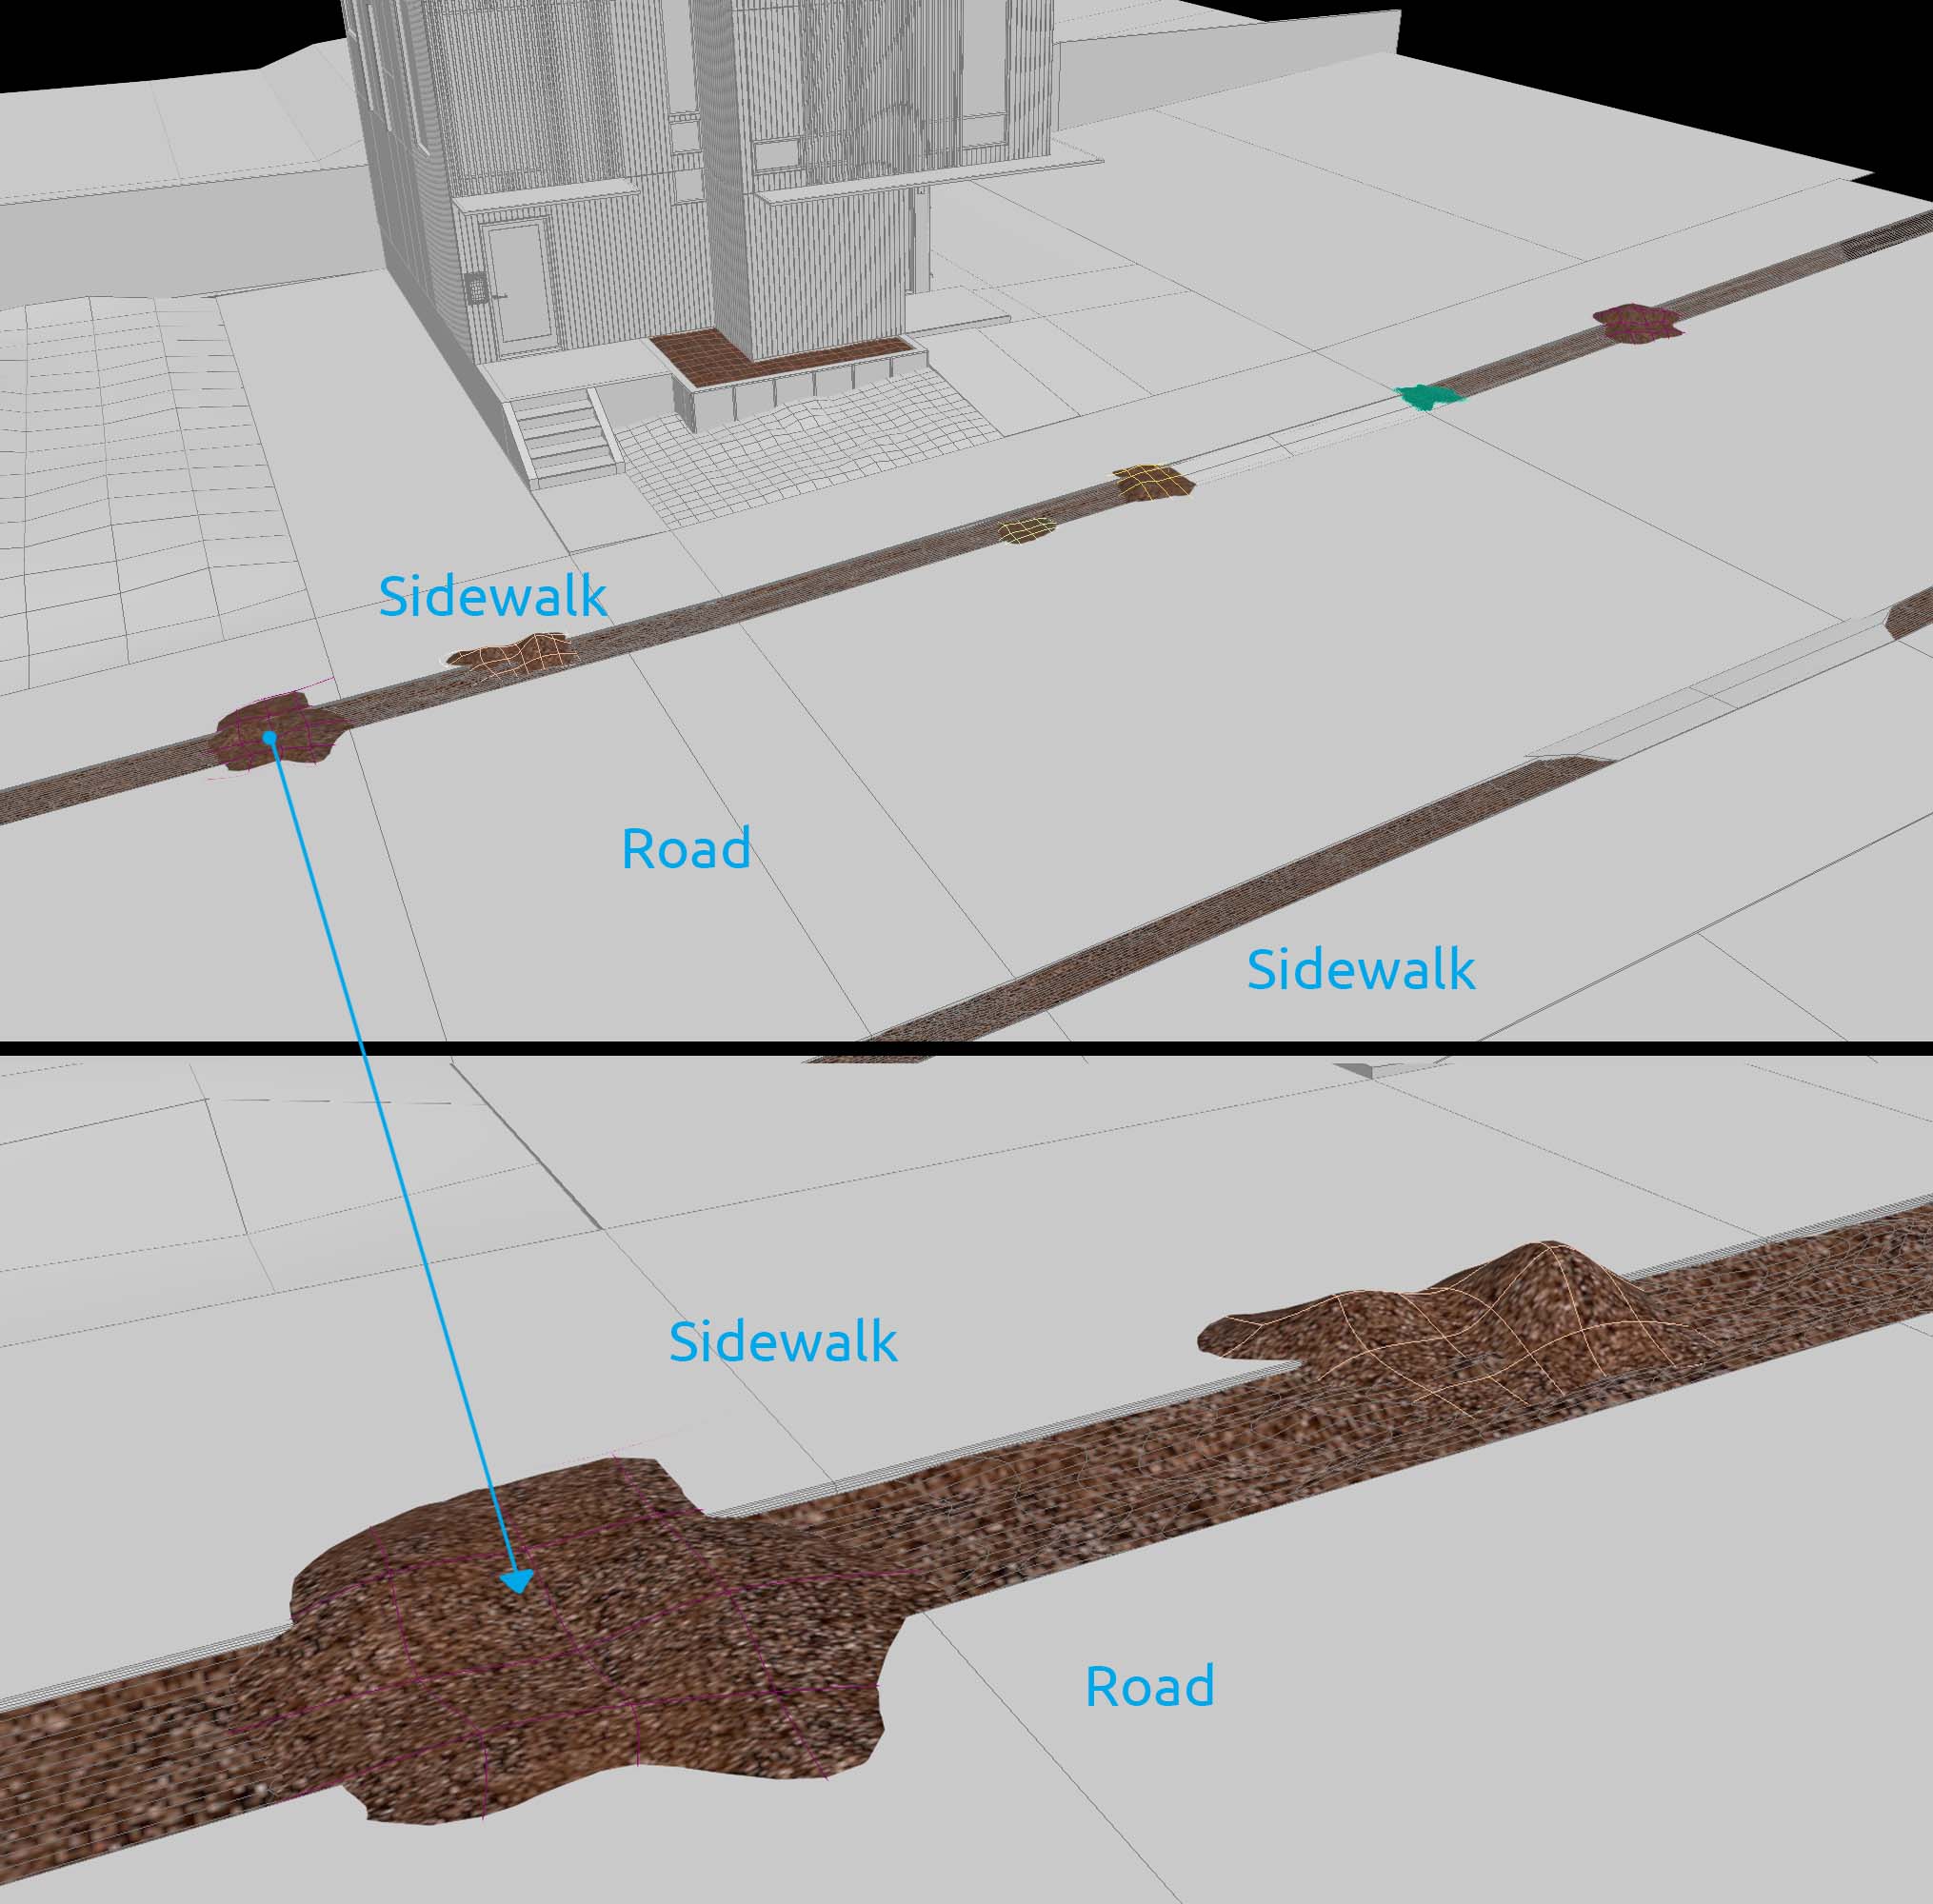
For the details of surrounding environment, I added detail in front of the building, which is the spilled dirt near the road and sidewalk. This dirt I made it only in front of the building (which is the visible part of camera) and this is quite good enough to gave detail in the environment.
That's it, nothing special about modeling.
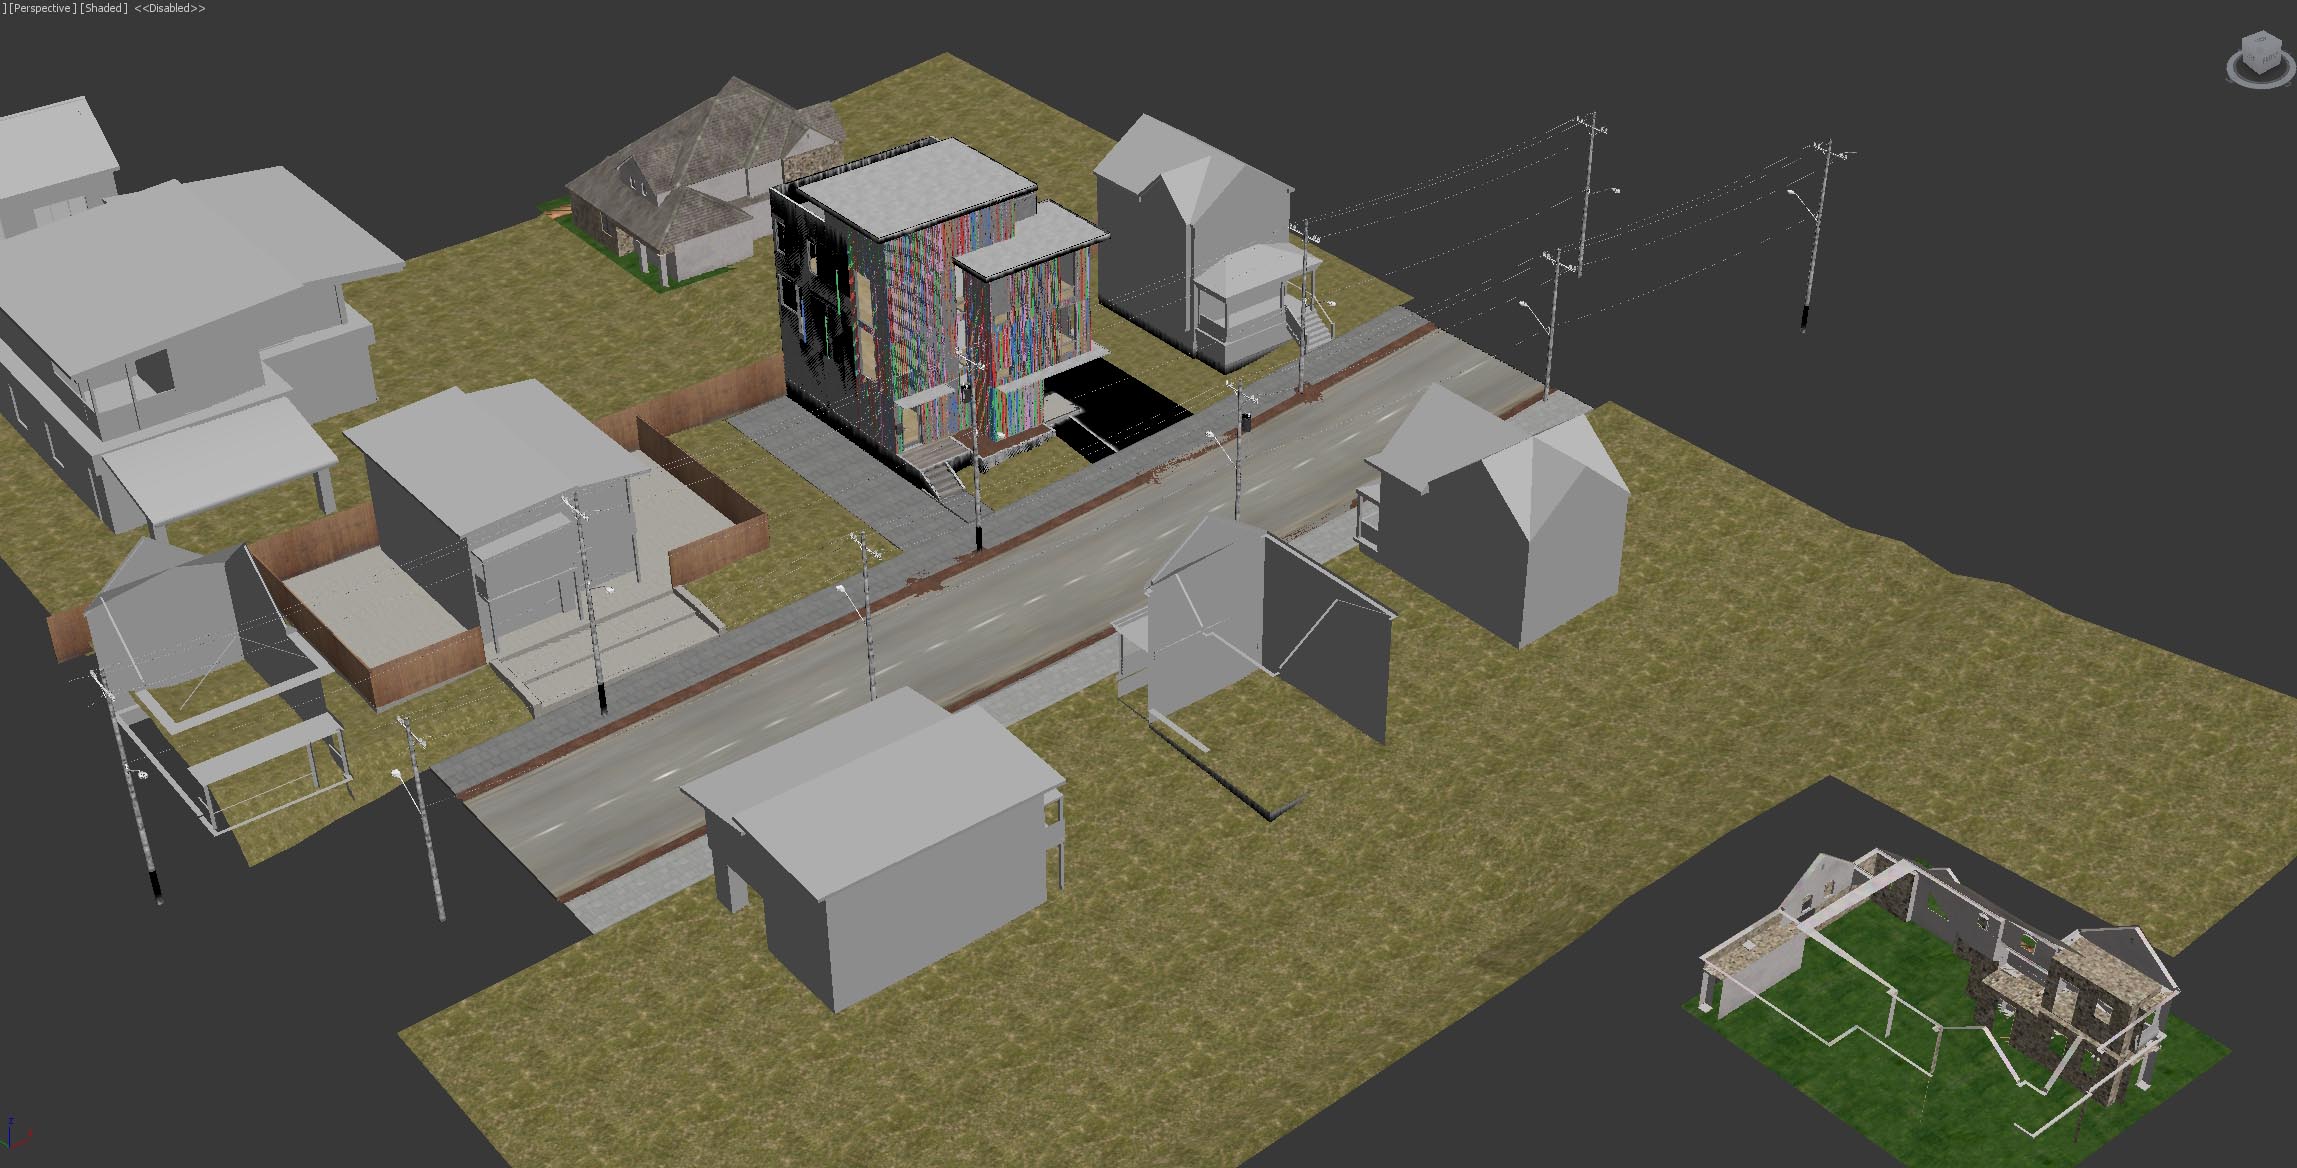
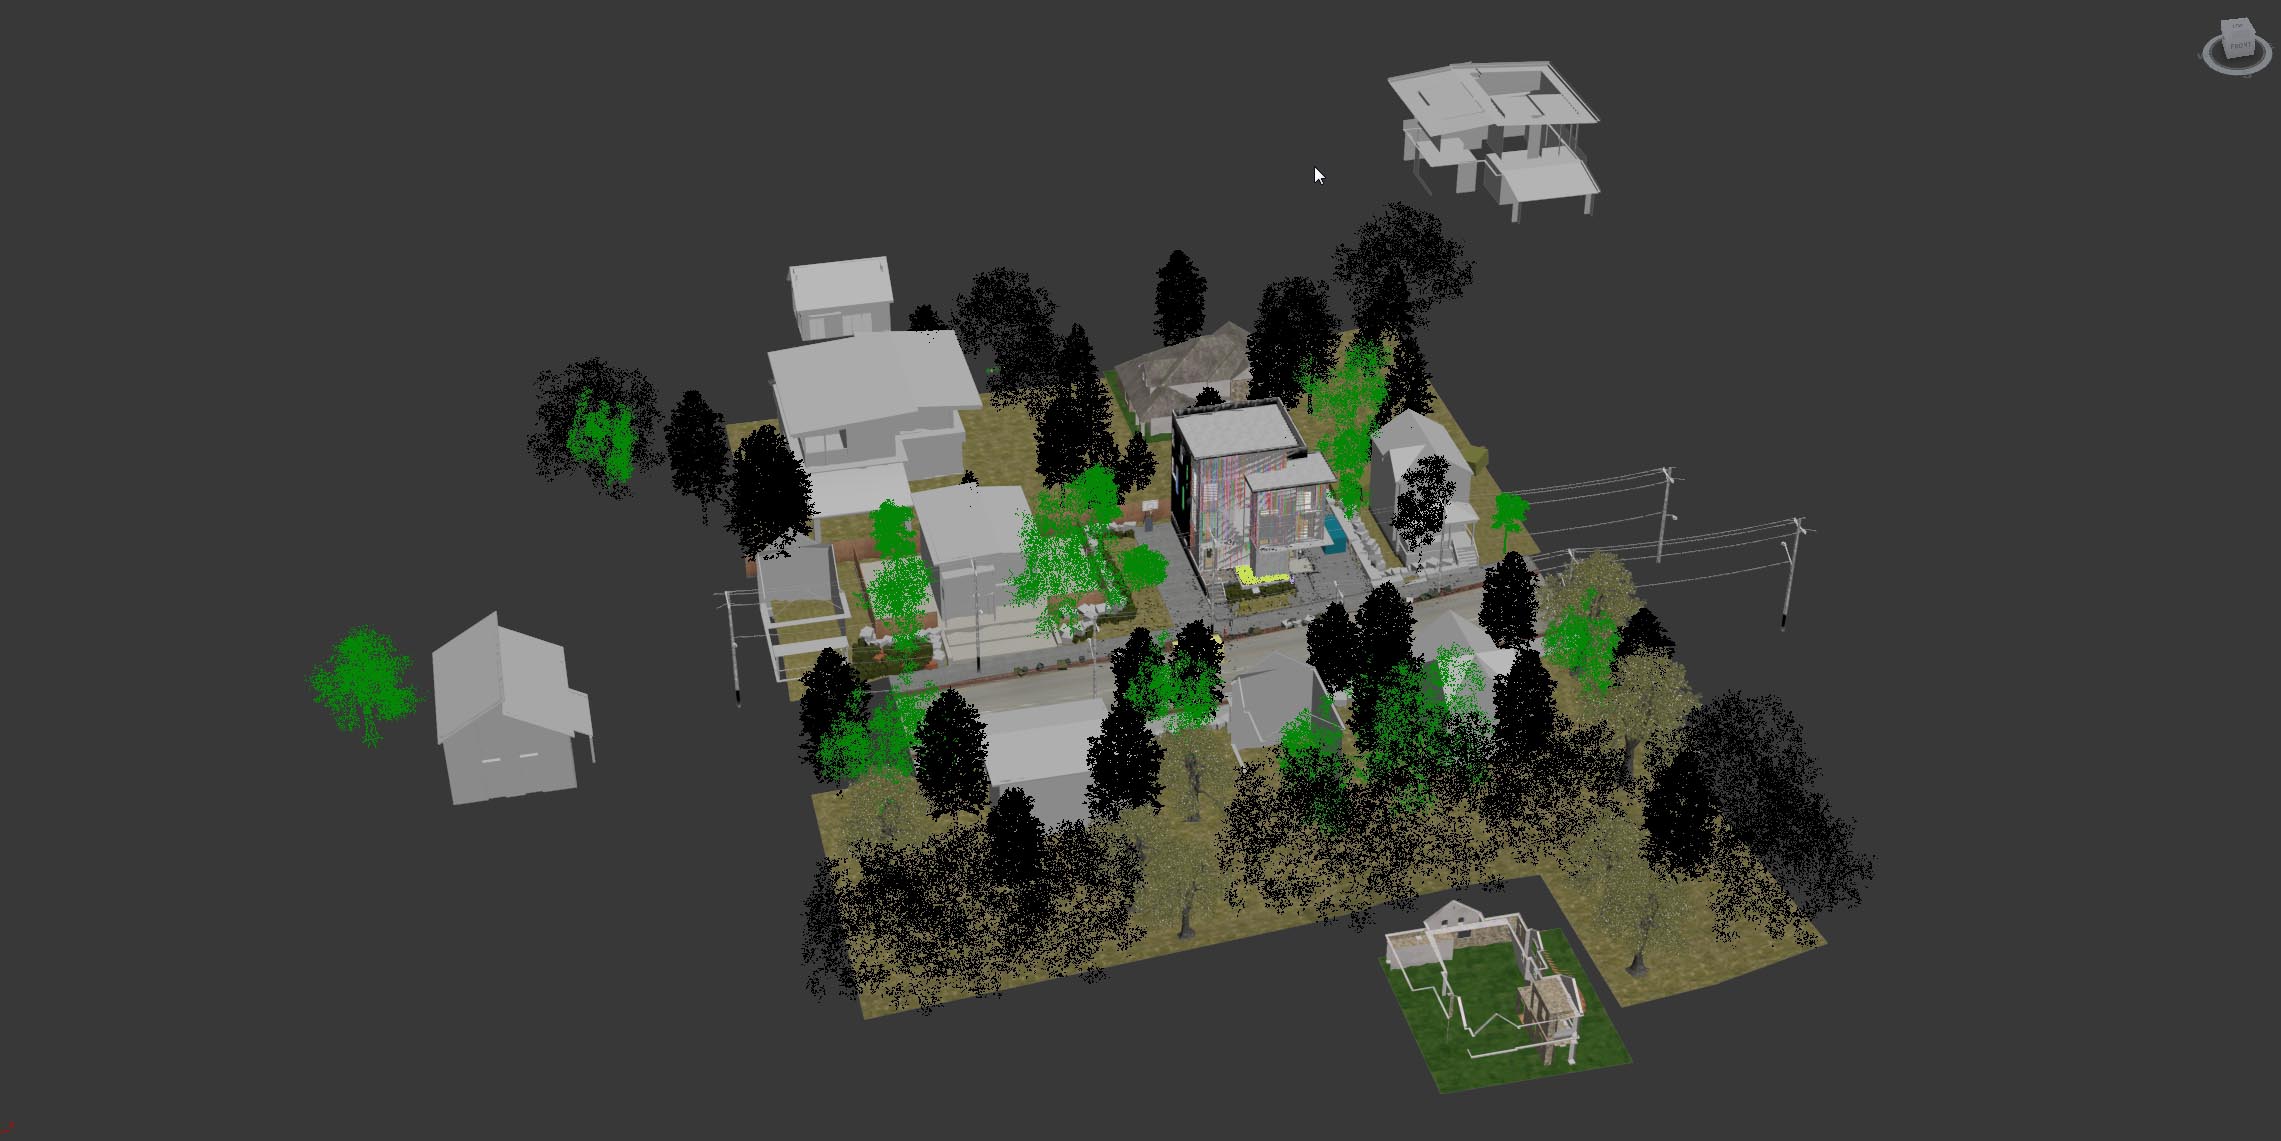
After texture and camera angle finished, I'm going to put all the plant and objects to give volume in the environment and this will pretty much affect the lighting of the building. First, I put more buildings in the surrounding to make the environment looks like a residential area (Evermotion).
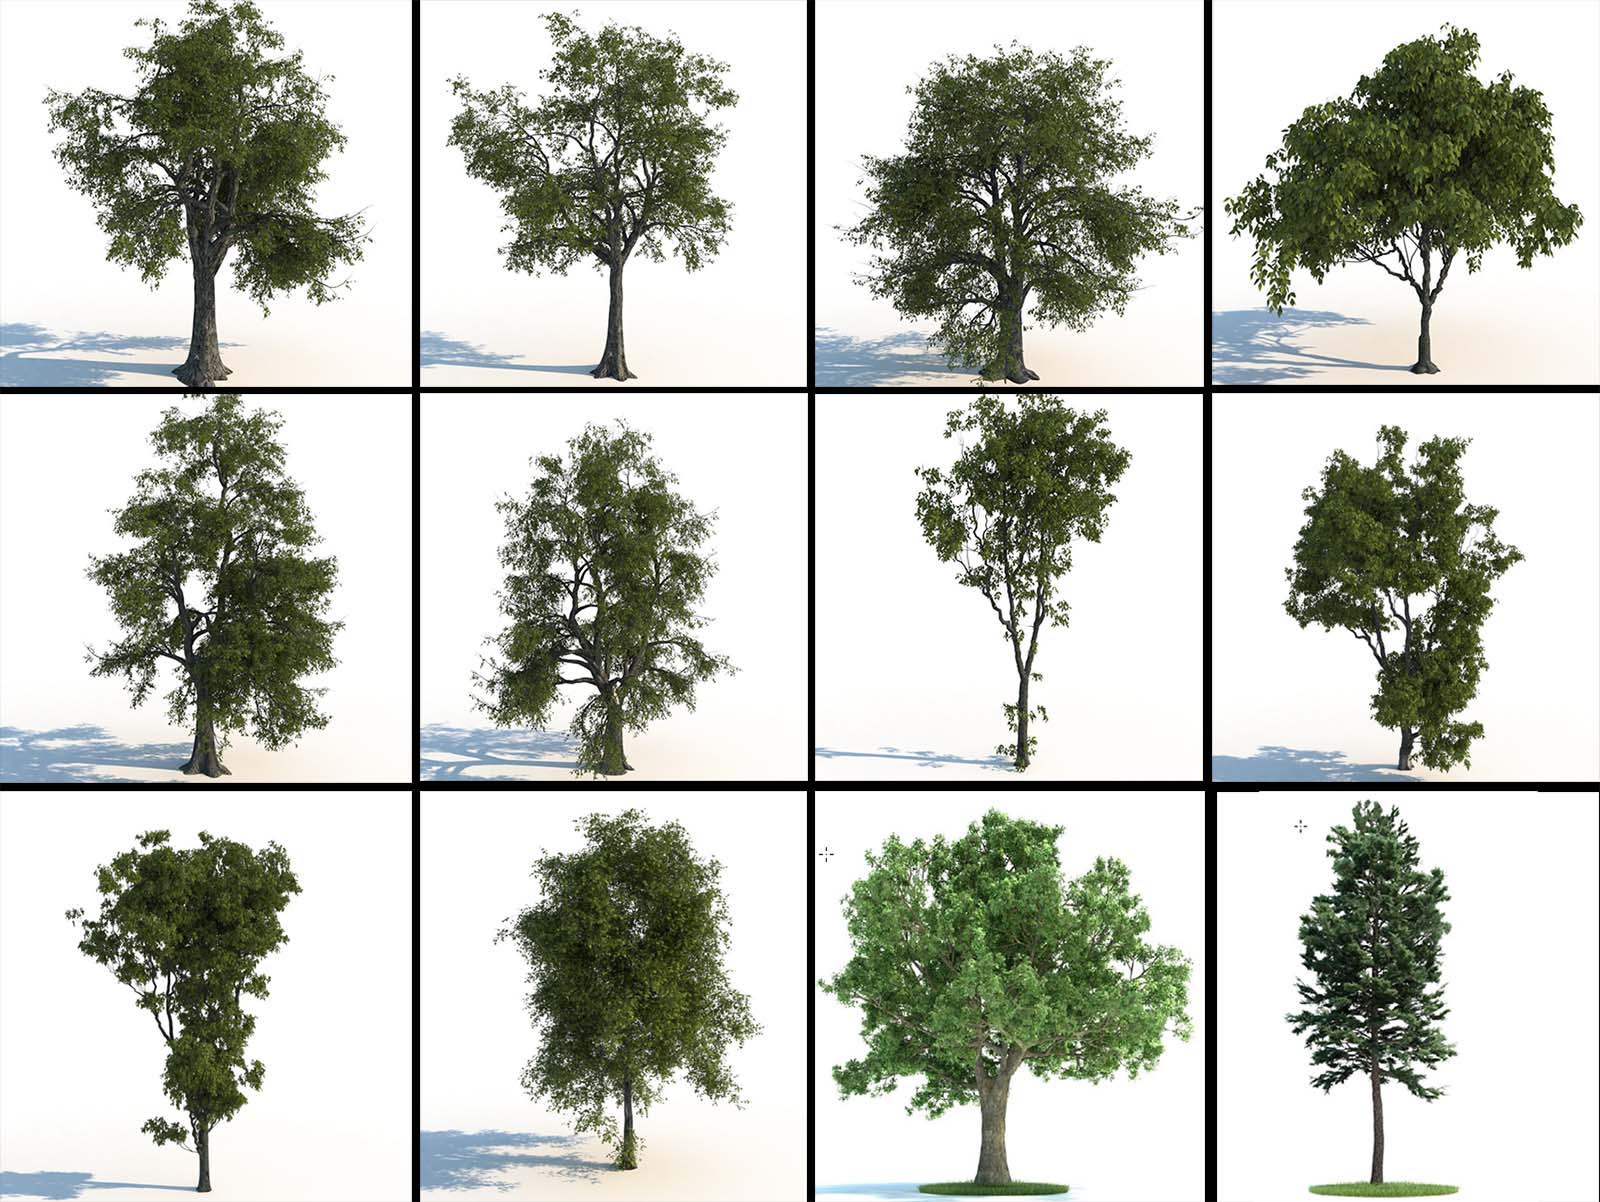
Then, I put all the plants, trees, grass and deadleafs to this scene. Below are all the trees and grass that I used for this scene. Almost every trees I used with evermotion and i-tree.
And these all the weeds and rock object that I put into scene of ballard aperture house. Most of
them I got from evermotion and i-cube.
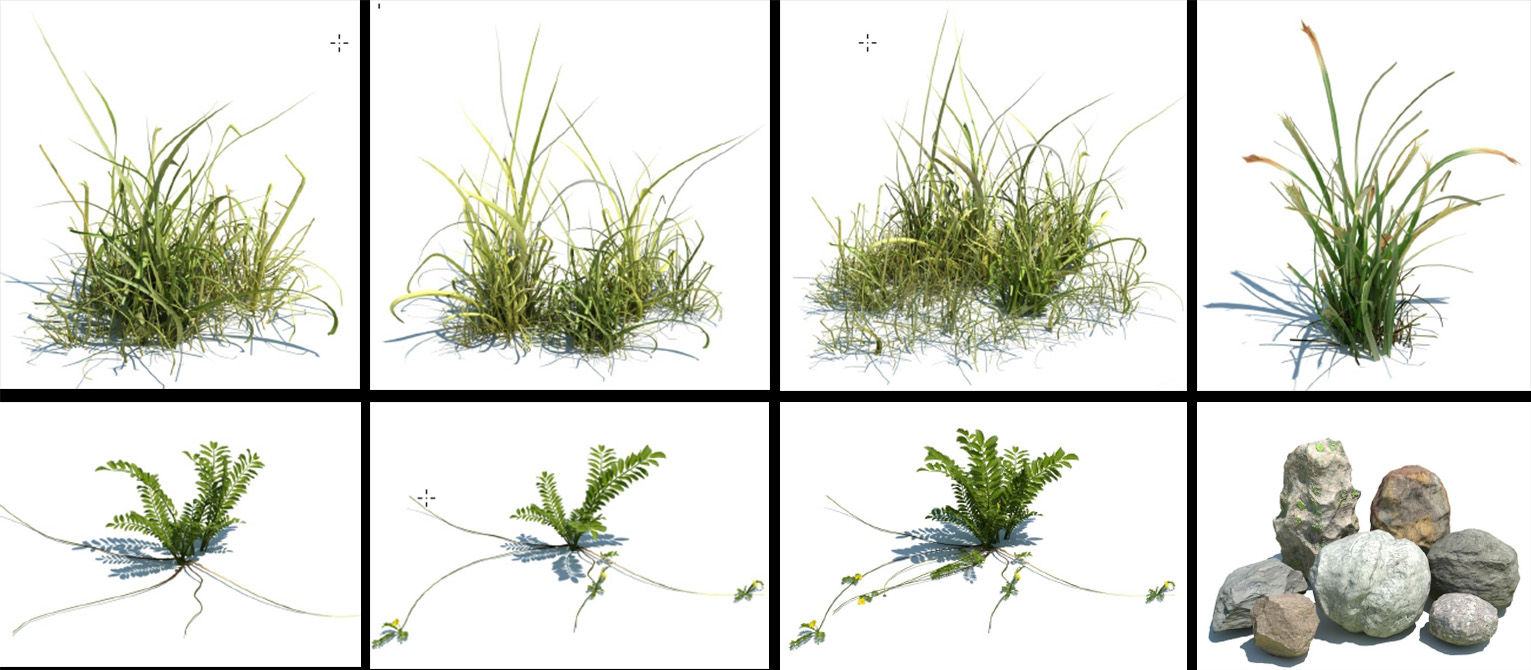
After grass and trees, I made deadleafs and this is how I made them
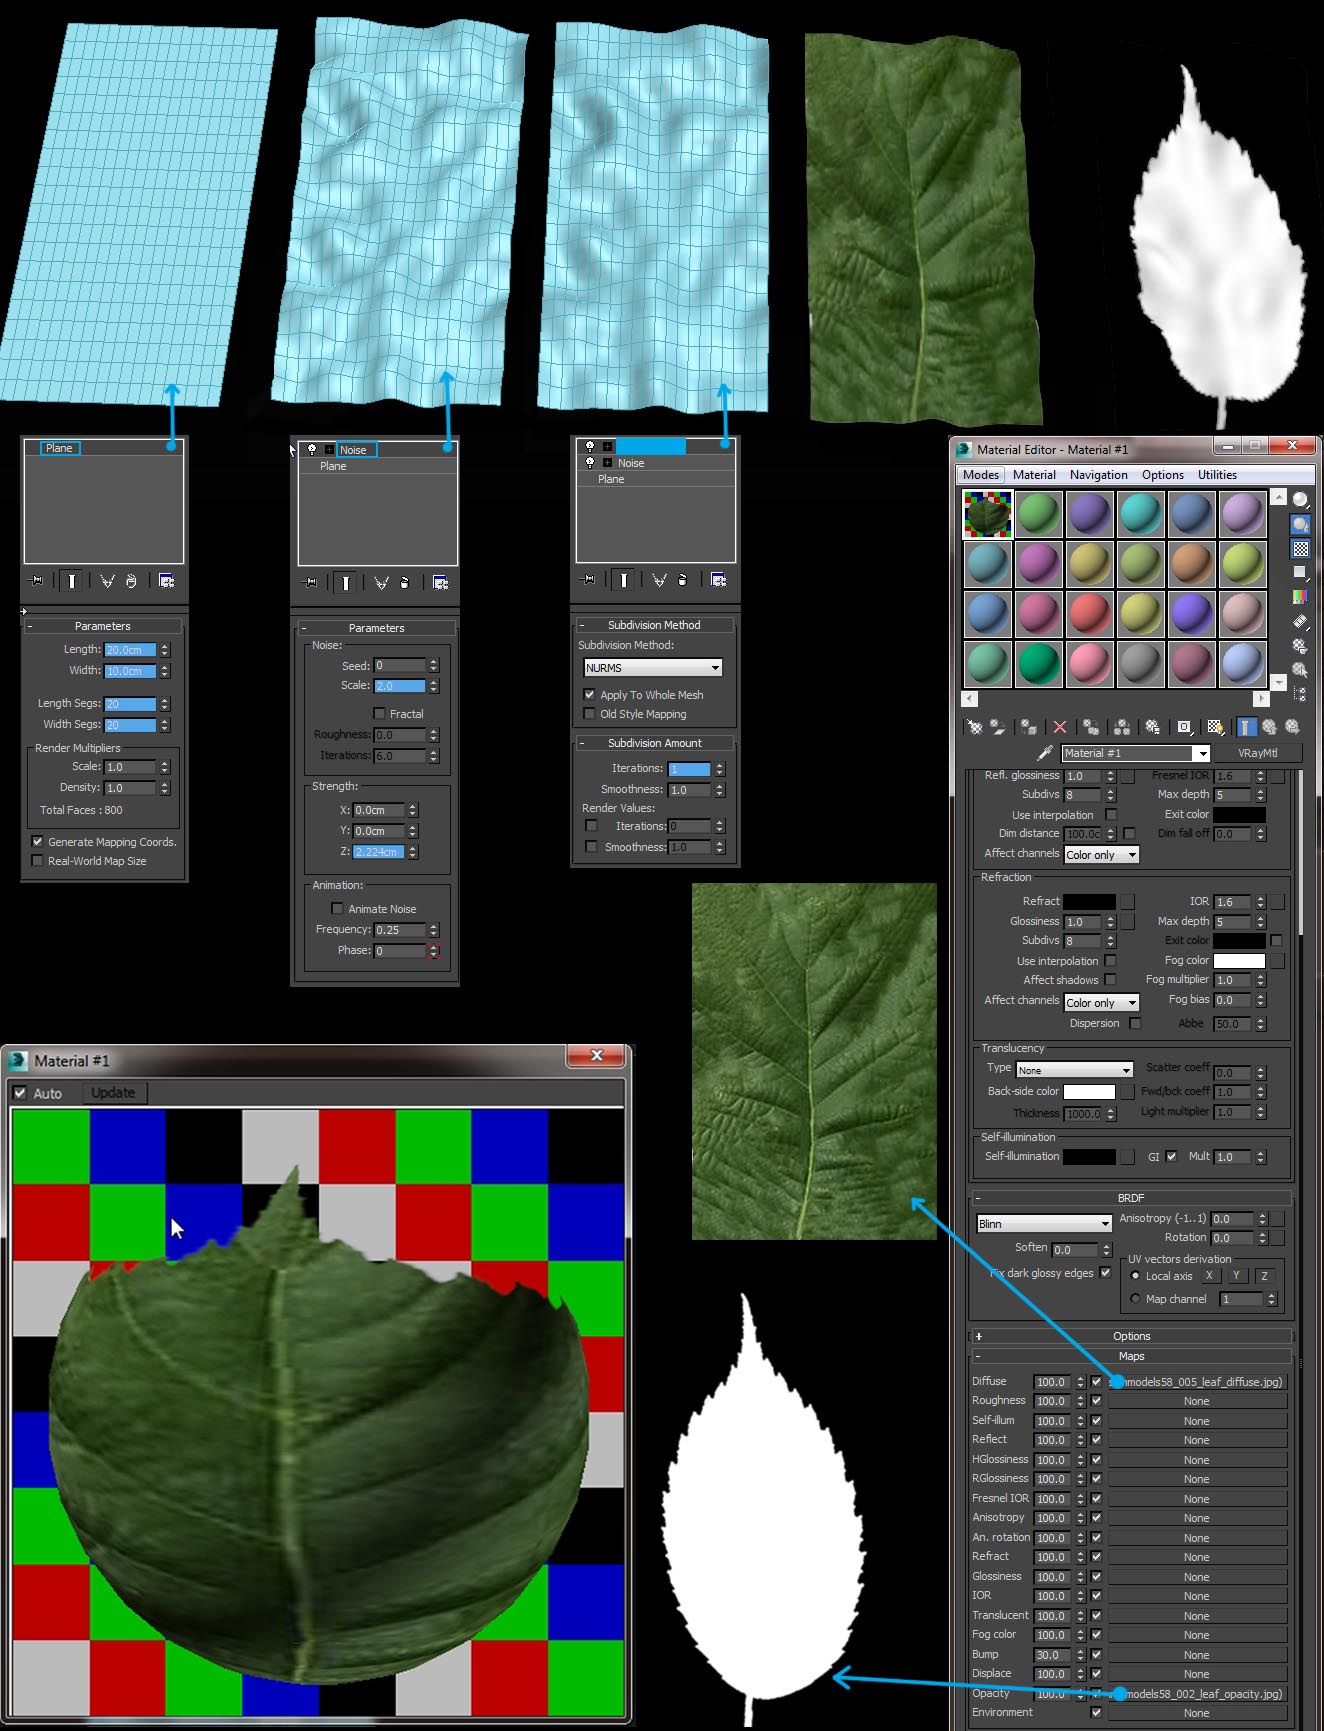
1. When you are making in the noise phase, you can copy a noise modified plane into 3 or 4 (depends on your liking). Make and play with the scale and Z strength until the paramater (shape) of every plane different and that will give a good natural effect.
2. If you have decided how much leaves you wanted, you could also play the color in diffuse bitmap (it could be changed in Photoshop or color correction). Make it until 3 or 4 colors, 6 until 7 is much better, then put them into the leaves that already scattered with advanced painter. That way we got that natural look.
This is my final picture after I put all the houses and plants (trees, grasses, bushes, deadleafs).
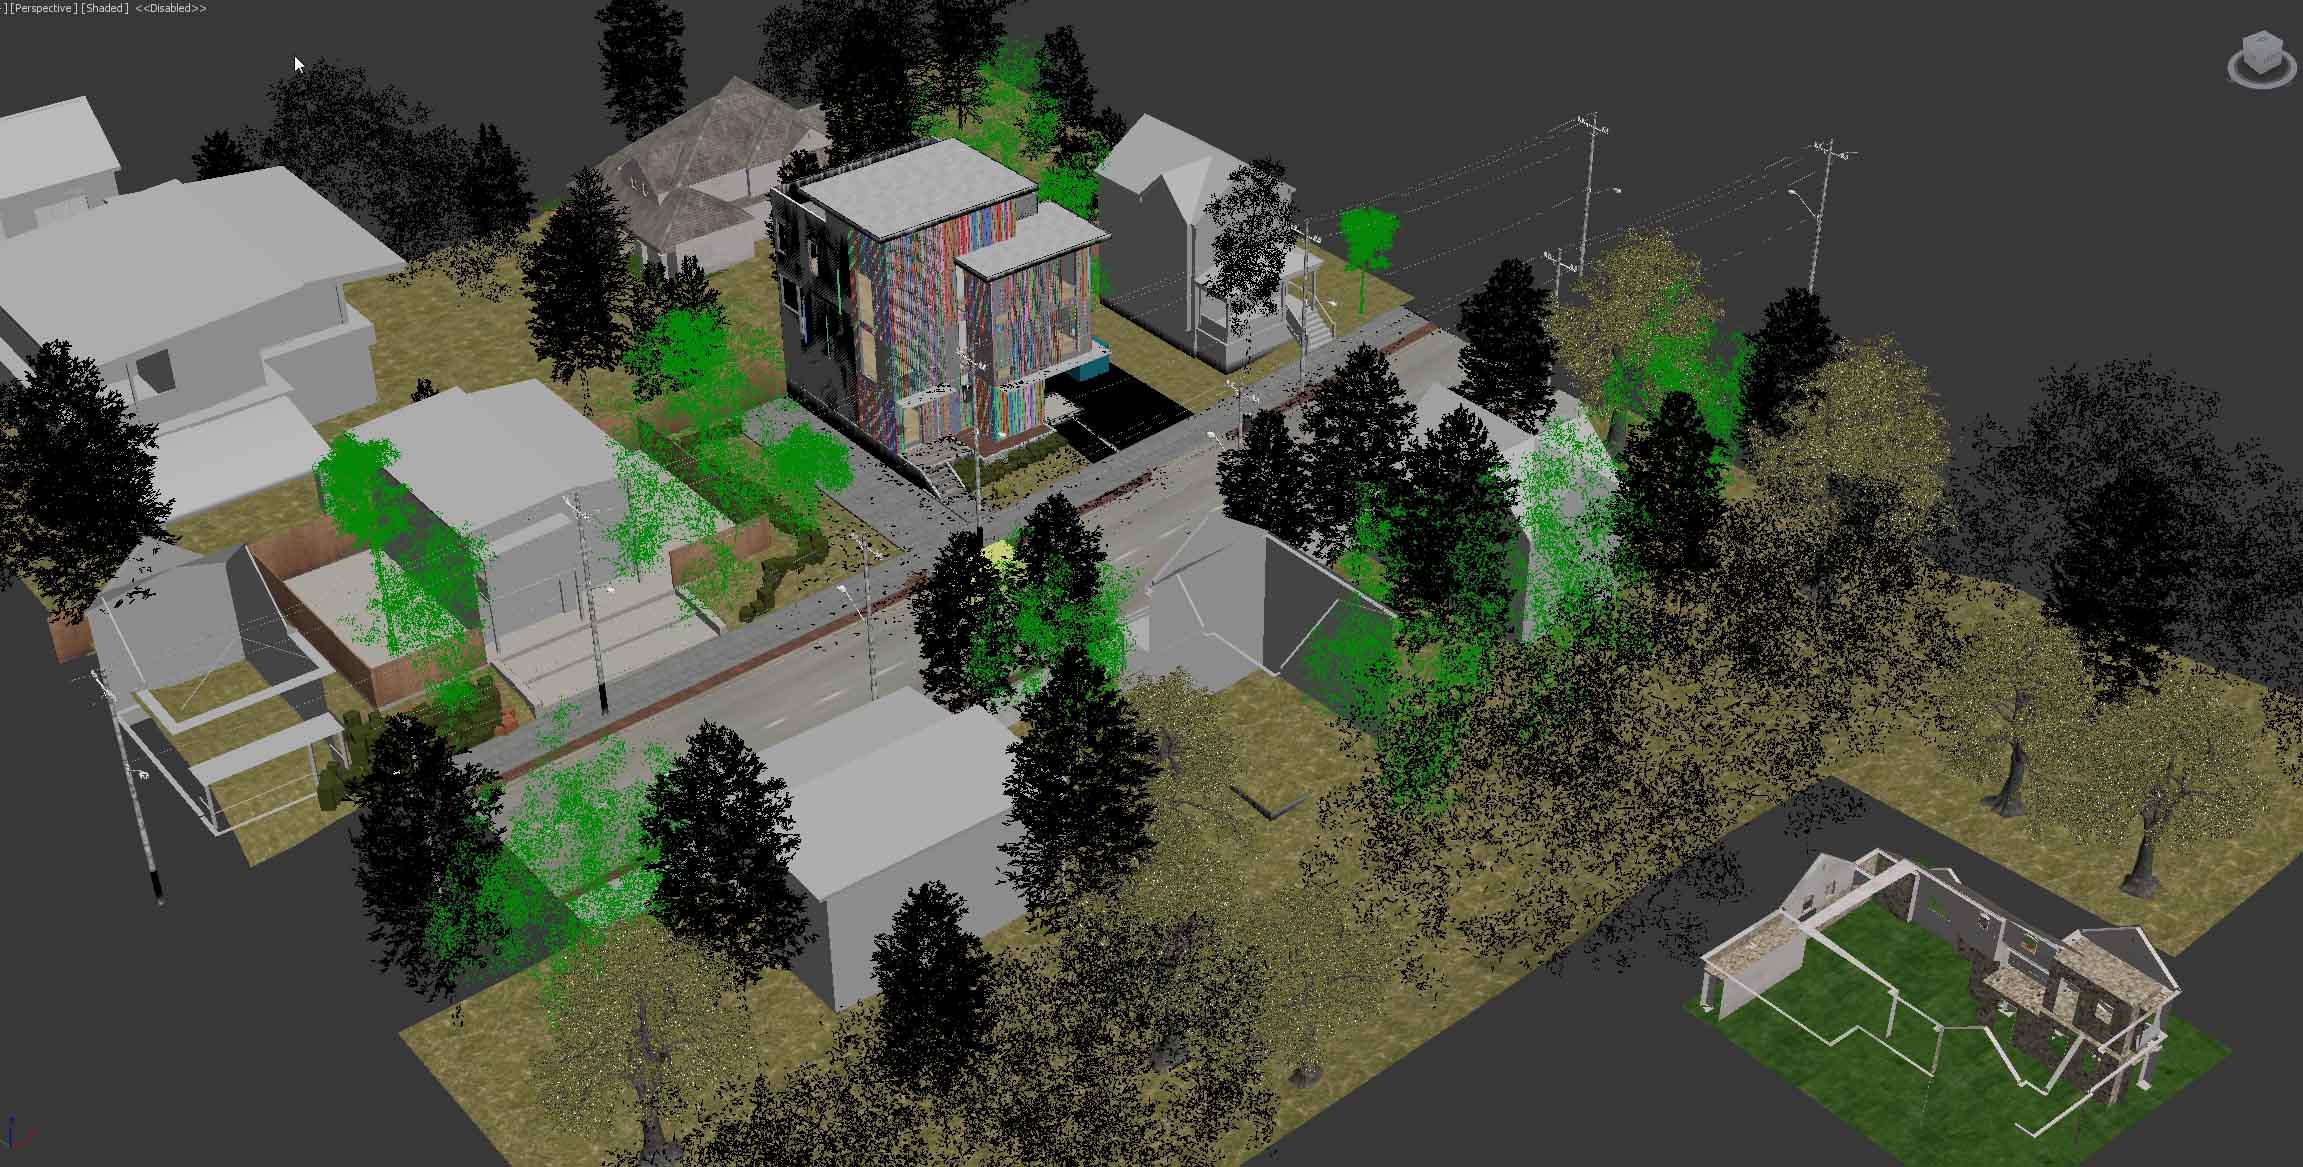
1. All the trees that I put was done manually according to each camera angle that I got. Deadleafs, bushes, and grass I scatter using advanced painter.
2. Every plants (trees, bushes, grass) that I put into this scene, I edited it again in every materia so look more natural and blends with the scene.
3. All the plants that I put into this scene are tested again to make sure whether it is suitable or not (if not then I will change the placement again) and every place of environment have been many times tested for the maximum result.
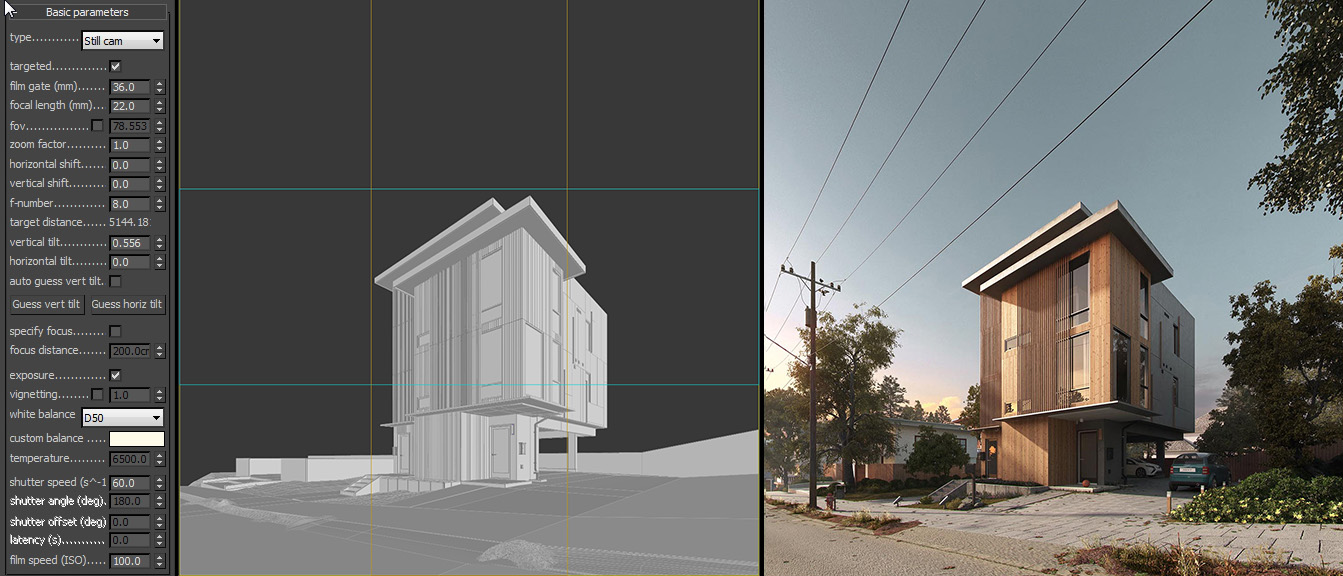
After finished with the modeling and texturing, I will look for camera composition and addition of more details and objects. I will tell you how I got camera composition in this personal project.
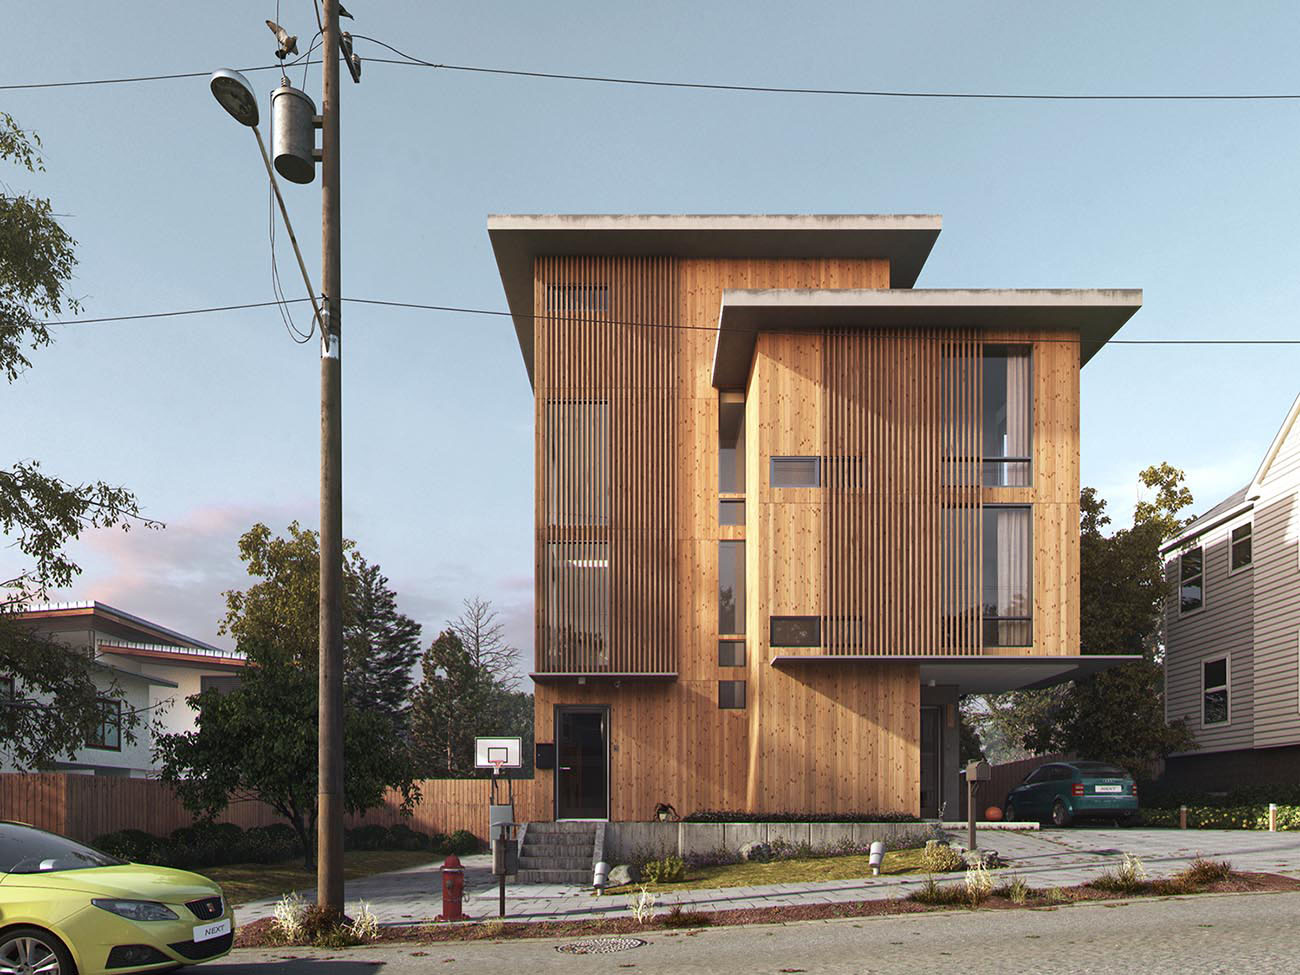
CAMERA 01. Nothing special with this angle, because I just feel that I need to add objects as maximum as possible to make the composition looks nice.
CAMERA 02. I really like the front angles like this and when I got this angle, I feel there's something missing in the composition. That's why I added electric pole in the left to balance the composition, but when I finished added the pole, it still feel not too good for the view of camera that I used. That's why I got angle cam 5 to get the detailed shot and that went pretty good. Also in this cam, I put a basketball ring because I think this can give a story telling. The reason is in cam 4 I give focus point to a basket ball and thus this will make a connection between cam 2 and cam 4, :)

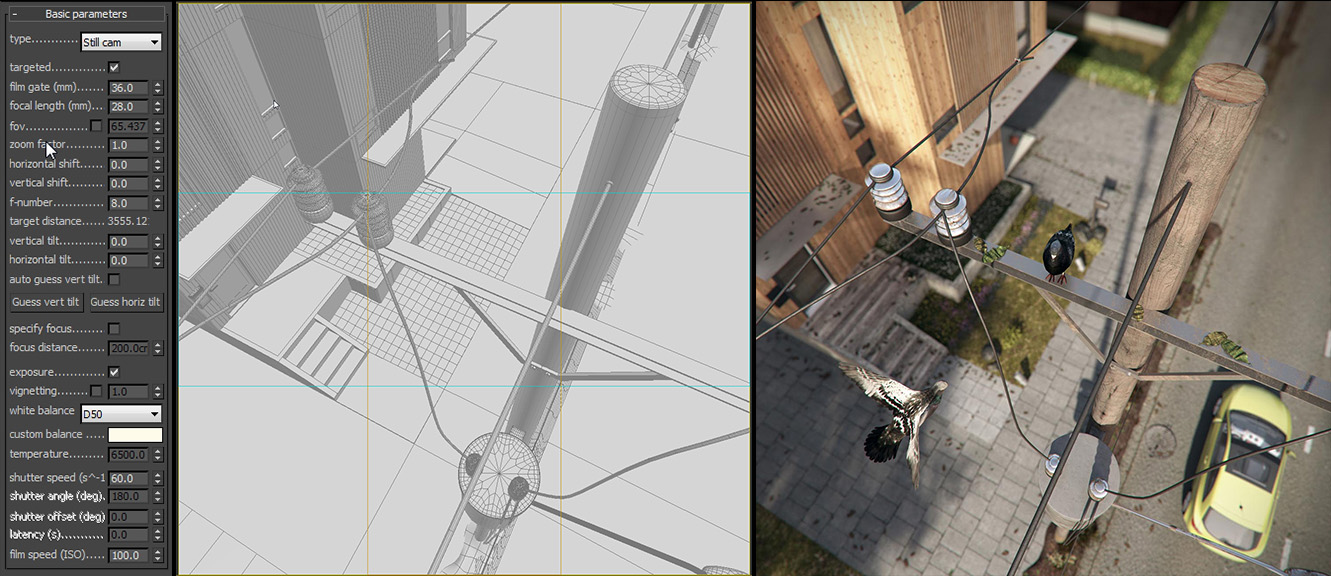
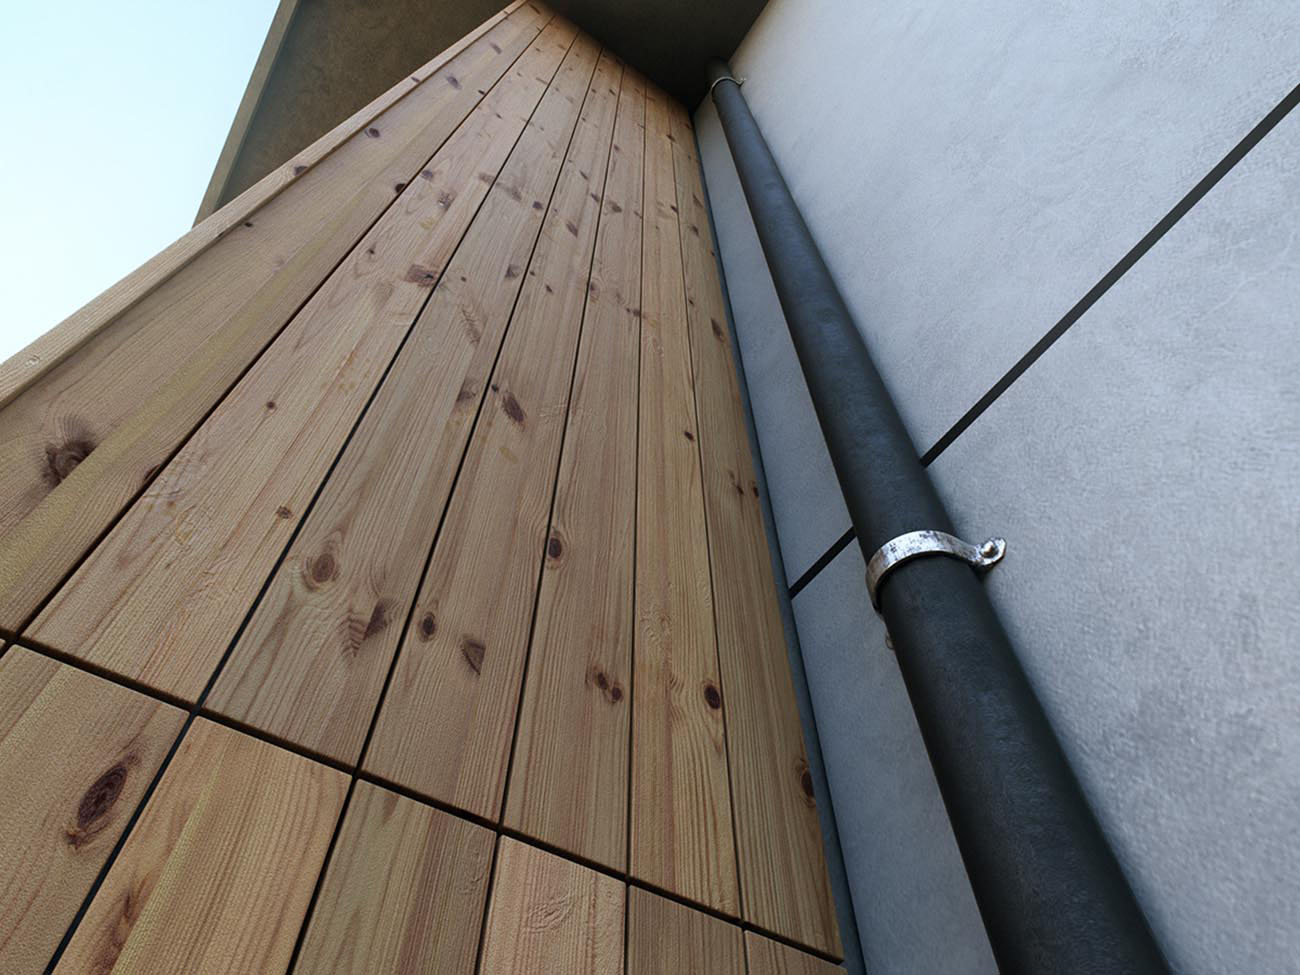
CAMERA 03. This detailed angle shot I got because of the first time I gave texture to the pipe and bolt. From then I have a feeling this will become a good one.

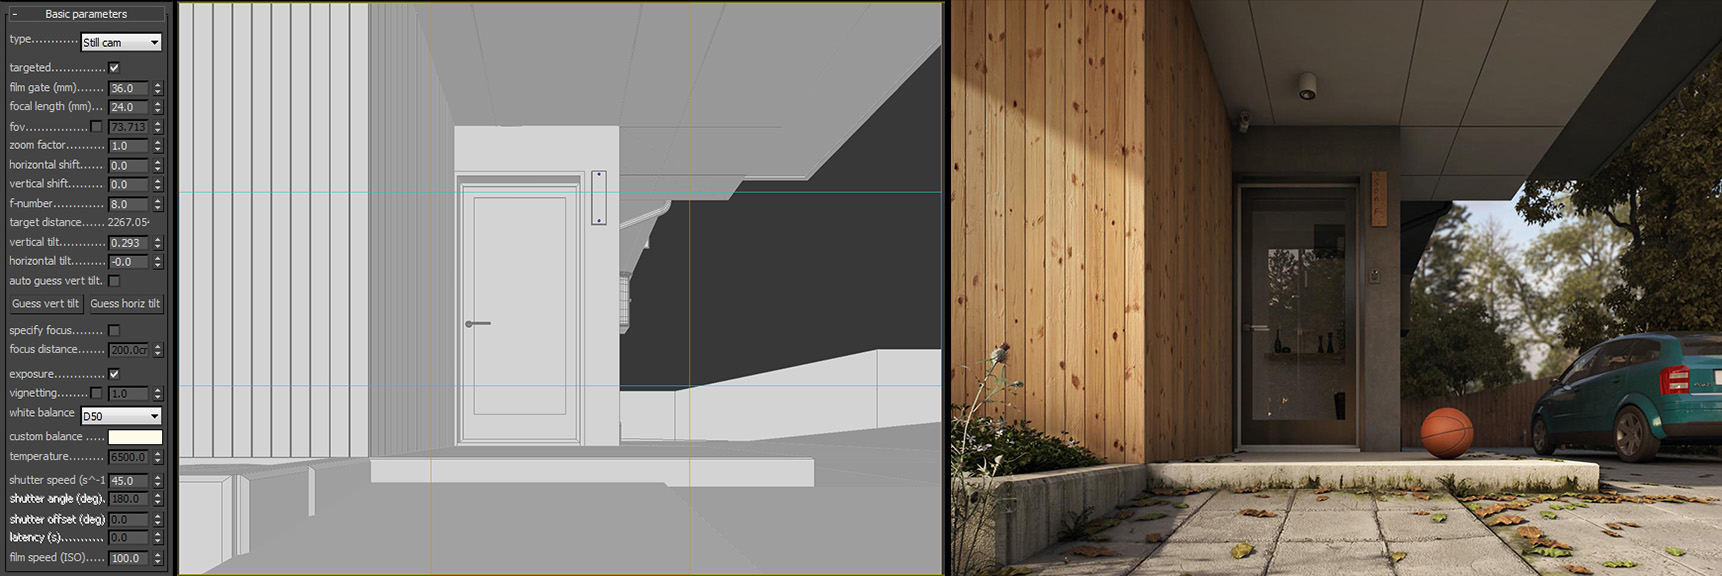
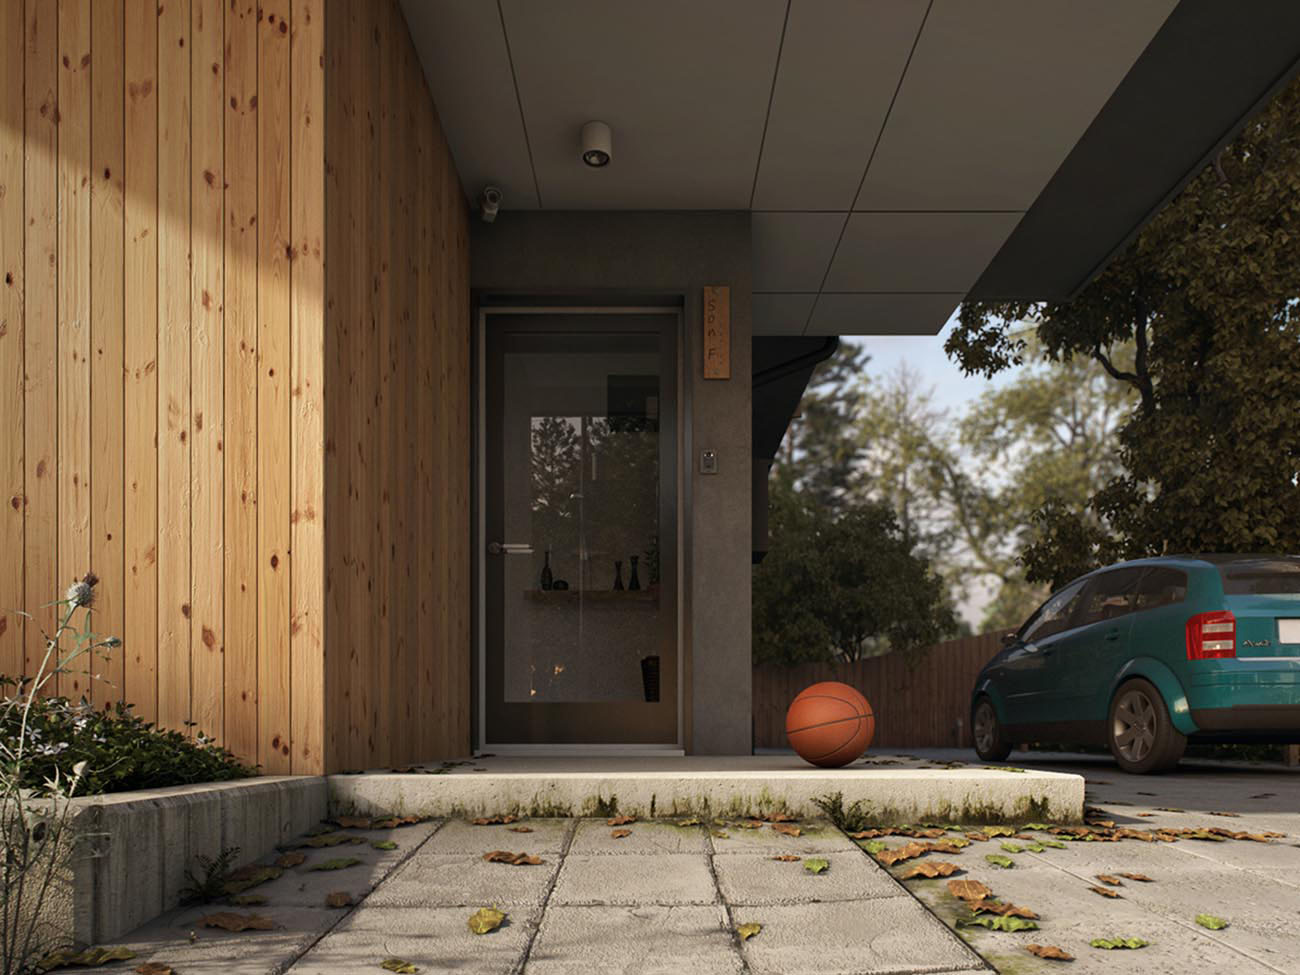
CAMERA 04. This angle I got because I want to show quite a lot of detailed effects and in this angle I thought of giving more detailed objects like a basket ball, car, and plant in the left side. This way, I have the fore ground (plant in the left), focus point (basket ball), and a background (car). I think those give a good composition in this angle, of course with other details like in the texture I gave some dirty effect and a little bit moss, I also put weeds in some spots and some dead leafs.
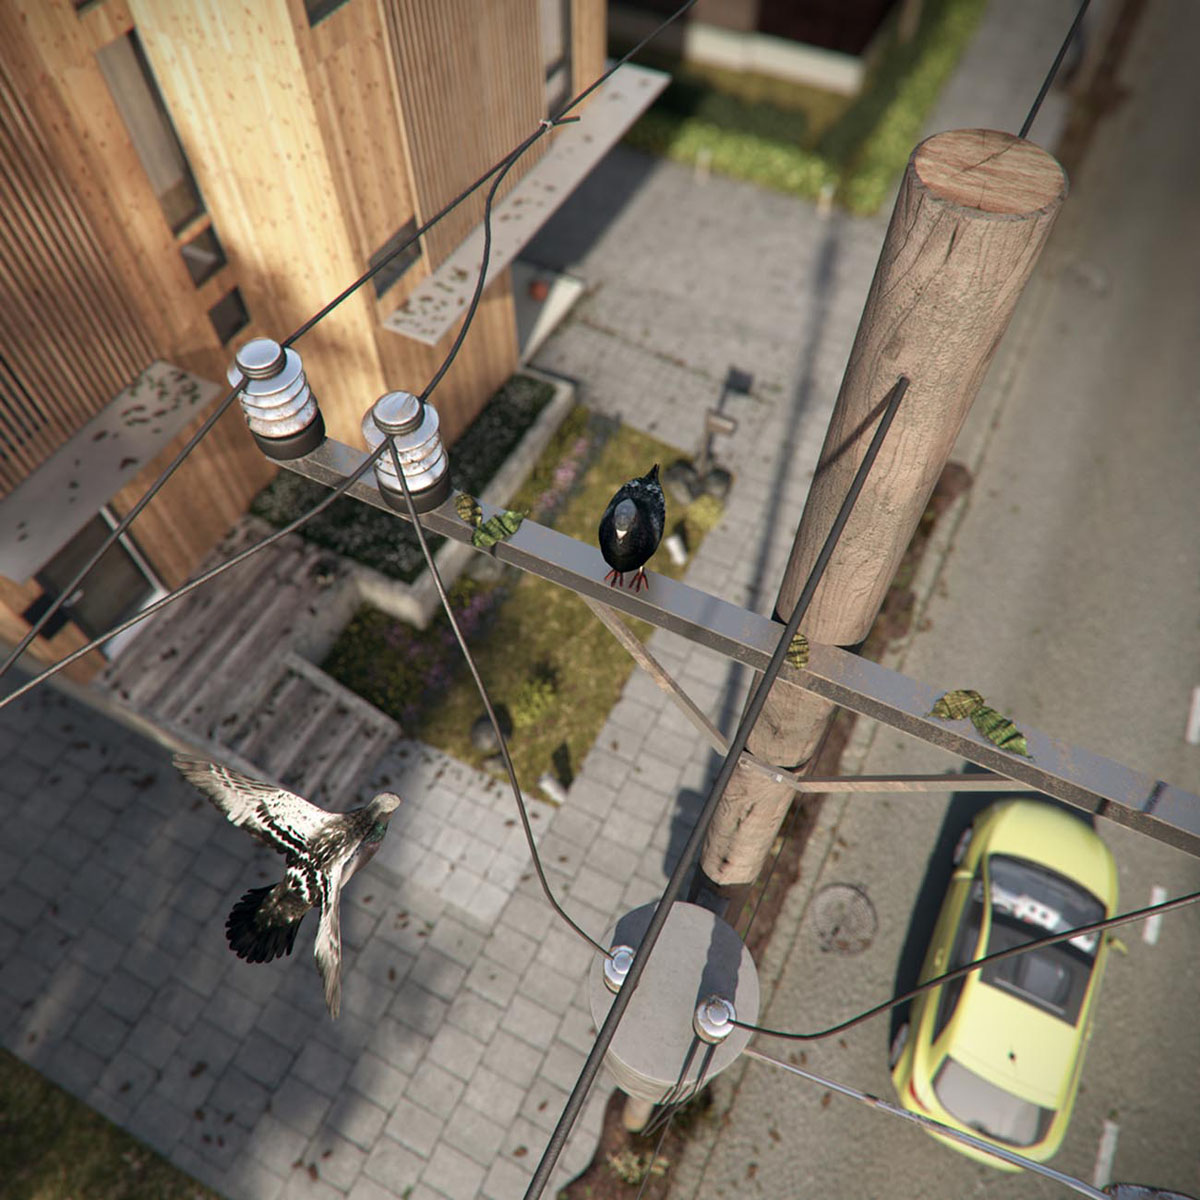
CAMERA 05. This last camera I got because of the additional composition for cam 2. In this angle I feel there's something missing if I only took a focus point to the electric pole, therefore I add a couple of birds to give a story telling about love, hahaha. ^_^ Also, don't forget to add deadleafs in the small roof. Here, I feel like addition of blur effect will become so good with after effect.
1. In this step, I'm very enjoyed looking for composition and giving story telling to the picture. In my opinion, a story telling will give your picture a more complete sense.
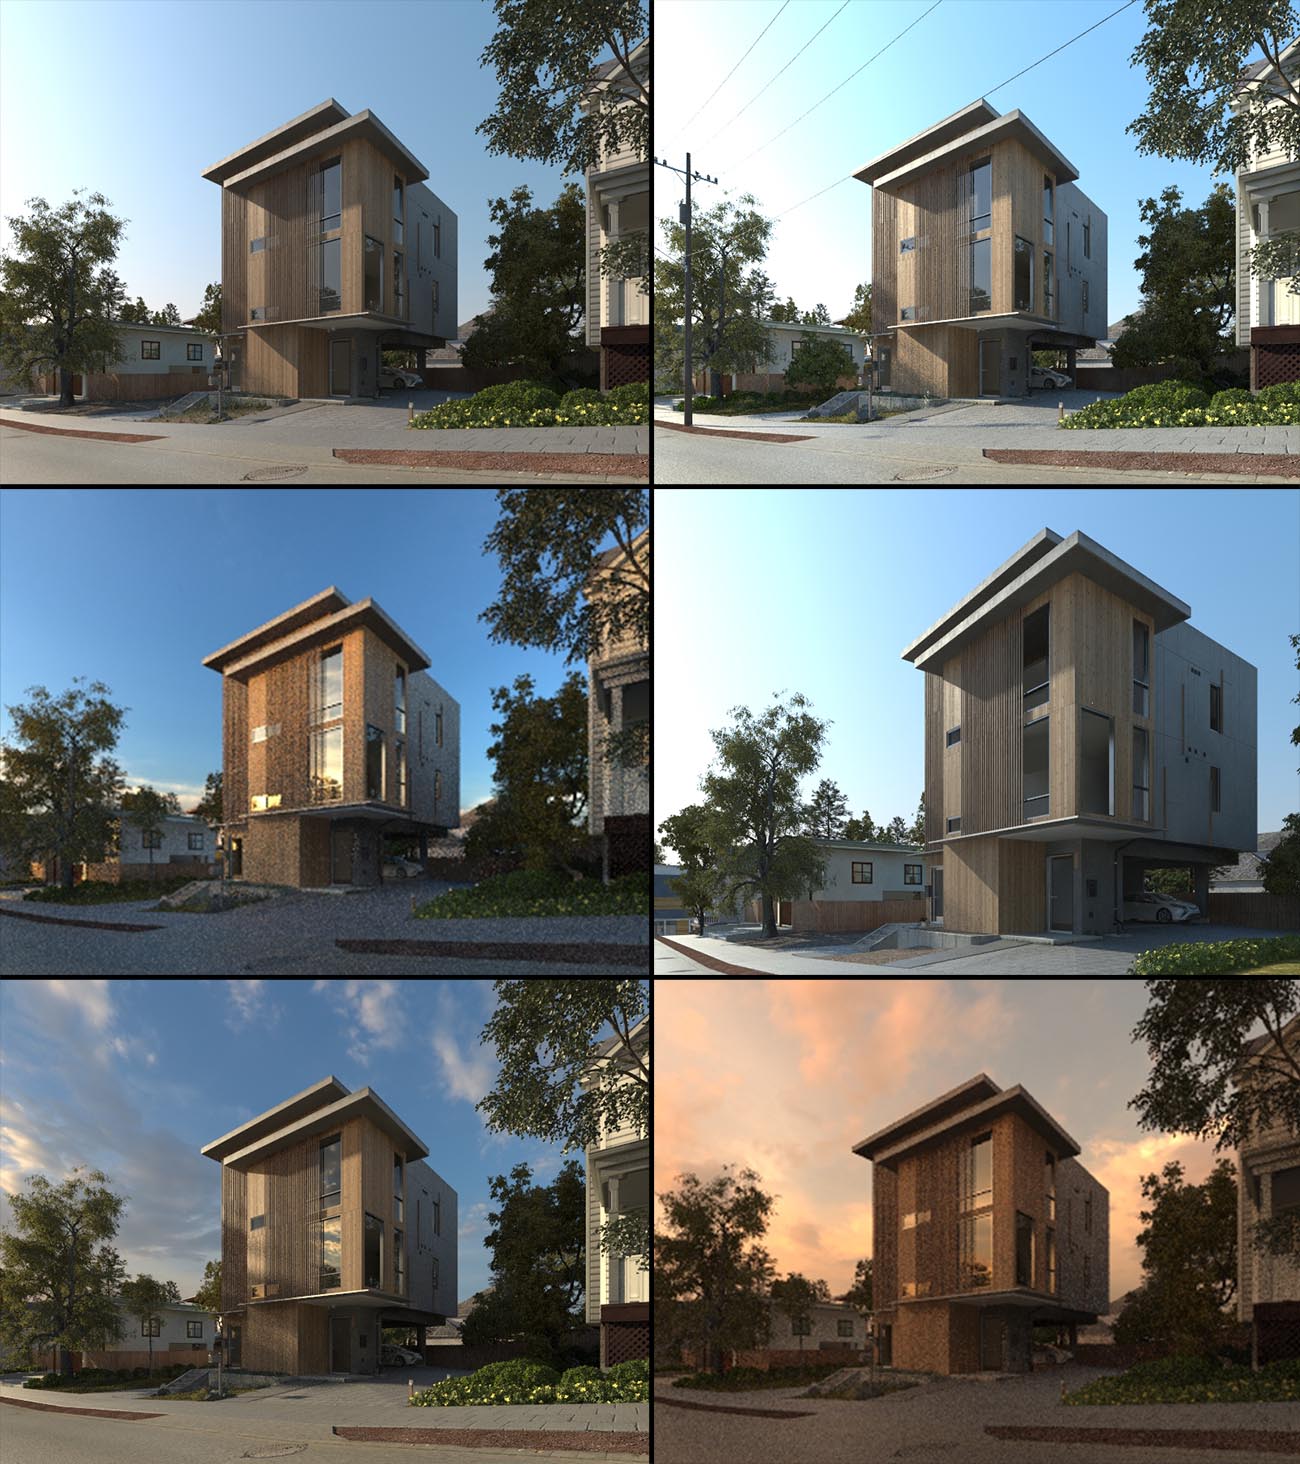
2. I've tried lots of scene and I think scene 5 is the best of all.
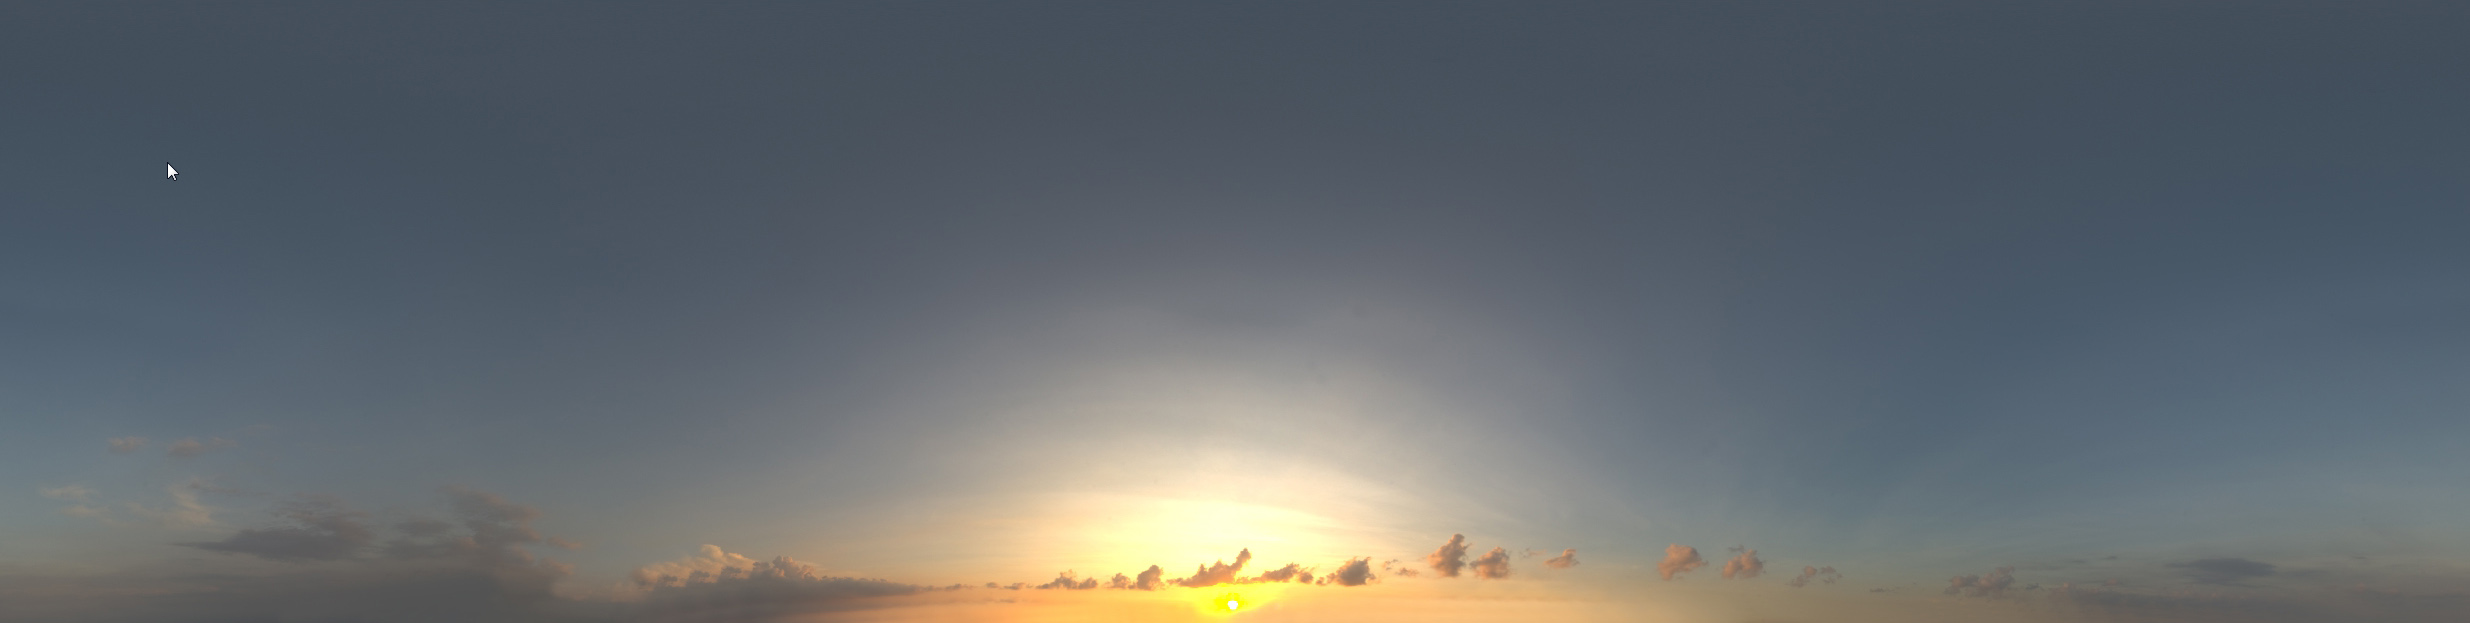
Searching for mood (lighting) that we want those are all the pictures that I've tested with many kinds of HDRI and vray sky, before I finally found an HDRI and mood that I liked. From three lighting that I used for this scene two are using vray light – dome (HDRI) and one is using vray sun. Those are all the pictures that I've tested with many kinds of HDRI and vray sky, before I finally found HDRI and mood that I liked.
Now I will explain how I use vray light dome, and below is the picture of HDRI that I used by. I'm using 2 VrayLight dome because I want to be able to adjust GI and Background separately and you can see the multiplier in vraylight dome is different. For more details about using HDRI,you can visit 2G Studio.
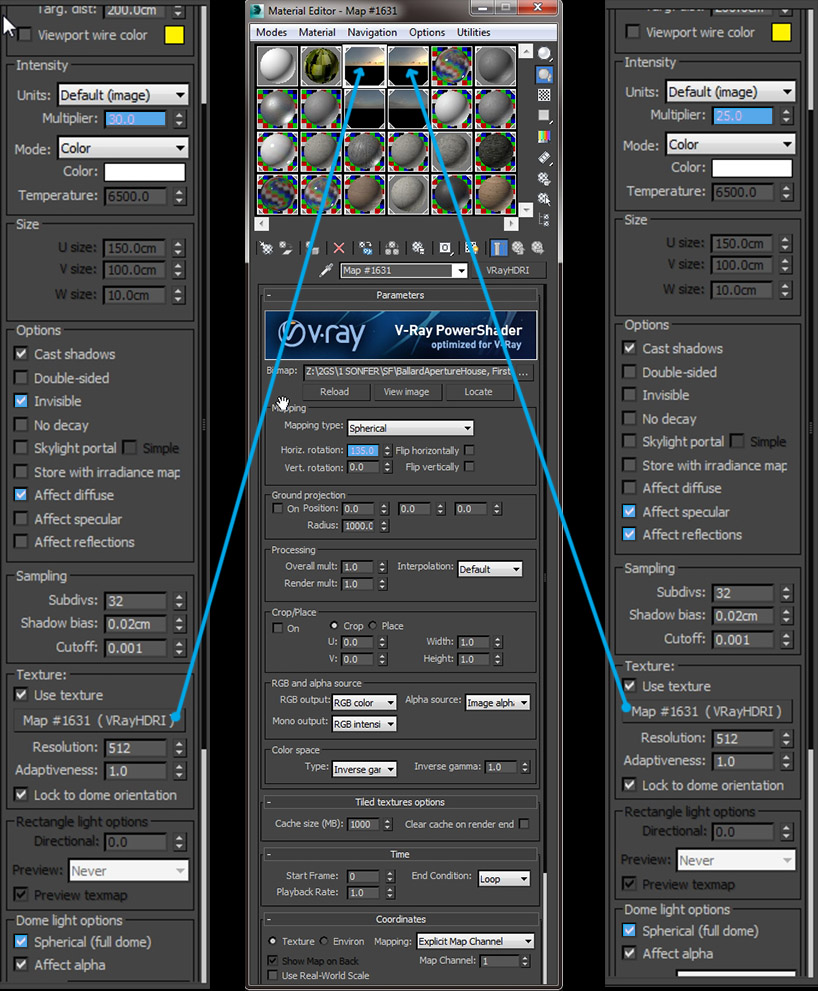
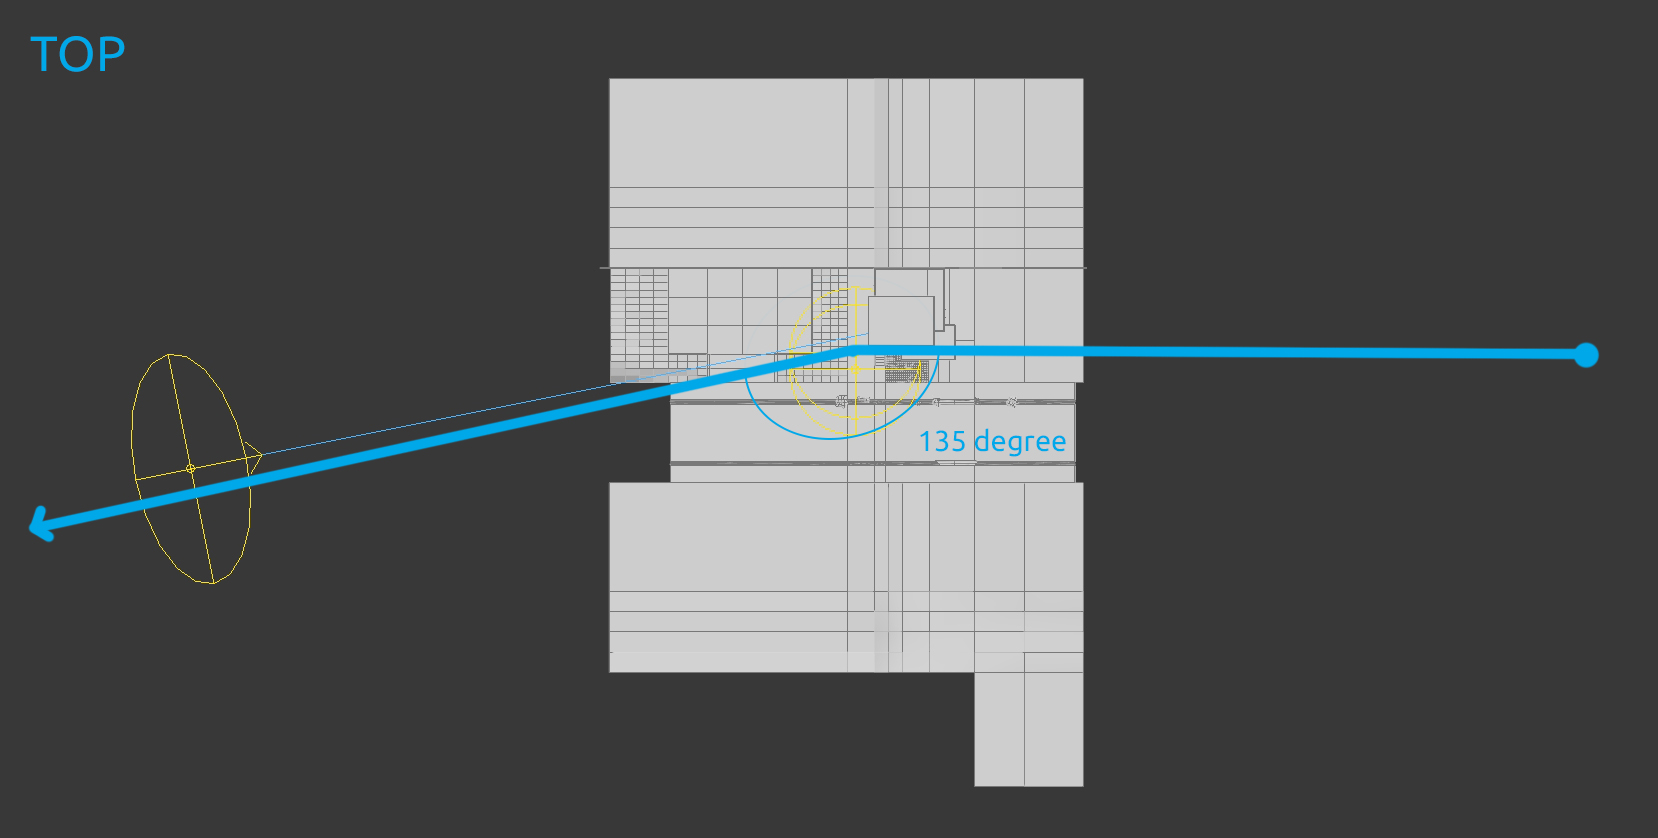
Because I feel like the lighting and shadow aren't bright enough when using vray light dome HDRI, I added vray sun in order to get a brighter sun. I adjust the position of vray sun and the sun in HDRI according to the horizontal rotation in the HDRI material, which is 135 degree.

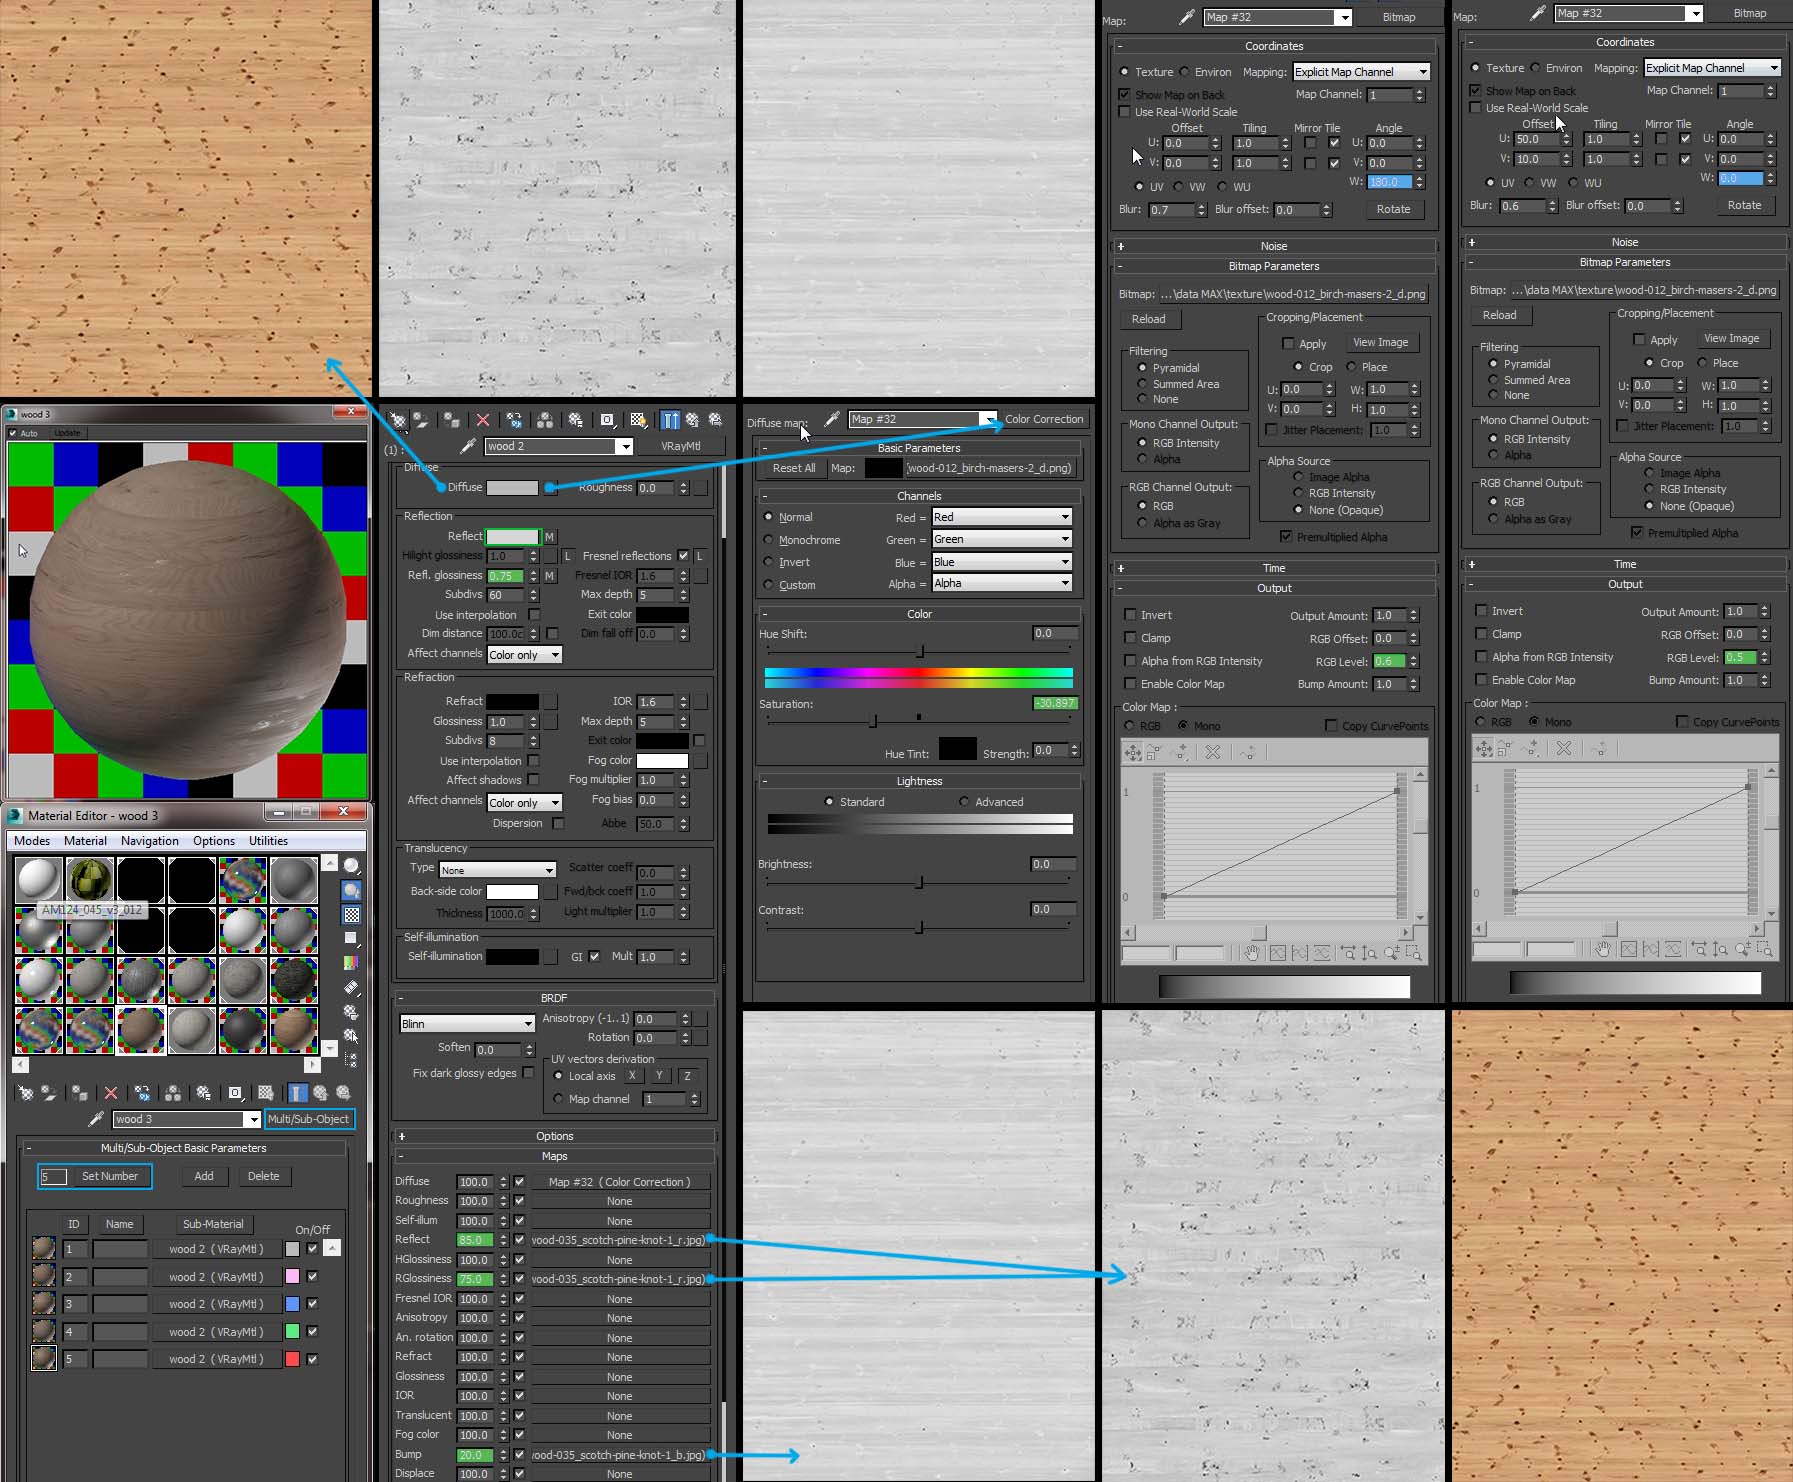
After modeling for building and environment are done, I'm giving all the materials existing in the 3D model. And coincidentally, the first one that I'm giving are the pipe and the bolt, which giving me the idea of the angle of the camera for the pipe.
For the Pipe texturing, I'm using vray blend material and 3 different textures to add dirt, detailed, and natural effect. After finished making the material, I'm giving 3 UVW map to the object modifier to adjust every map channel in the textures.
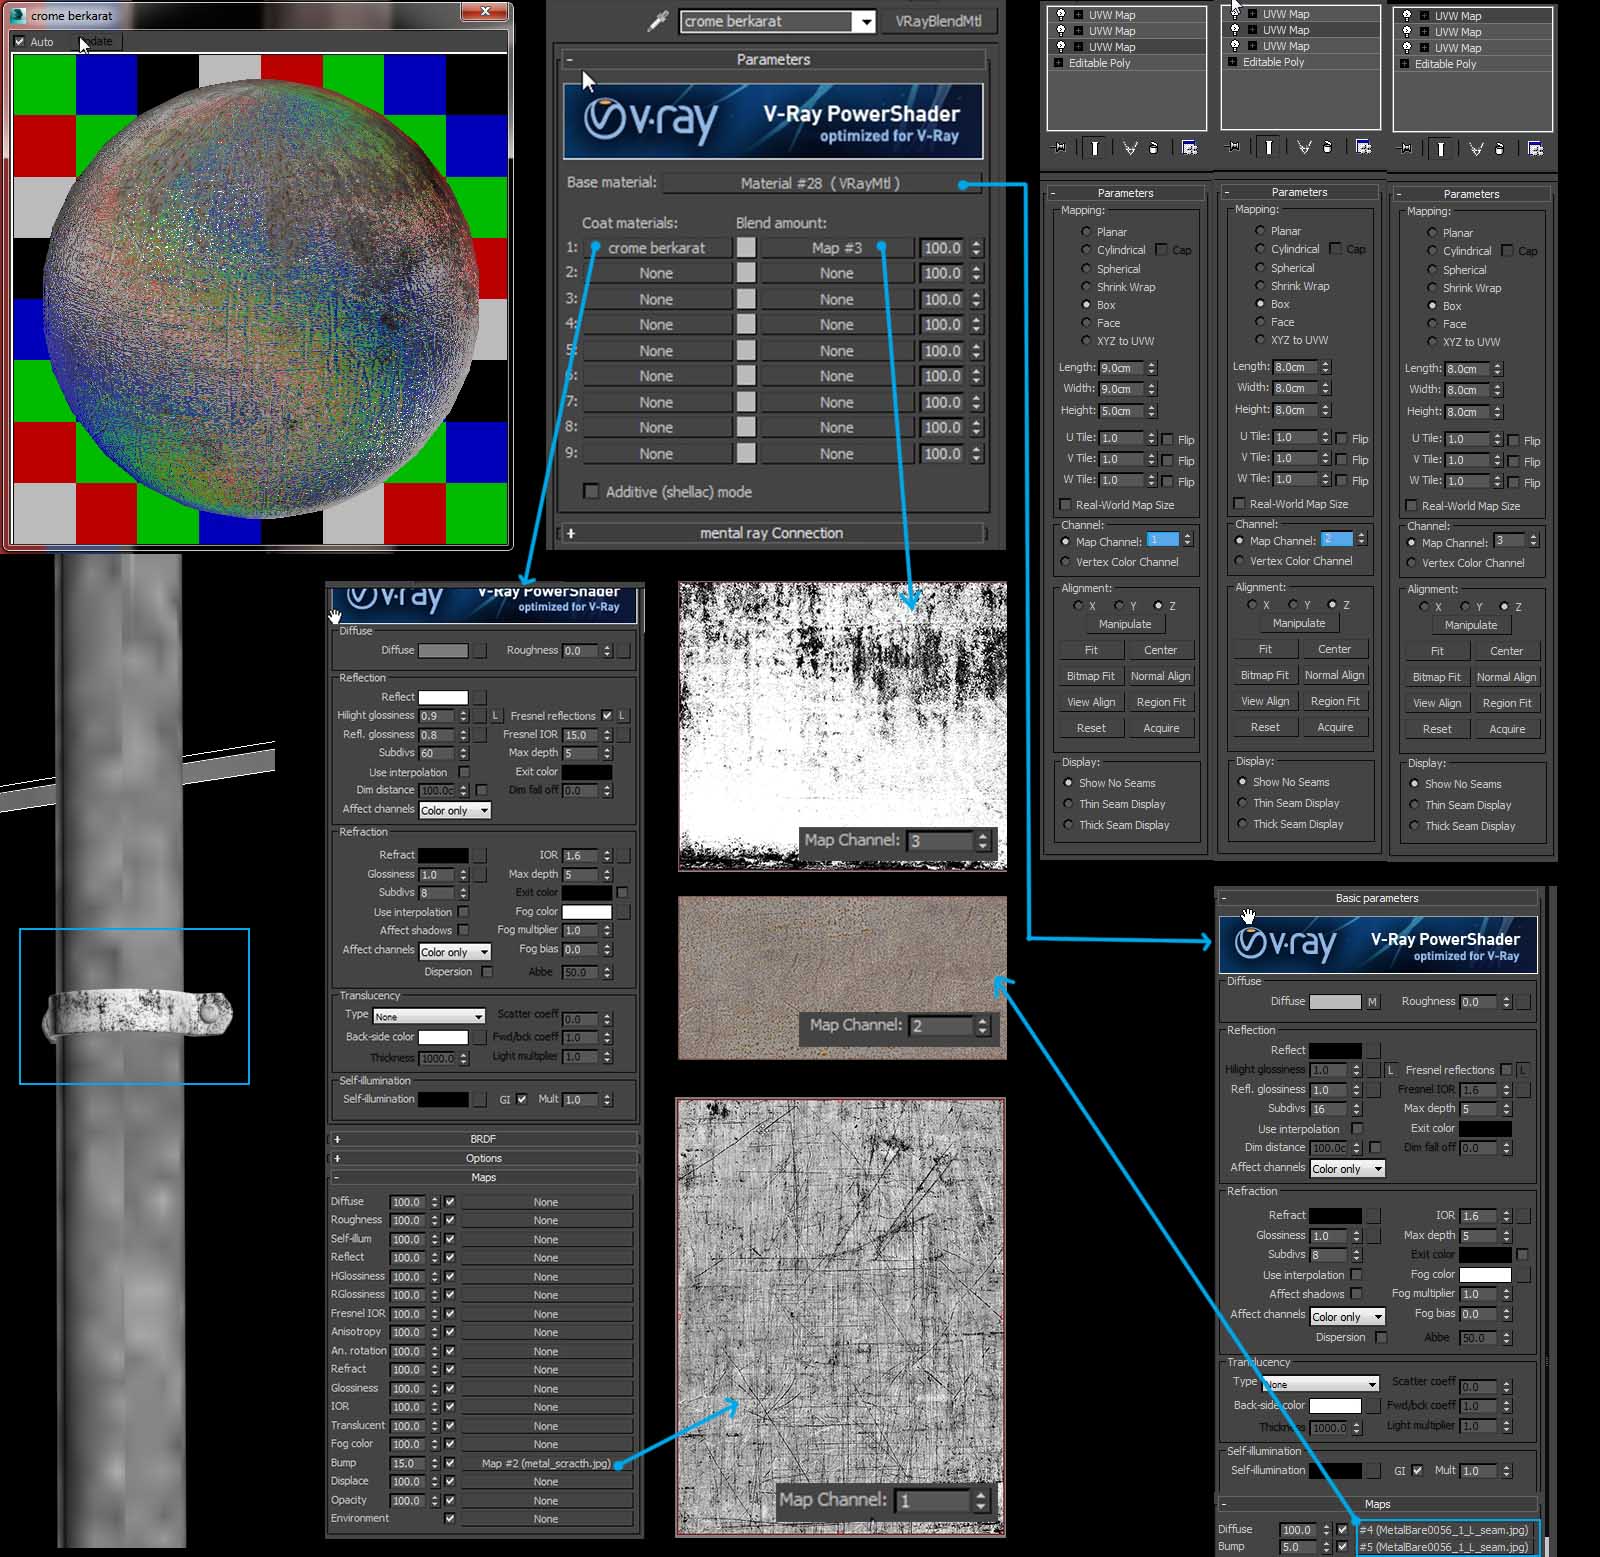
1. Why for the crome material I was using bump? In my opinion, in each and every object and material, it always has bump so I added scratch effect to the crome material and I'm using this for some of the others objects.
For the Facade textures of the building, I'm using multi/sub-object to make sure every wooden object in the building is not the same and this effect give deep realism feel. You can see it from the colorful of the building. That indicate 5 different color (5 materials). For every Multi/Sub-object material, I insert our commonly used material which is VrayMaterial.
For the list modifier of the object, I gave MaterialByElement modifier and chose random distribution with ID count 5. (According to the sum of created Multi/ Sub-object materials) This modifier ensures that every wood in the building facade is randomized so it won't be the same.
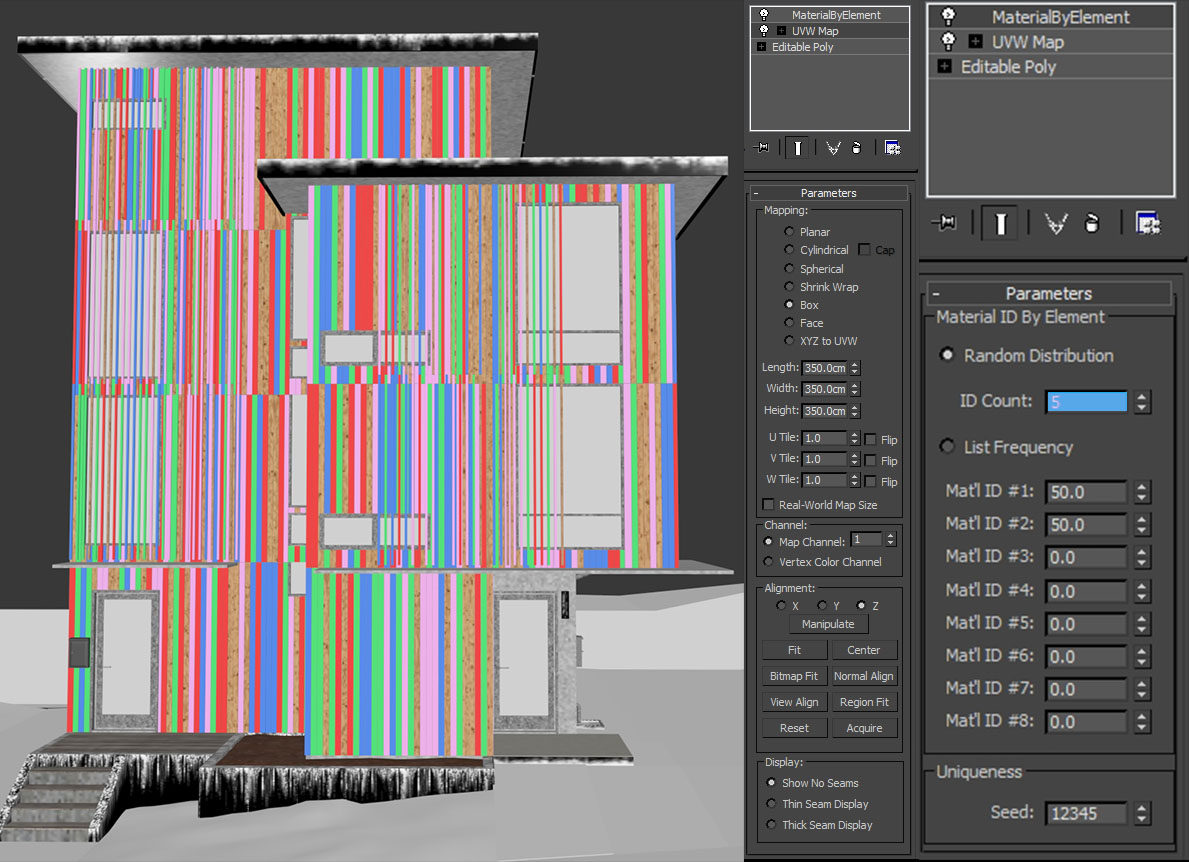
1. For specular (bitmap in reflection and refl. glossiness), I'm using different bitmap than bitmap diffuse and bump to give randomized reflection effect in wood.
2. In the setting with green color mark, for each Multi/Sub-object material, I change the number so that it won't be the same for each material, therefore we give random feel and looks more natural.
3. In the setting with cyan color mark, for W angle in bitmap, I give number 180 for 3 from 5
materials so that 3 directions of the wood fiber rotated 180 degree so it won't be monotone.
This is how I gave dirty textures to the wall. for the dirt texture in this scene, the method is the same. I will give example of one material of the top part of the building, abd tge nateruak which I used is VrayBlendMaterial. Basically, the wall texture material which given dirt effect is the same with making the wall texture. The differences are the degree of roughness and the darker color than the dirt texture. Therefore, I make the number lower in RGB level so it will look darker.
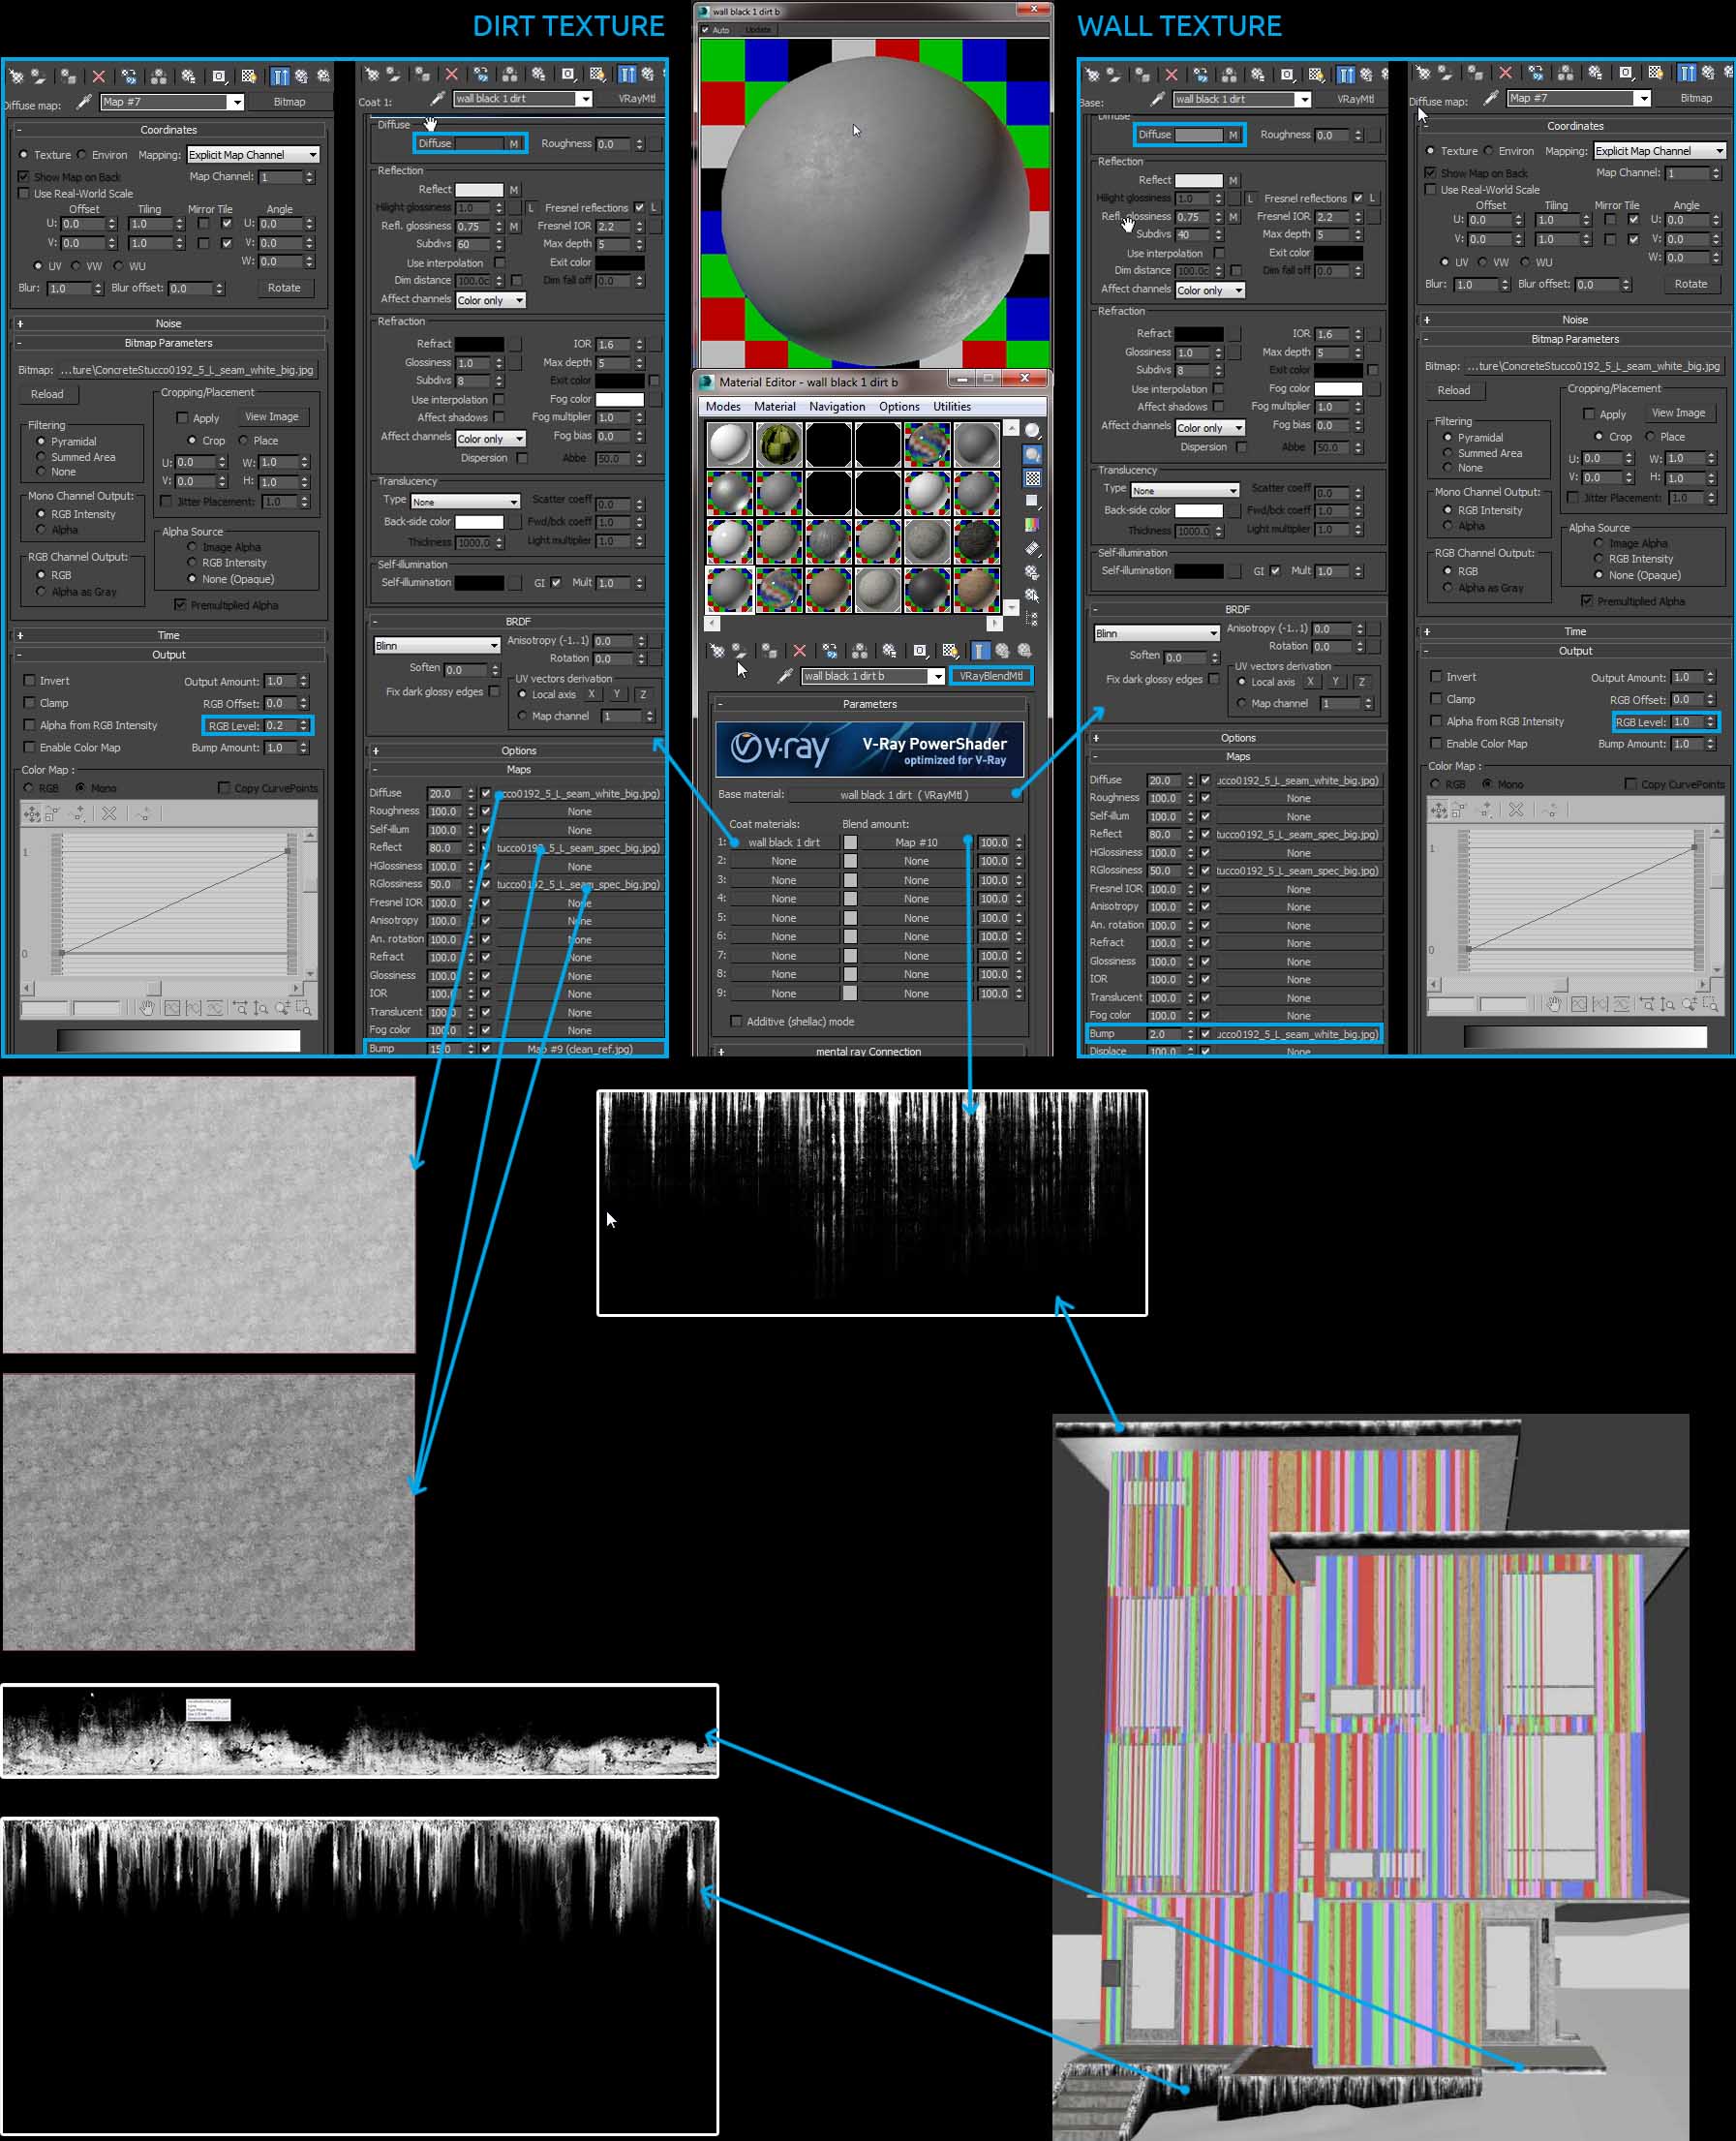
1. For the wall texture, I don't want to only use color for the wall because that will only make the wall looks flat. So I give bitmap concrete and I play with the number of diffuse in maps until the color of diffuse and bitmap blends and look natural.
2. For every material, I give specular (reflection and refl. glossiness) bitmap and every specular bitmap I made them in Photoshop as I desired. This will look the material texture looks more natural.
3. So, for the others texture, basically it's the same as what you use when giving vray texture material. In my opinion, what make the texture different from each other is the feel and experience we have. So keep practicing with diligent ^_^
Lastly, here are my final setting before the final render.

For the post production workflow you can use the download page link below, at the end of the article.

Thank you for reading, I hope you can get something from my experience and have fun rendering!