Its humbling when I get asked to create a making of tutorial like this as I'm such a student myself-always learning and finding my way through new challenges. But at the same time, it's in these types of tutorials that I often discover that nugget that propels my work forward. so here goes!
Create a series of whimsical images for a 'choose your own adventure’ Christmas story that would run in a children’s magazine. The story takes place in Boston at the south train station in the early 1900s. Image needs covered the gamut from outside the station, inside the station, looking at a roaring train rushing down an icy track and all the way into a dining cars. The immediate challenges I saw was the need for a lot of custom modeling, texturing and lighting, large crowds to be photographed in period specific wardrobe, tight budget and fast turnaround- the usual right!!
I immediately researched my location through some beautiful old photographs I found in some online archives . This period in history is one of my favorites when it comes to the character it had in its architecture. The building facades are all so detailed and unique. Once I felt comfortable in the historical setting I quickly got my sketches approved so that I could dive right into production.
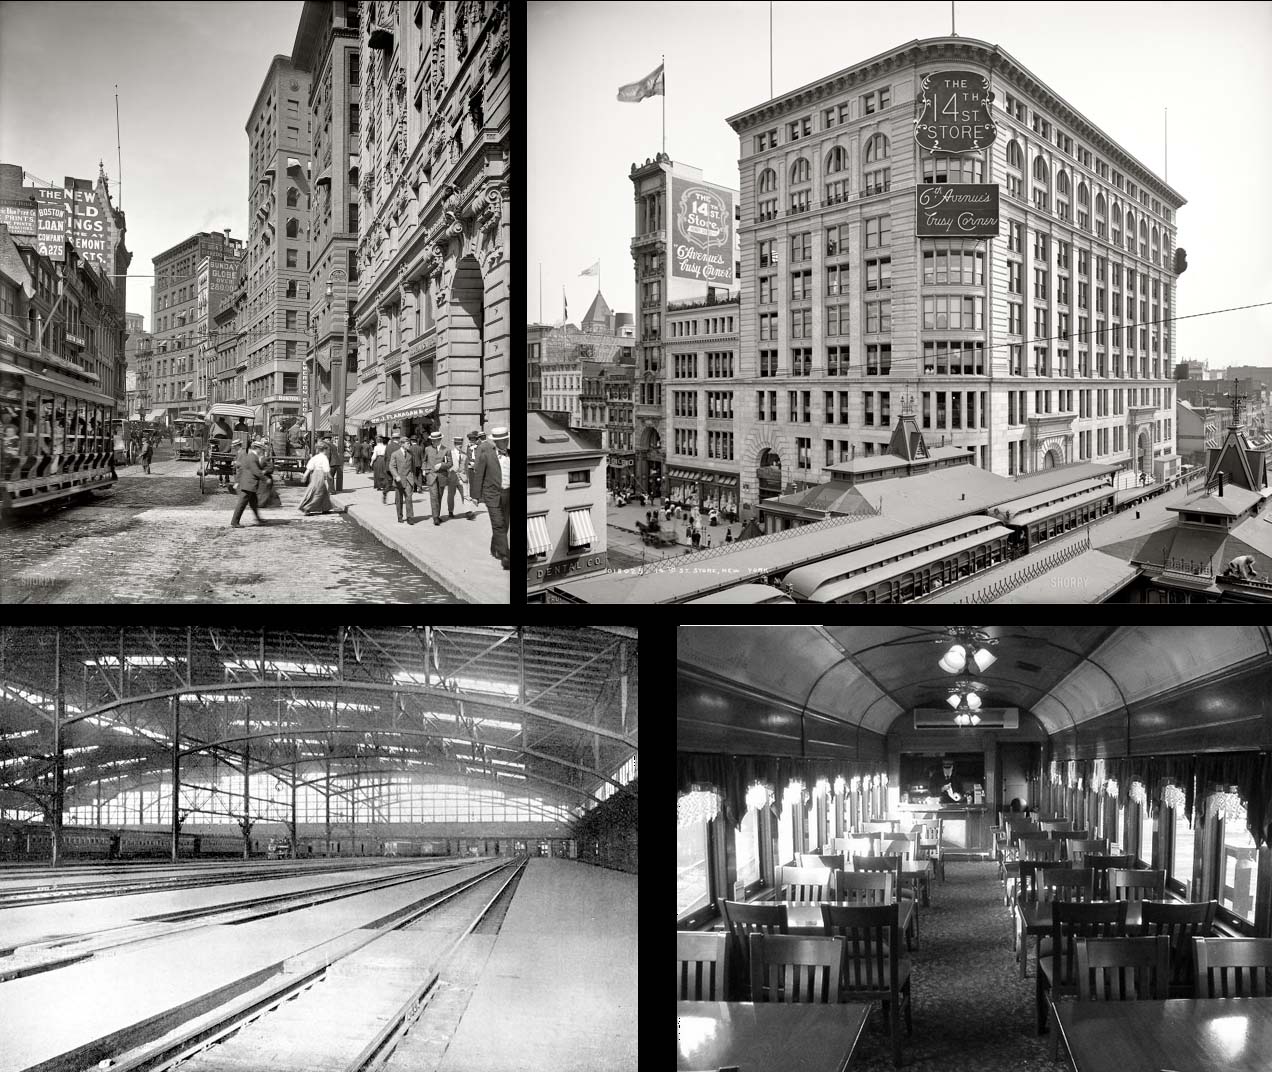
Boston reference from the early 1900s.
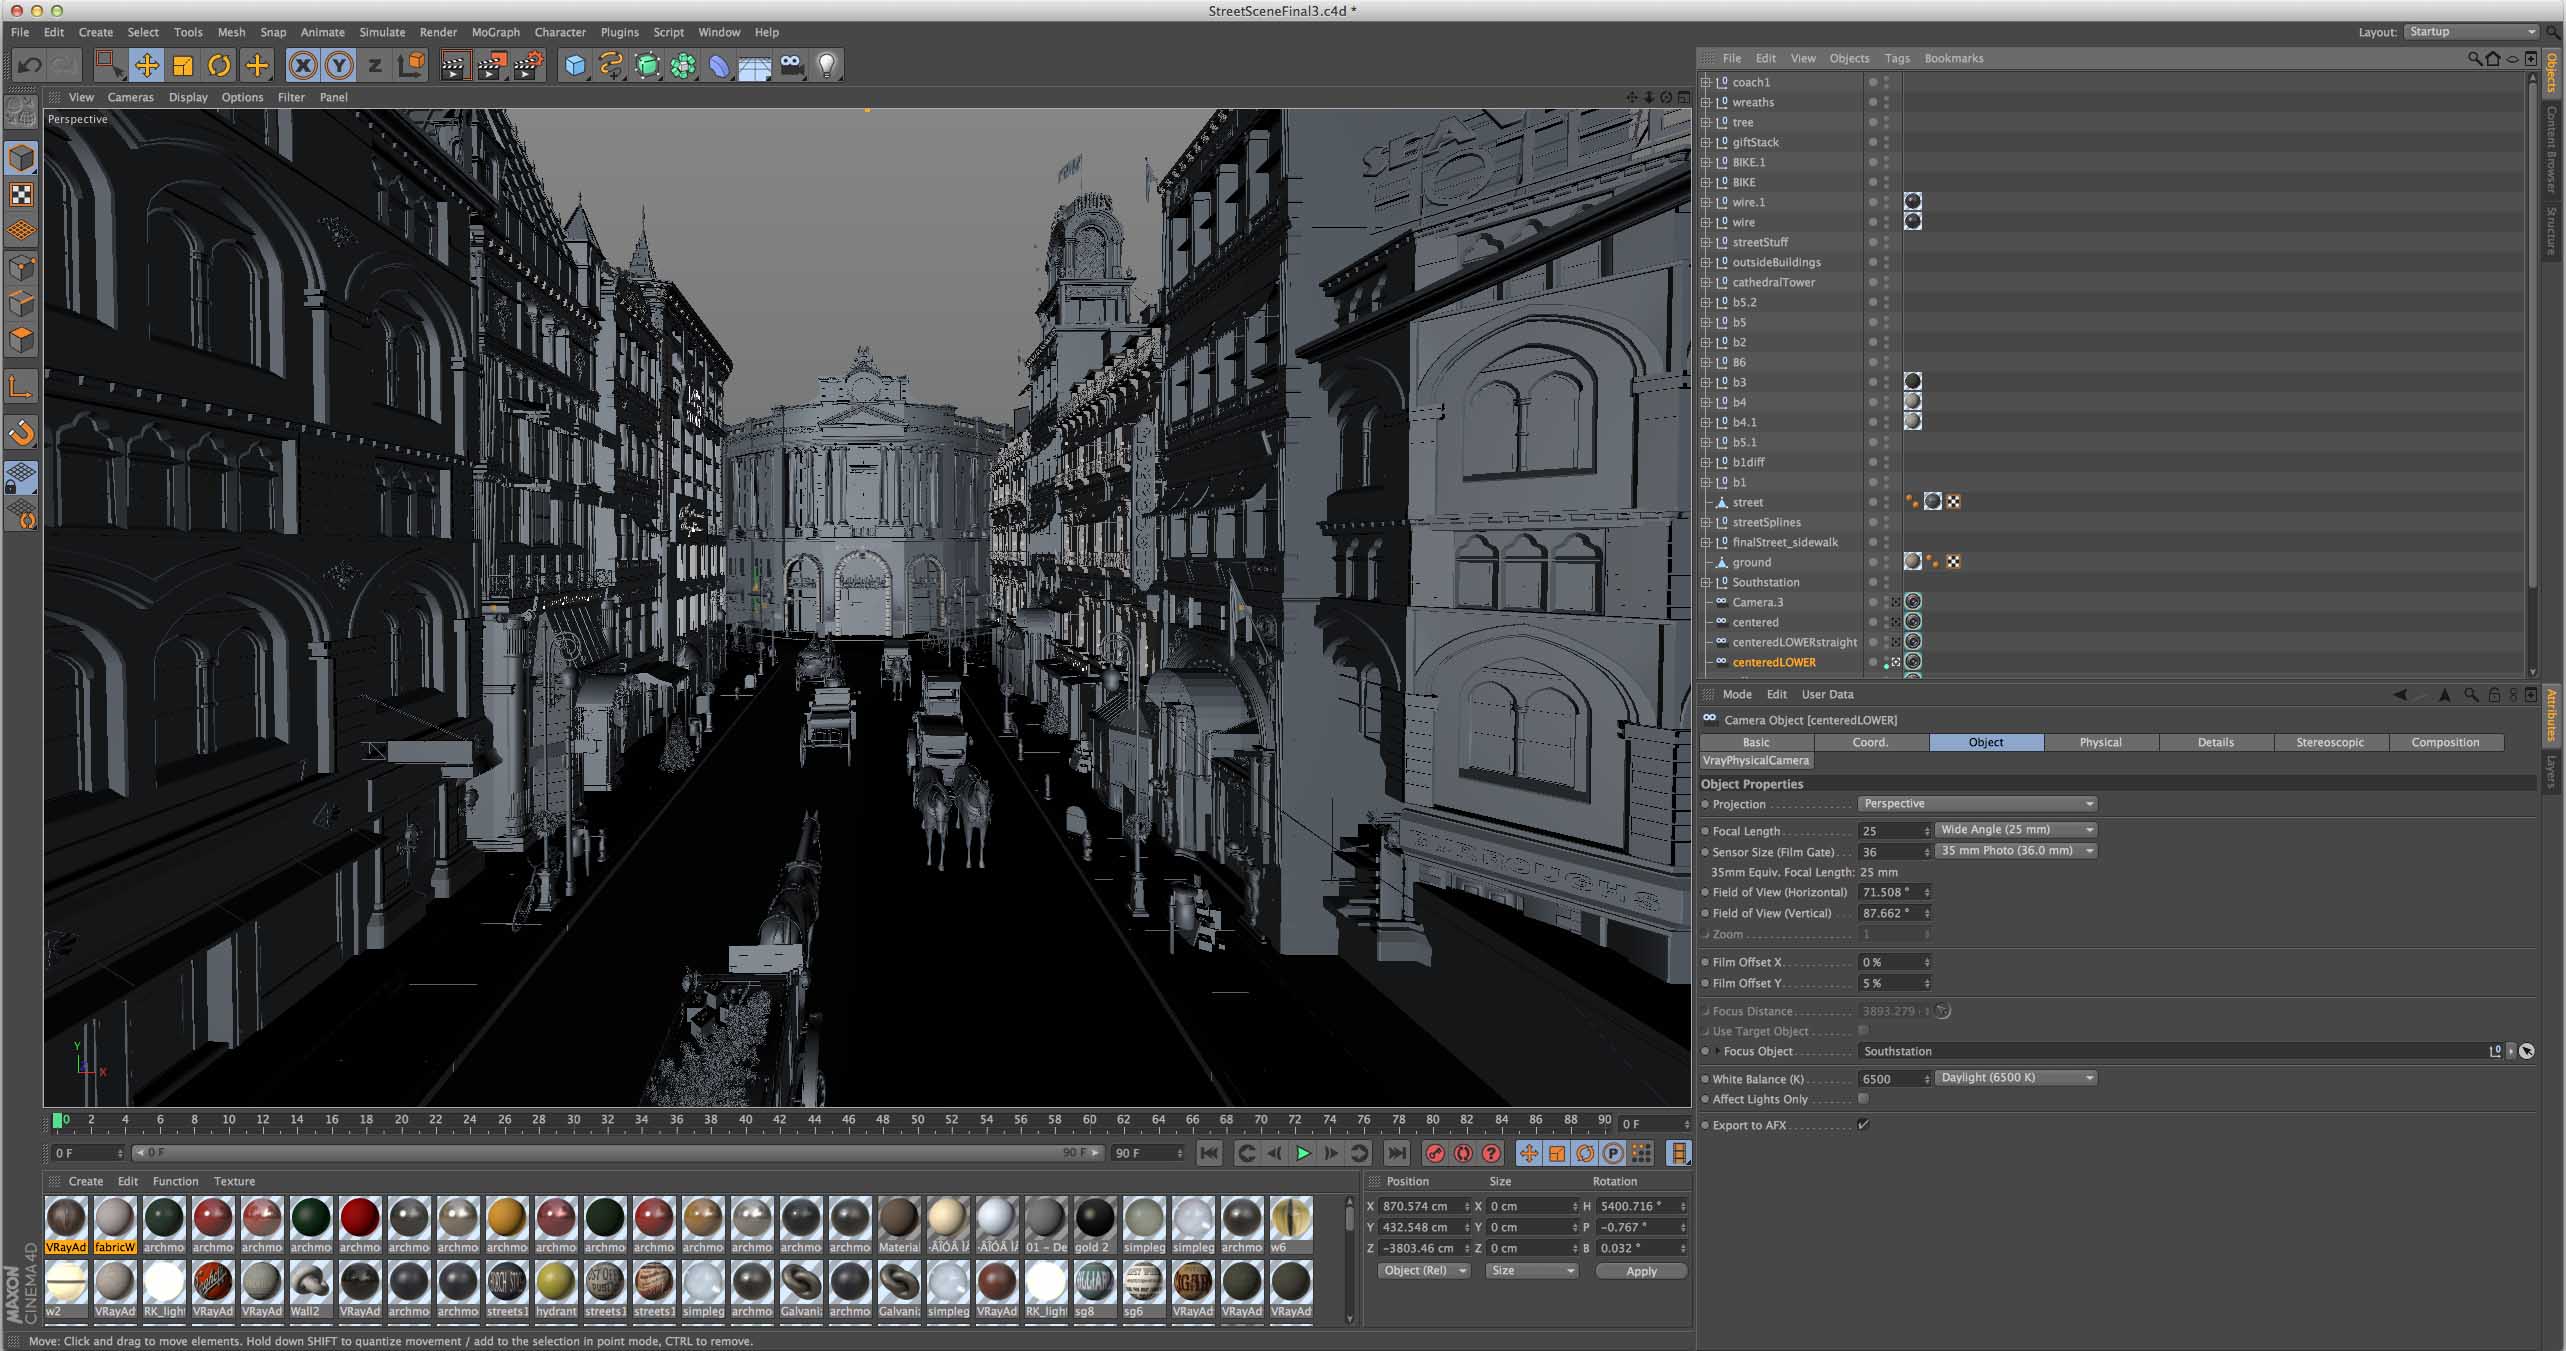
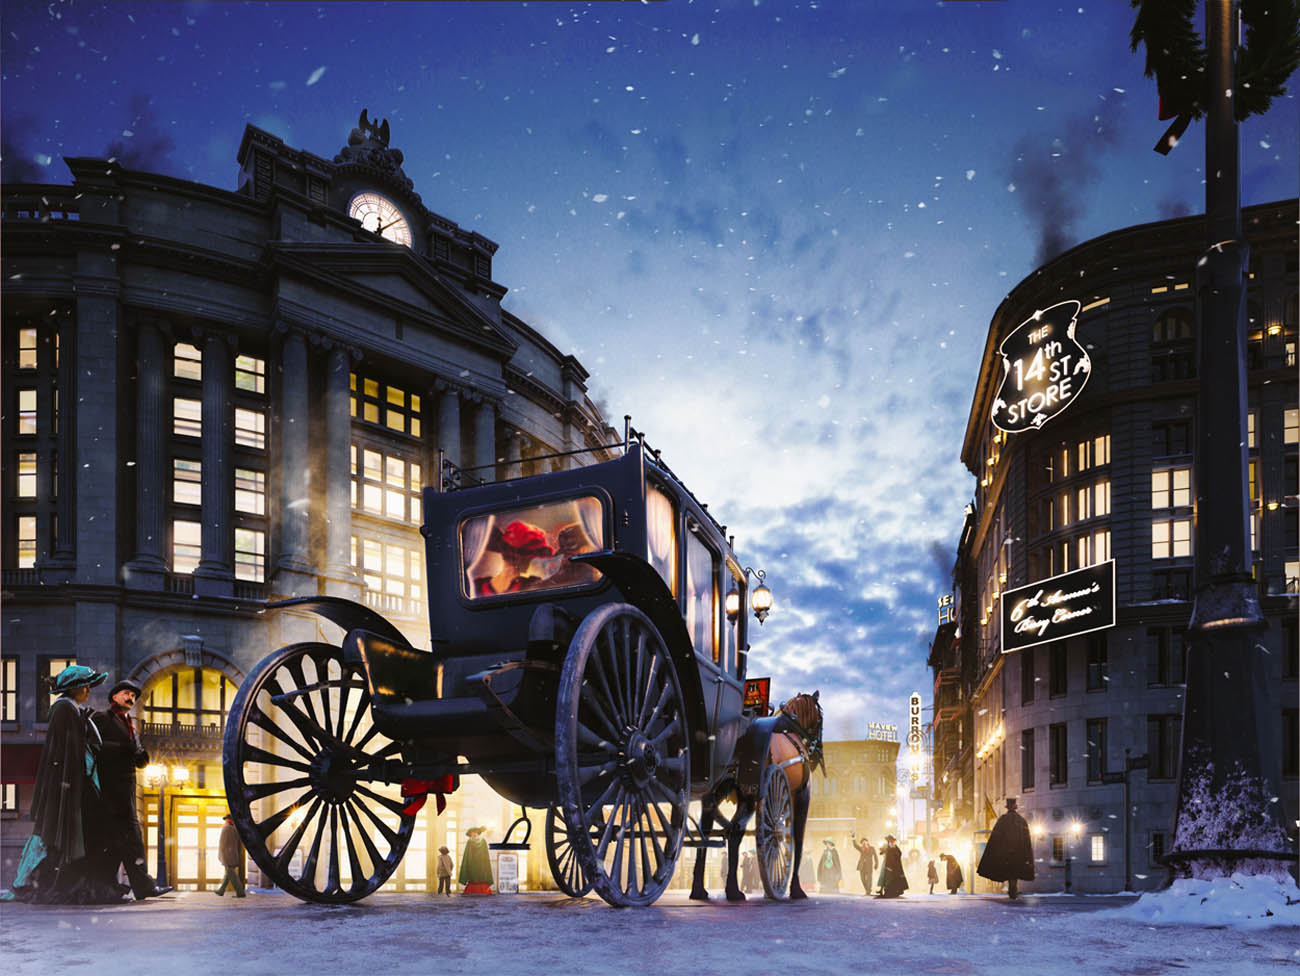
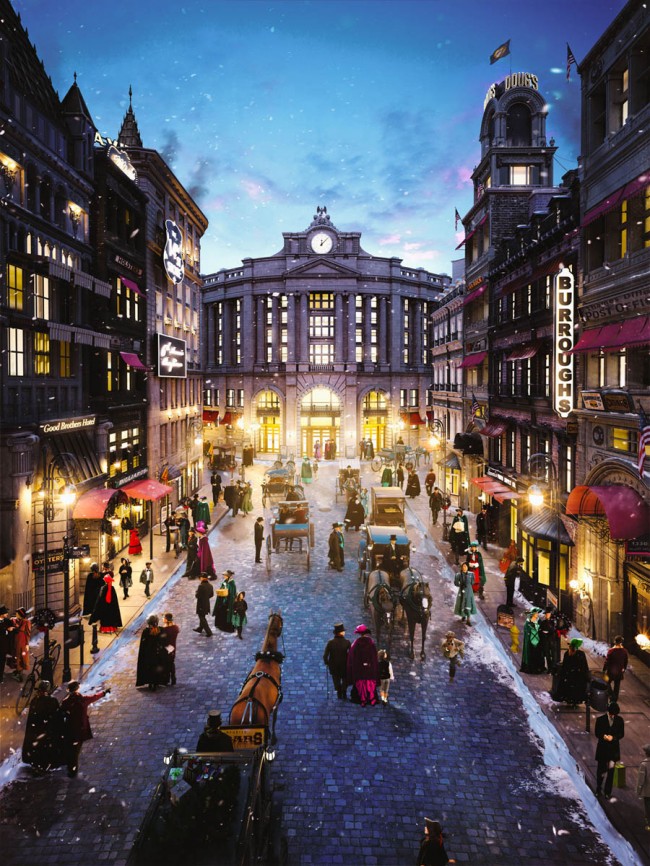
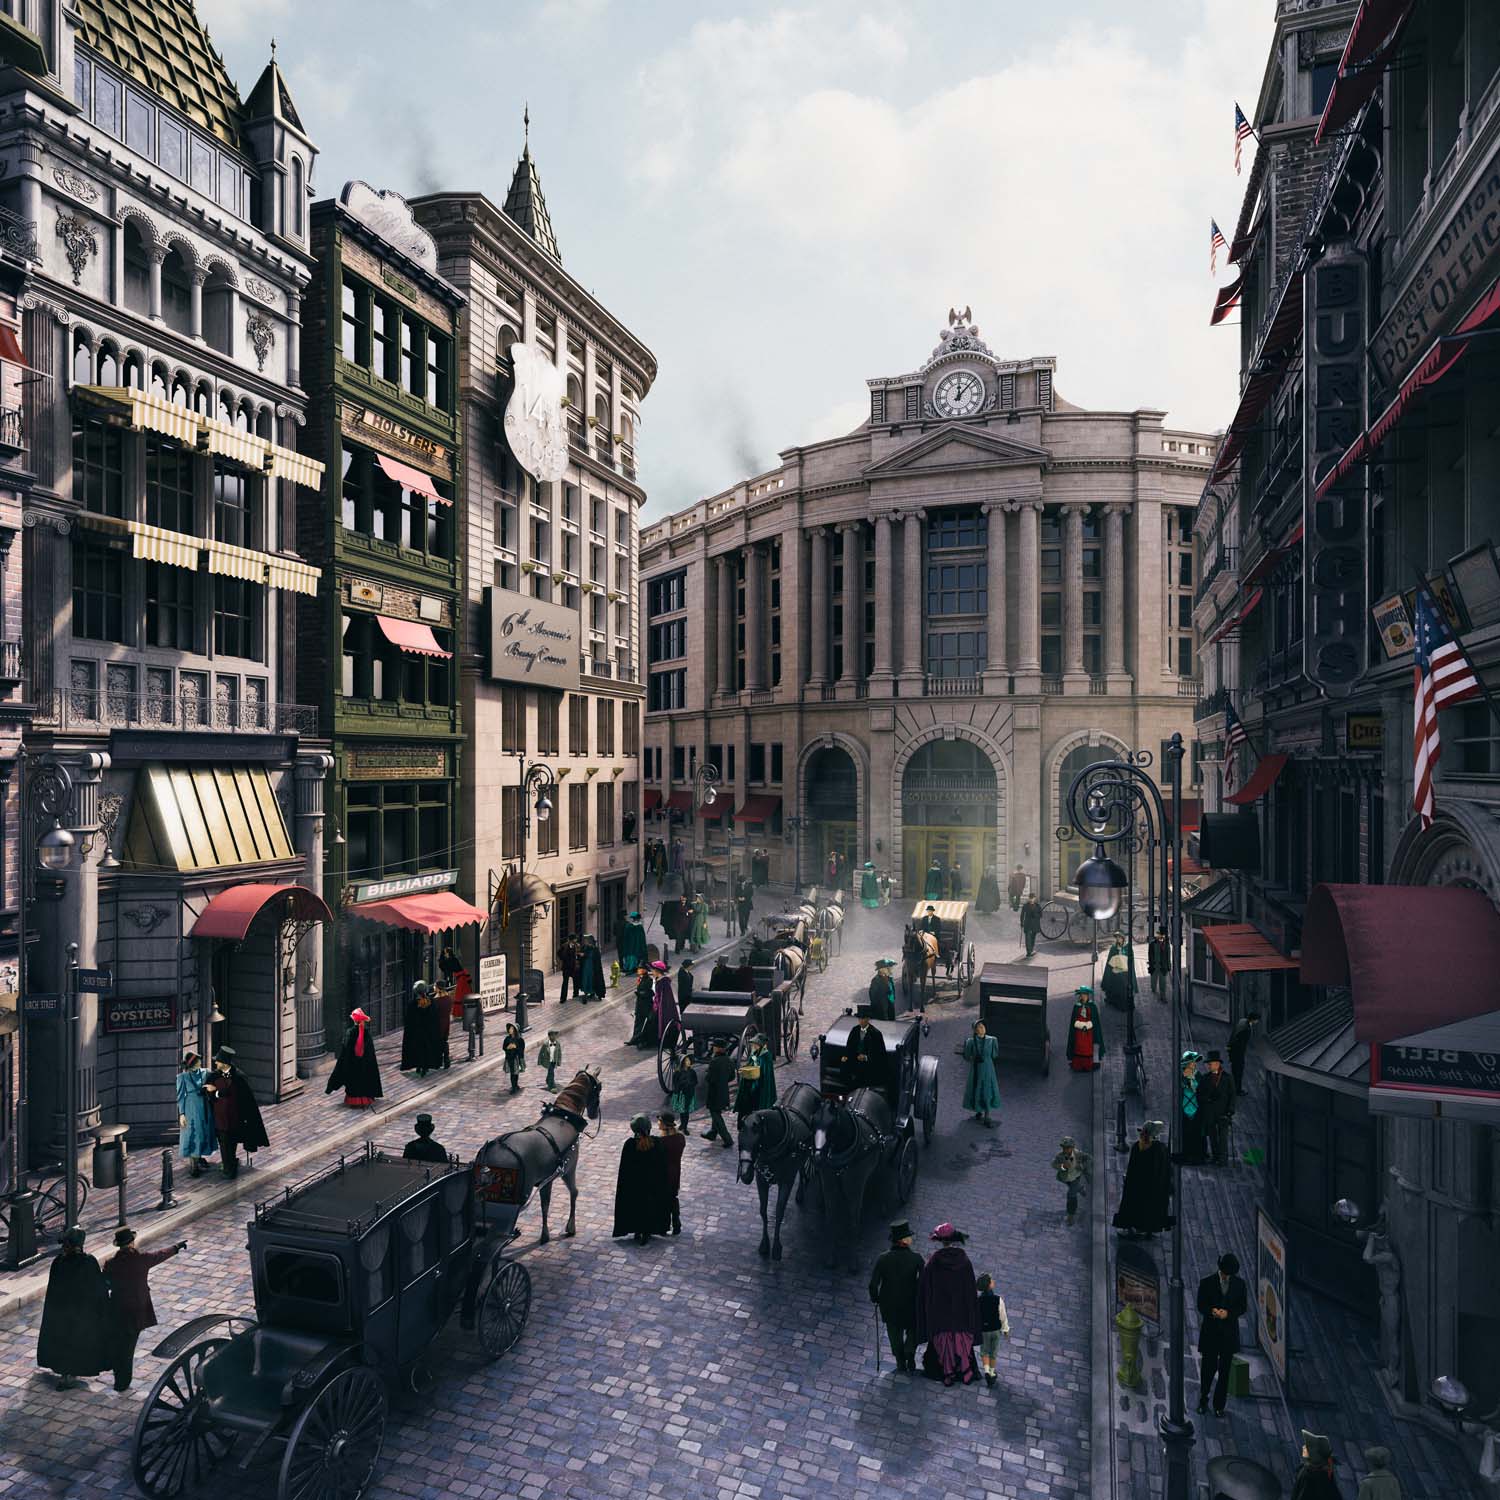
Main image of city block and South Station.
I typically start with the hardest challenges first and in this case it was the city block leading up to south train station. I found a few stock buildings on Turbosquid.com but not only were they expensive but many of them didn’t have those little details I was looking for in my picture. Victorian building façades are very detailed so this is what I begin modeling. Nothing out of the ordinary here but whenever possible I would use cloner objects for example if there was a detailed window design I would clone it across the building to save on polygons. Another place I used cloner objects attached to splines was in creating those old-fashioned bulb light signs.
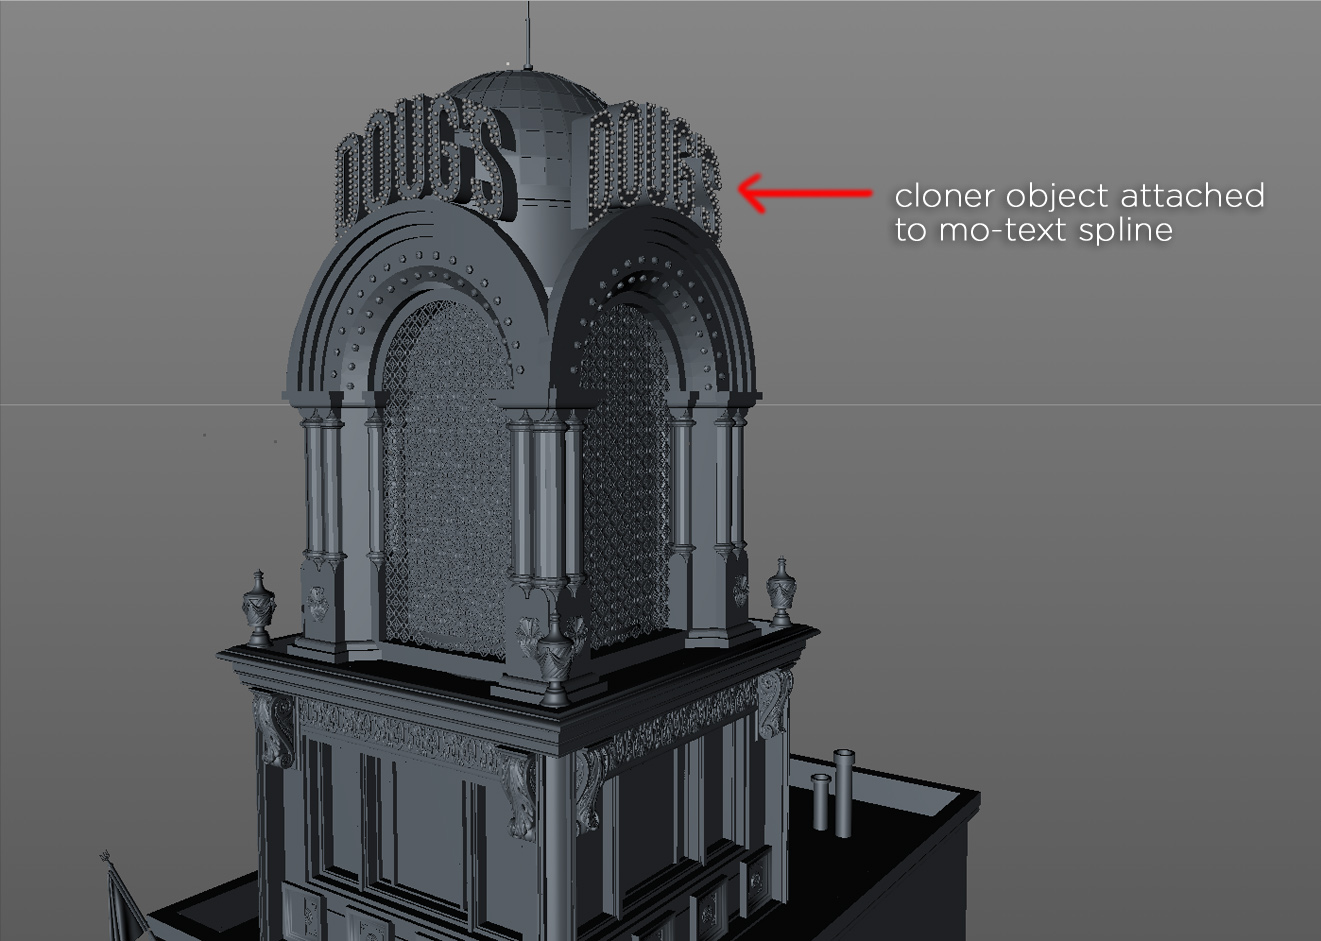
Cloner object connected to mo-text spline.
A lot of attention to detail went into the rooftops of each building because of the high camera angle of one of the main shots. I continued modeling the inside of the train station as well as the interior of one of the dining cars (yes the Polar Express movie was inspiration for this scene:) Mentally it helped me to start big and work small which is why started with a city block. I did purchase a high-quality train model for the interior train station as there simply wasn’t time to model everything.
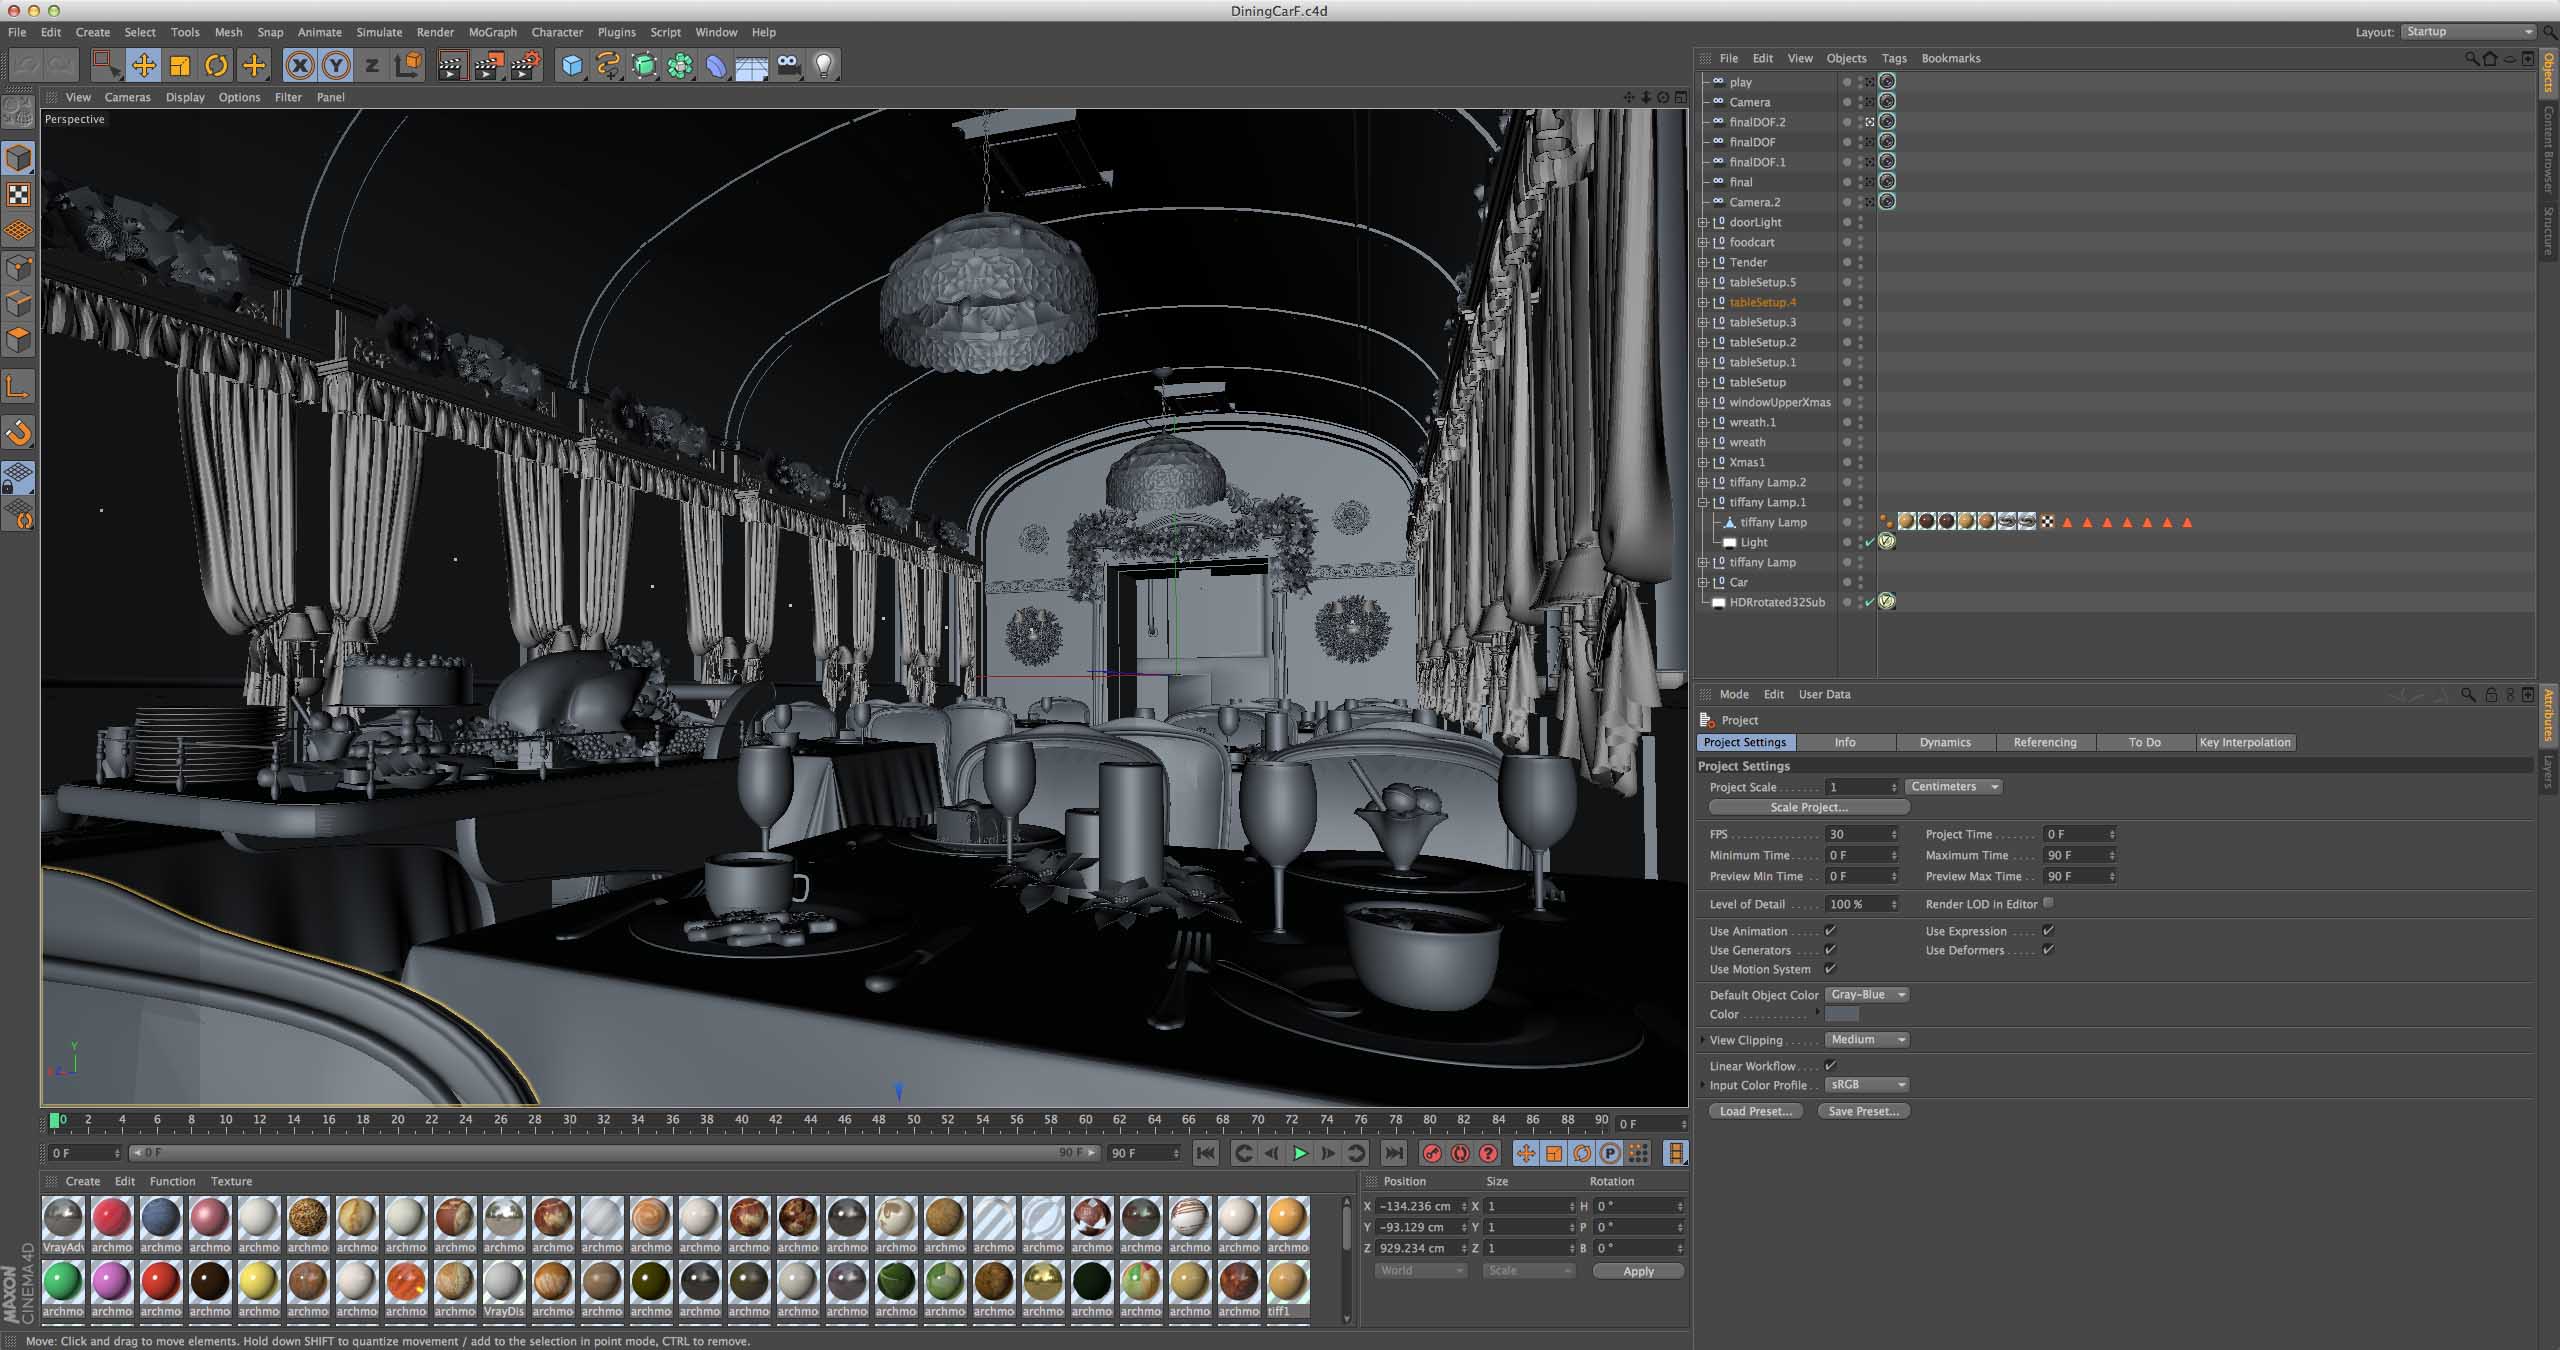
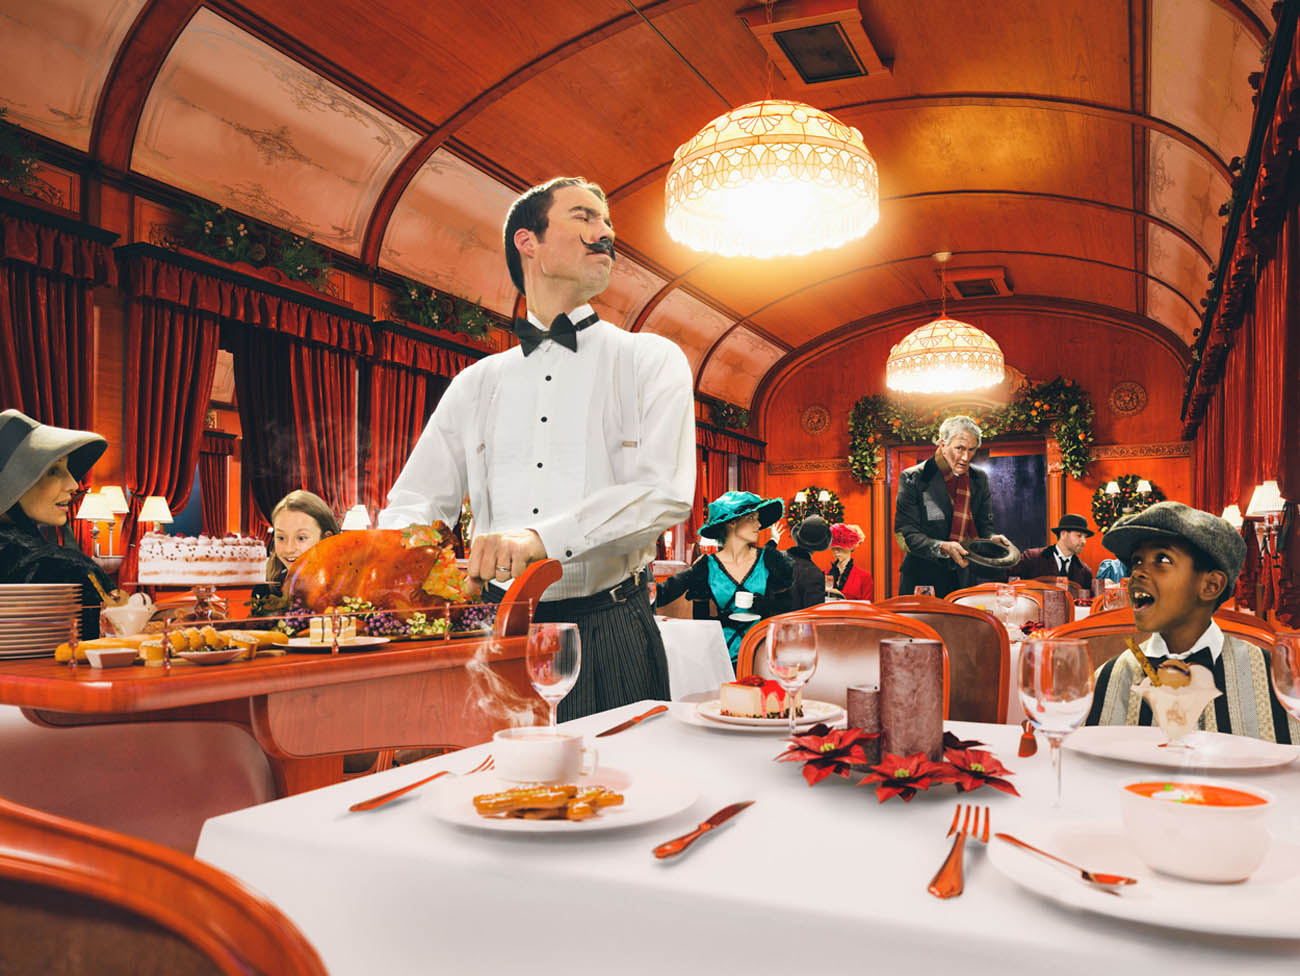
Dining car interior model.
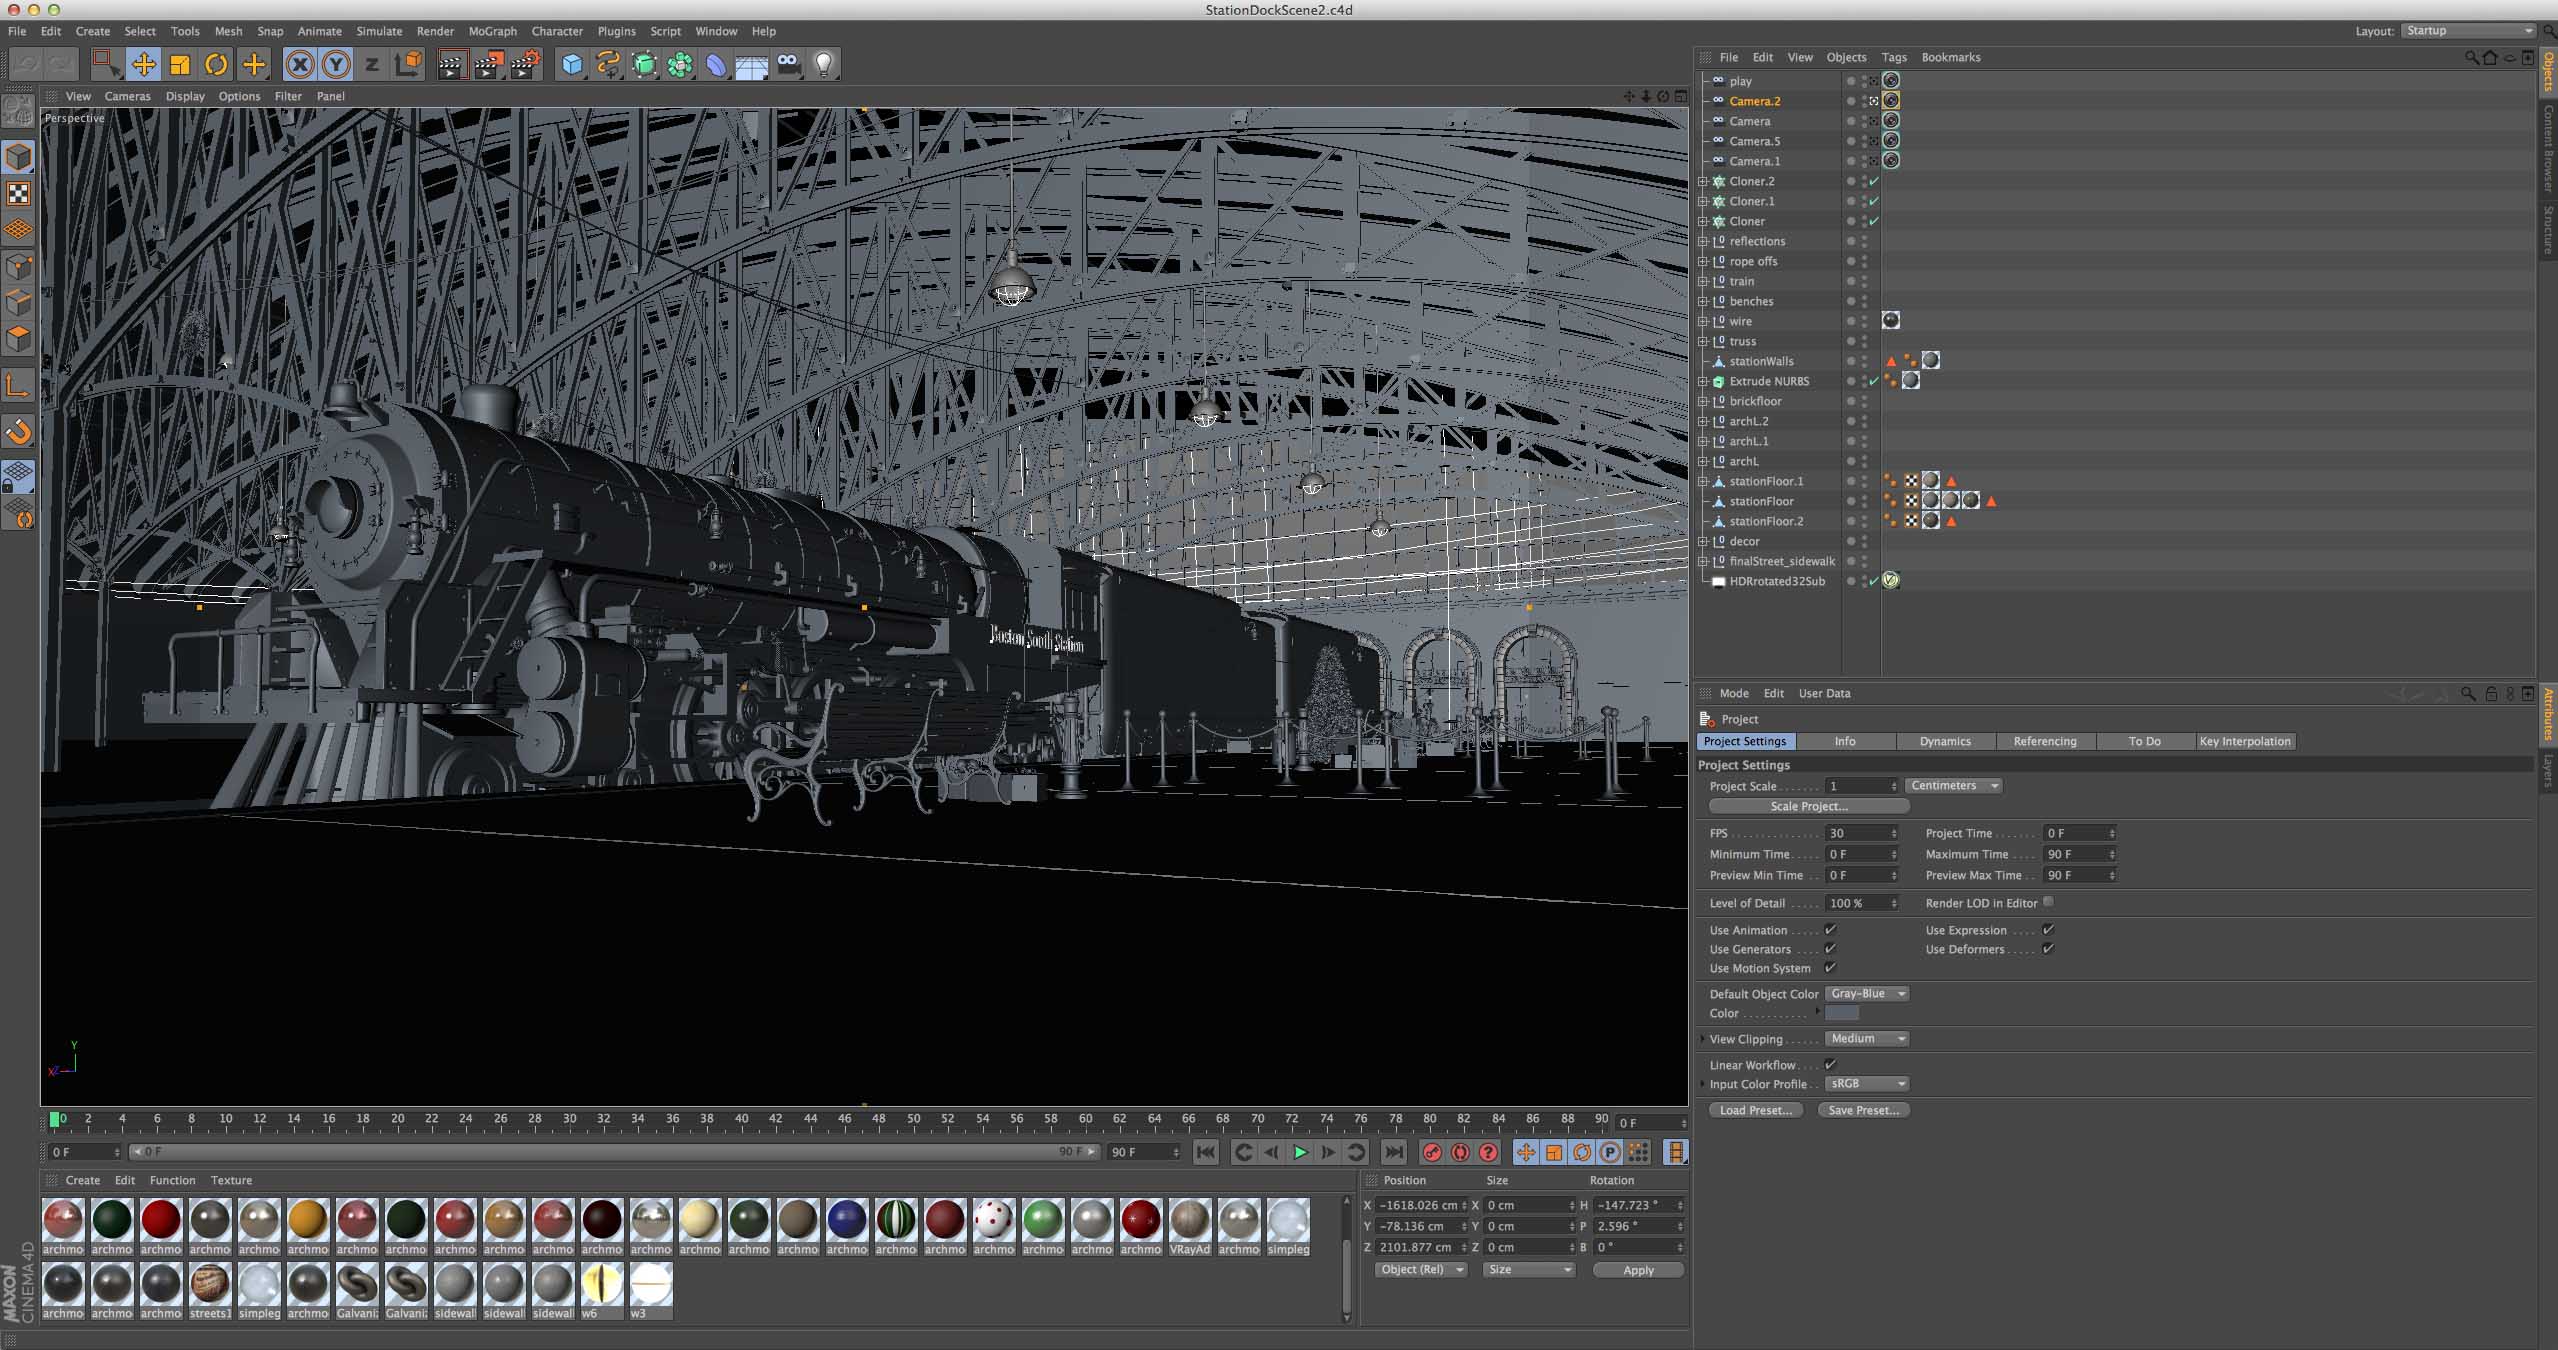
Interior train station model.
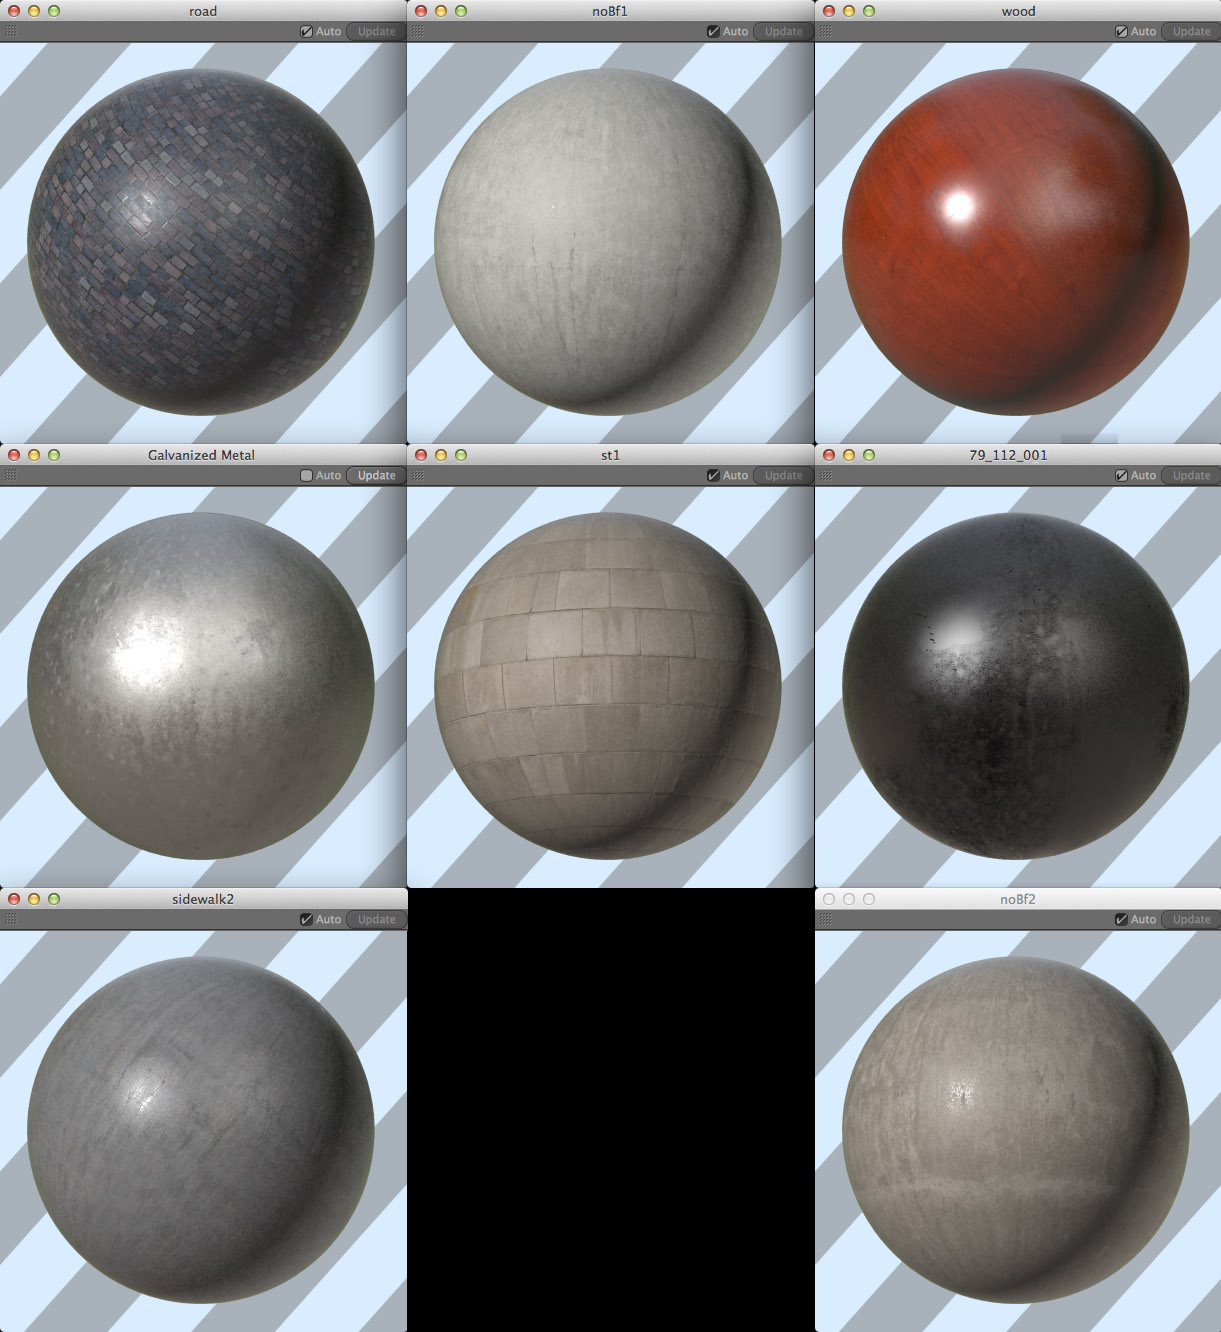
It’s no secret that Vray’s power lies in it shaders and I always find that this aspect takes dedication to create materials that have the nuances we see in real life. I again started with the city block and created about 5 different building Materials like concrete, stone, brick, painted wood etc (I used textures from Arroway and CGtextures for some of the shaders) The trick here was creating textures that had weathering to them without having to hand texture all of the buildings -there simply wasn't time. So if you look at this concrete texture I made the top of it has a very clear weathering/decay line. I would just line this up at the tops of each section of building and then offset the X axis so that it didn't look repeated. Additionally I used the Vray dirt shader to add further weathering and age to the cracks in the corners of the building. One thing to note when using the dirt shader is that the amount radius is largely dependent on the scale of the world you're creating so pay close attention to your units of measurement! The only other shader worth mentioning would be the sidewalk and cobblestone. I painted custom specularity maps for puddles of water on the sidewalk and street’s.
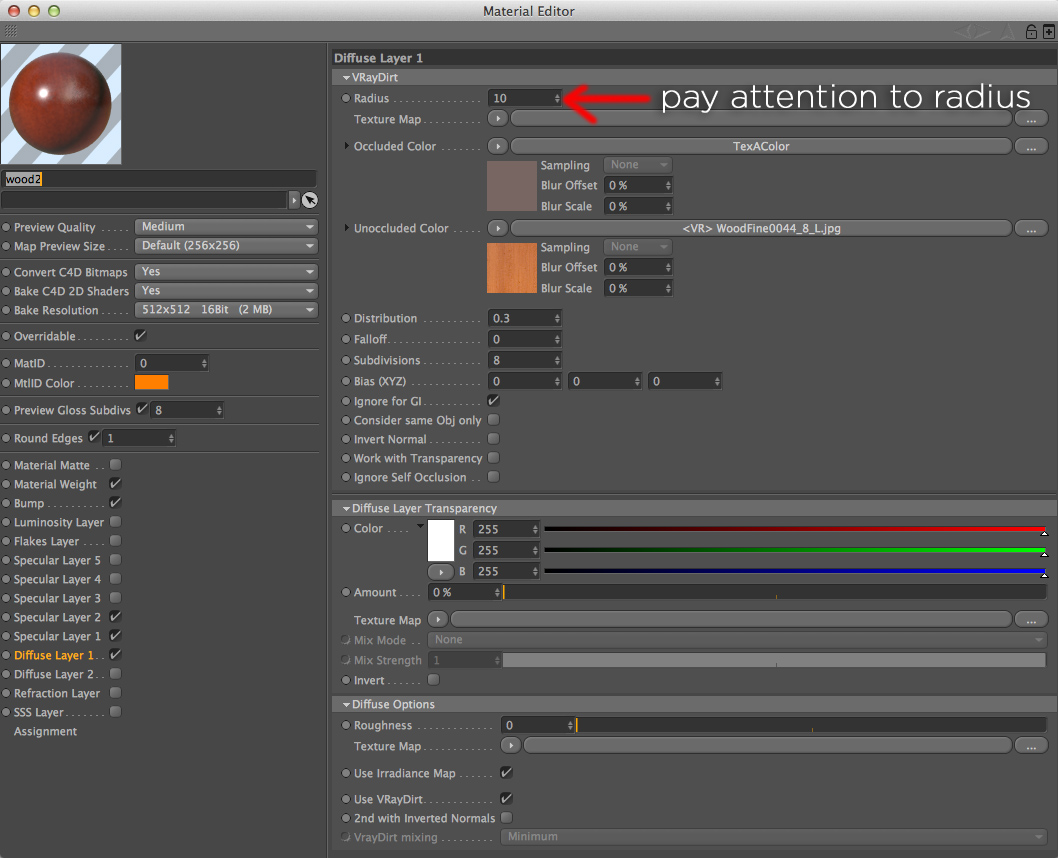
Pay attention to the radius in comparison to your world scale-this will help you control how much the dirt spreads out from the occluded corners.
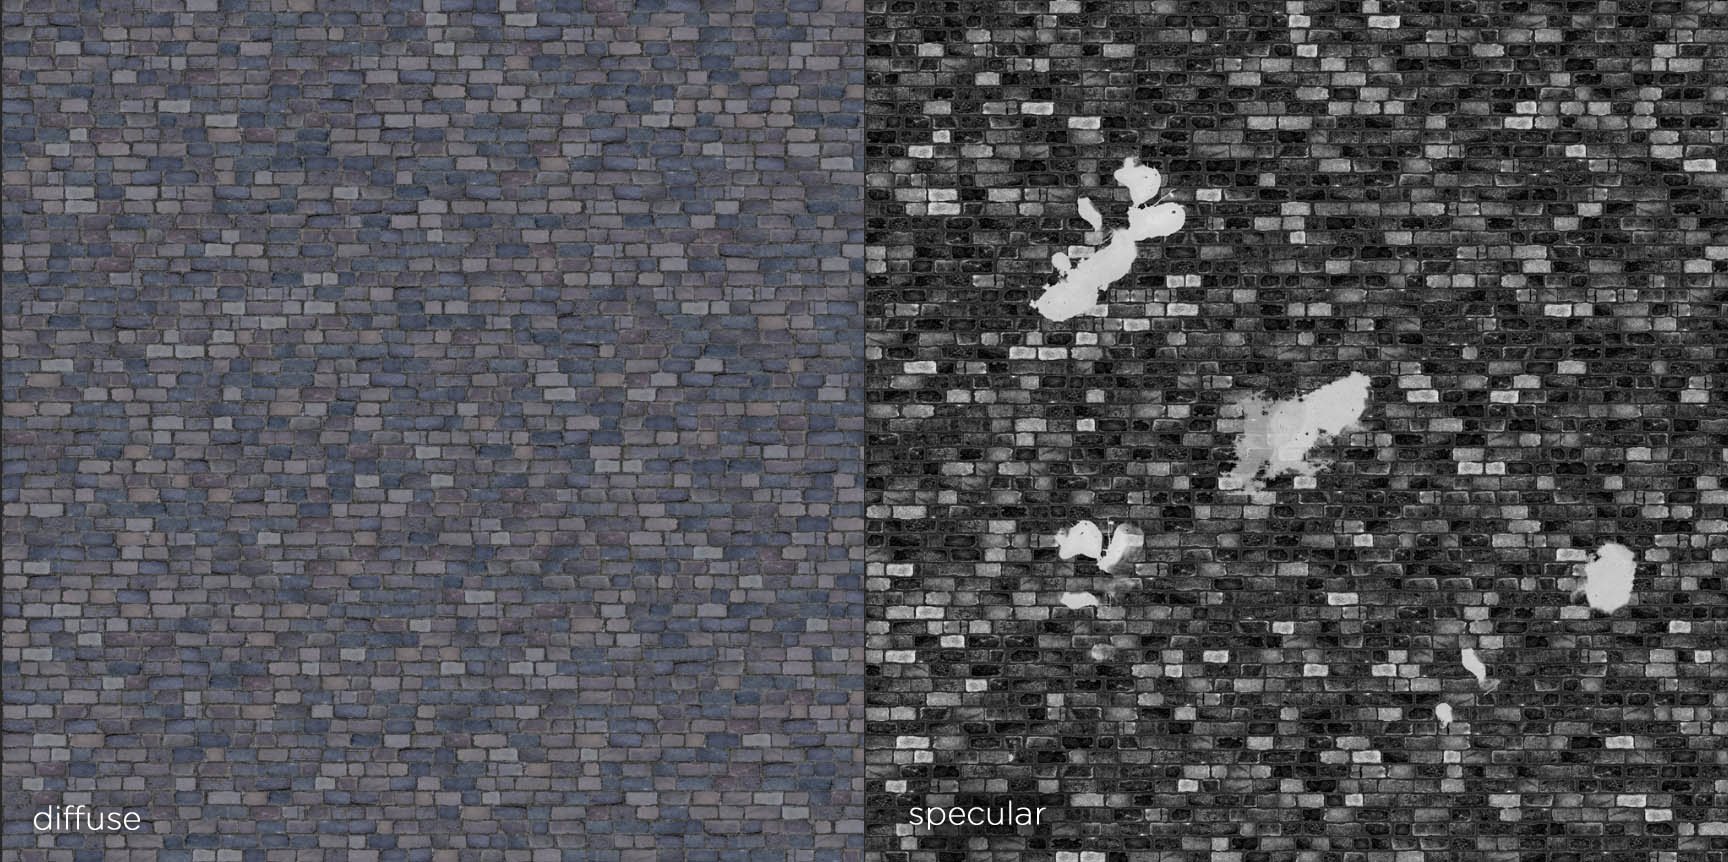
Cobblestone street texture showing water puddles painted in the specular channel.
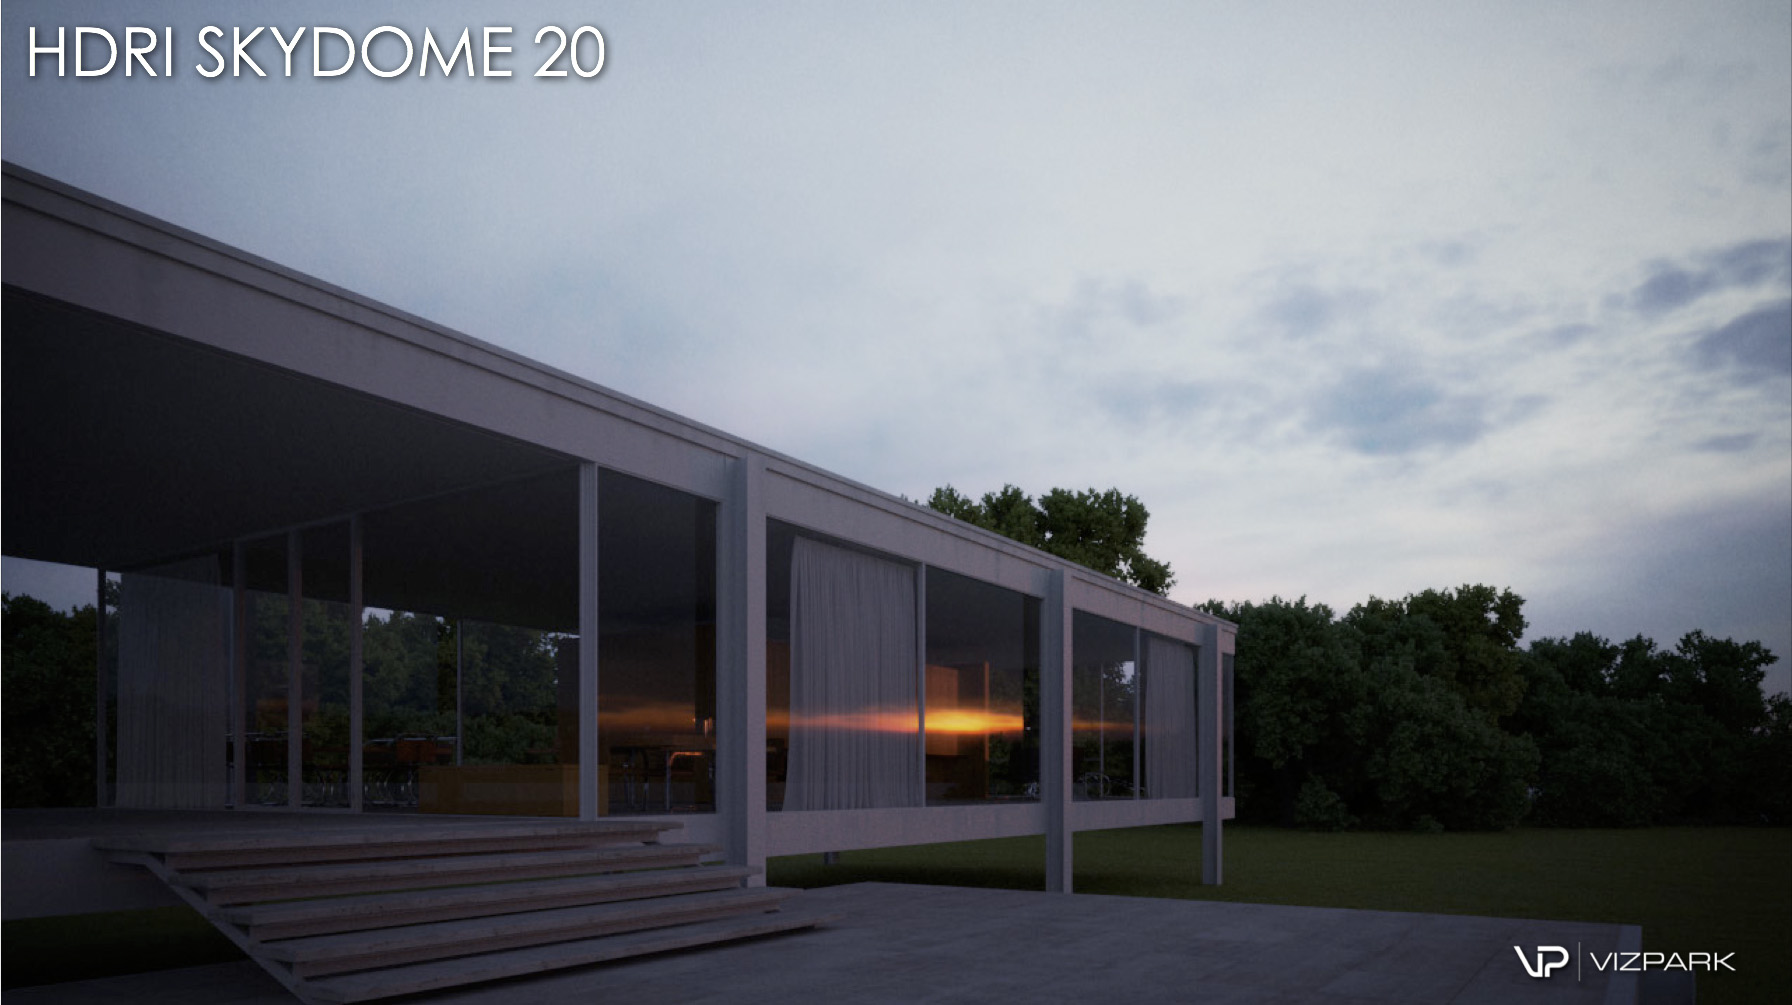
The HDR image I used for all images-indoor and outdoor. The only things you want to be sure of when using and HDR in the texture channel on a Vray dome light is to make sure it's a 'Vray Shader' and that you set the gamma correction to .75. These settings will ensure you get hard shadows from the sun and nice color coming through from the sky.
Now it was time to add lights! I was surprised to find that this period in time actually had more artificial illumination than expected. So once all of the city buildings were in place it was another phase of adding lighting in a believable way through building lamps window lights and illuminated signs. I mostly used area lights as spheres to emulate light bulbs, the luminosity channel in a shader for window lights and then an HDR image from Vizpark for the overall night sky lighting. At this point I was doing a lot of little renders to adjust the balance of artificial lighting and sky light. You can take a look at my renter settings below. I always use brute force in combination with light cache for my GI as I like to know that it's creating a physically accurate render. It's already hard enough to make a render look real and I don't want to be concerned with the light and shadows being approximated which is why brute force is my go to GI method.

A raw render of the city street with lights in place. Again, all lights were area lights or textures made of a luminosity channel.
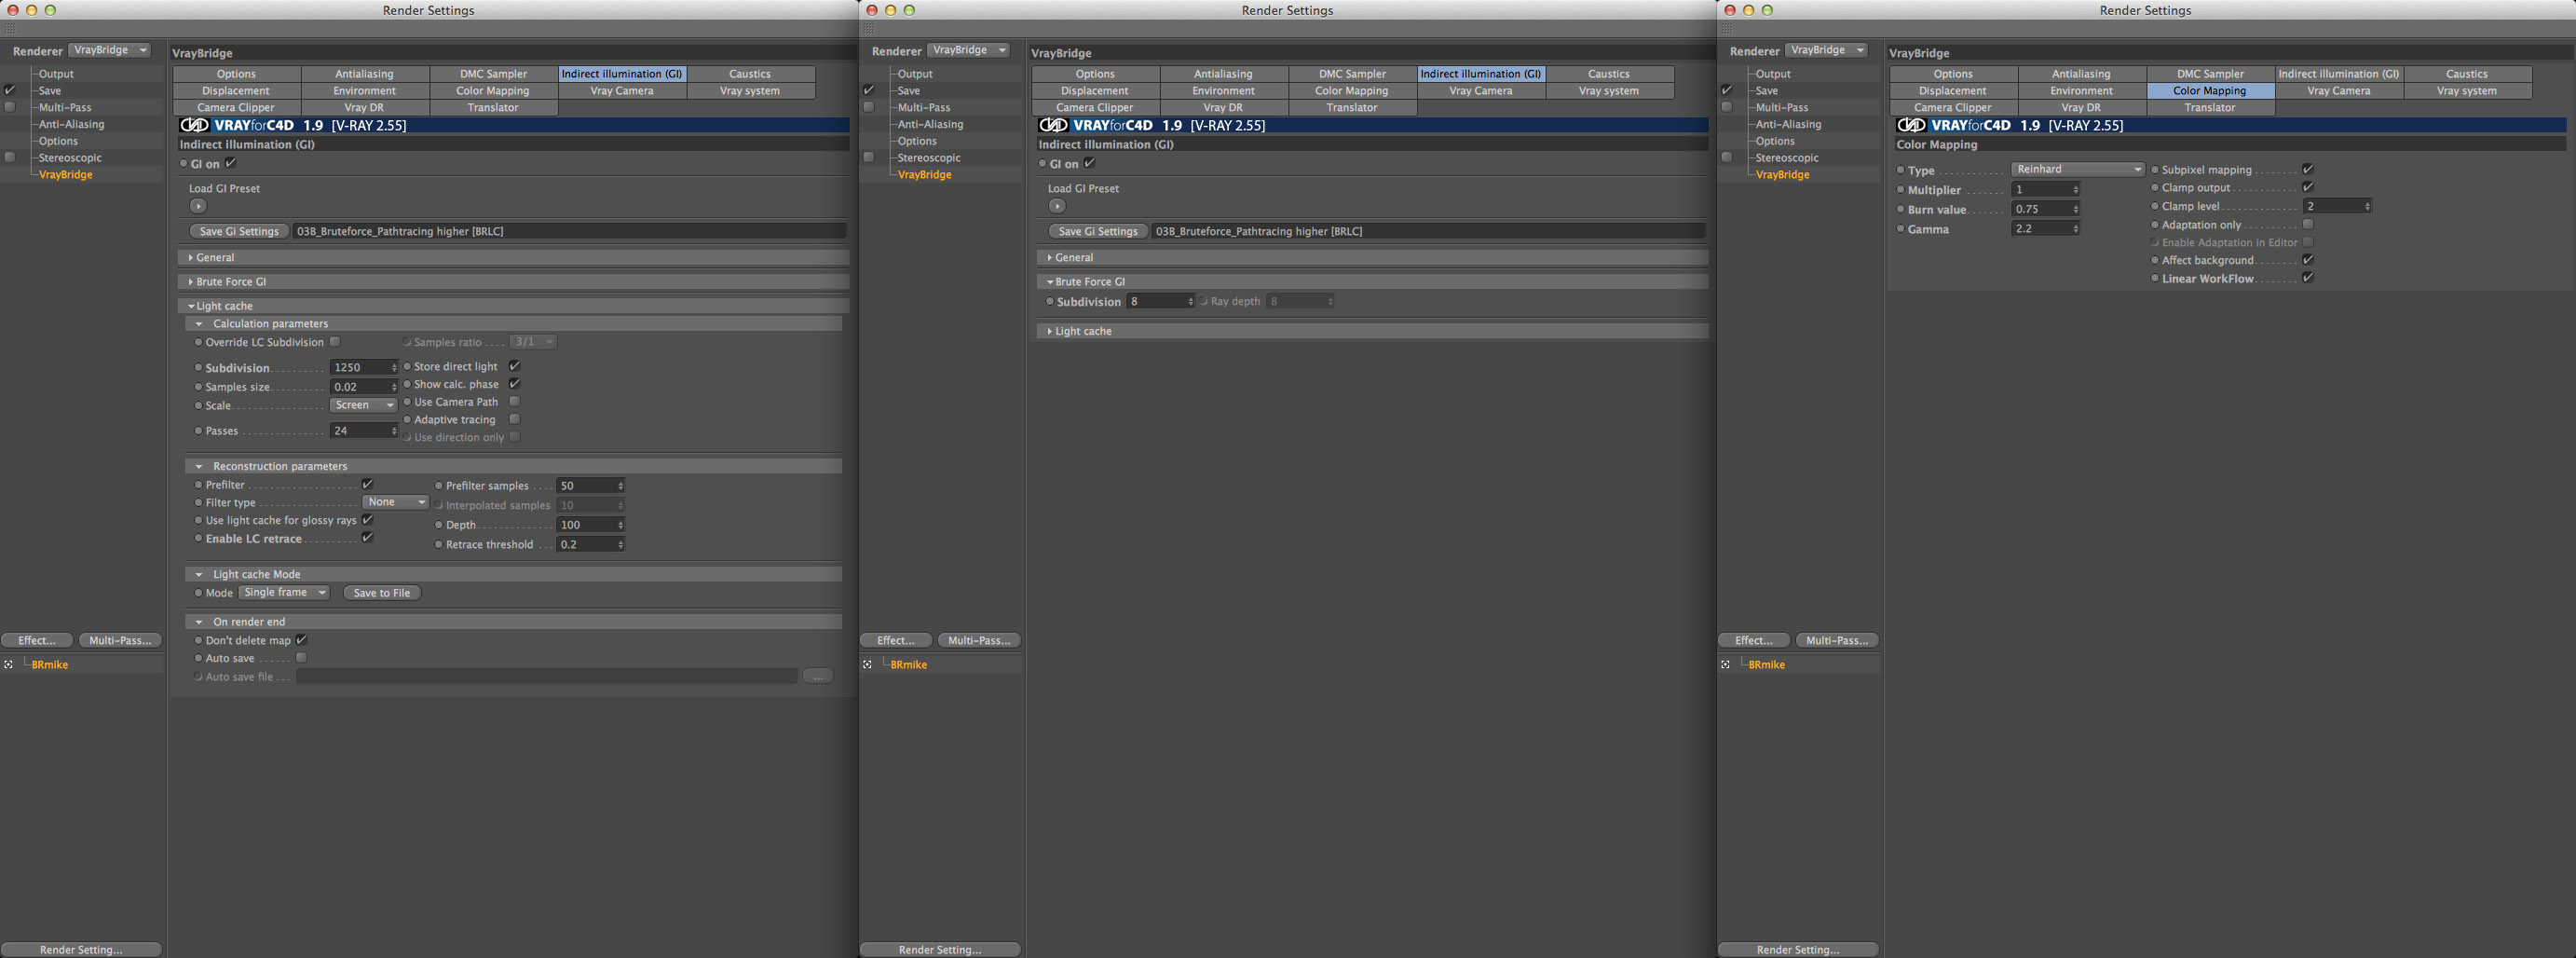
Render settings above. note that the Brueforce subdivision is left at 8 because the HDR dome light has a subdivision of 48-so the render still comes out smooth and grainless. Also note that the Light Cache has the 'enable retrace' checked on as it creates accurate shadows in those little tight spots in your images.
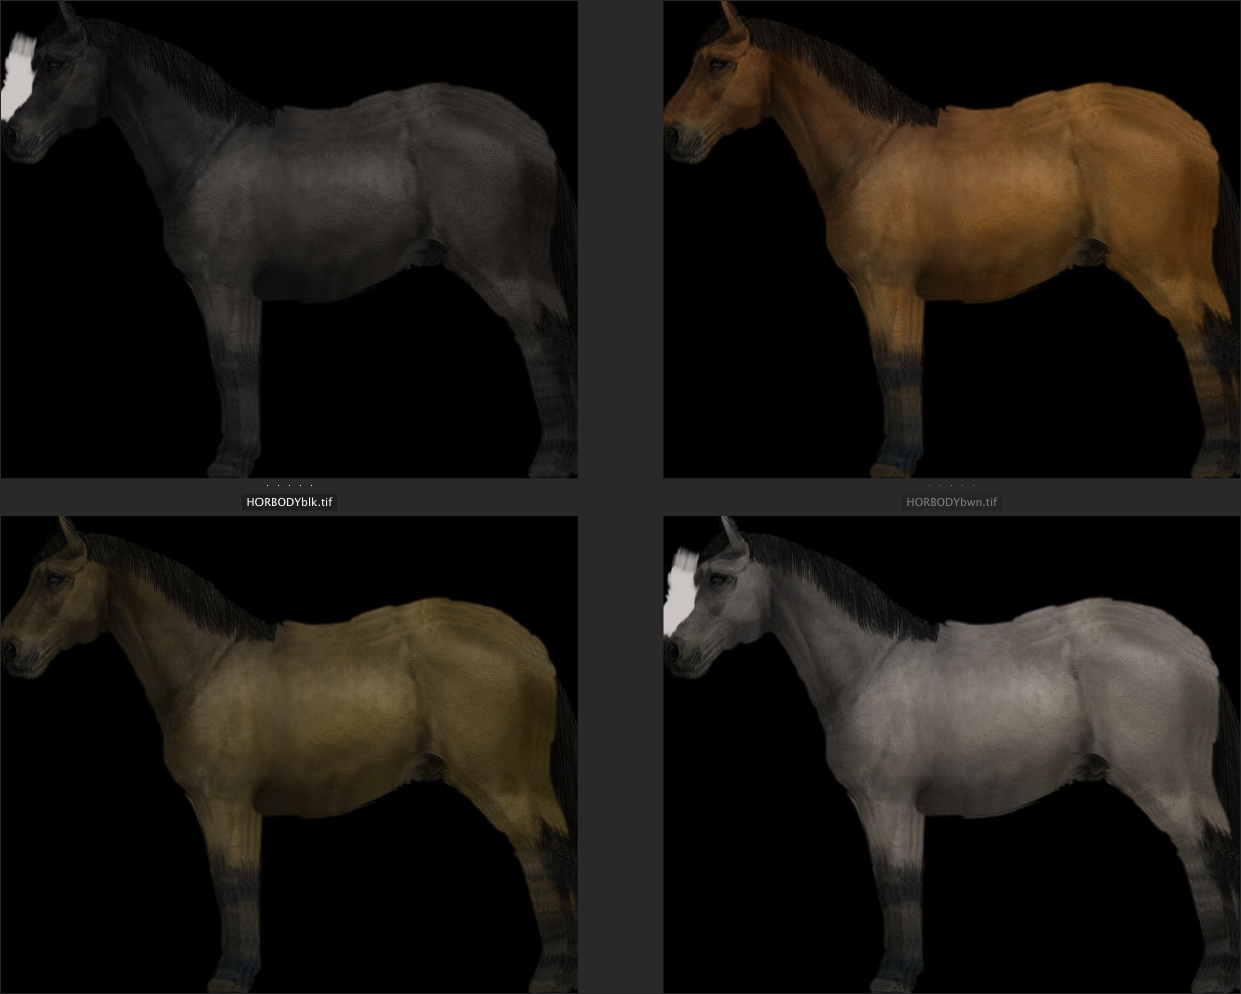
I finally had a complete city block minus all of the people and horses and carriages to make it look alive. I found a couple of free carriage models to use which I detailed out and added custom metal shaders to. I found a single horse model that I made multiple texture maps for to simulate a variety of different horses. I used see Zbrush to pose them in slightly different ways.
I then moved on to the interior train station and dining car. Again lots of trial and error refining the shaders for all of the various materials inside and out. One of the shaders that stands out was the wood interior of the dining car I used two channels of specularity to achieve a shiny wood material that had fingerprints and other imperfections on its surface as well as the DirtShader to recreate the look of varnished wood. One of the challenges when applying Vray textures in the viewport within Cinema 4D is that they are often miss represented as solid black or very low rez so it's hard to tell if you have the proper scale. So again, lots of test renders. This part of the process is the most painstaking because the test renders slow down your creative energy. Needless to say I'm looking forward to Vray RT.
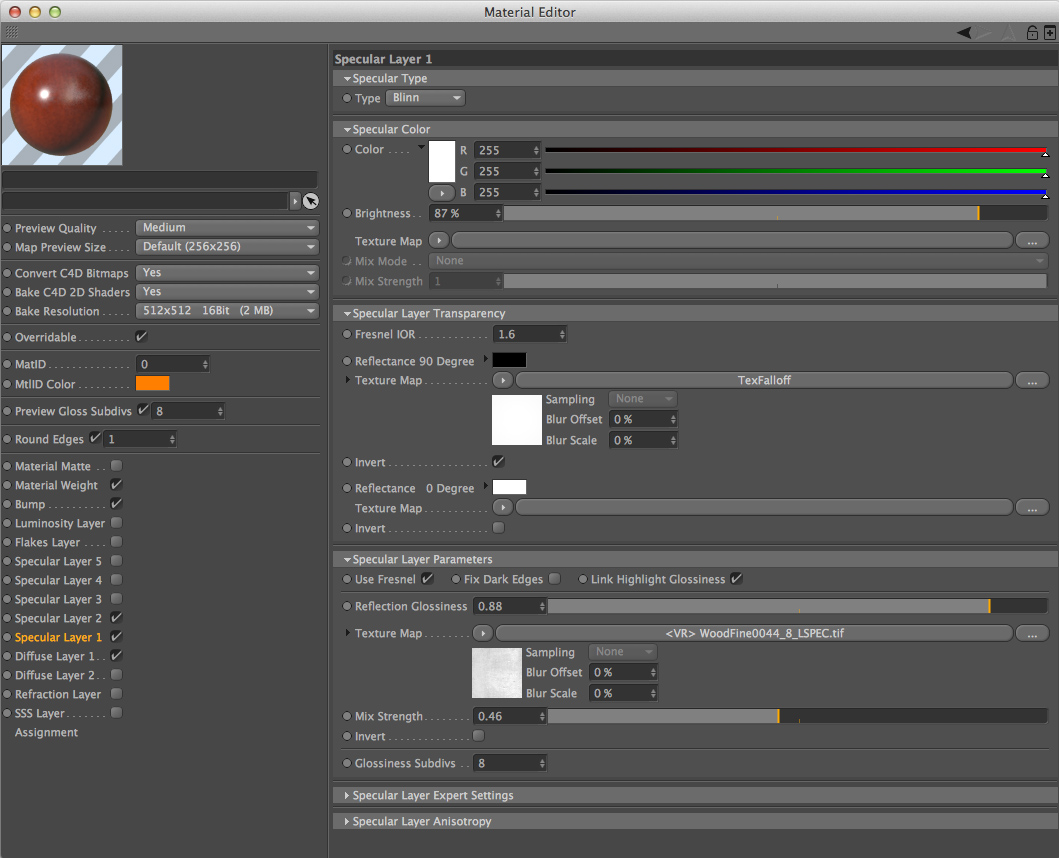
One specular layer was quite glossy while the second layer dialed the glossiness down to .65. This gave the wood the shiny varnish with a dull glow around the hot spot which makes the wood feel like it's been there for awhile.
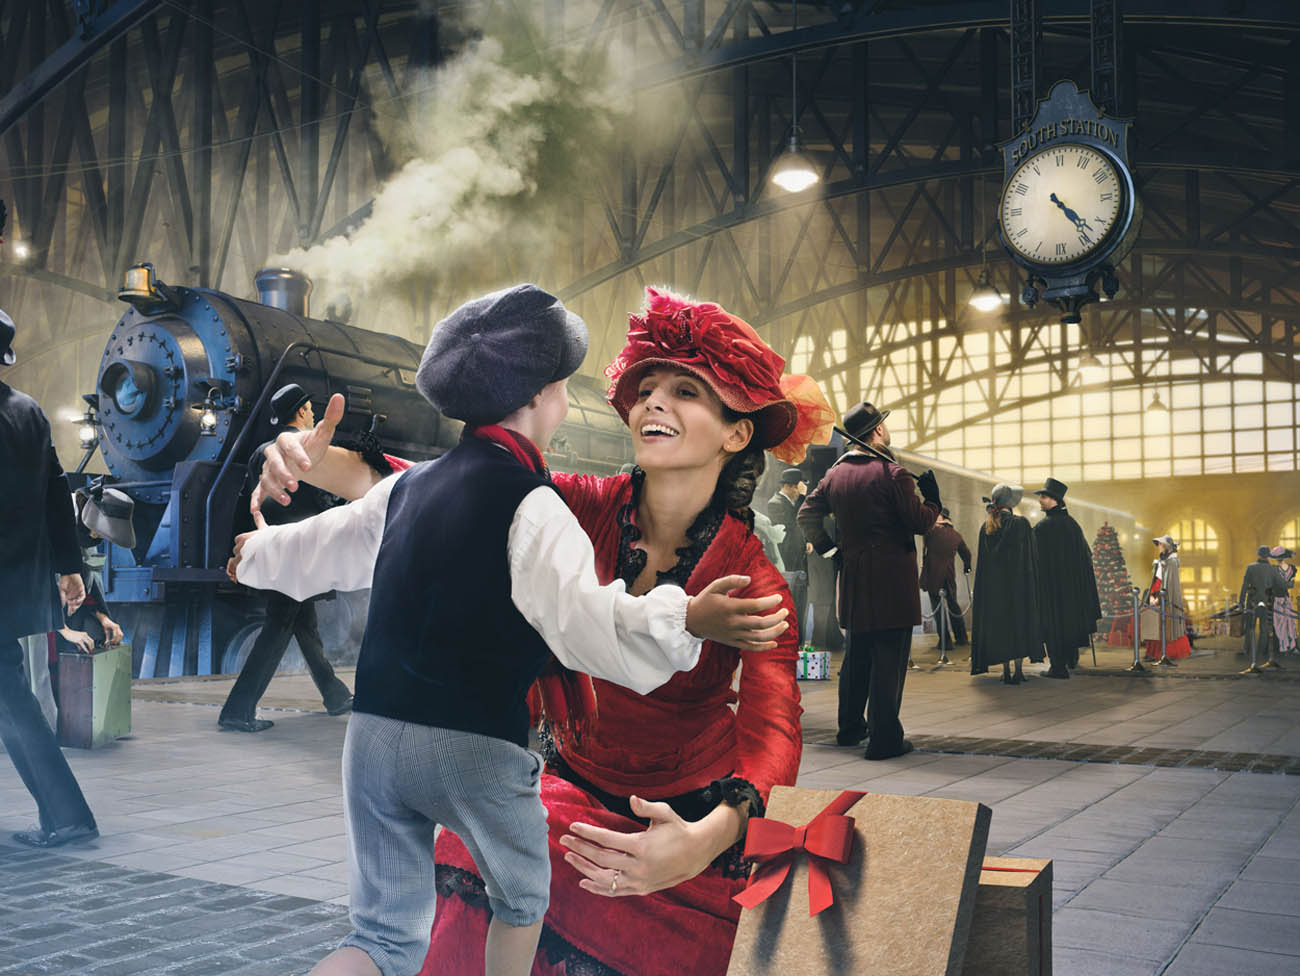
At this point I had all of my sets created. They were textured and the test renters I had done so far we’re looking good. But now it was a juggling act of rendering them all at least 6K and doing so in a timely manner. I had 36 physical cores to work with in my small render farm but many of the renders still took up to nine hours each! And I usually have to do 1 to 2 rear re-renders because something isn't right. So while all of this rendering is going on I moved onto the photo shoot aspect of the job. I rented 10 costumes from the Victorian era and had about nine models to work with. Each model had to do many poses at many different focal lengths and angles for all of the different shots. Plus they had to play multiple people because we had to fill a whole city street! I shot everything on a green screen and created some custom actions in Photoshop to cut each person out, color correct and retain the shadow information on a separate layer. This was hugely helpful as there were hundreds of models to cut out for all of the images.
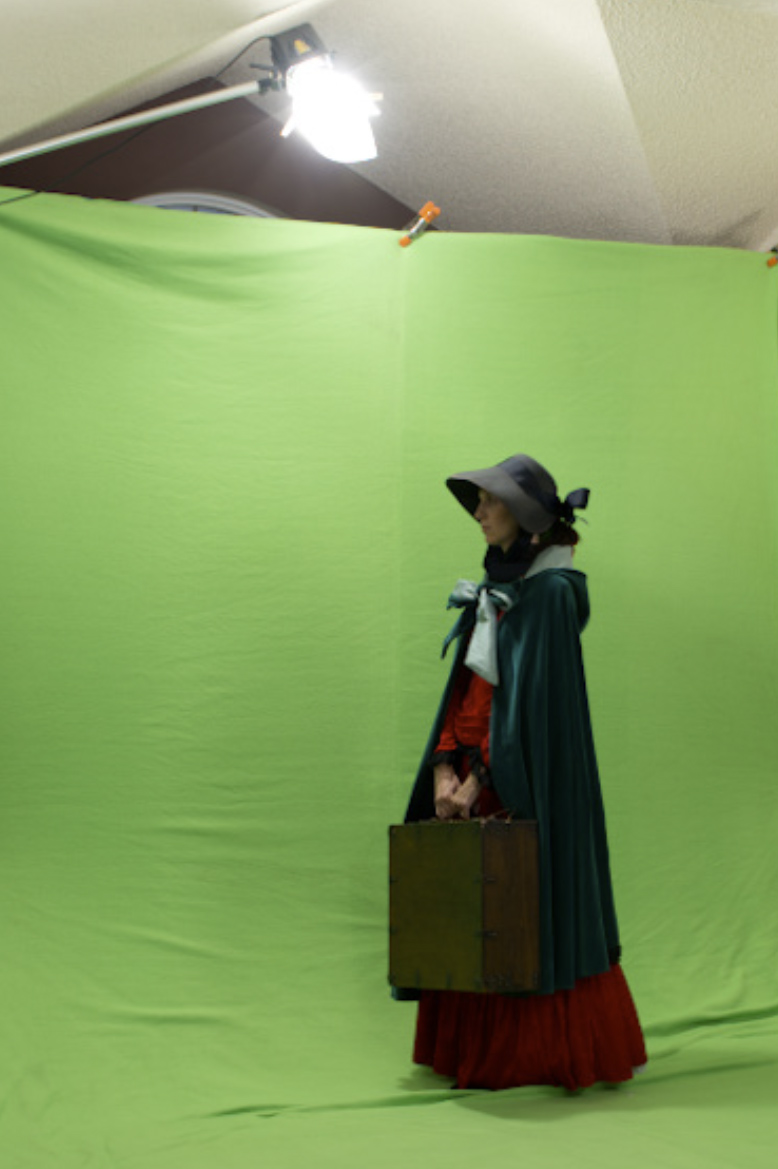
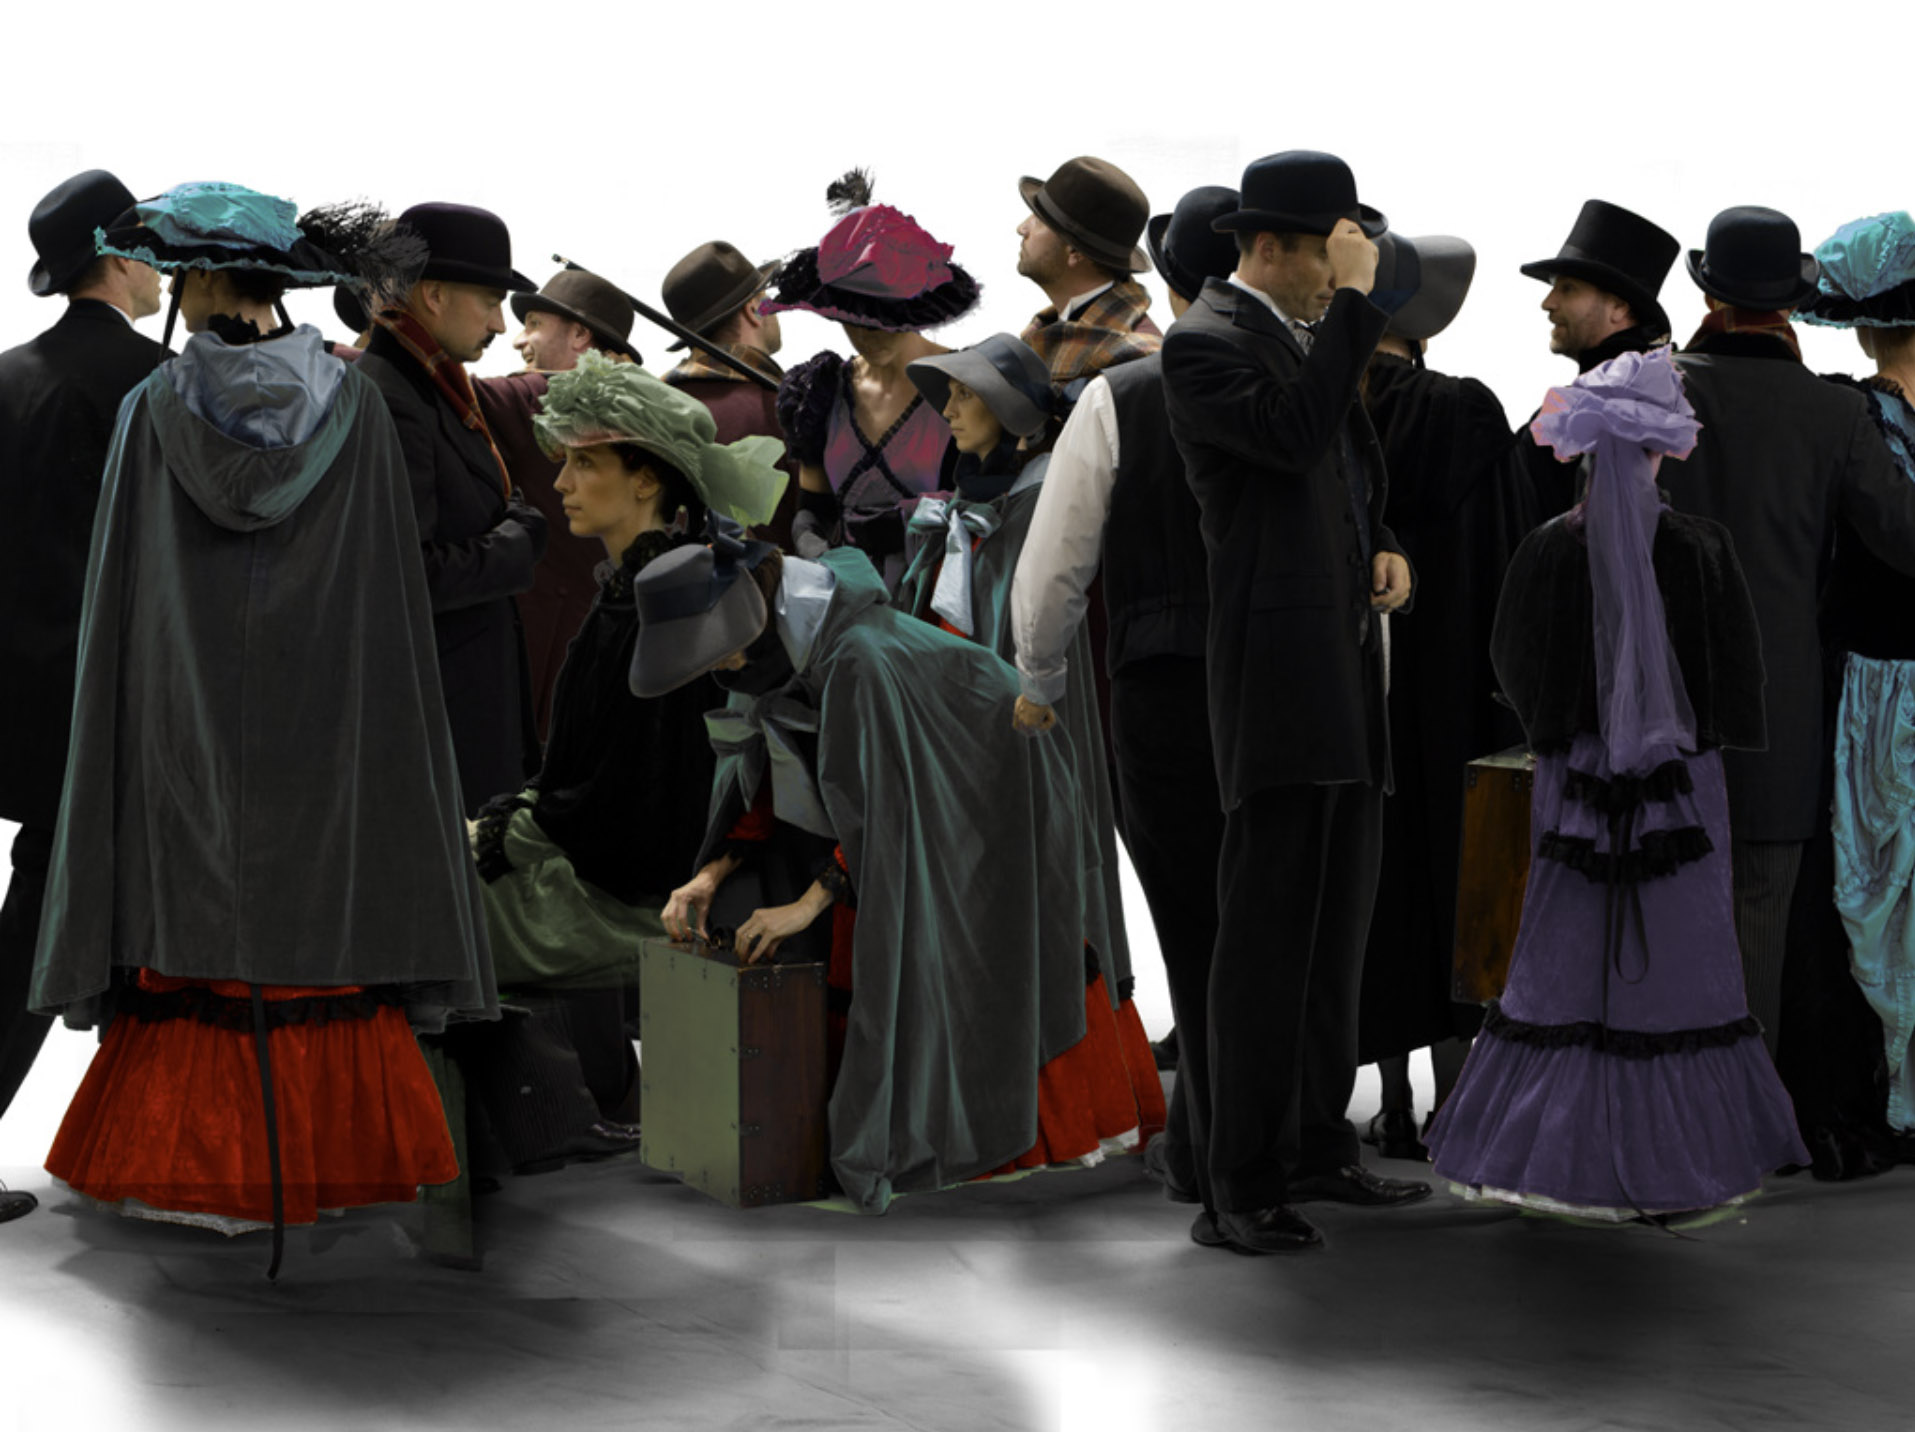
After the custom action was written, all photos were automatically cut out of the green screen and then a separate layer was made for the shadow information on the green screen floor. The shadow information was desaturated and set to multiply so that they could literally be dragged and dropped onto the final composite image in Photoshop!
I now have my renders complete all of my actors cut out and the final compositing phase was at hand. I've gotten to do a lot of compositing in my career so this part of the job is actually pretty fun. I am very meticulous about matching lighting on actors and backdrops and the beauty of creating the environment in 3-D is that I can easily do that. And this time I created the backgrounds first so that when I did the photo shoot I knew exactly where to place my lights for each of the shots. I created Z depth passes of several of my images to aid in the compositing phase (see images below). Many times a depth pass is used for DOF effects post render in Photoshop but I did my DOF during render time for ultimate quality.
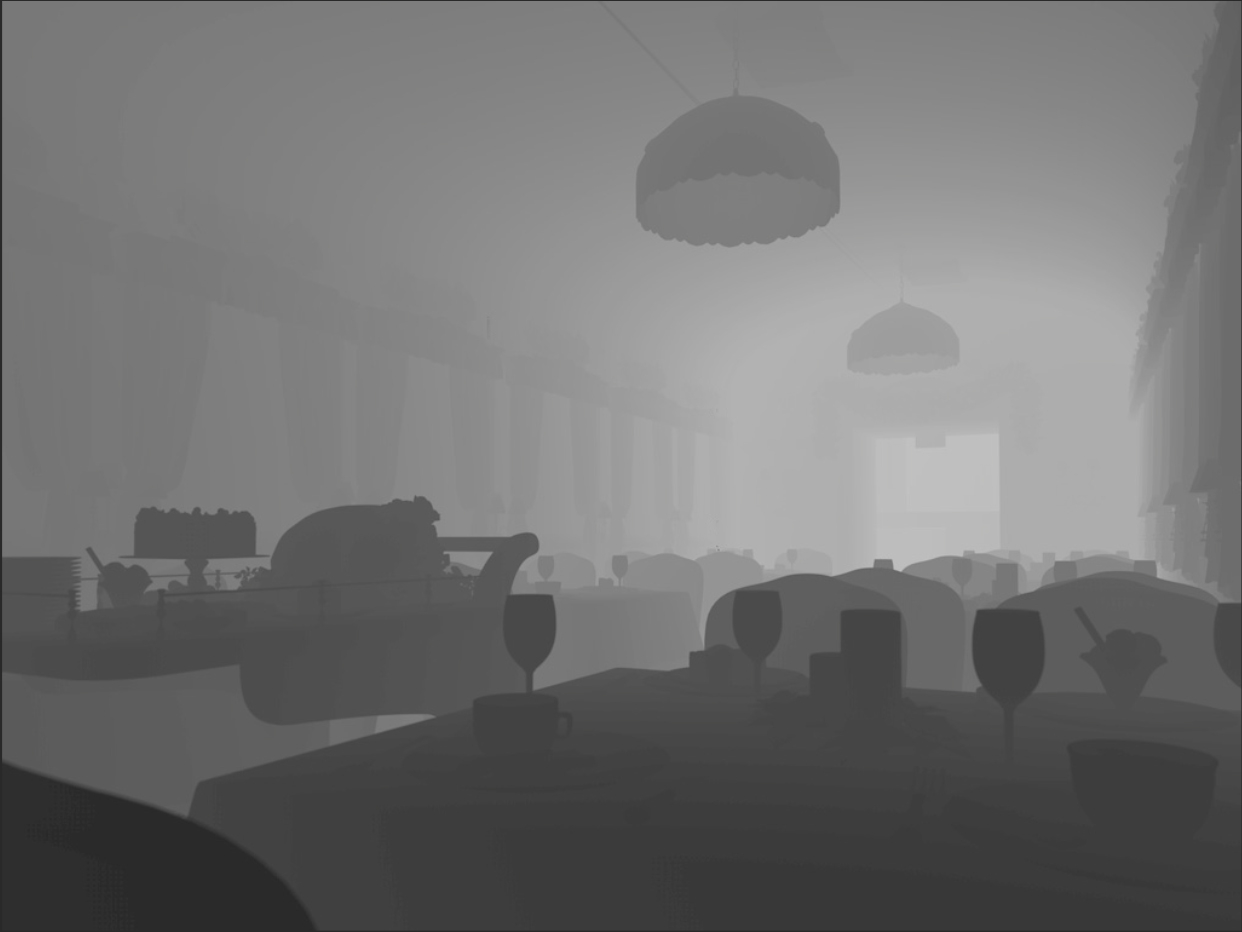
This depth pass was hugely helpful for the composite as you can simply put a levels adjustment on top of this layer, crush the whites and blacks to the depth that you want to insert a figure into and then do a luma selection within channels to mask out a section for each character. This was a great time saver as there wasn't any tedious masking with the pen tool!
one of the new renders with a more natural, photographic look instead of the whimsical approach needed for the magazine work.
Thank you guys for reading this making of and I hope that you found it useful somehow. Best wishes!