Ibrahim Alameer describes us his work-flow in a very nice, colorful and balanced interior project using Corona Renderer. Enjoy!
Hello everyone. My name is Ibrahim Alameer and I am an architect and 3D visualizer who has the passion of creating realistic CGIs.
It has been 5 years since I entered this field and since then I've been trying to learn new stuff every day, and today I have the chance to share some of what I’ve learned with you.
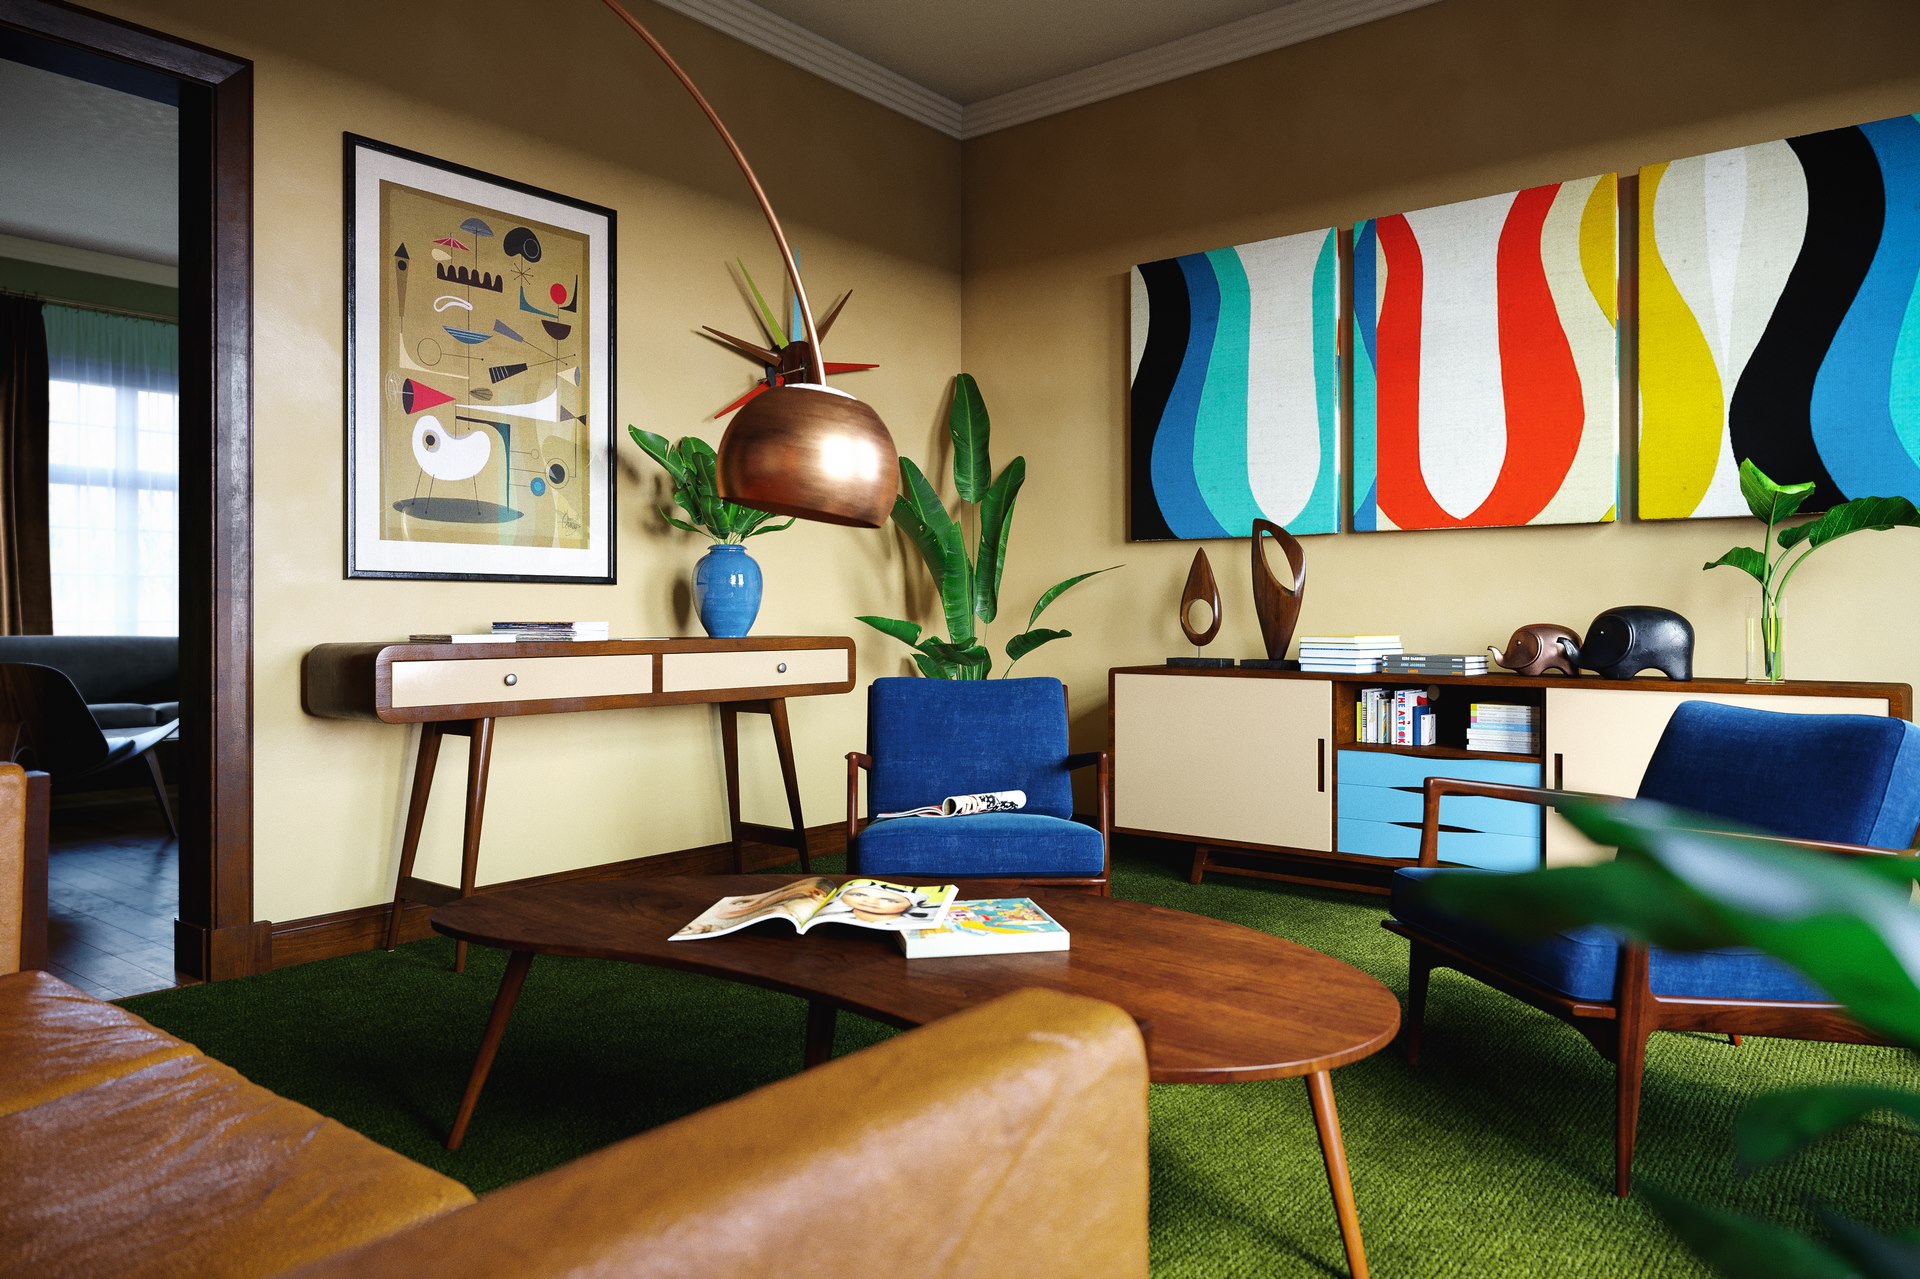
Recently I made a project entitled “Mid-Century Modern Interior”. The main purpose of the project was to explore corona render engine features and render quality as this was my first project using it. So, I spent a good time working on materials and lighting to get the result that I was aiming for and I think that this project helped me learn about Corona a lot.

In this article I will go through the steps of making this project and share some tips with you (materials,lighting,cameras,post-production). I hope you’ll find them useful.

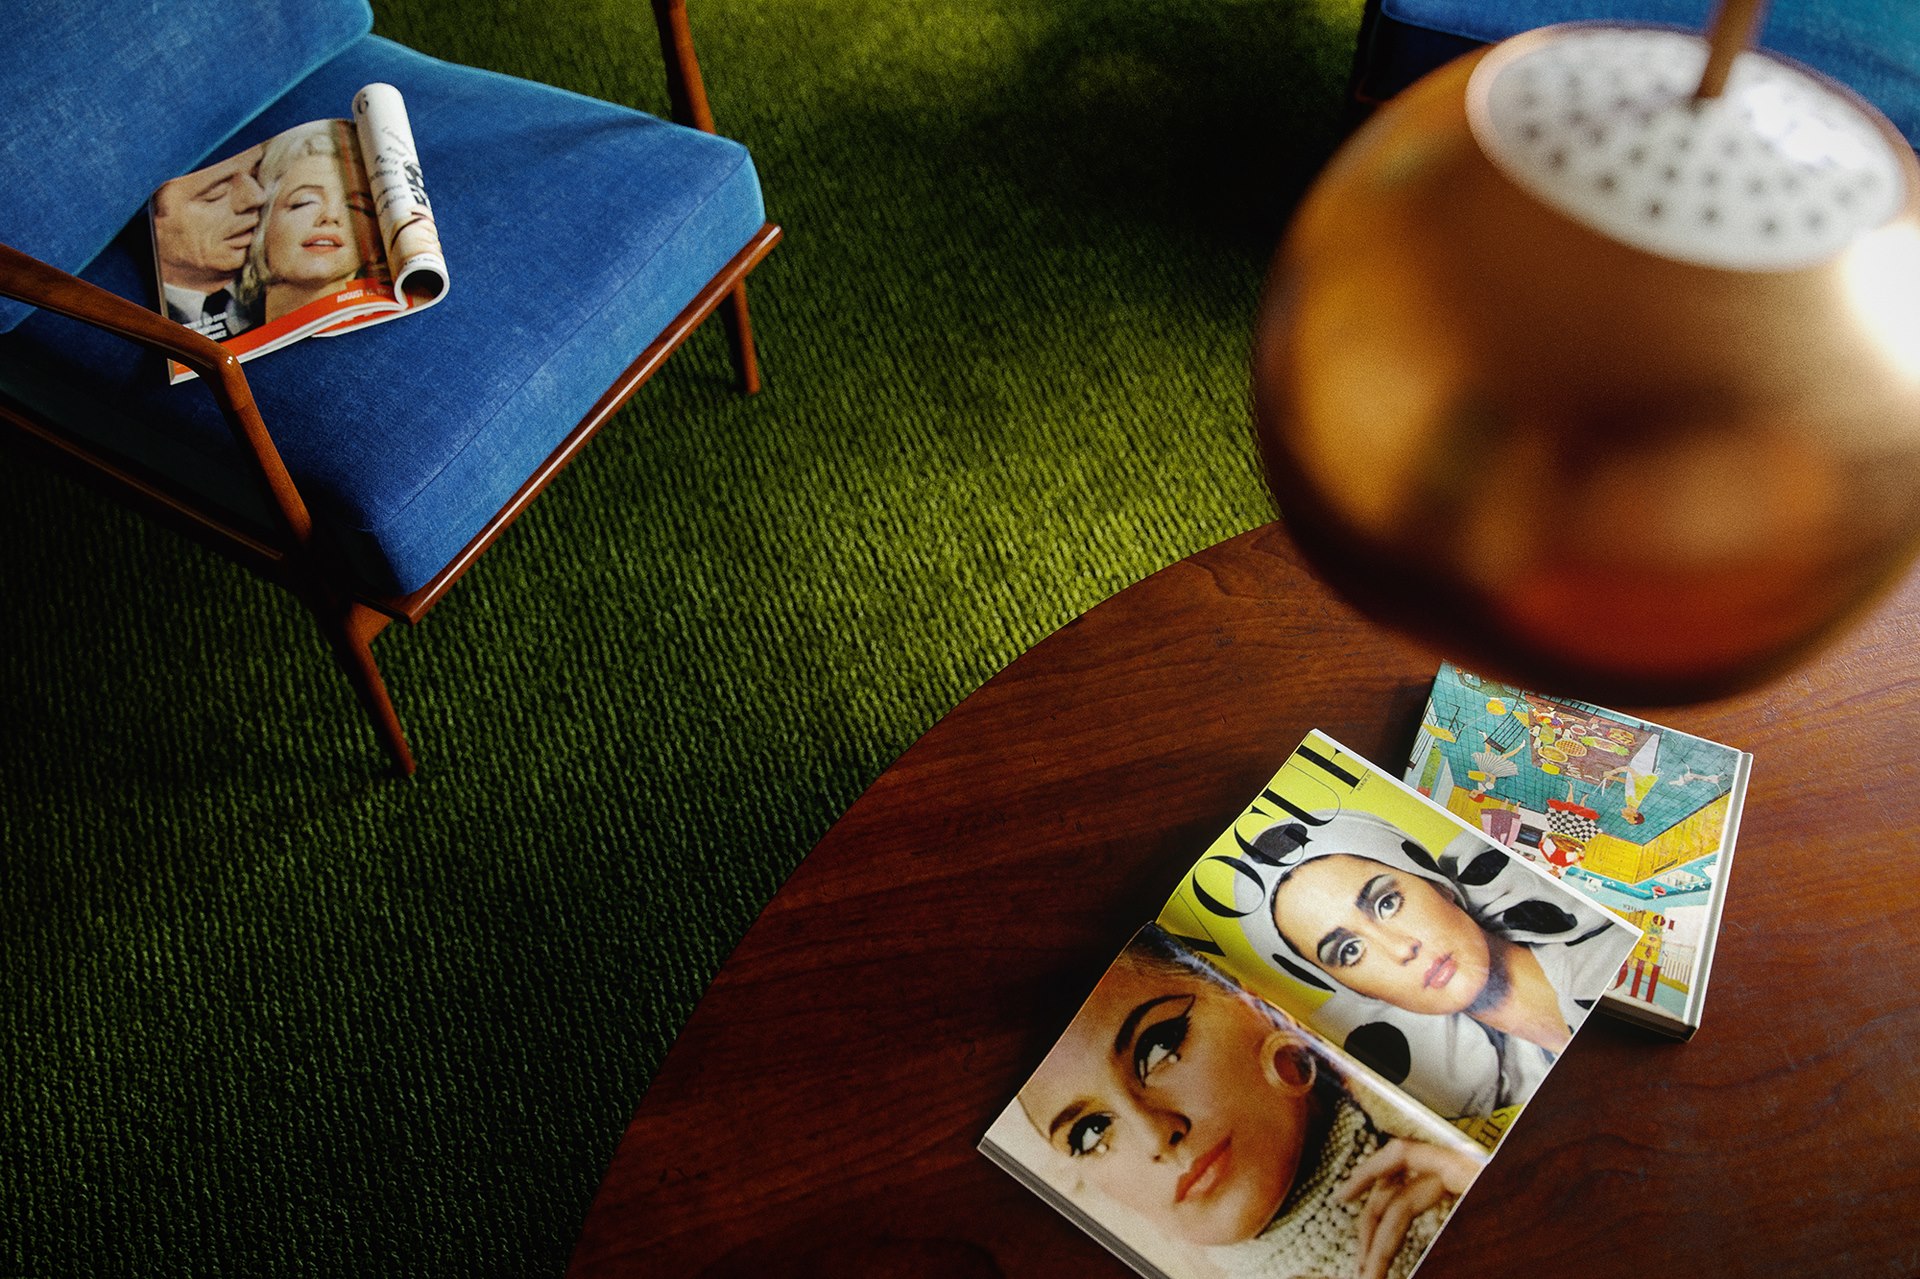
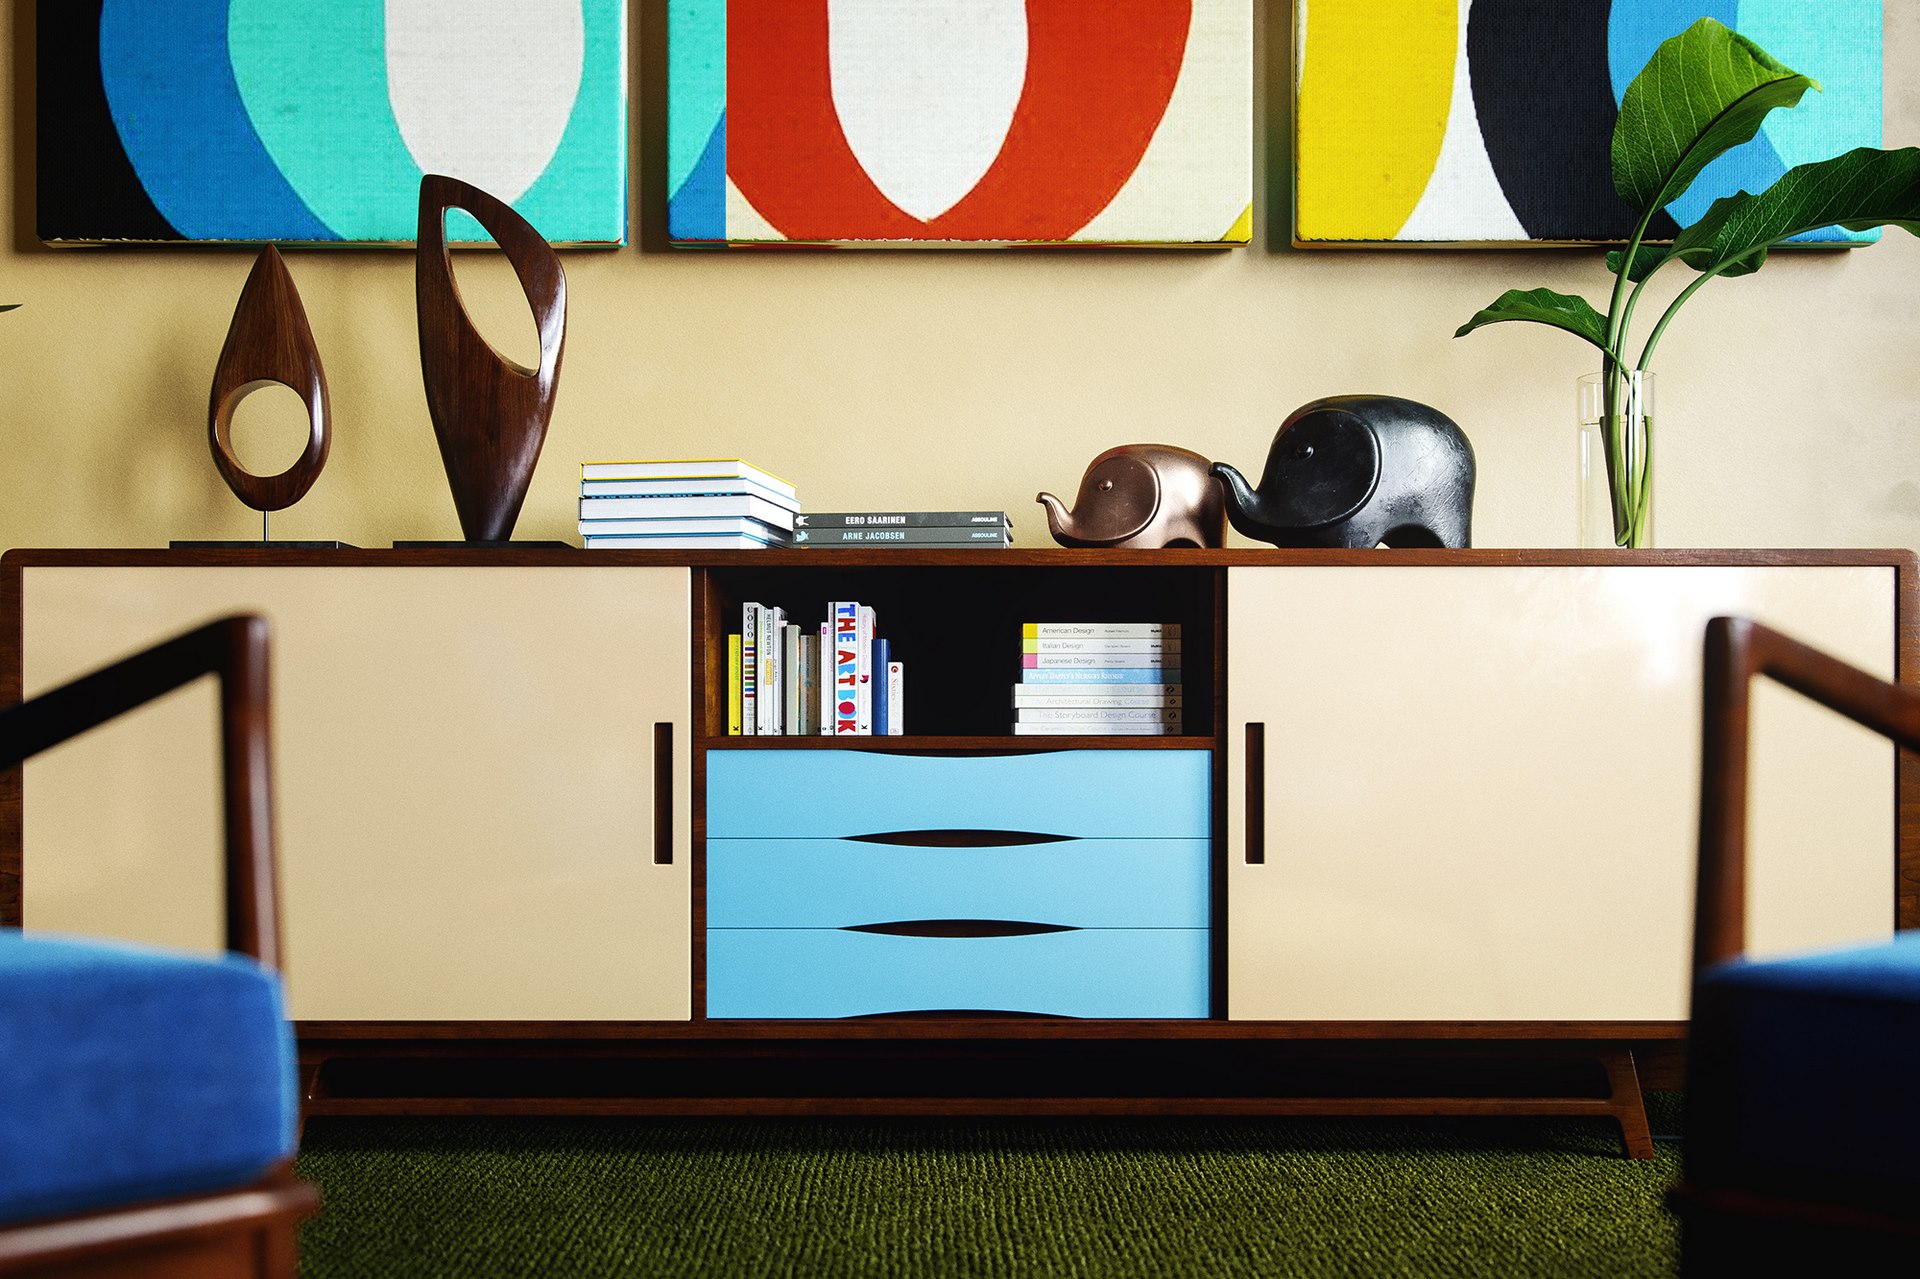
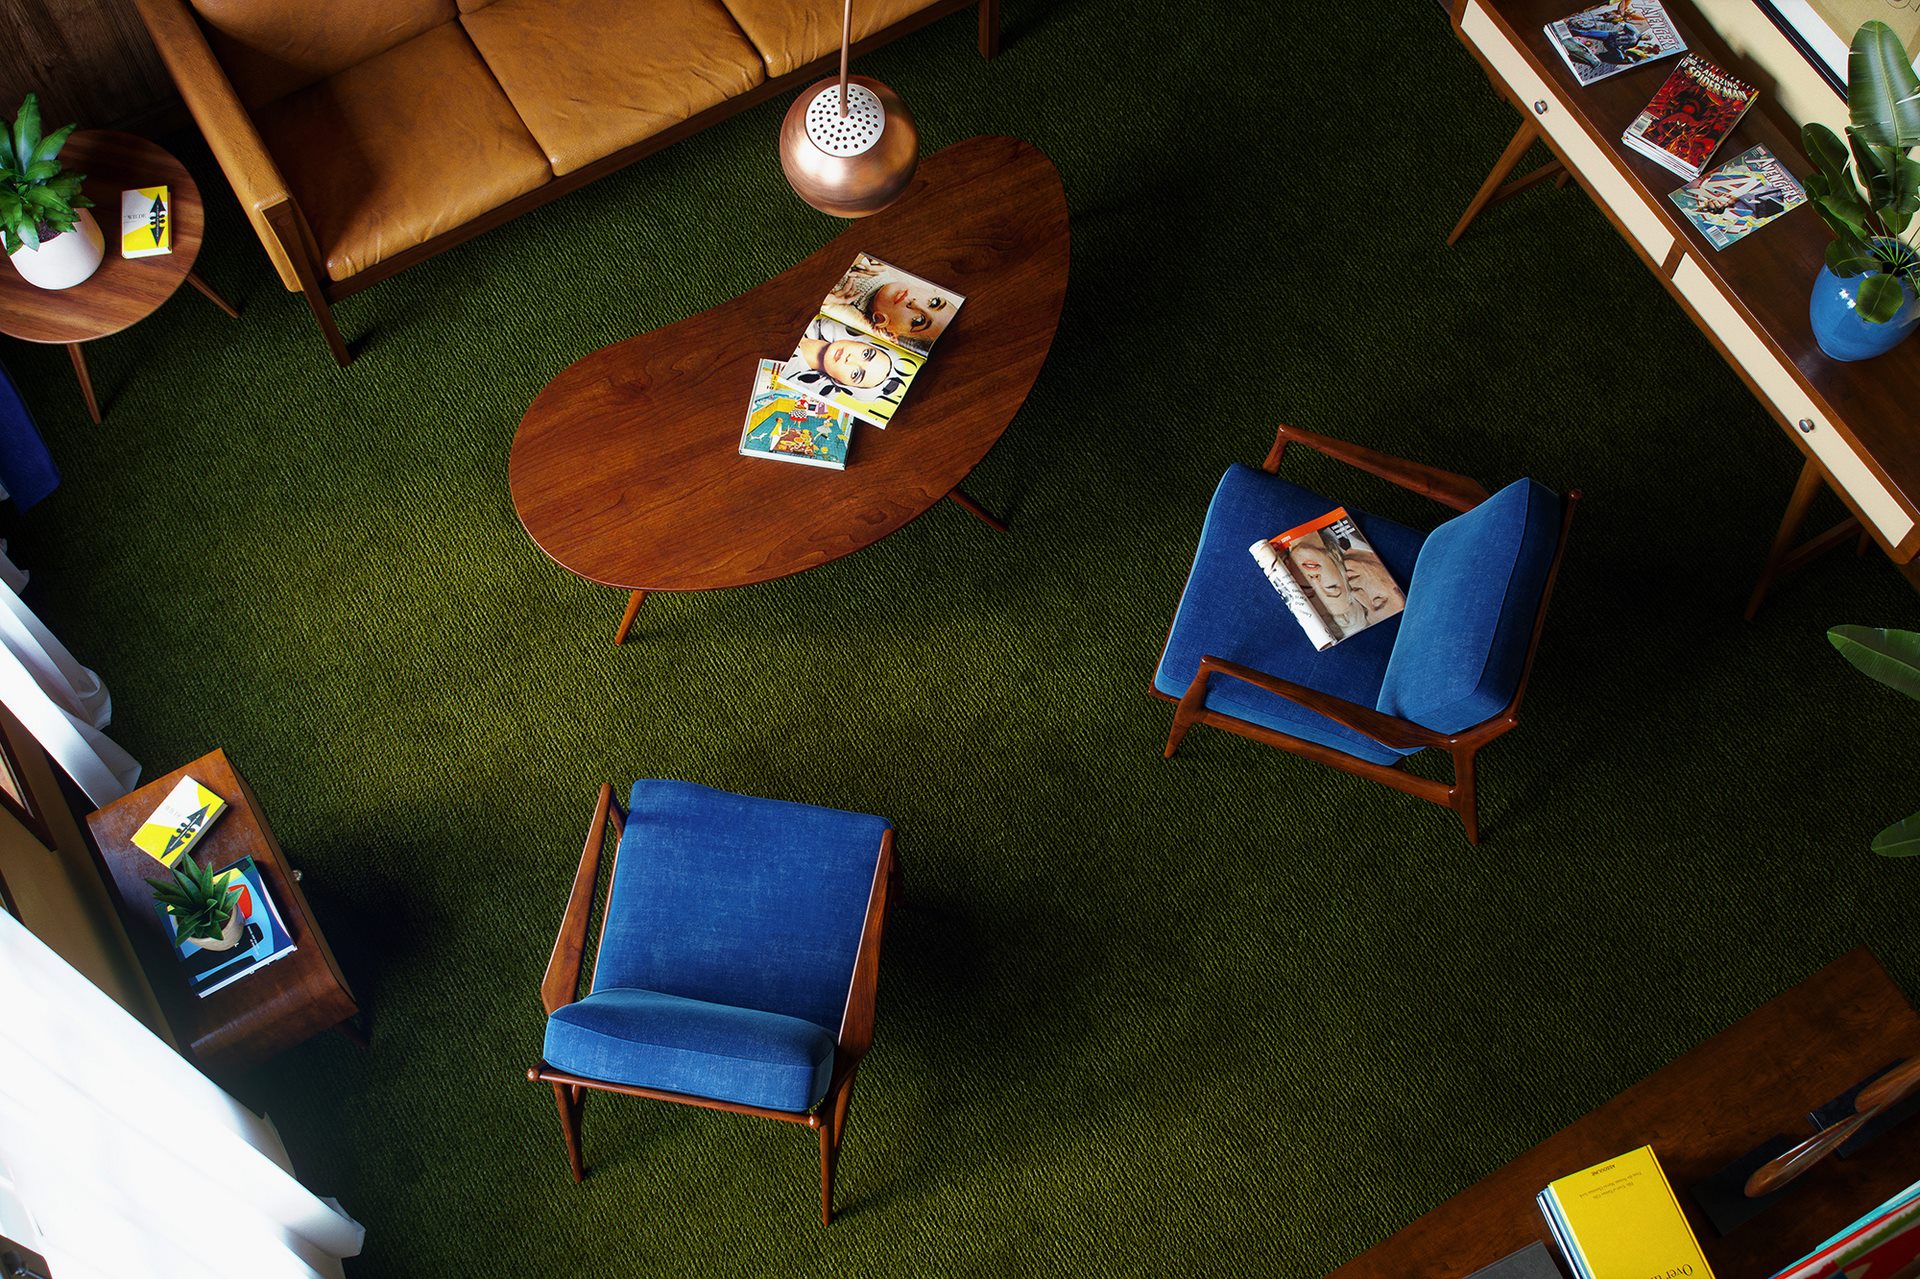
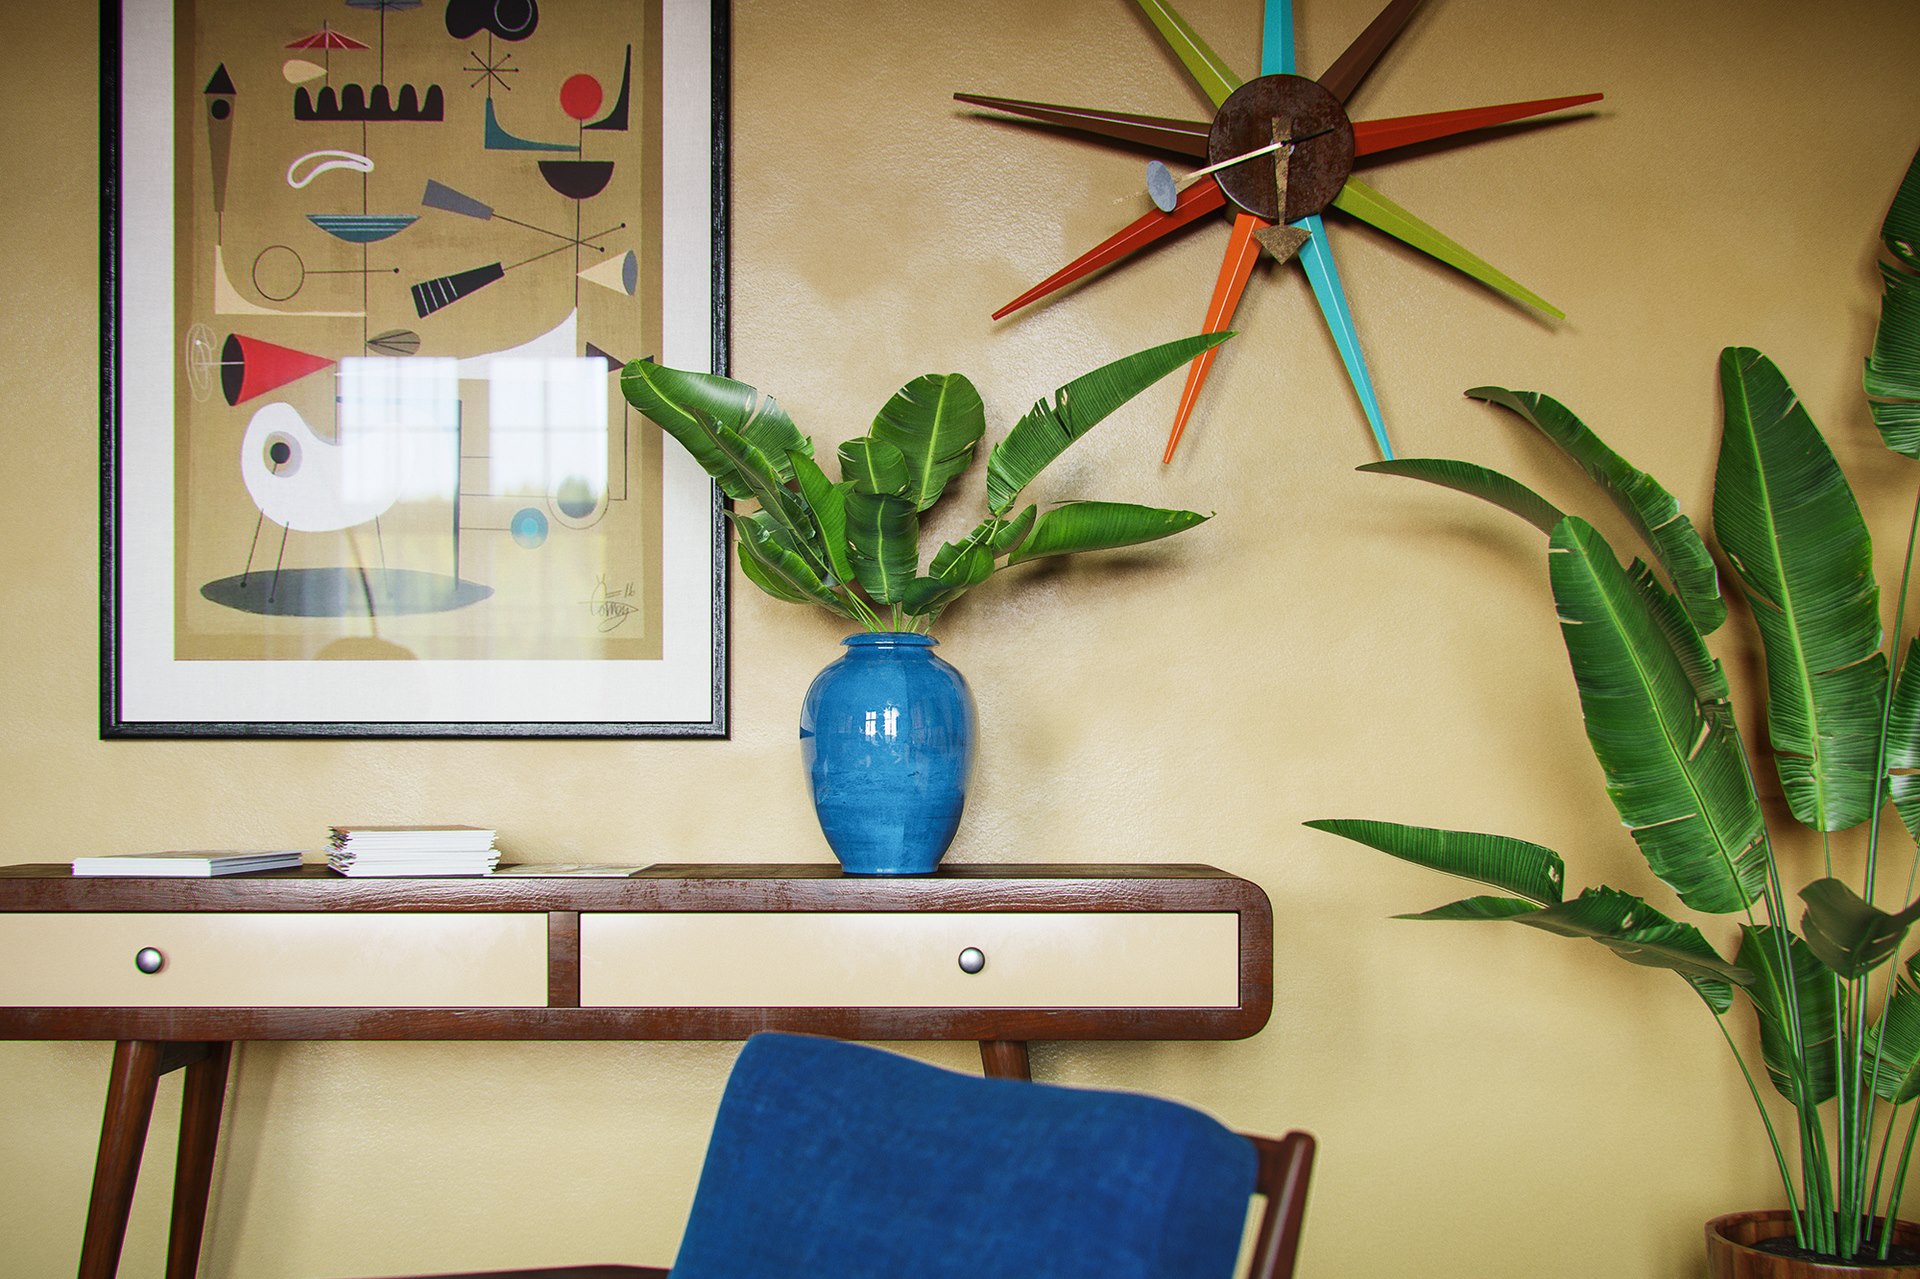
Mid-Century Modern is a term used to describe the art style (Architecture, interior, products...) of the era between 1933-1965. If you’ve seen an old movie, a poster or an image (surely you have) that was made then, you should be familiar with this unique style.I've always adored this style and this era in general. I love the architecture, the interior, the art and fashion, everything is unique and beautiful, so I decided to make a living room with the same mood. To achieve that I had to study references for the interior composition, furniture, accessories, textures and colour pallets.Here are some of the references that helped me create this work.


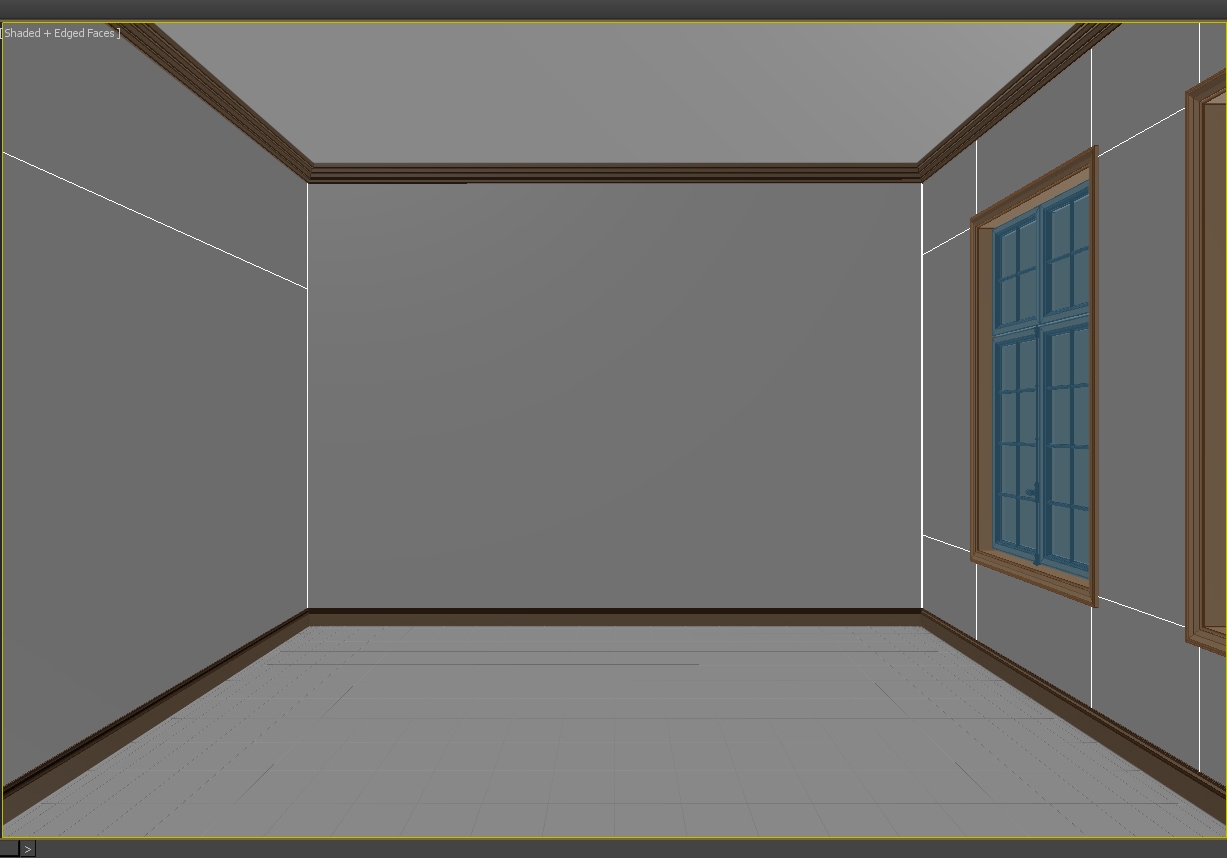
There’s nothing special I can say about modeling. I started drawing walls using editable poly following the architectural plan that I made using Autocad. Then I used the sweep modifier for cornice and skirting and window frames.

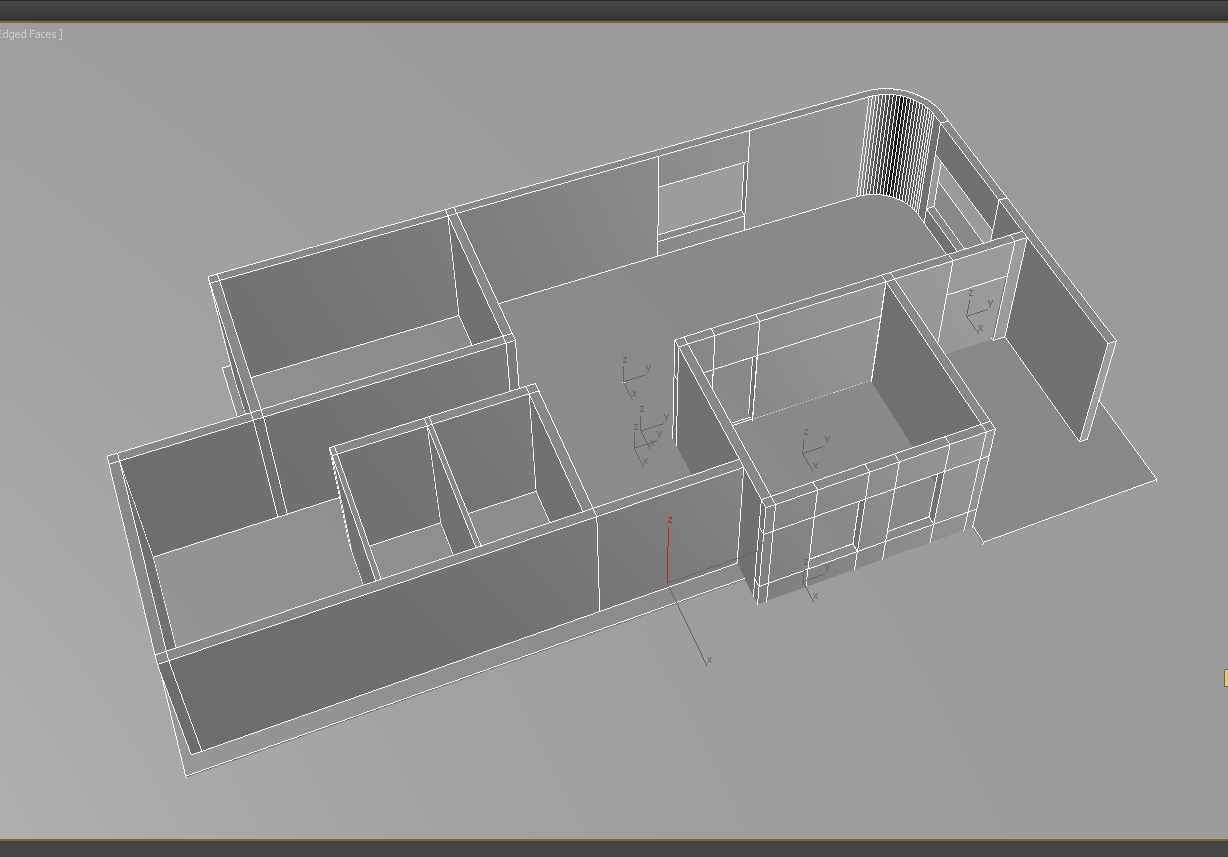


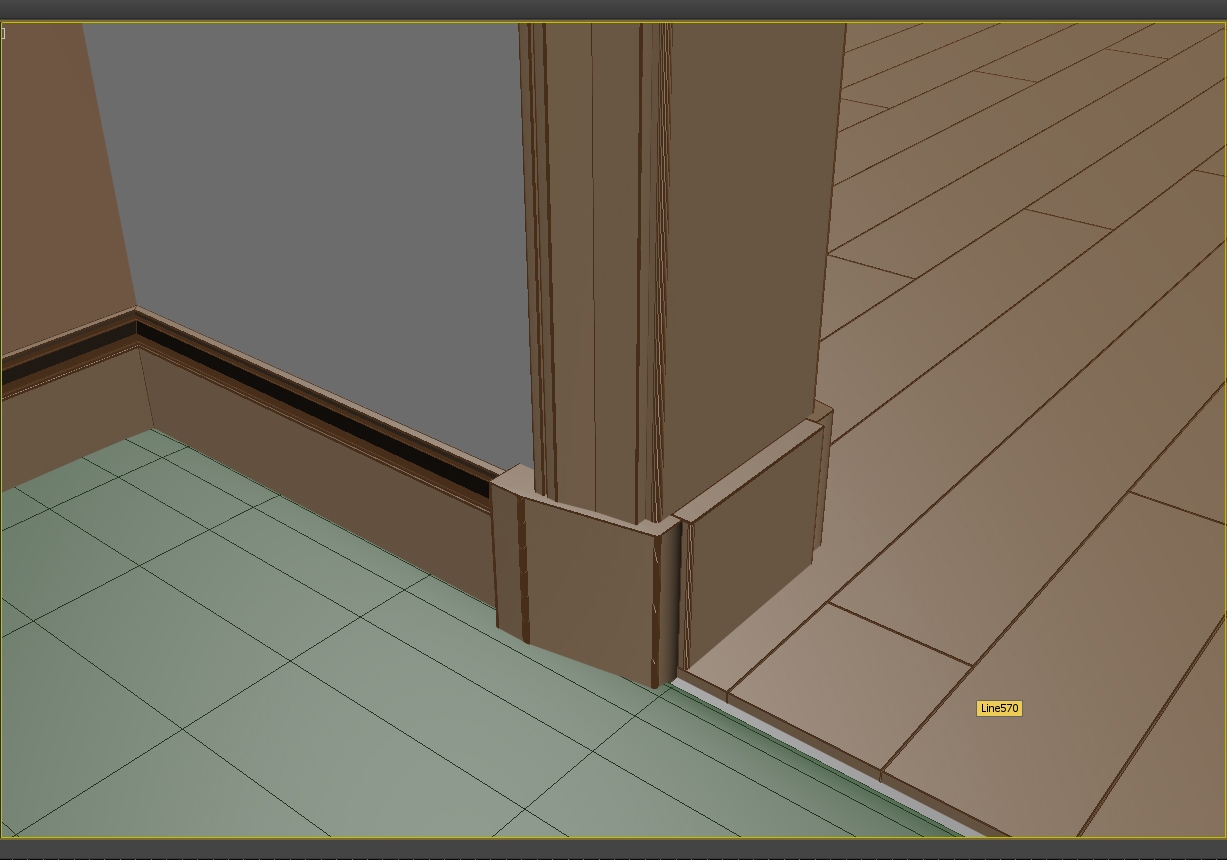
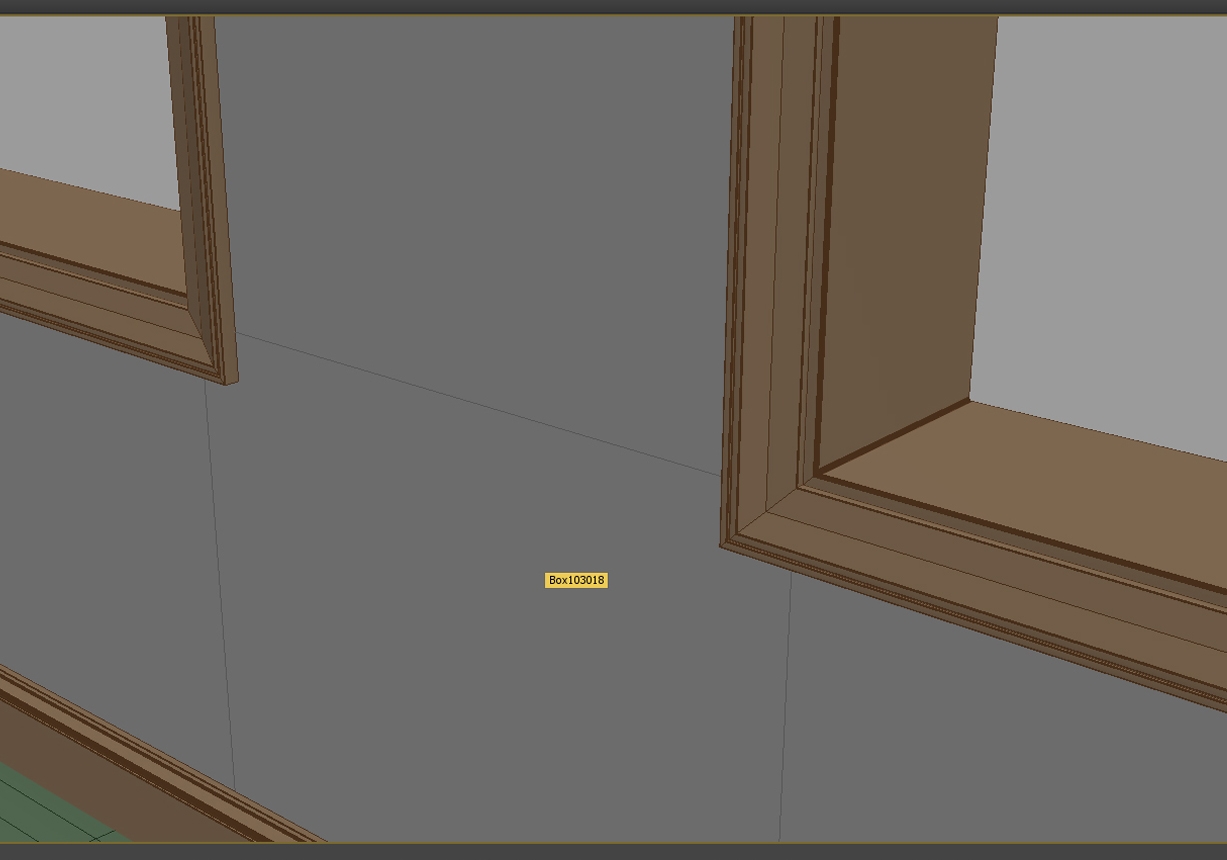
Skirting & Frames details.
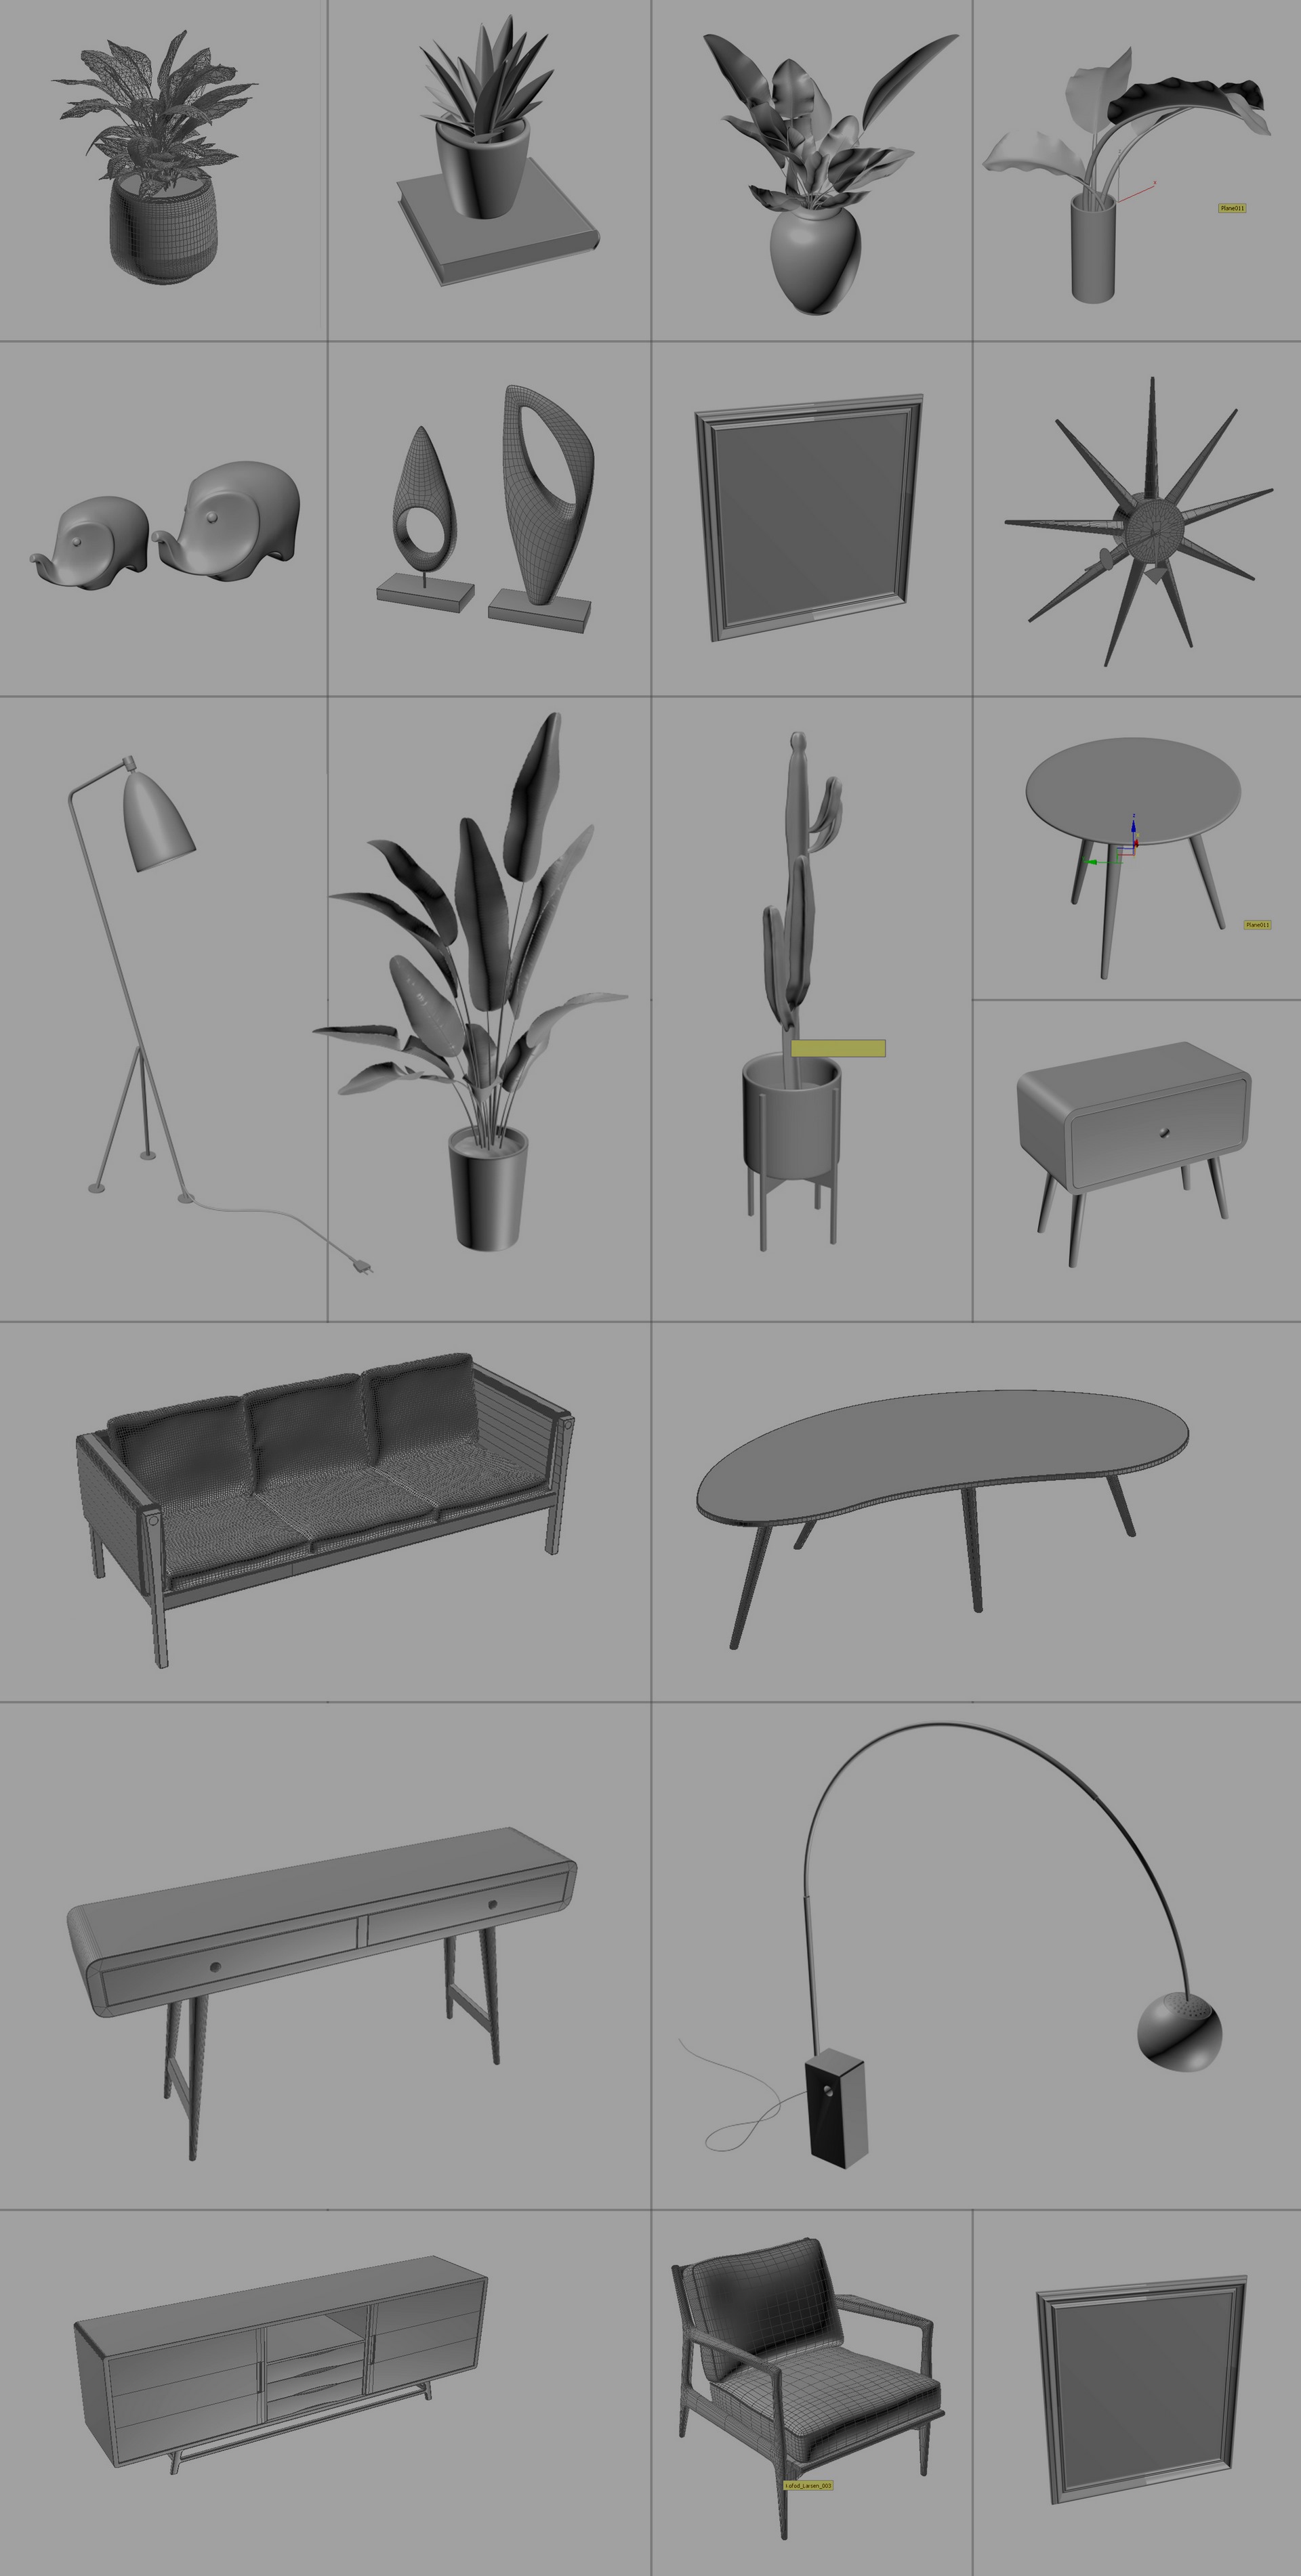
These are the models of the furniture and accessories that I used in the scene. I modeled some of them and you can find most of them at 3dsky & Google 3D warehouse.
Also you will find some great furniture of the same style at the Carl Hansen site:

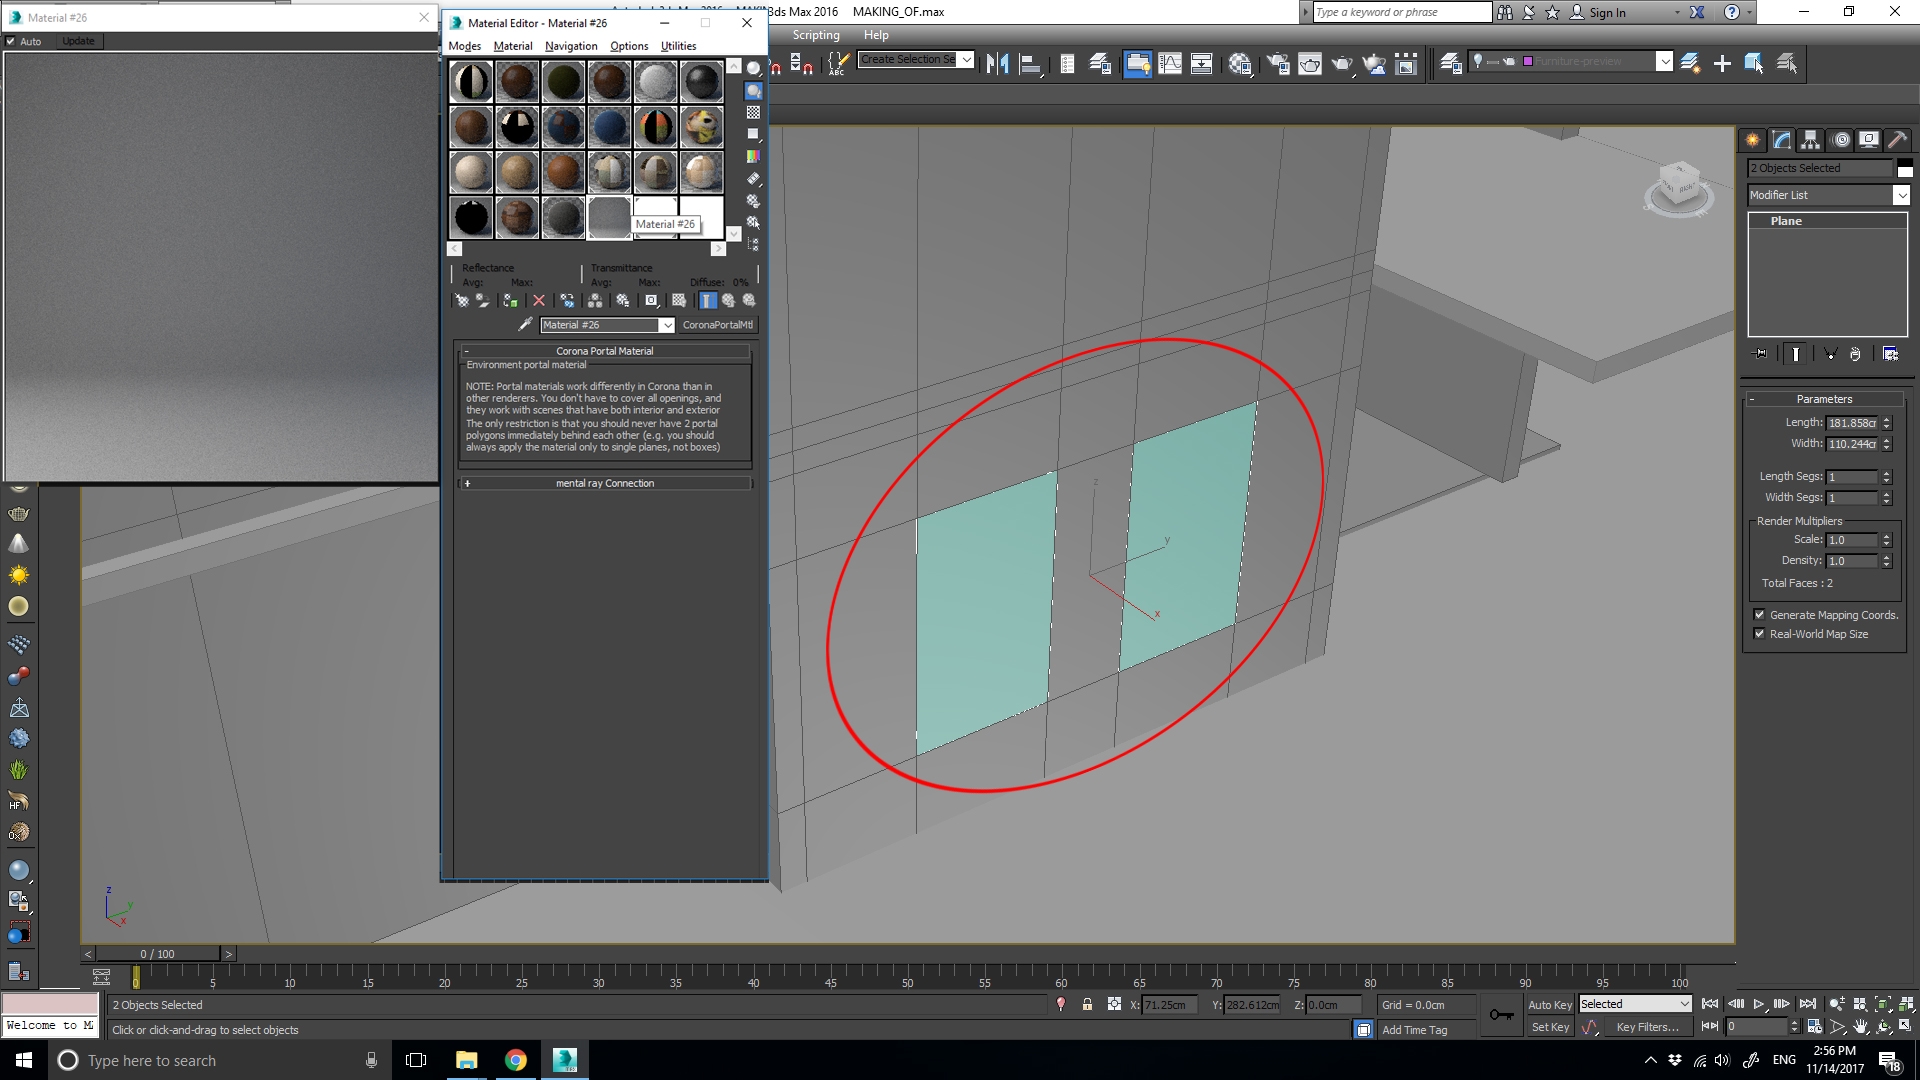
Don't forget to add sky portals on the windows.
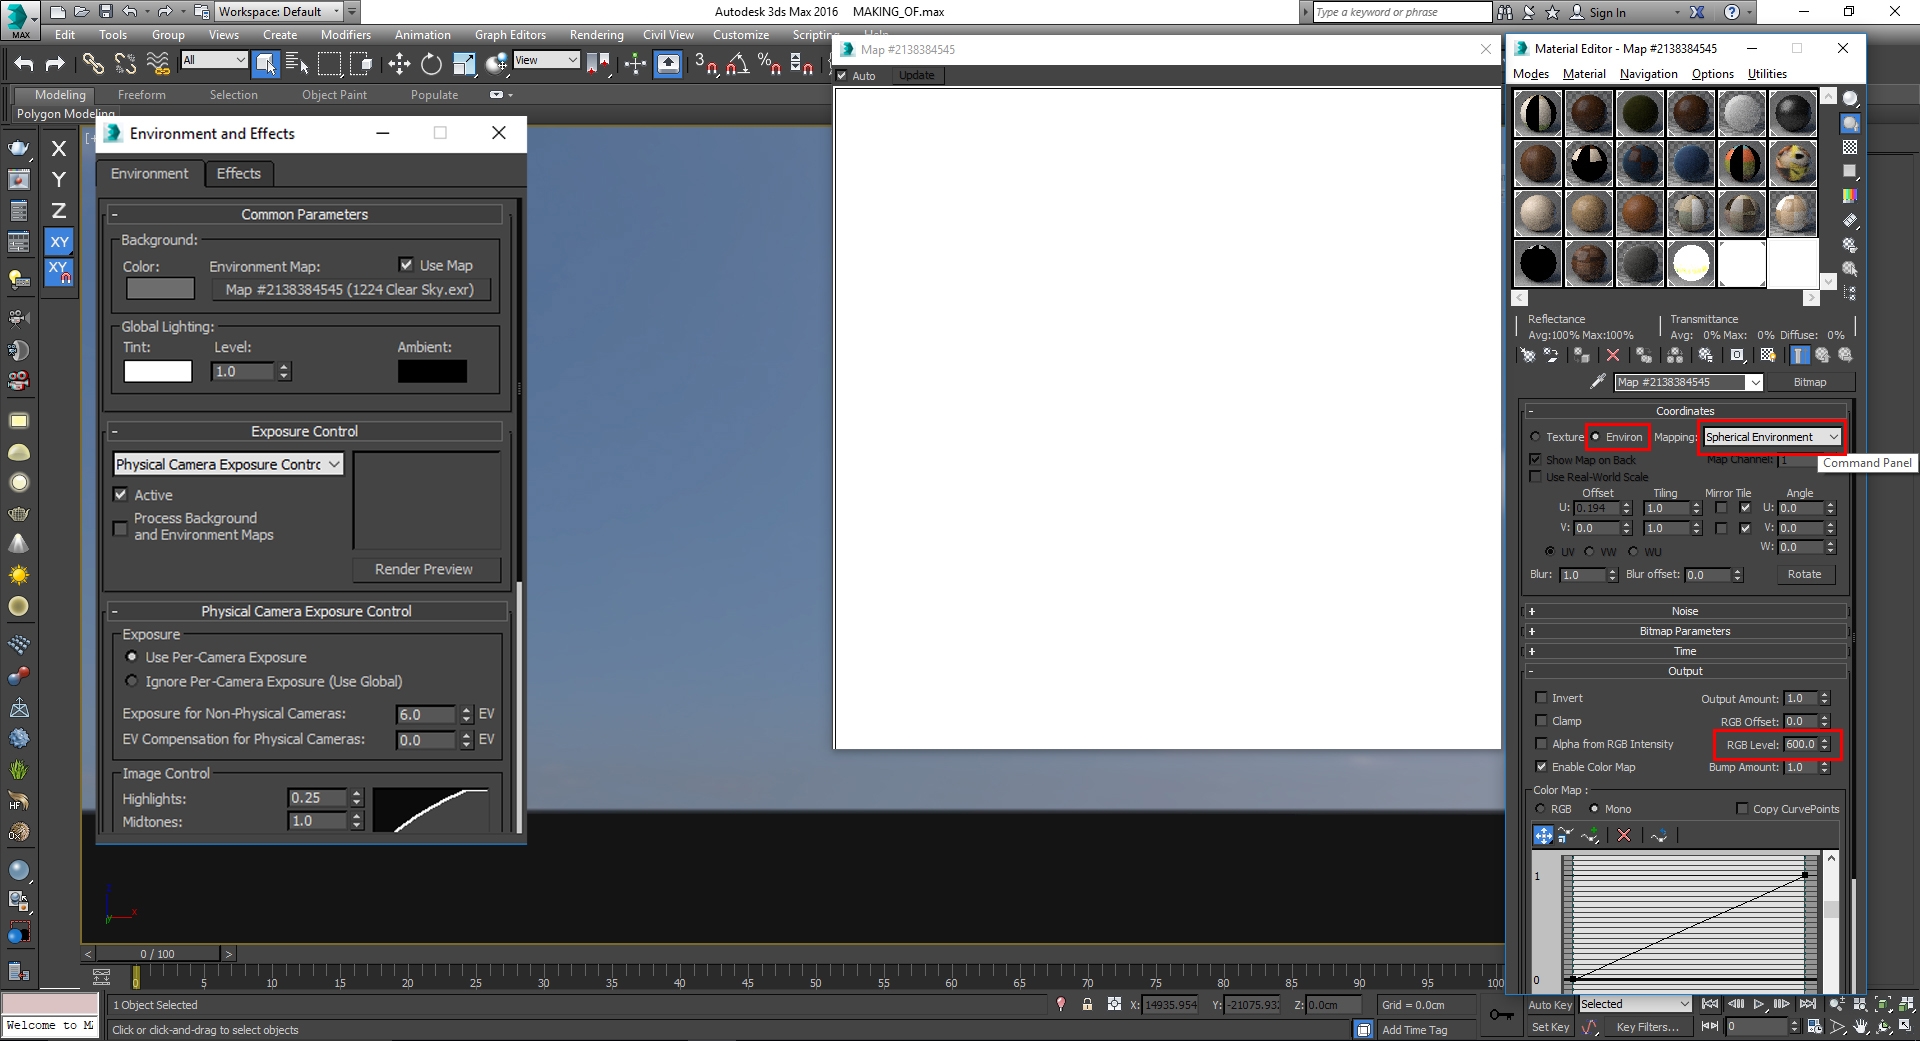
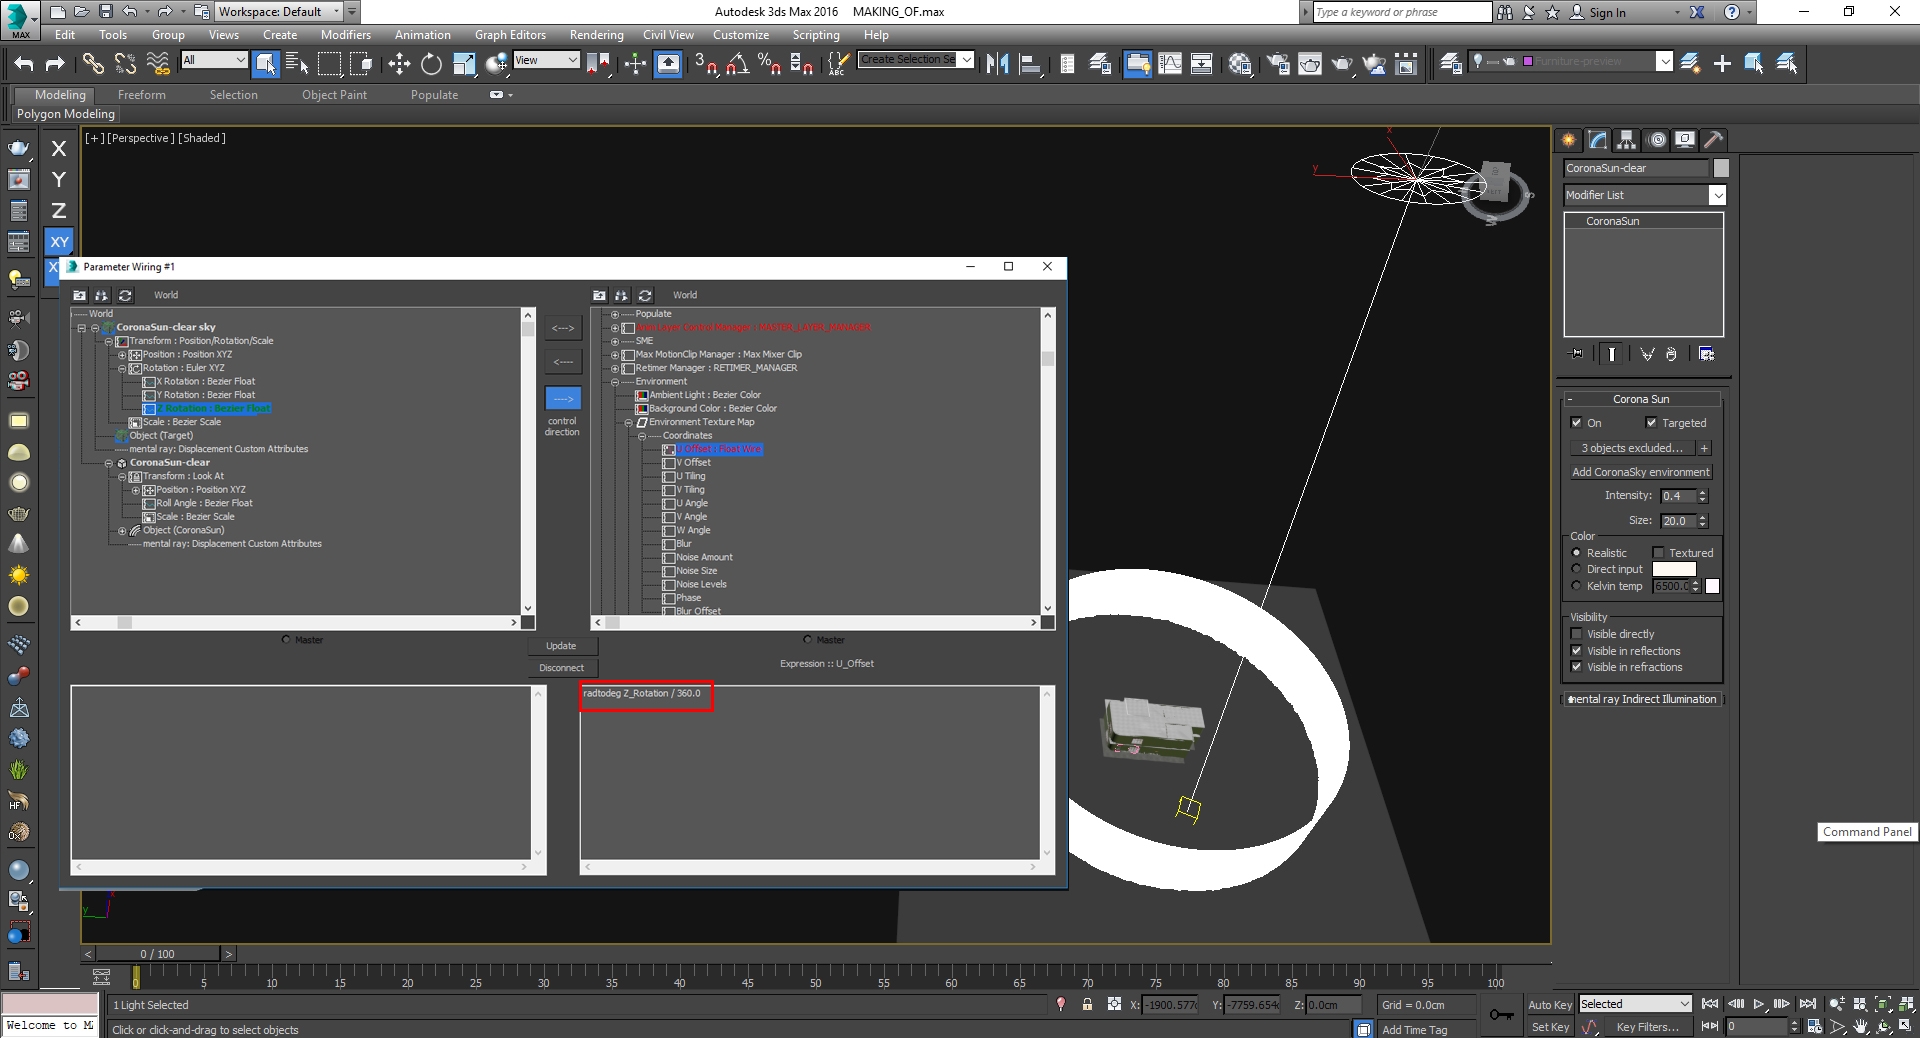
I wanted to control the amount of the sun entering the room so I added corona sun linked with the horizontal rotation of the HDRI Texture.
For the background I used a Corona light material applied on a rounded plane and Disabled (Cast Shadow) from the object properties.

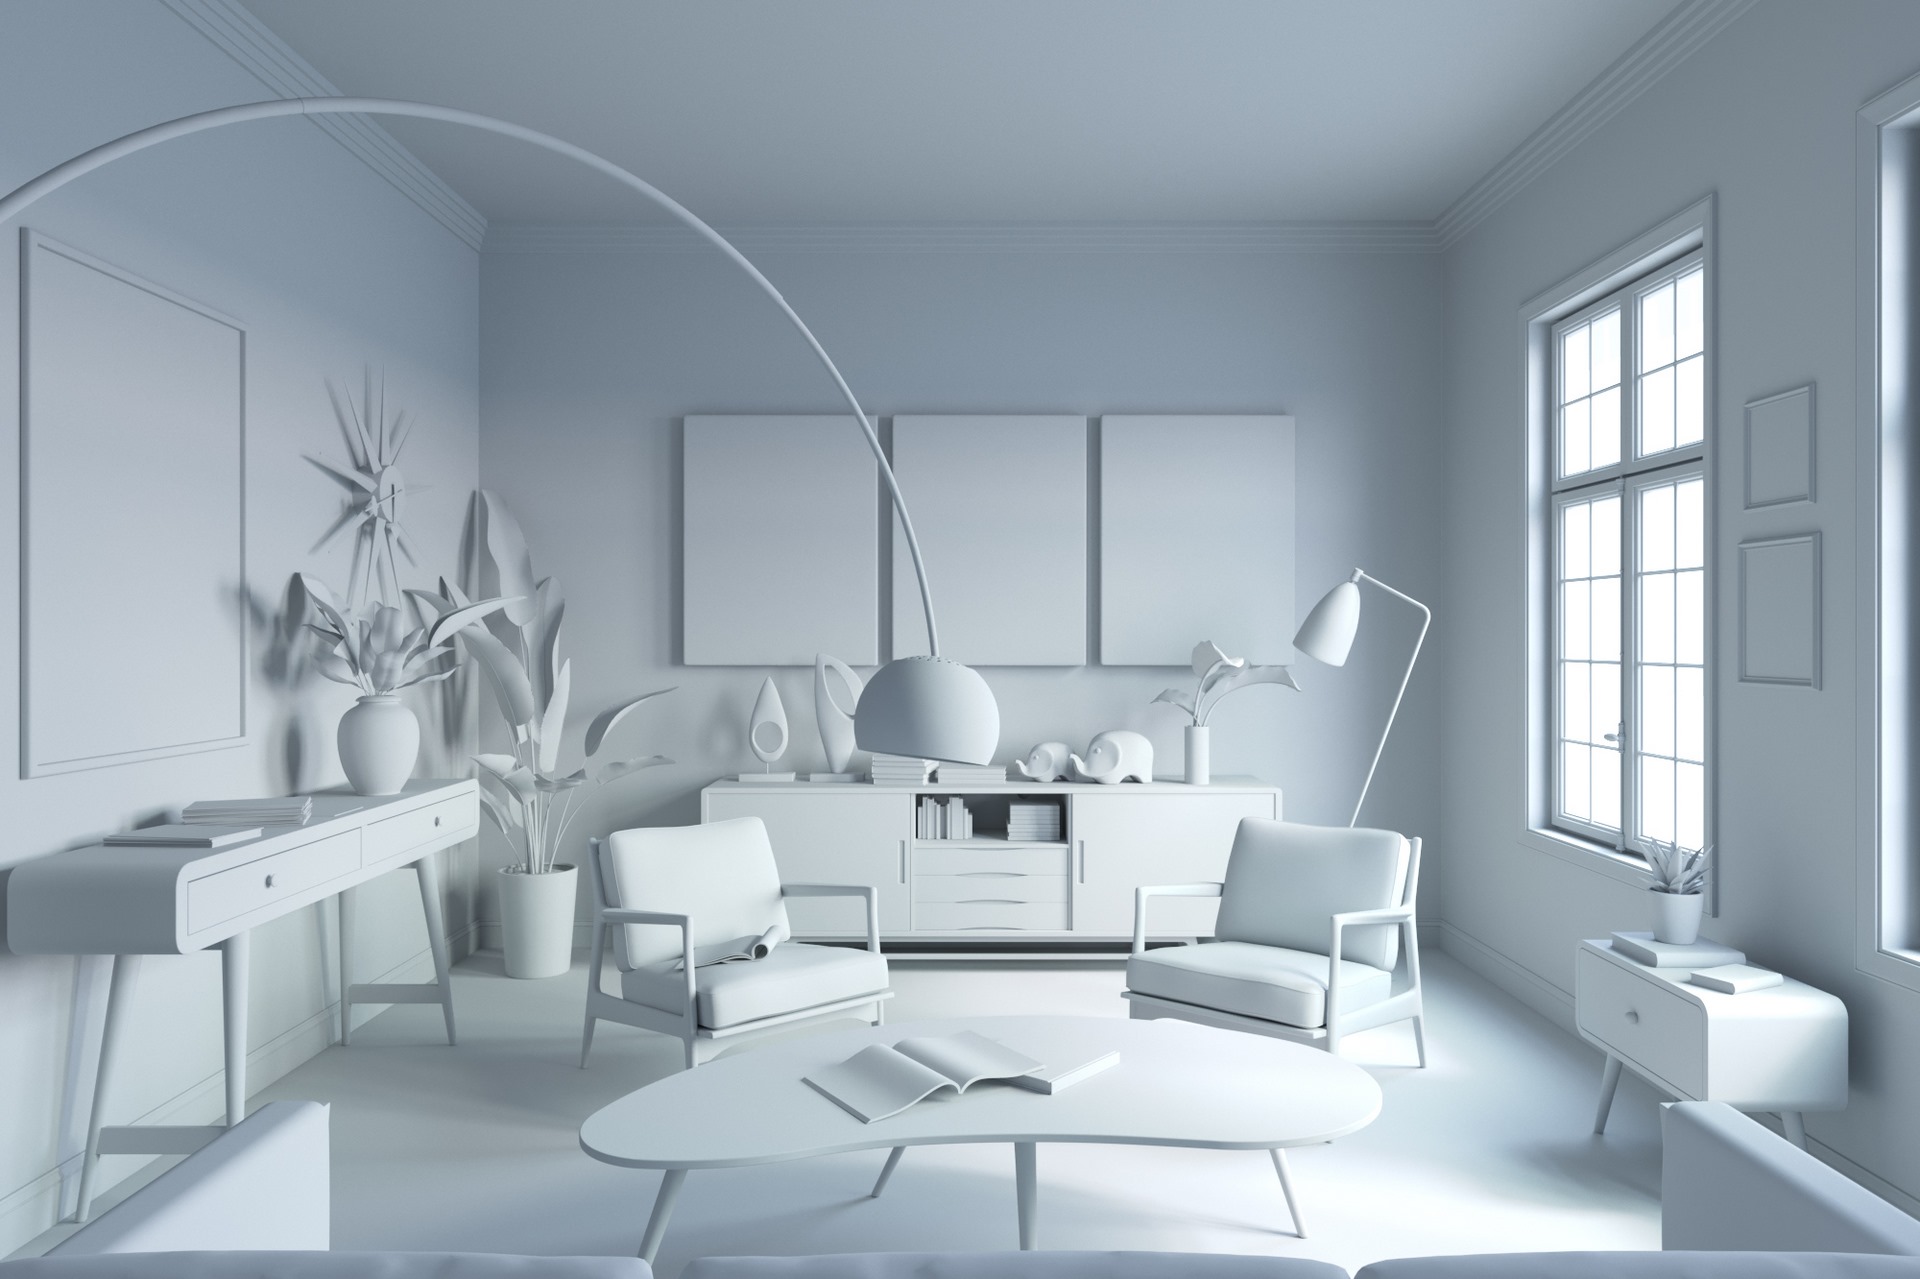
Here are some test renders for the lighting with a light gray material. It will definitely become darker after adding the materials.
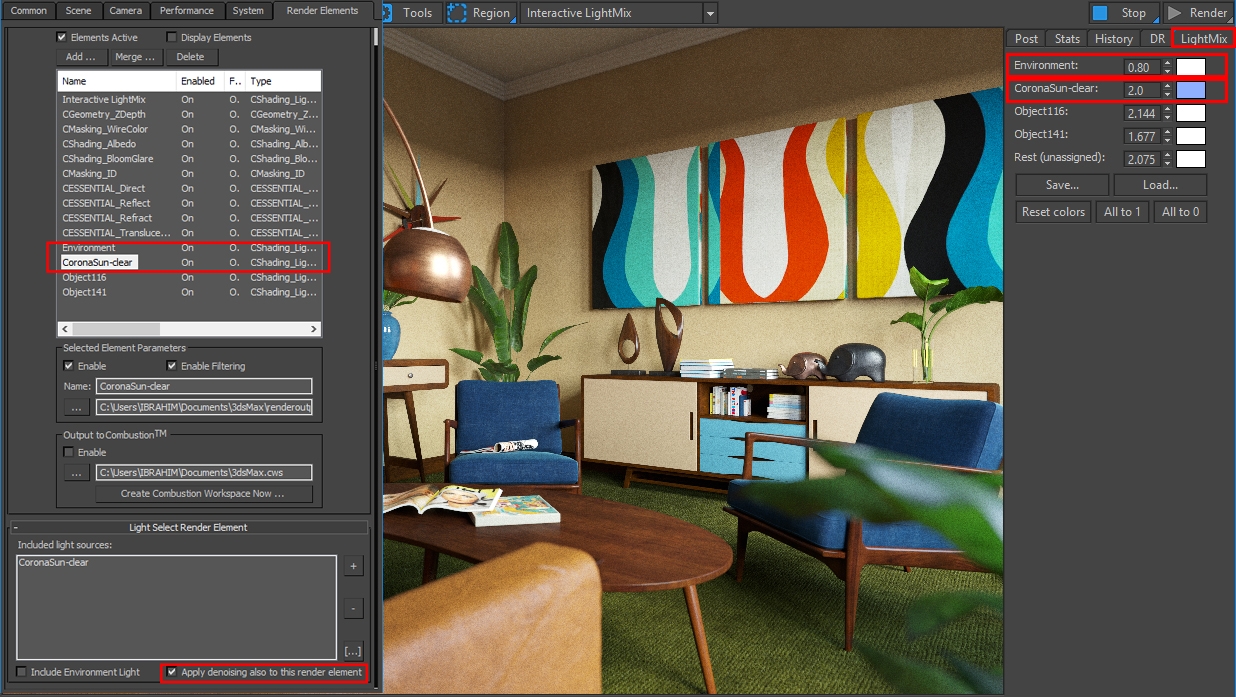
But you shouldn't worry about that as you can always increase (or reduce depending on needs) the environment intensity from the (Glorious!!) interactive light mixer. The same thing goes for sun intensity.
It is also very important to enable denoising for each light element if you’re going to use interactive lightmix as a final render.


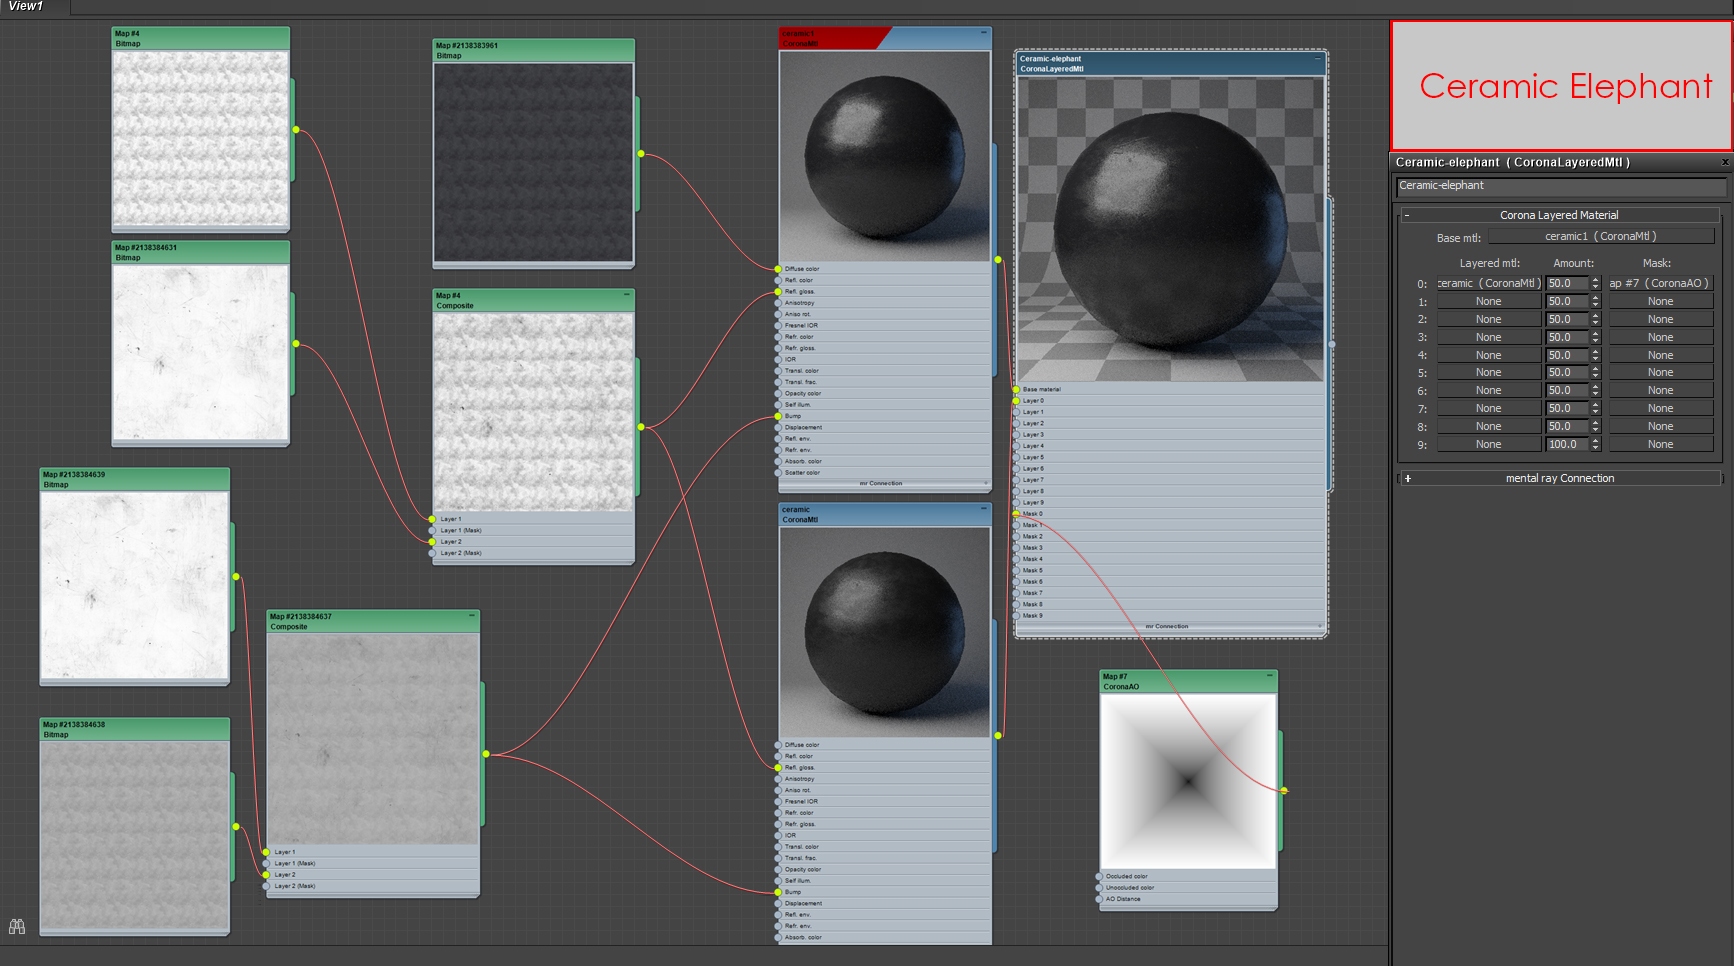
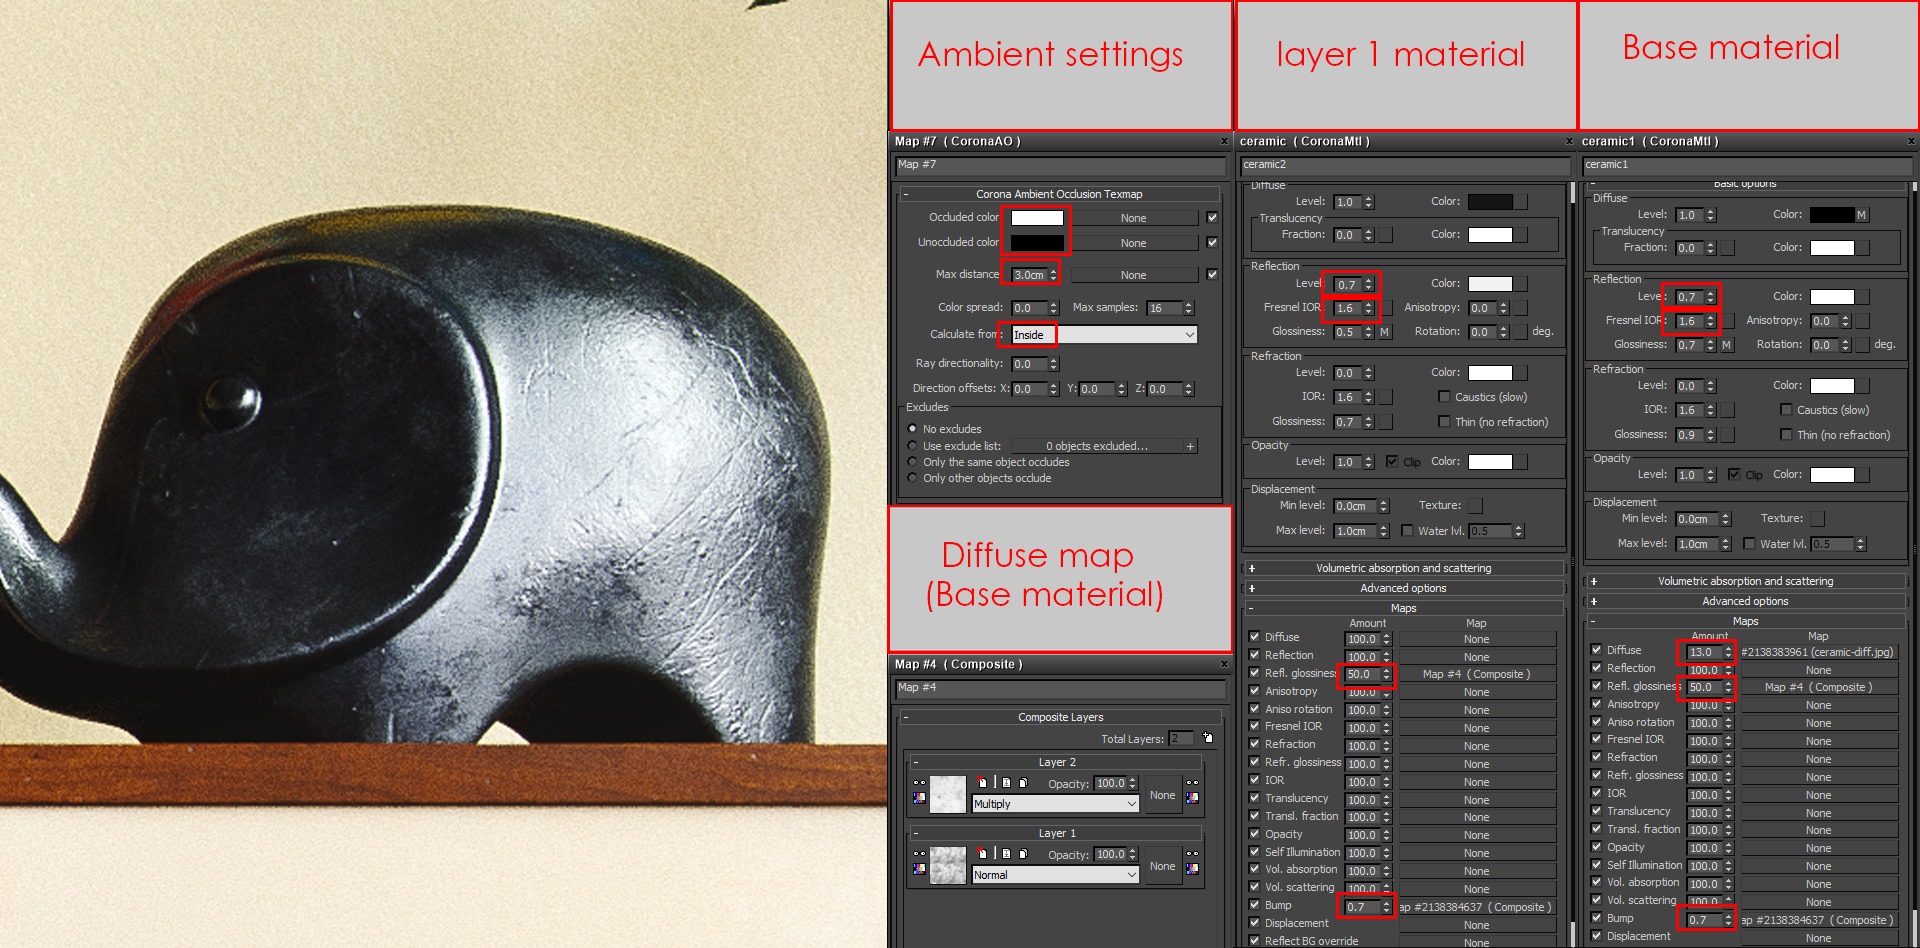
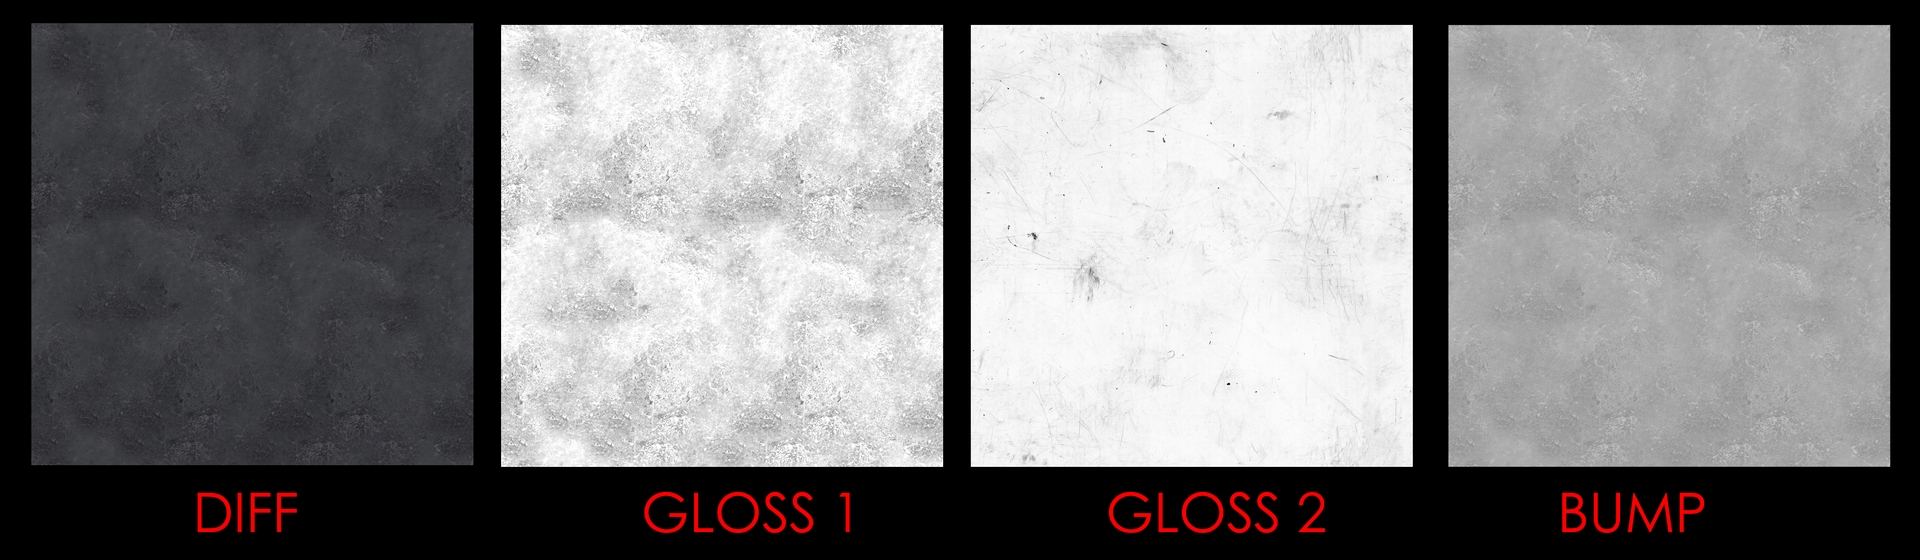
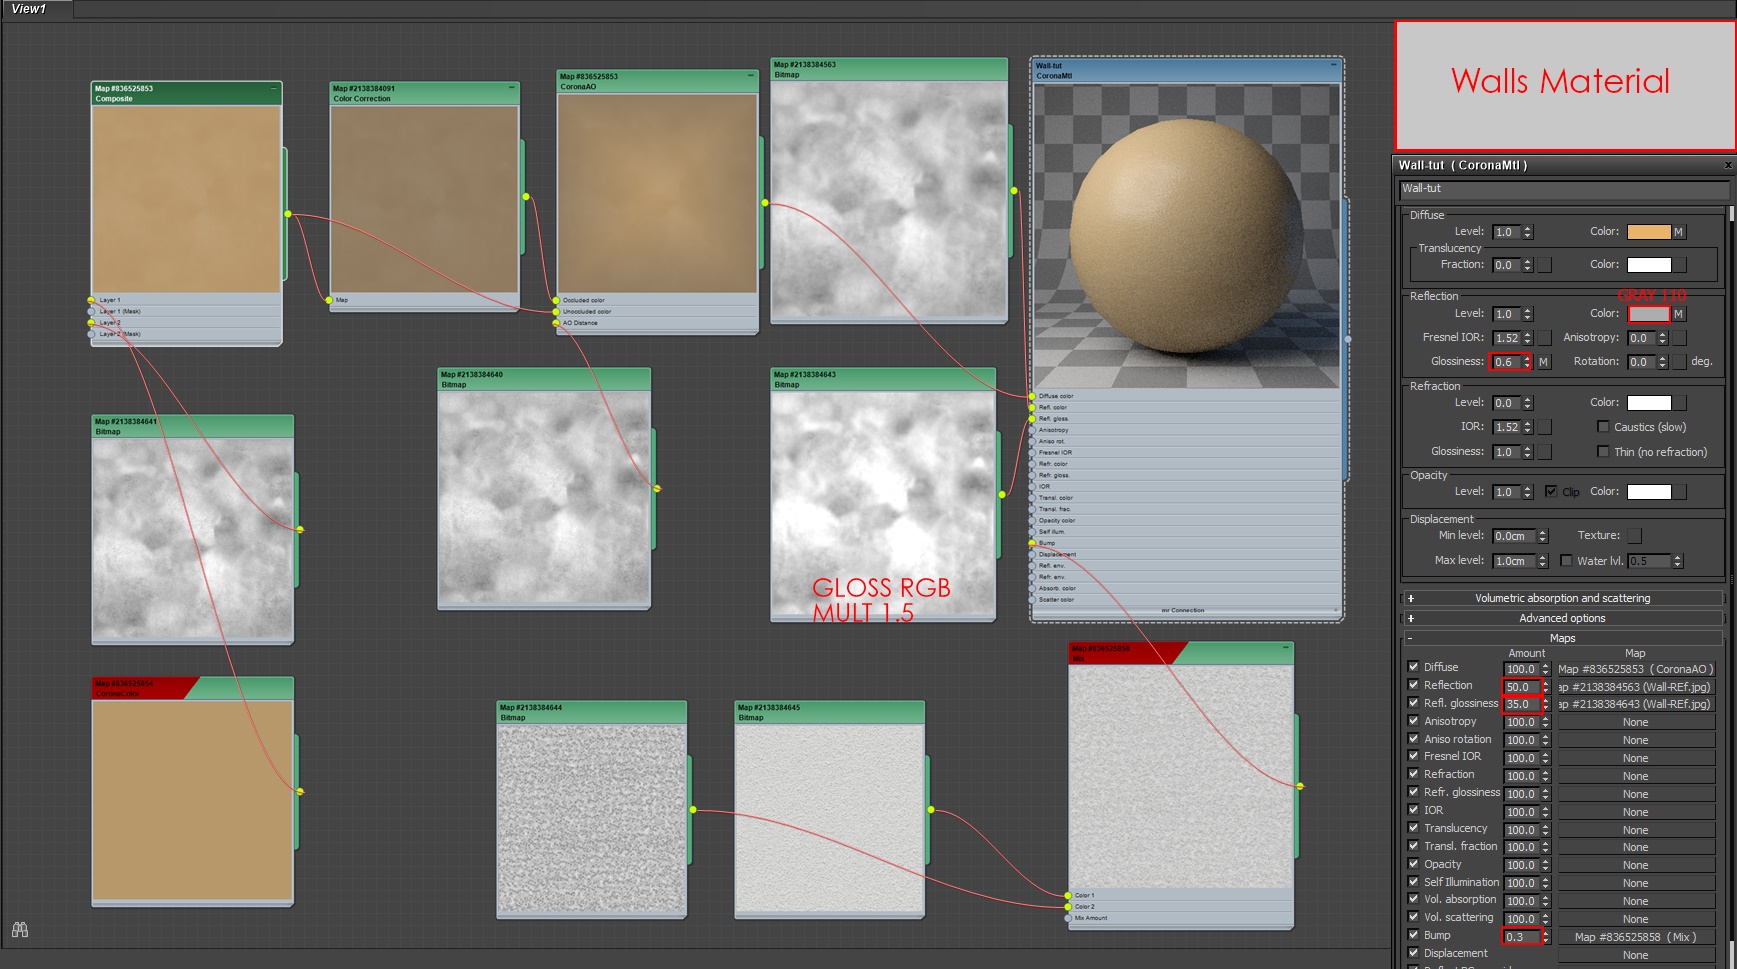
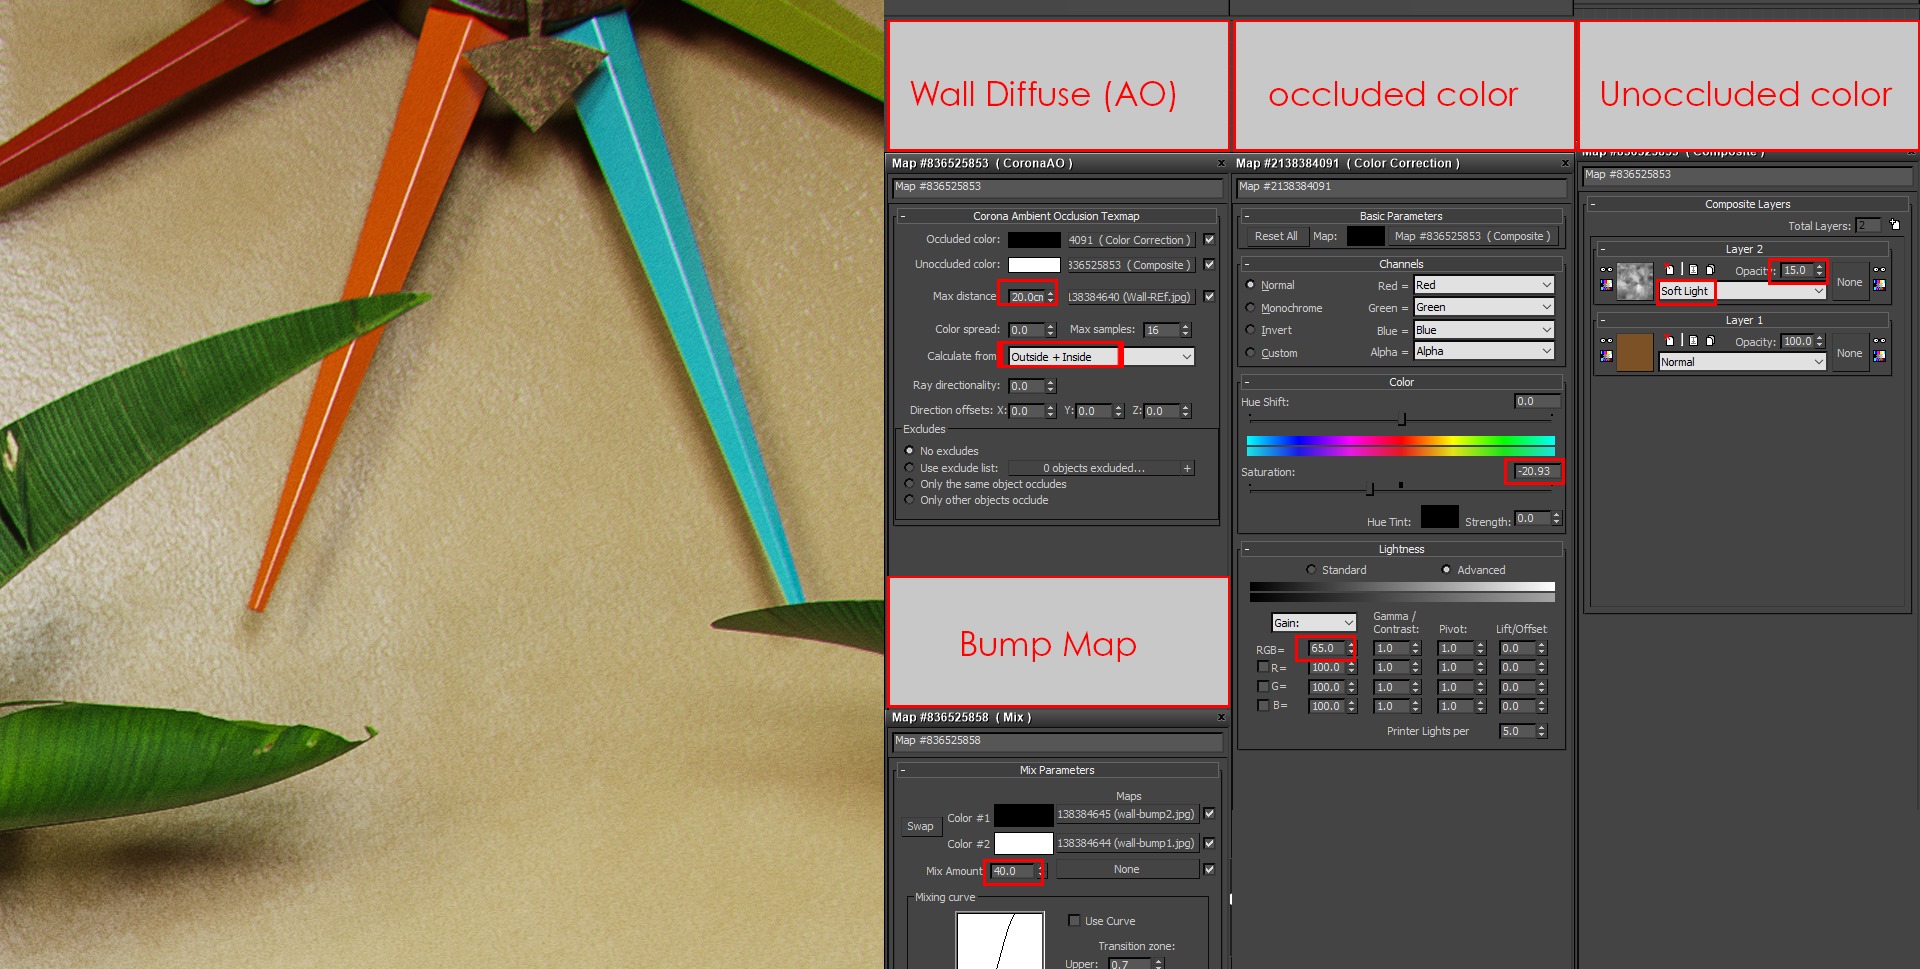
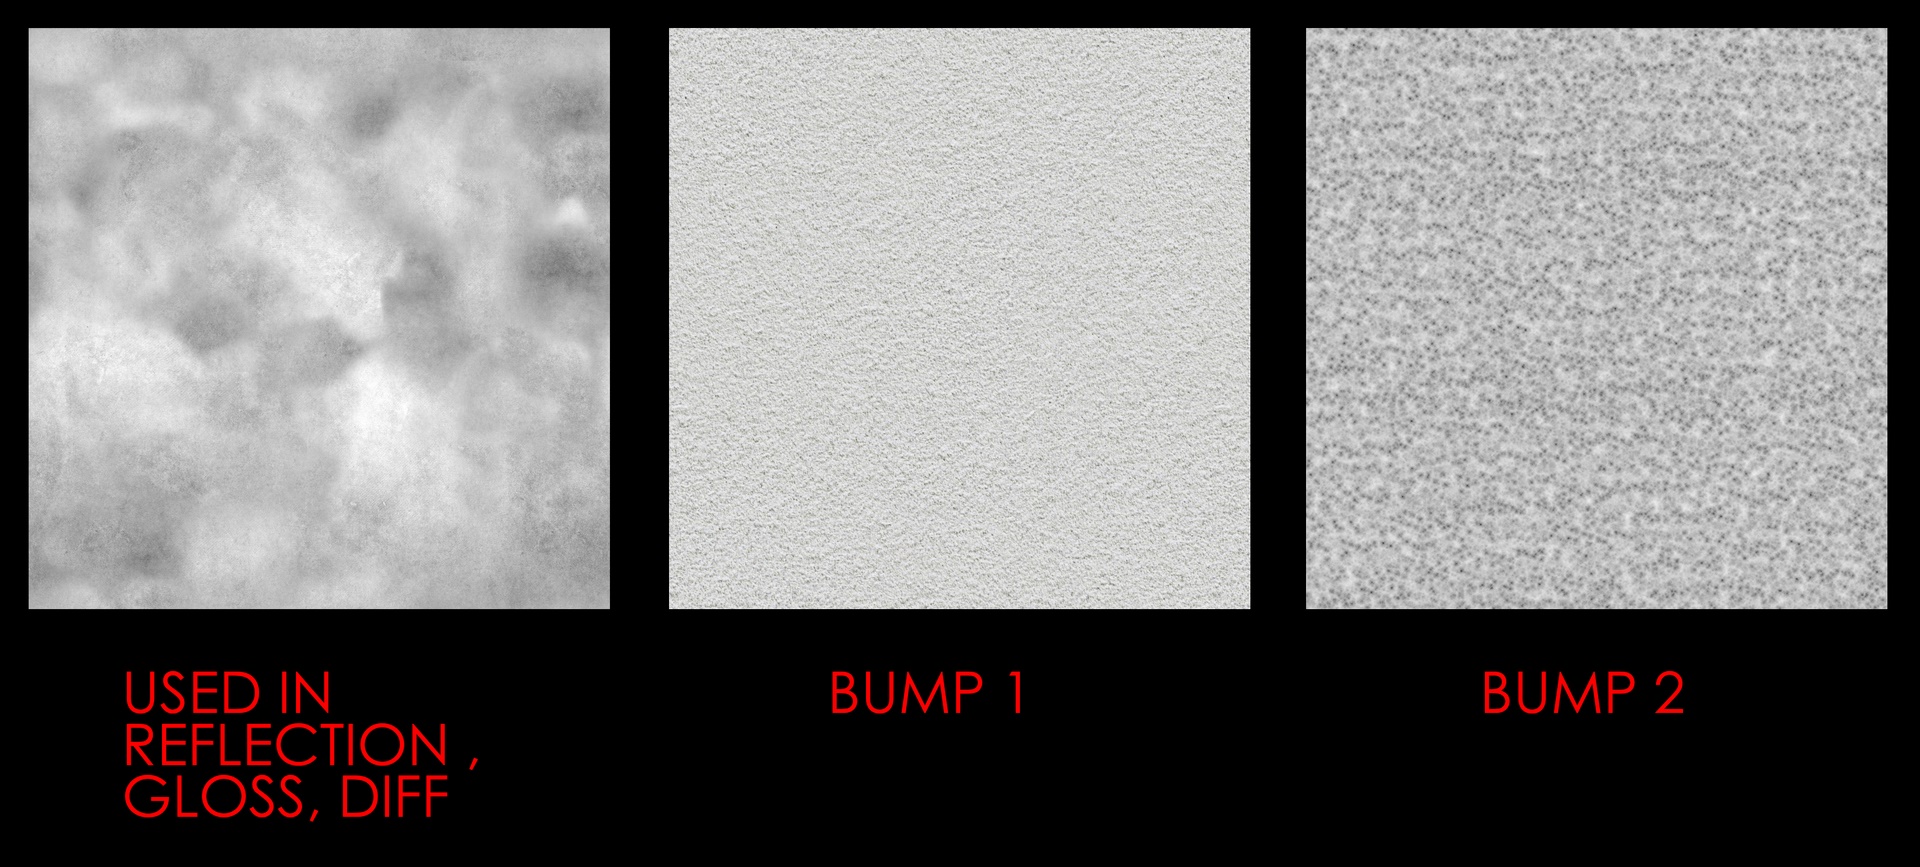
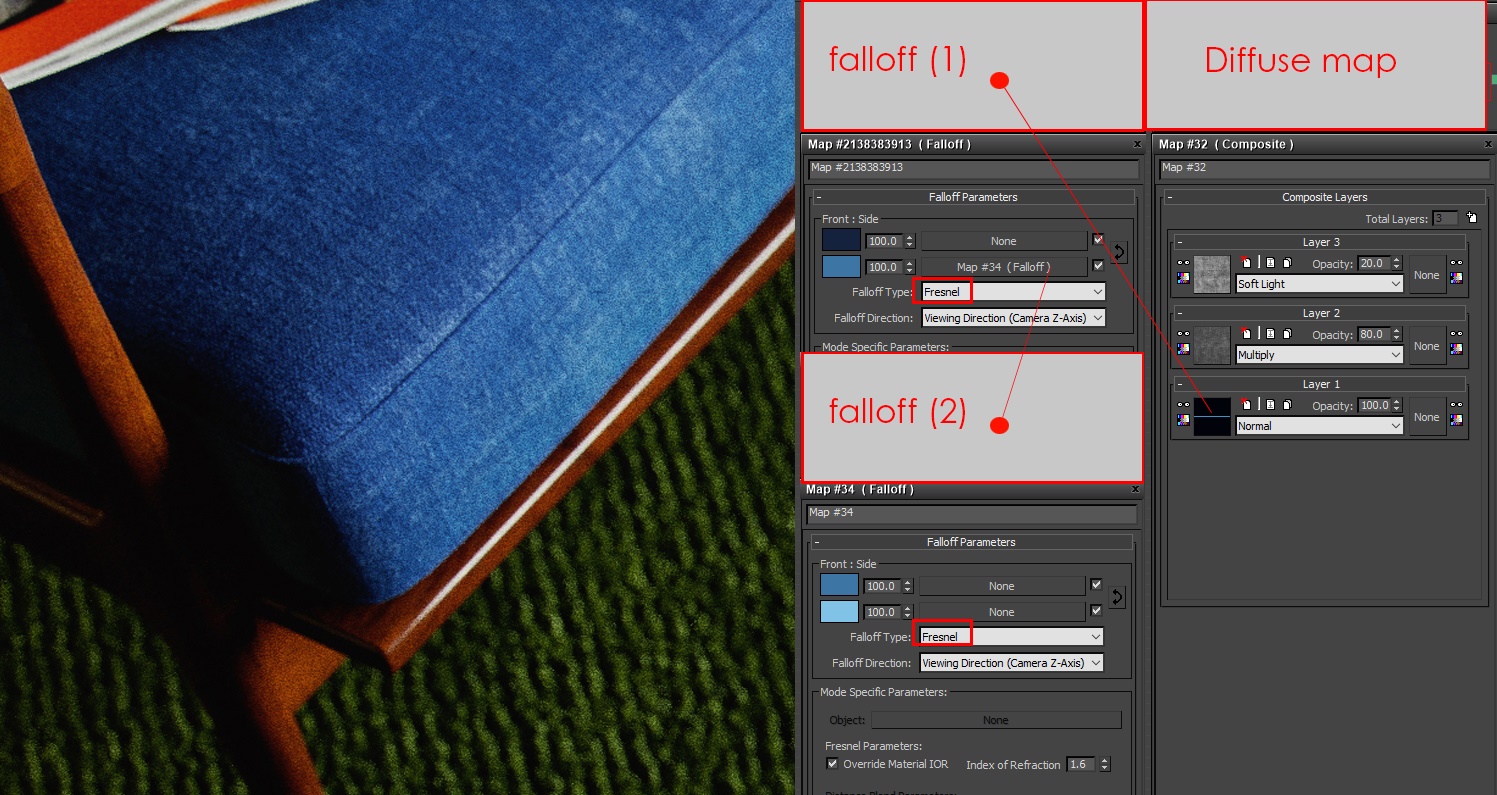
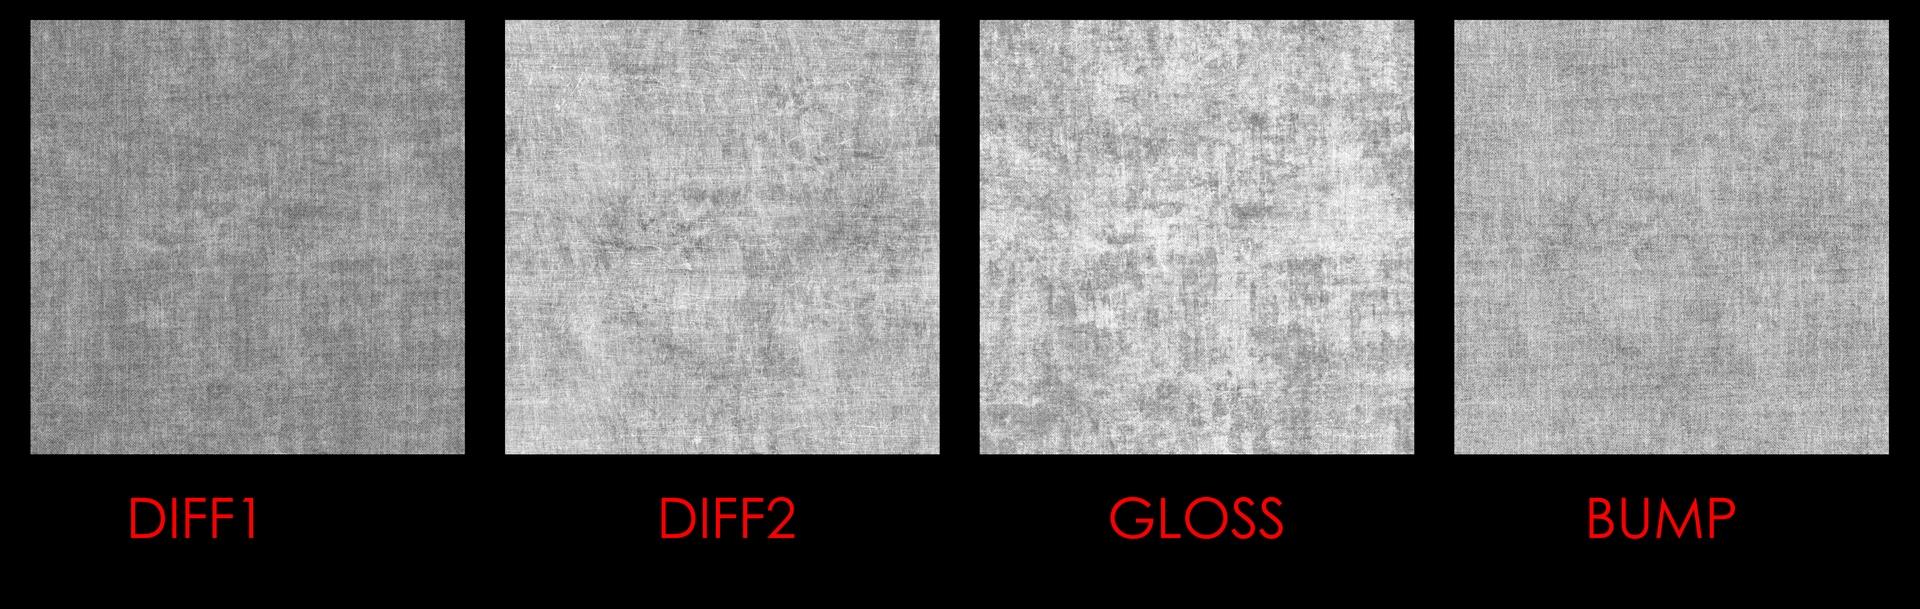
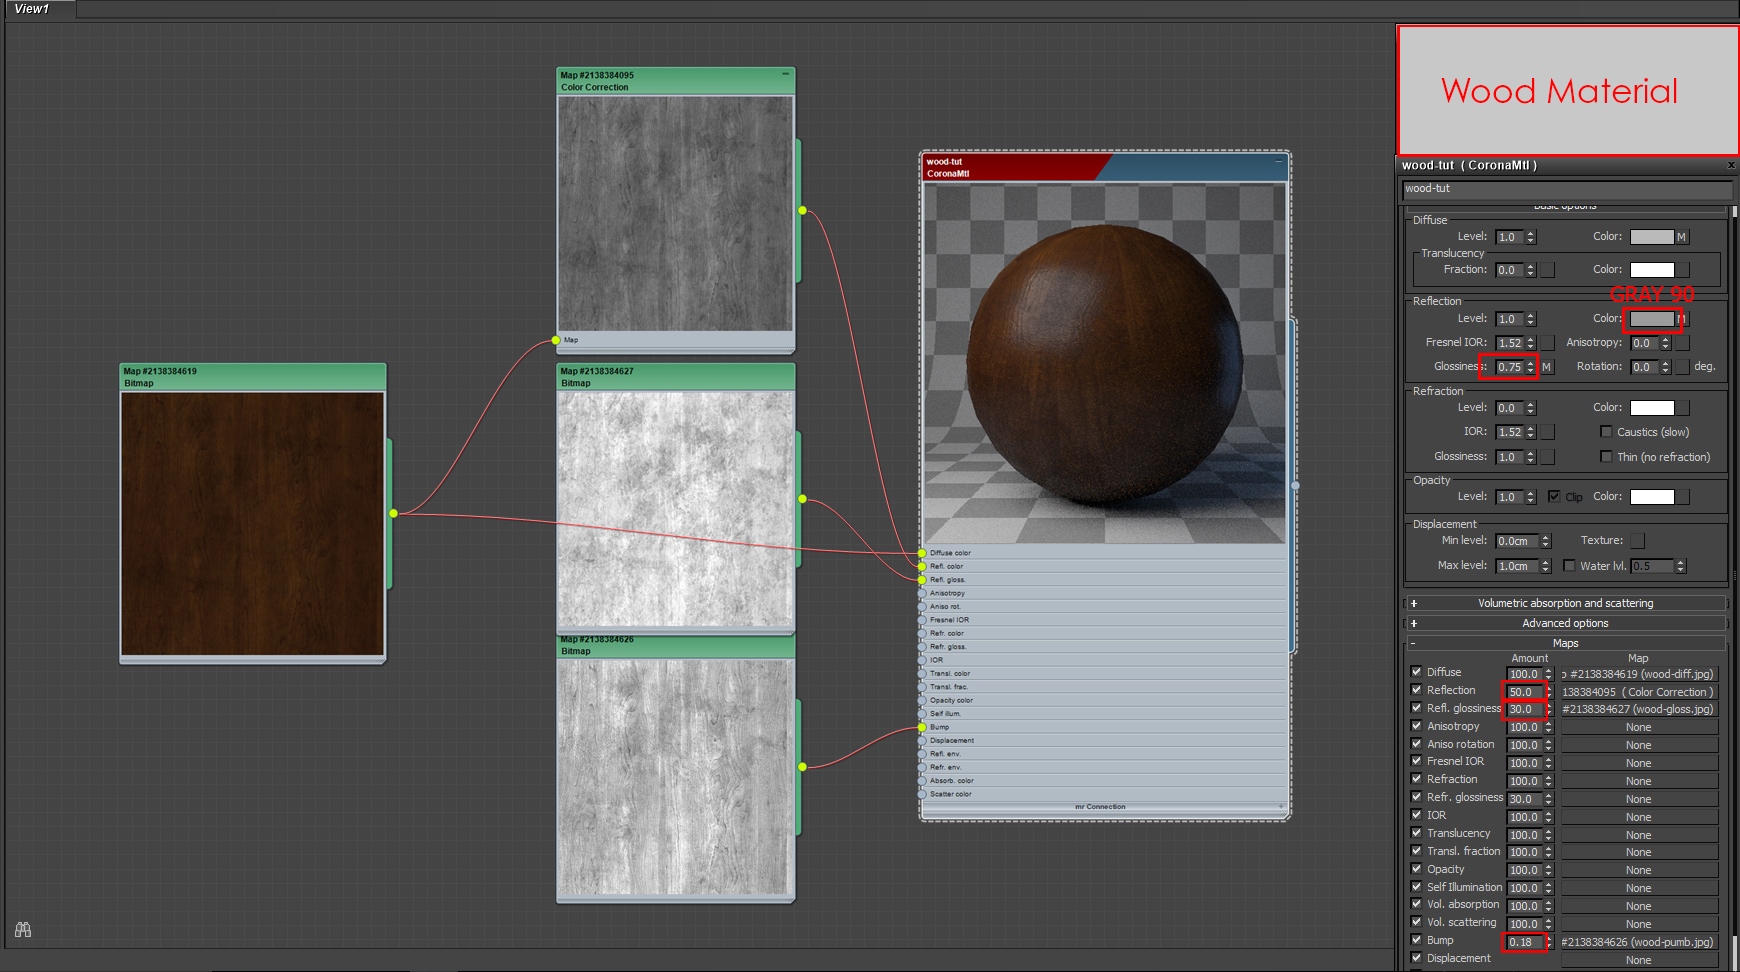
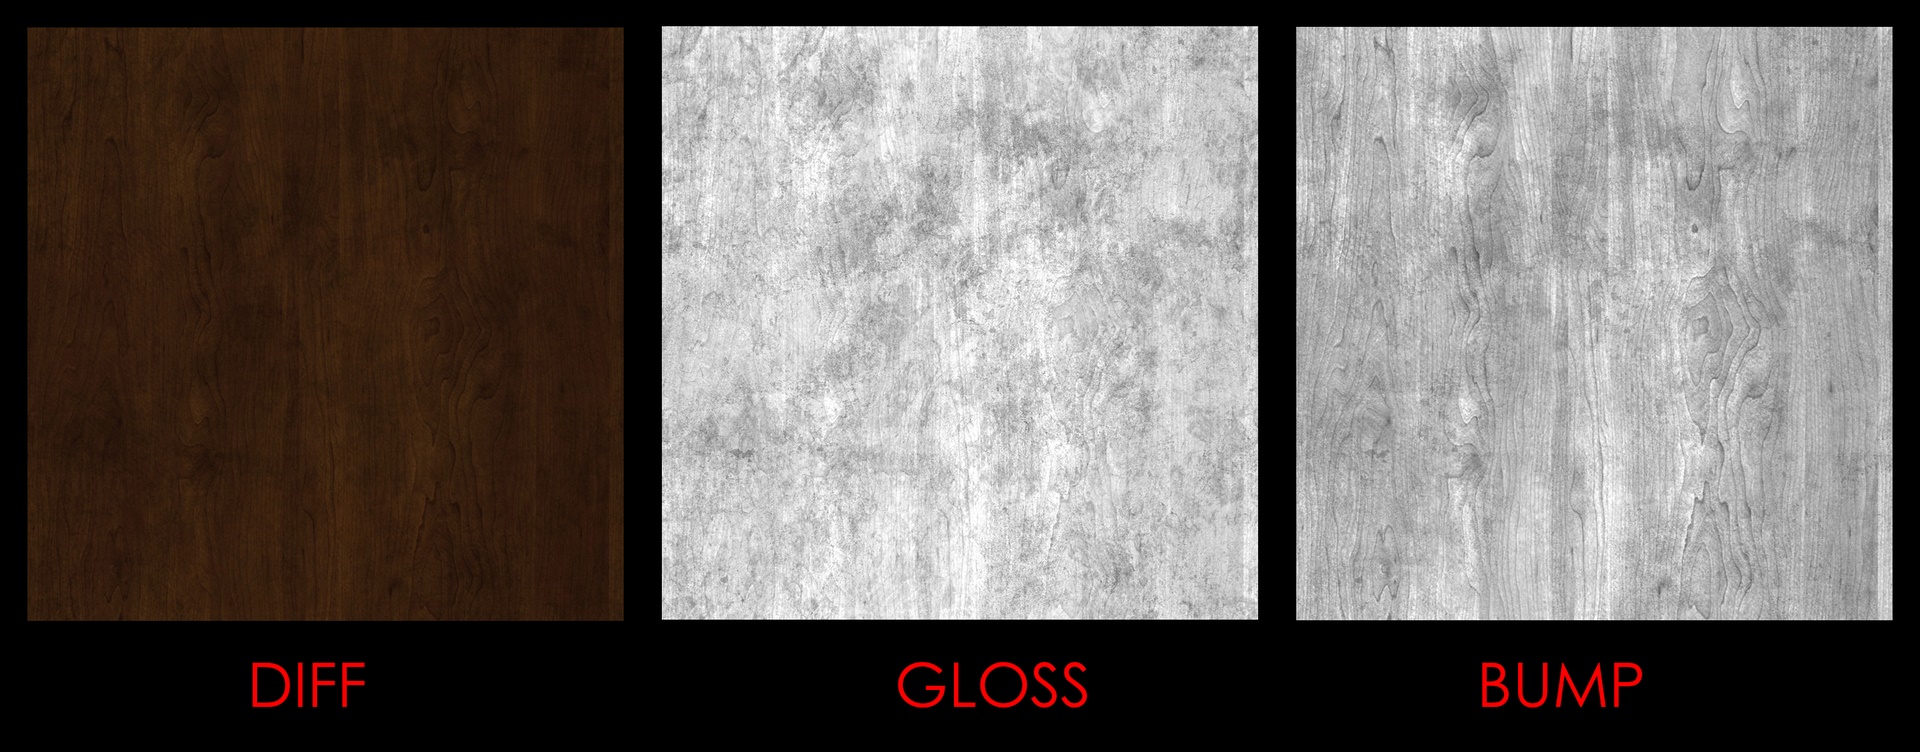
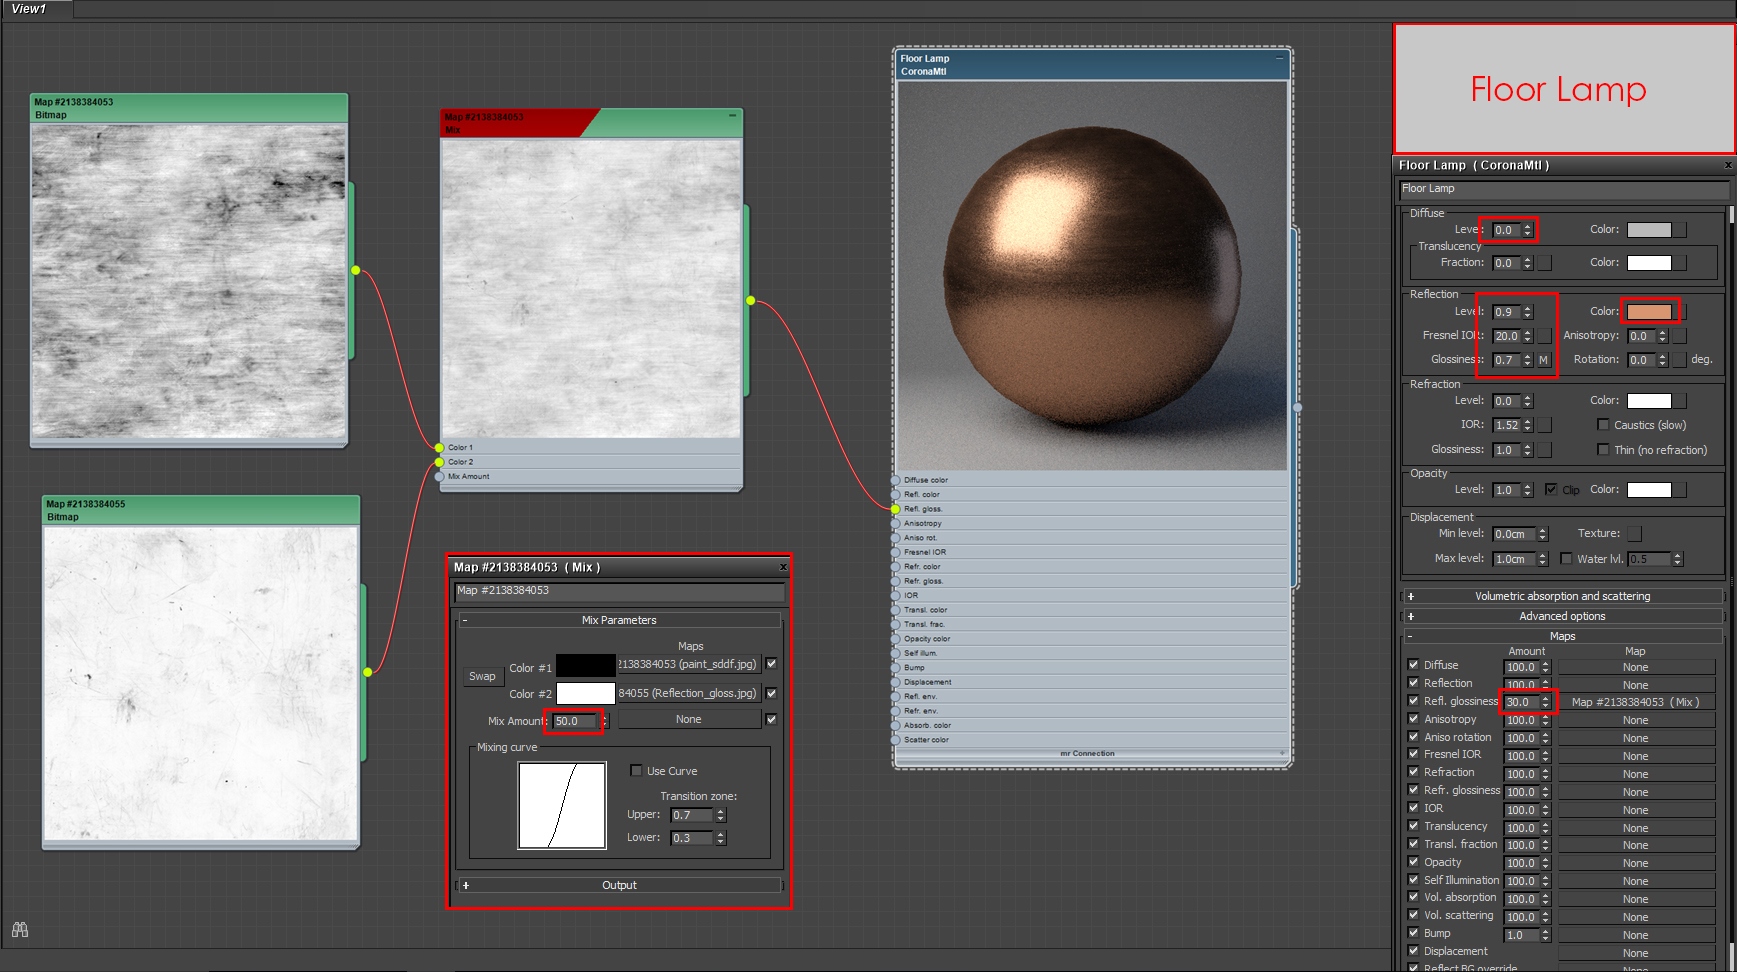
This is the part I like the most. In this scene I tried to show that the furniture and almost everything is old, so you should expect some dirty maps. Here is how I made some of them.

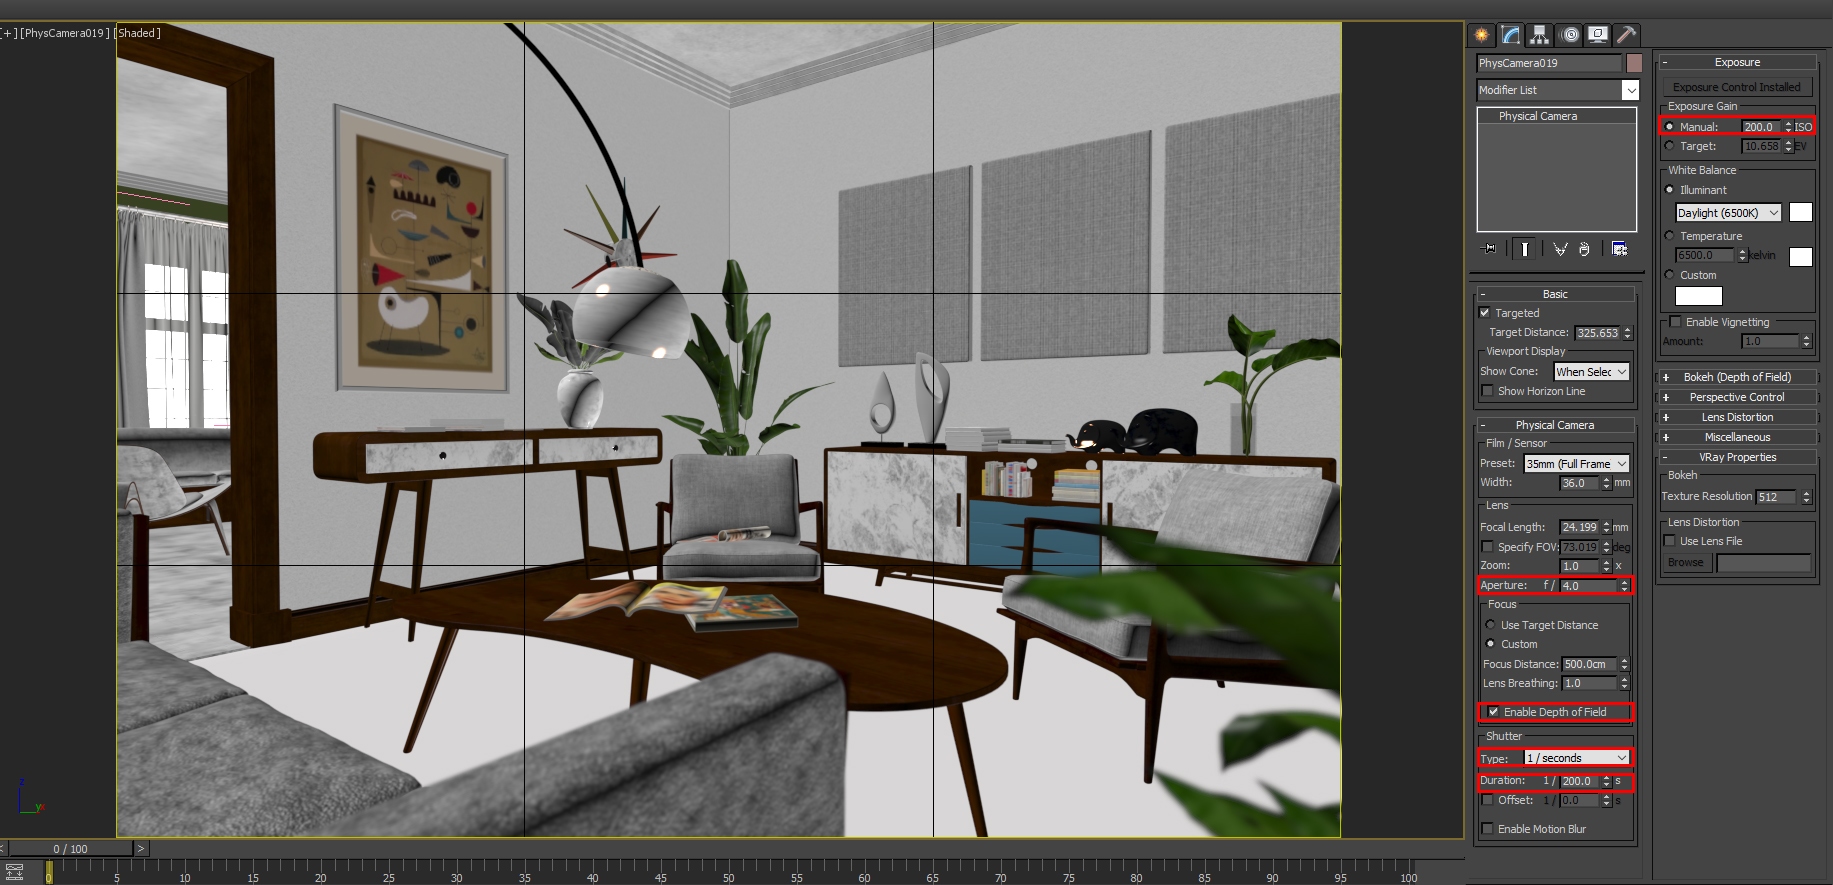
These are the camera settings.
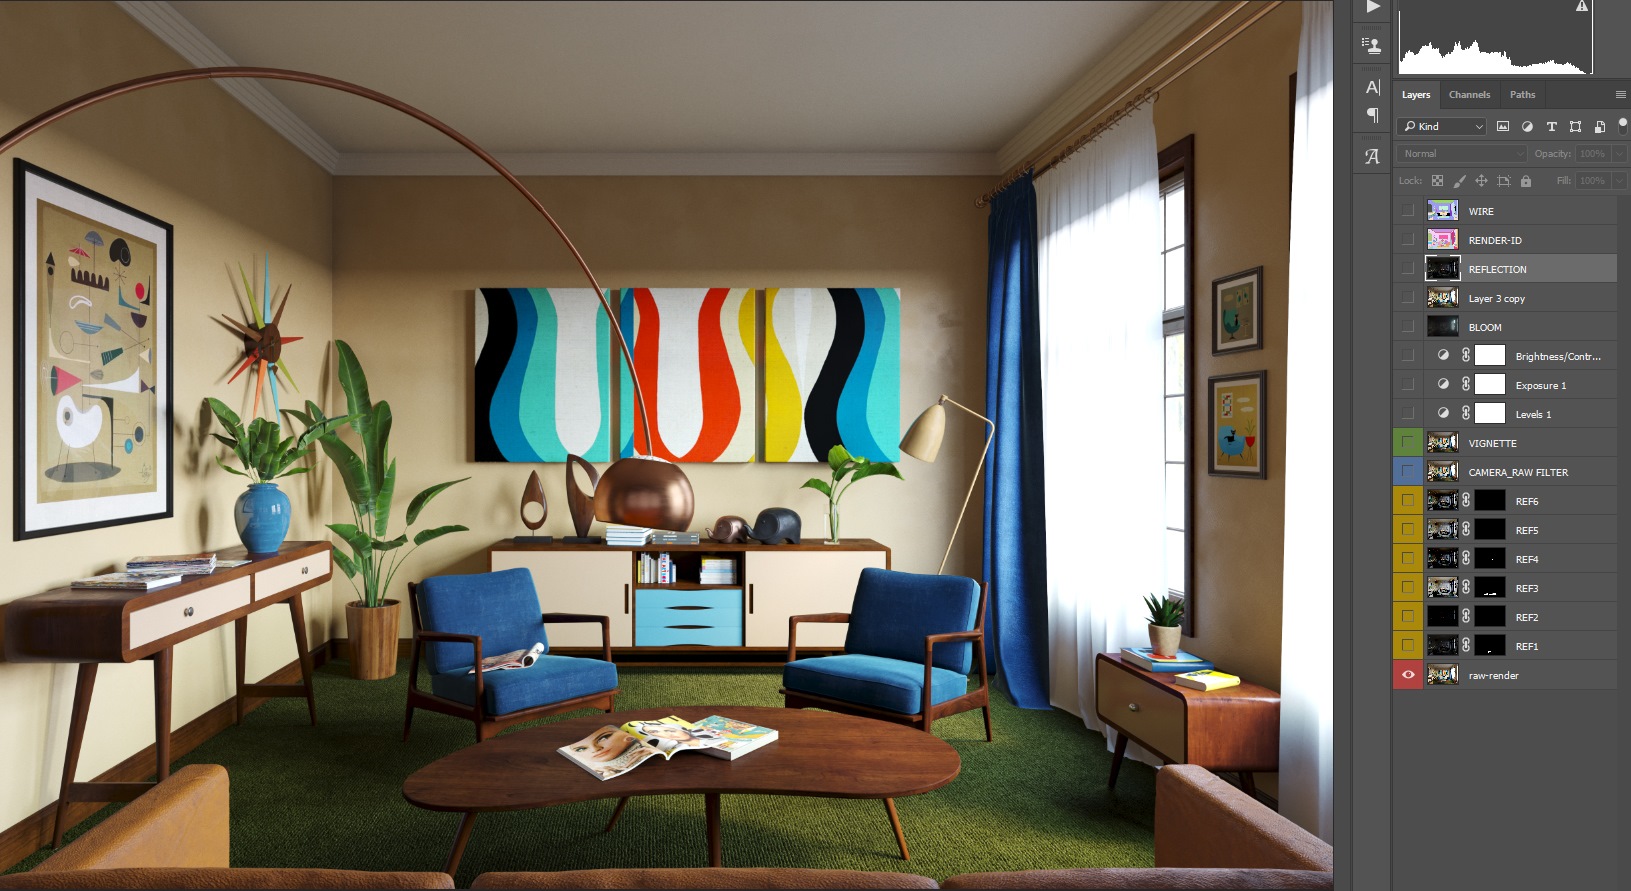
For the post-production I used Photoshop. Here is the raw render.
These are the render elements that I mostly use in post production.
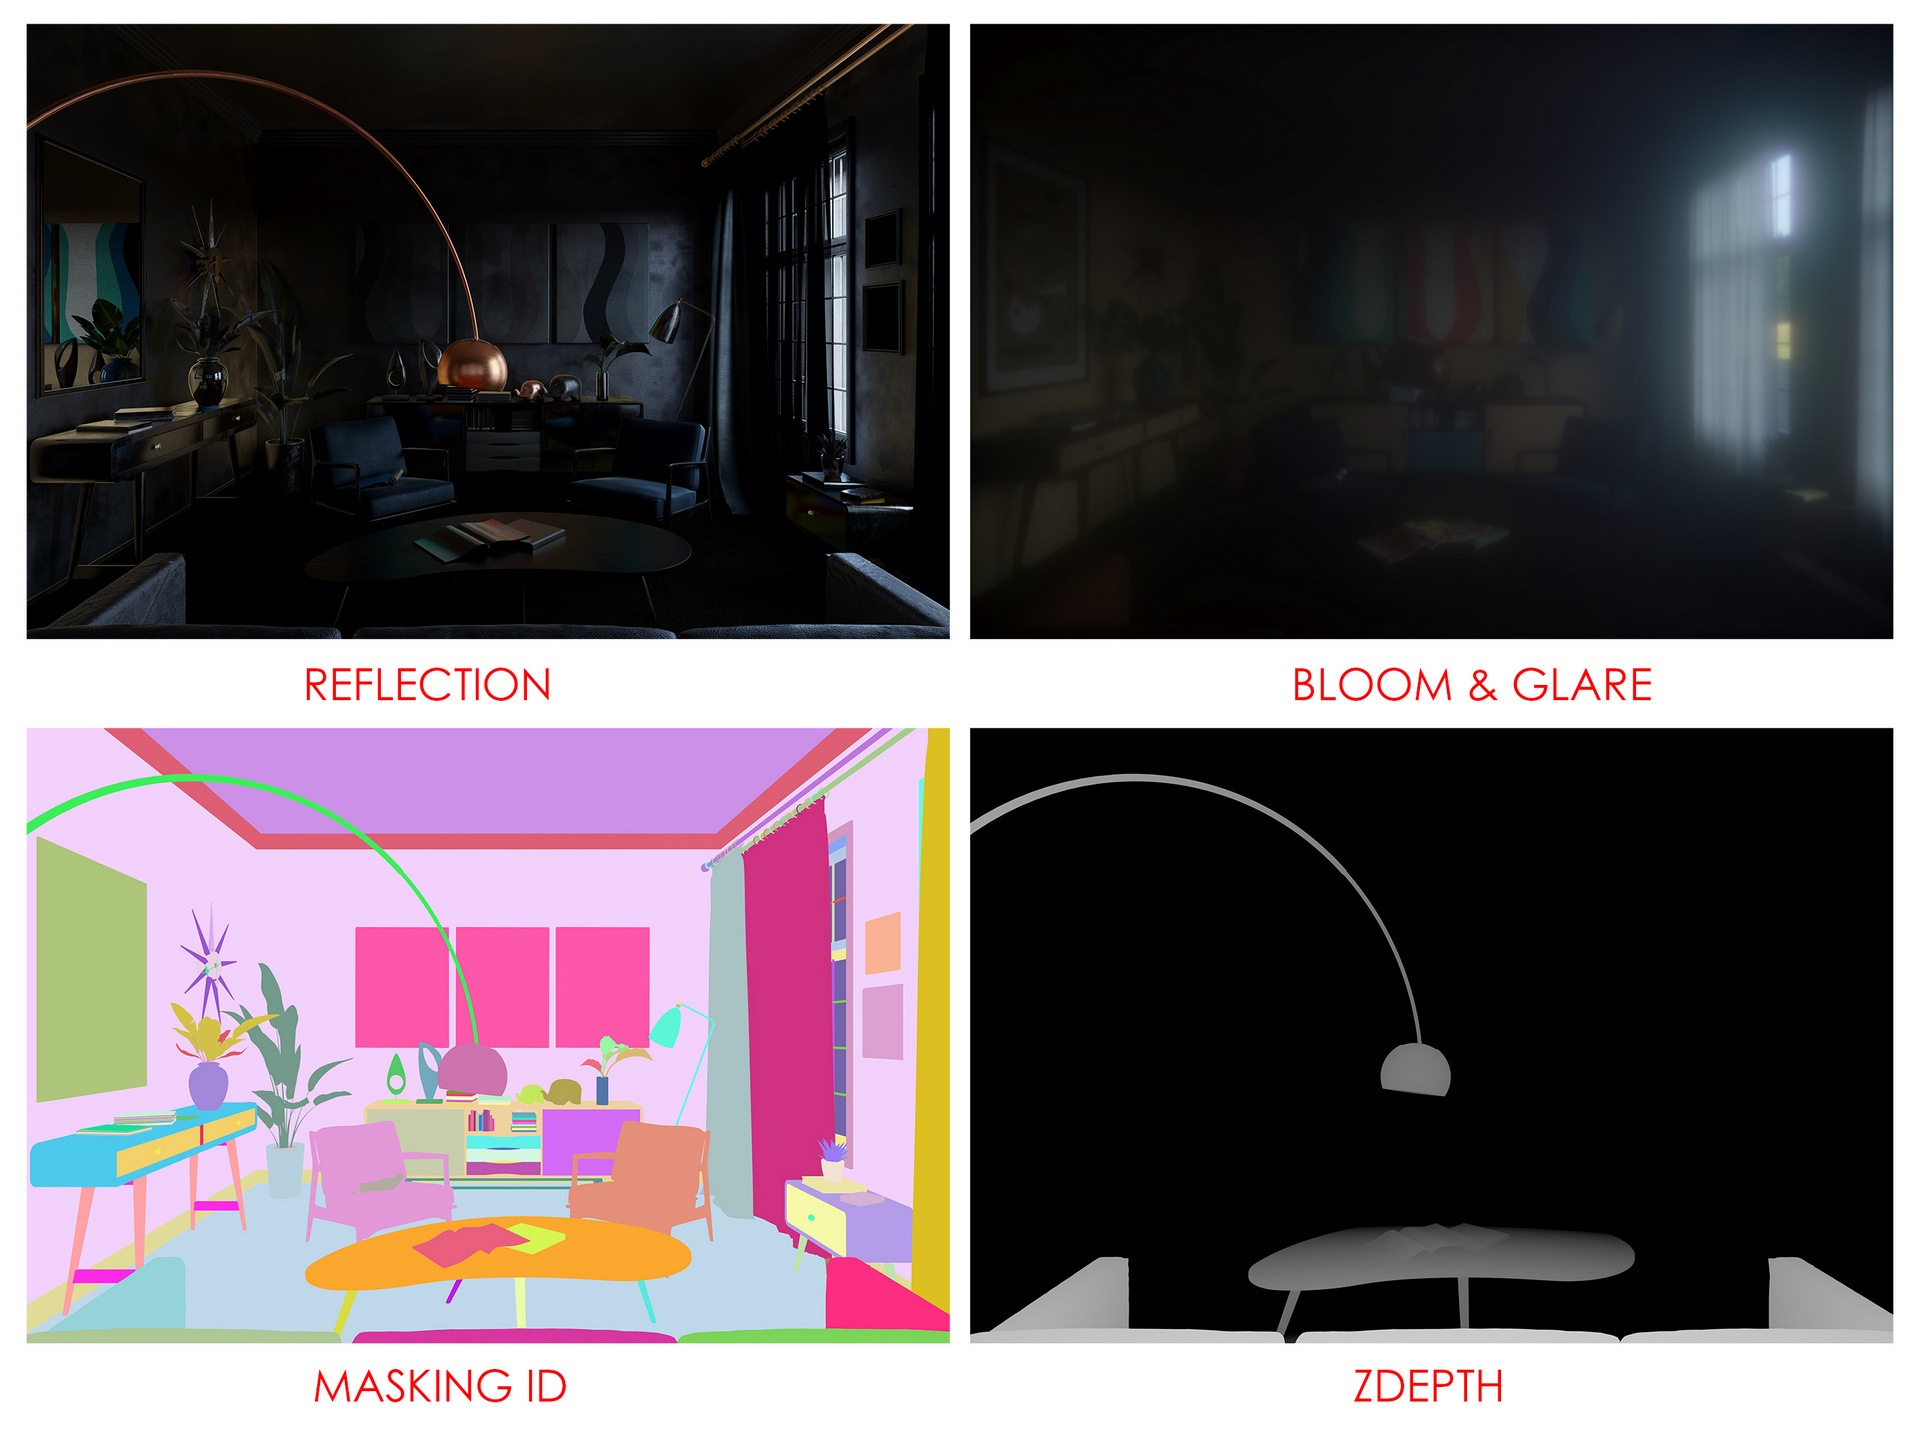
First step I do is to adjust the reflection for the objects that I find need more reflection using the reflection elements and render ID for selection.

Second step is adjusting the image using Camera RAW Filter, at this filter I adjust (level , exposure , curves ,highlights , shadows ,colors and sharpness) as shown below

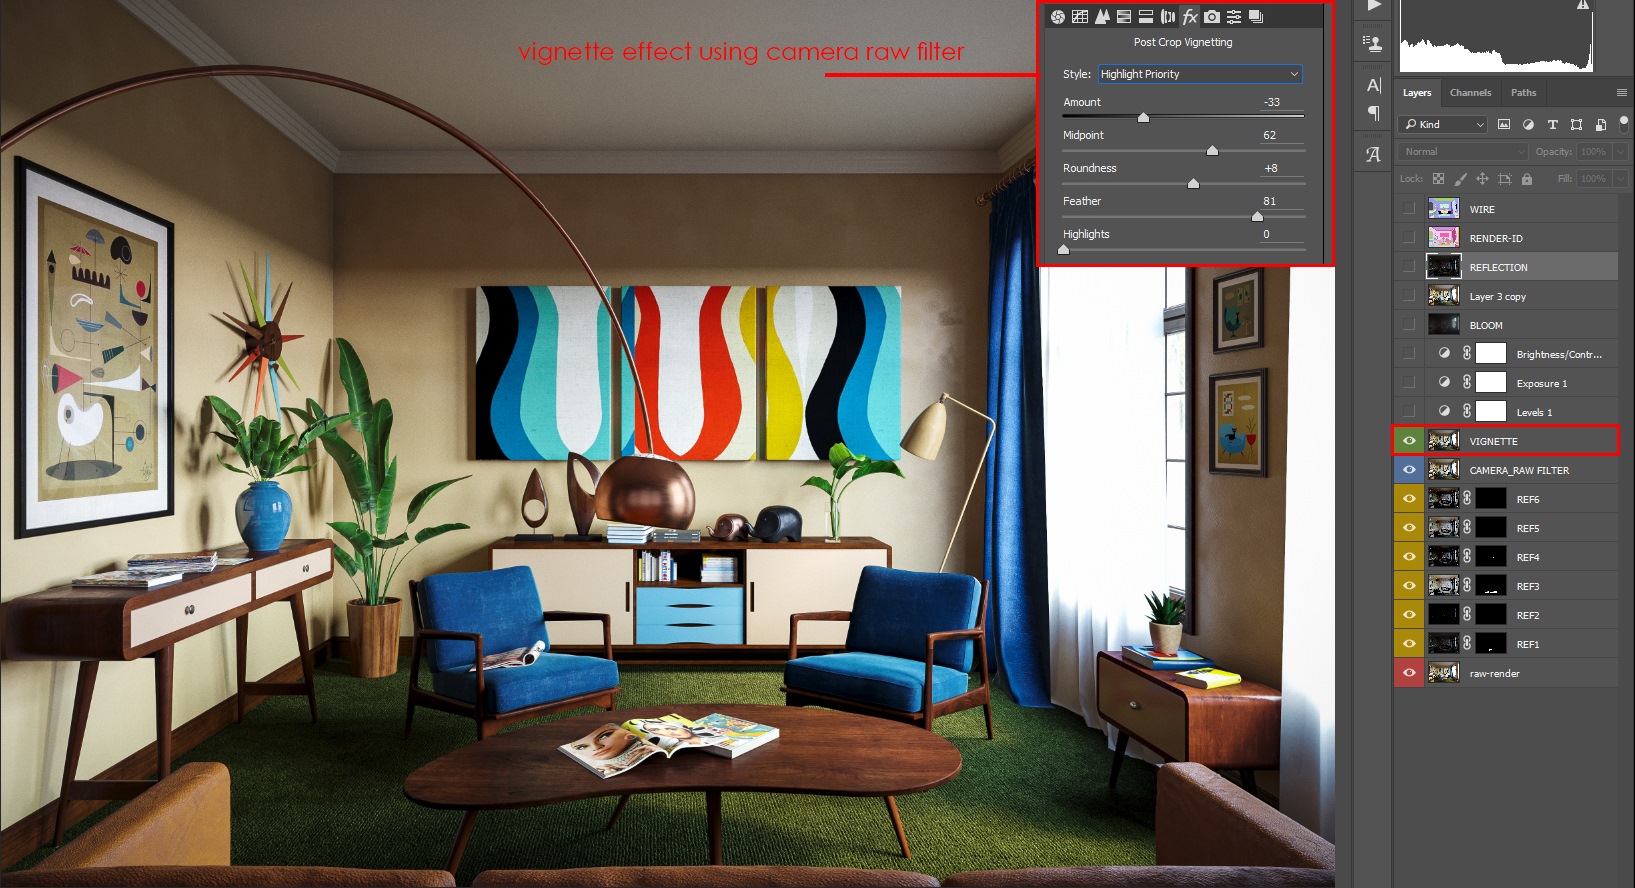
Then I added Vignette effect using camera raw filter.
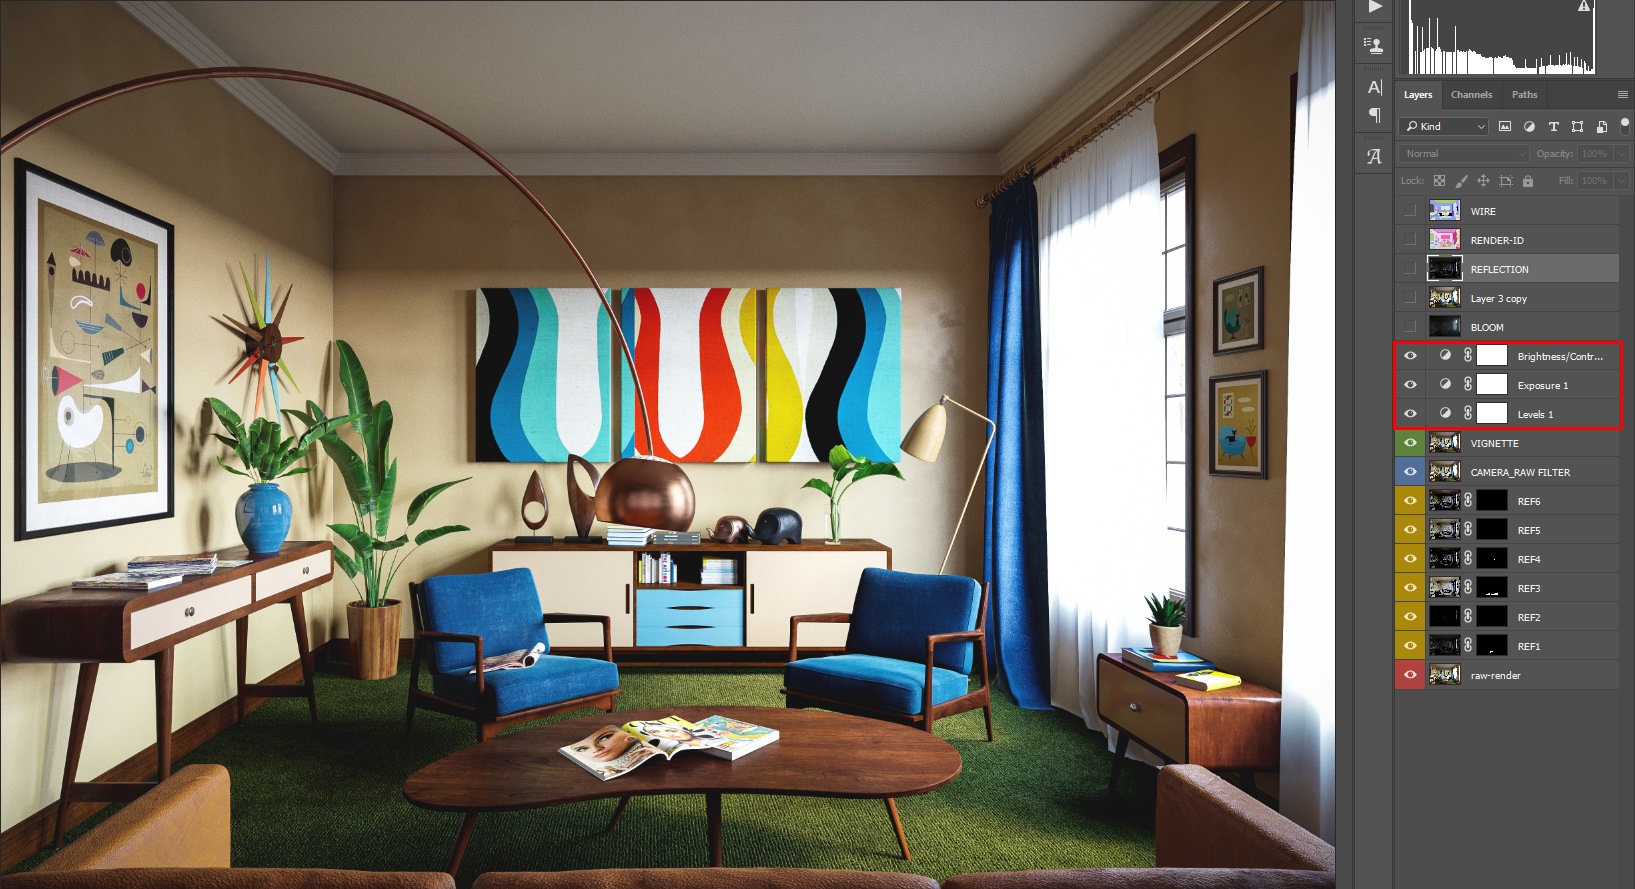
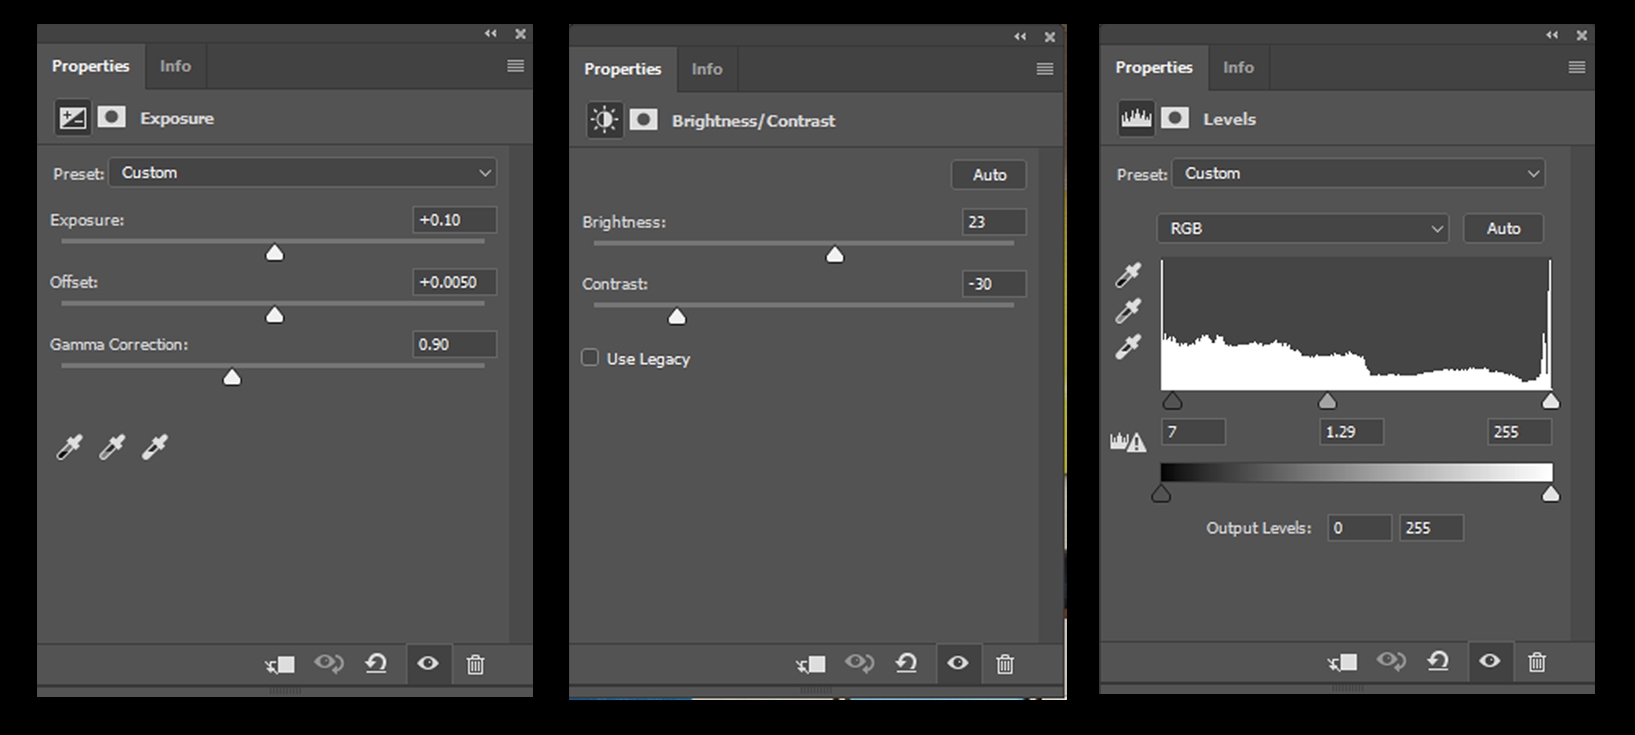
Then I added adjustment level layers as shown below.
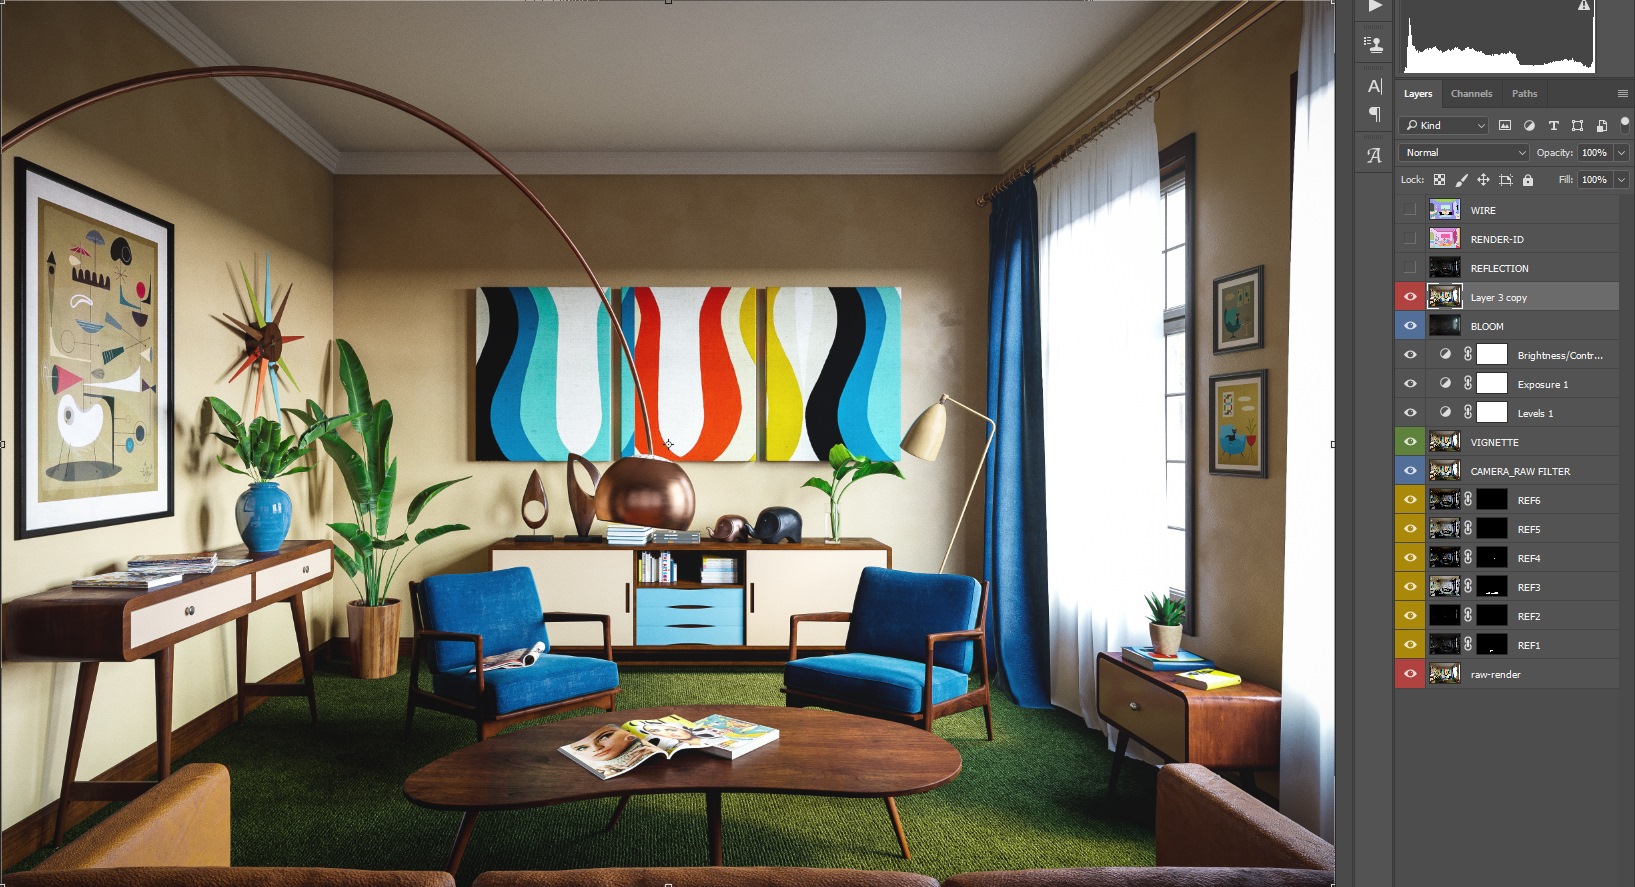
To get the bloom effect, I added the bloom element from corona using lighten blend.

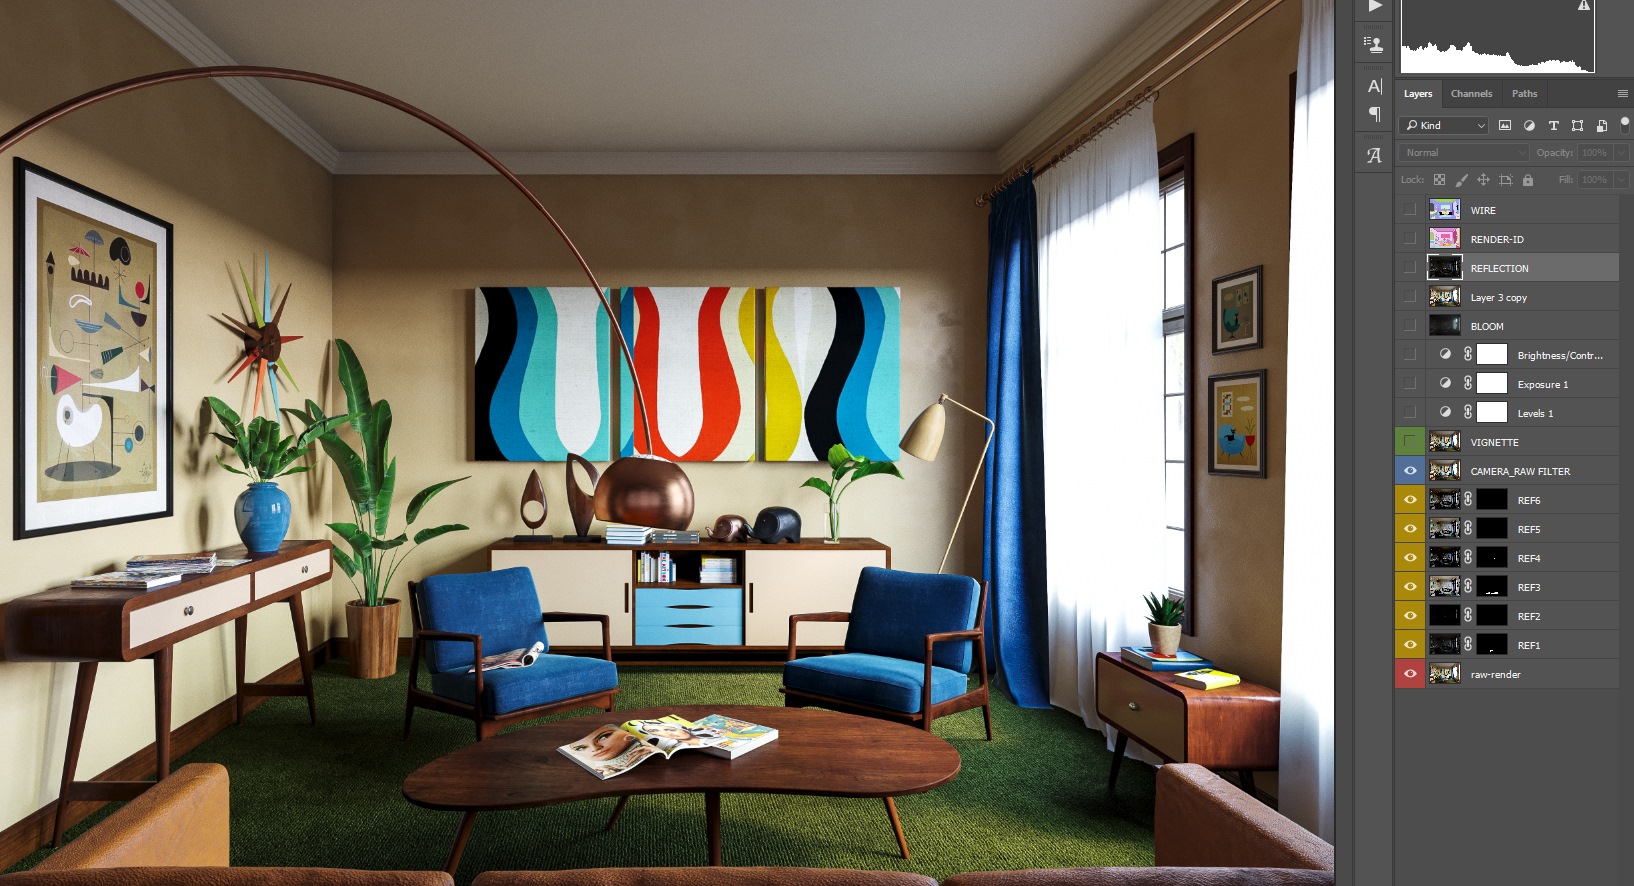
The last thing is that I play with the camera and I use a raw filter as a final touch to adjust levels and contrast.
And here is the final work.


I really hope that you enjoyed and found my making of helpful!
Kind regards,
Ibrahim Alameer.