Pablo Kujman from Cuádrica 3D wrote a making of for his game scene. We asked him to write this article in which he describes his workflow using Cinema 4D and V-Ray. One of the best points in his game scenes are the mixed colours everywhere. Enjoy it!

Hello everyone, my name is Pablo Kujman. I am a CG artist from Argentina and founder of Cuádrica 3D. I want to thank Vasilis, for giving me the opportunity to show my work on the website of VrayWorld.
This scene was made for a hidden objects game. This work was different from others because the client needed all objects to be distorted with a cartoonish style (or something like that).
Cinema 4d bend deformers were applied to achieve that effect. To optimize time, most objects in the scene were downloaded from free web libraries. 3d Warehouse, Archive 3D. So, I have only modeled the structural elements.
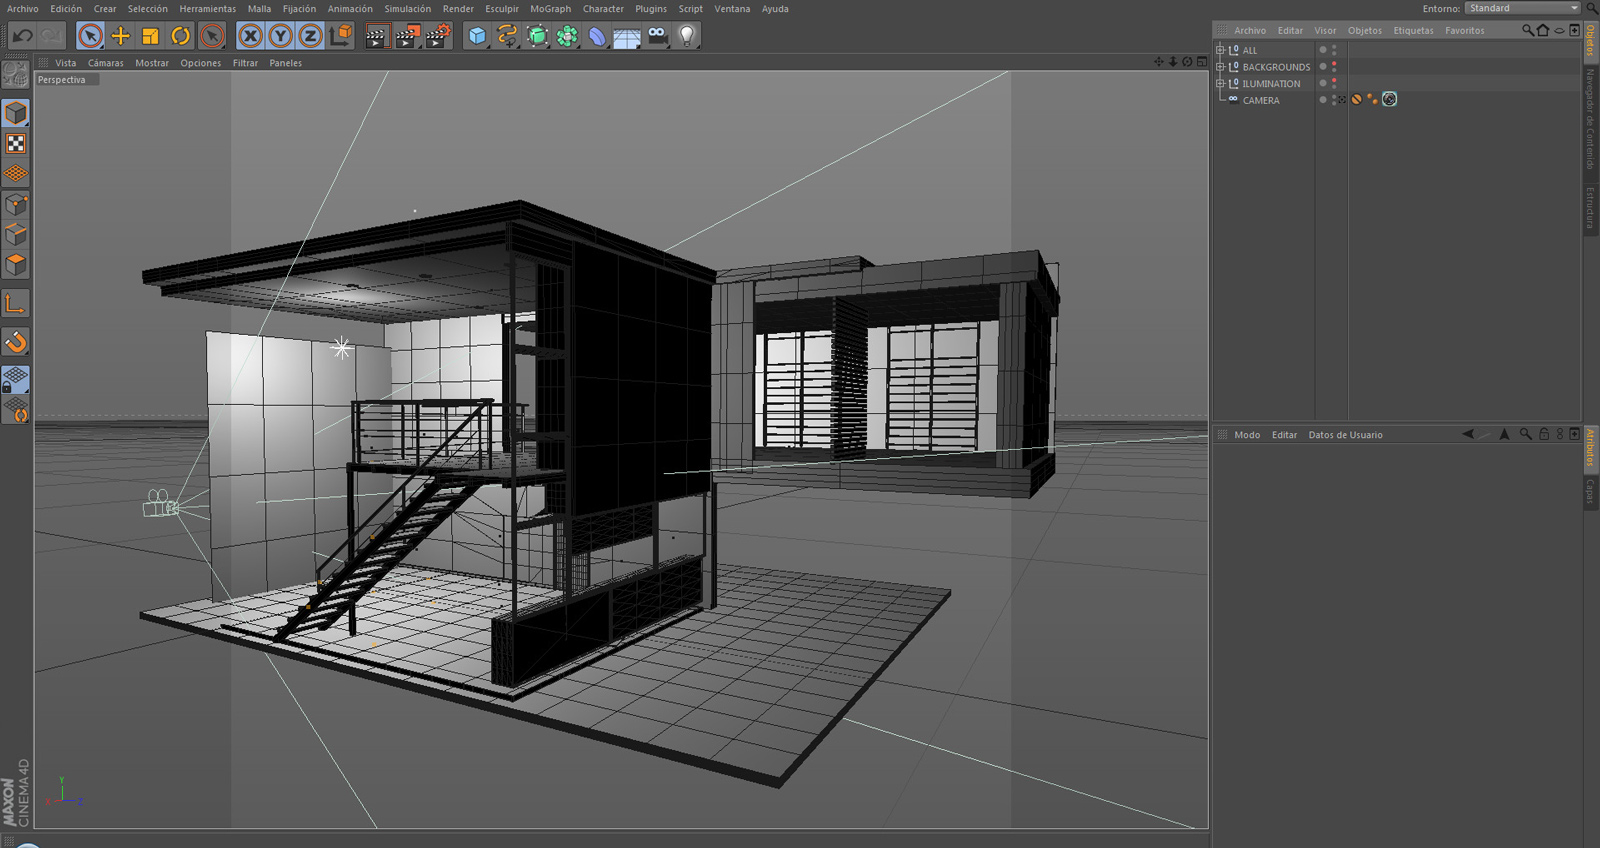
As the client requested only one rendering, it was not necessary to pay attention to objects that are out of the shot. As you can see, all the objects such as walls, floors and ceiling have several subdivisions of polygons. These subdivisions are necessary when applying the deformers. Some of the subdivisions were made on native objects and then I made it editable. In other cases, subdivisions were added at the end of the modeling process using the "Selection" tool.

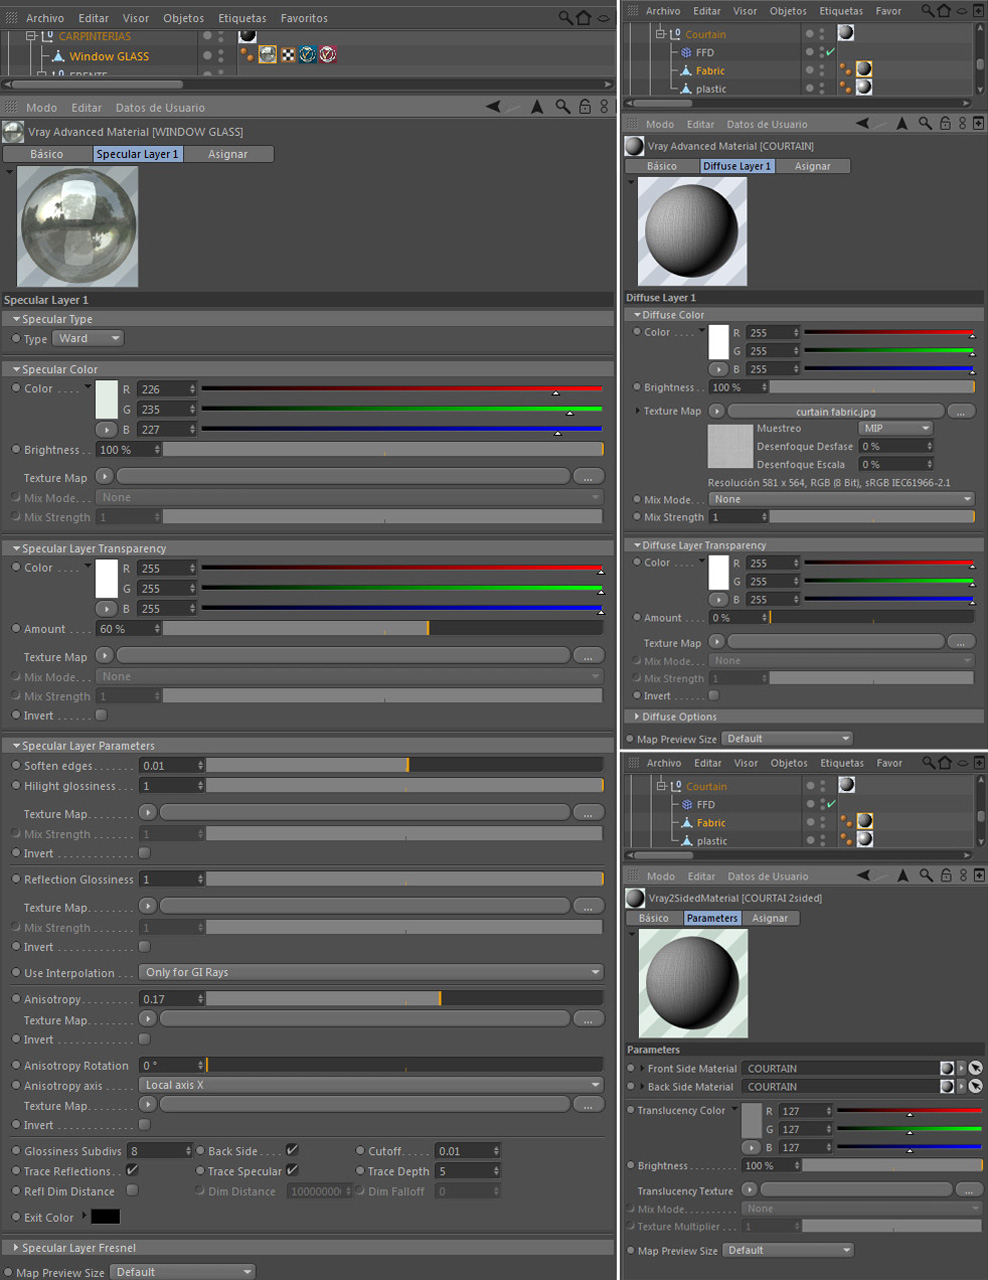
The downloaded objects usually do not have their textures applied correctly. For this reason texturing was one of the tasks that took more time to be done. However, they are not very complex materials (mostly wood, metal, plastic, glass, concrete..).
Note: The window glass has a displacement tag to get the horizontal lines you see in the final render. Here there are some materials and their configuration:
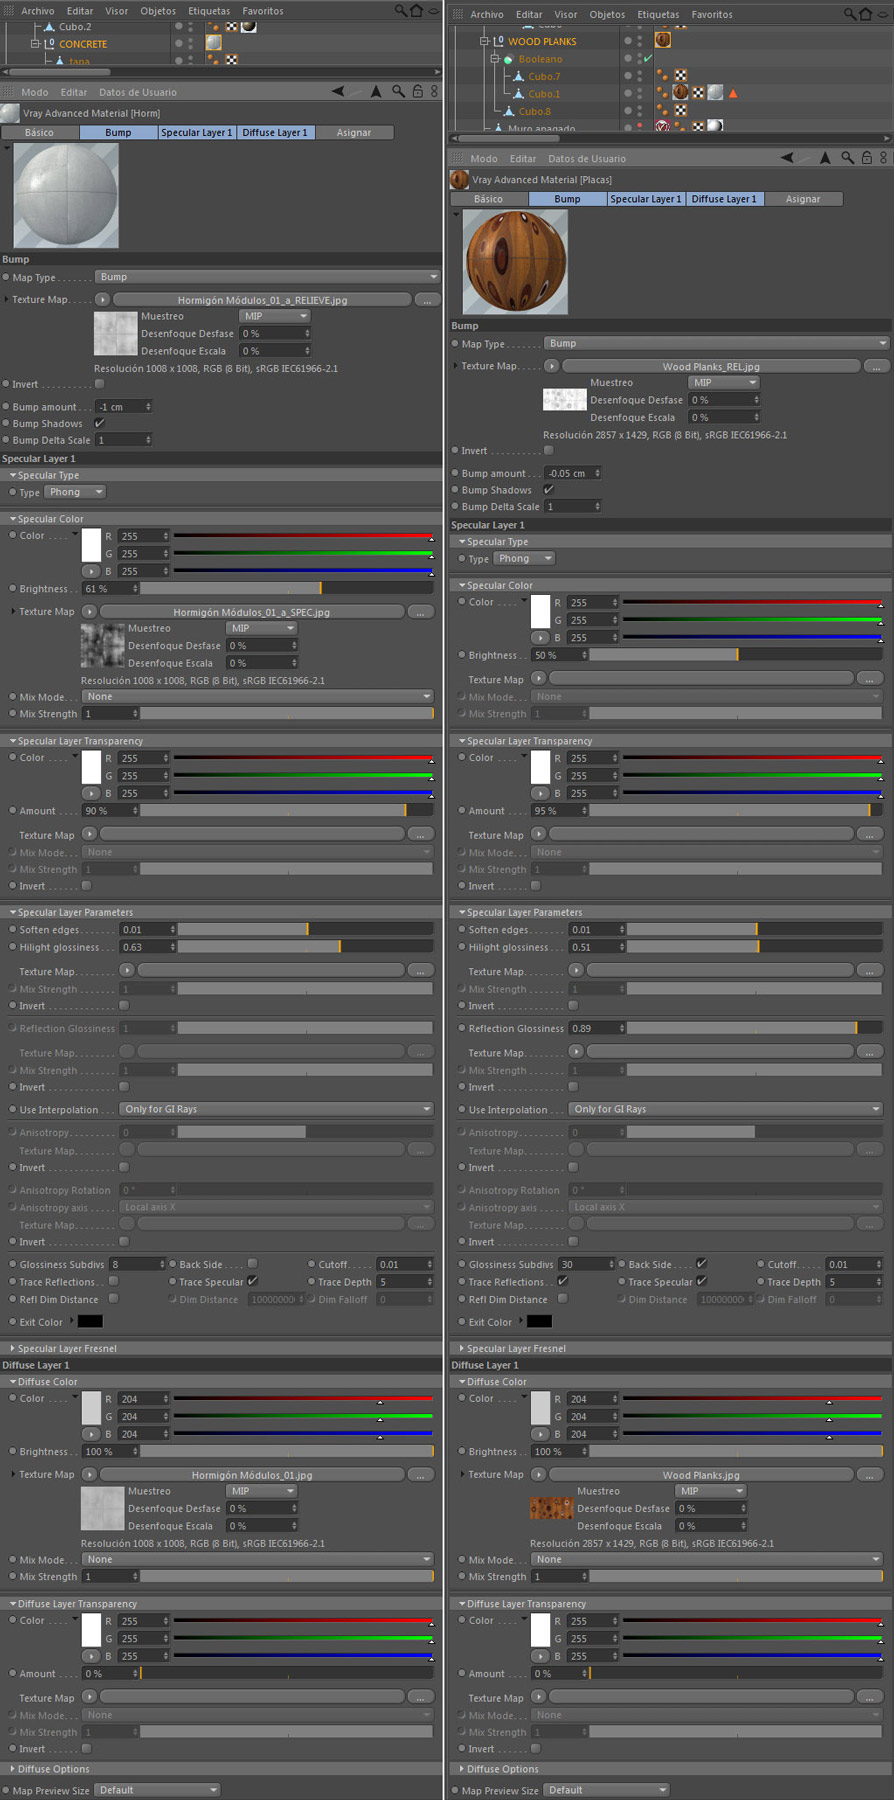
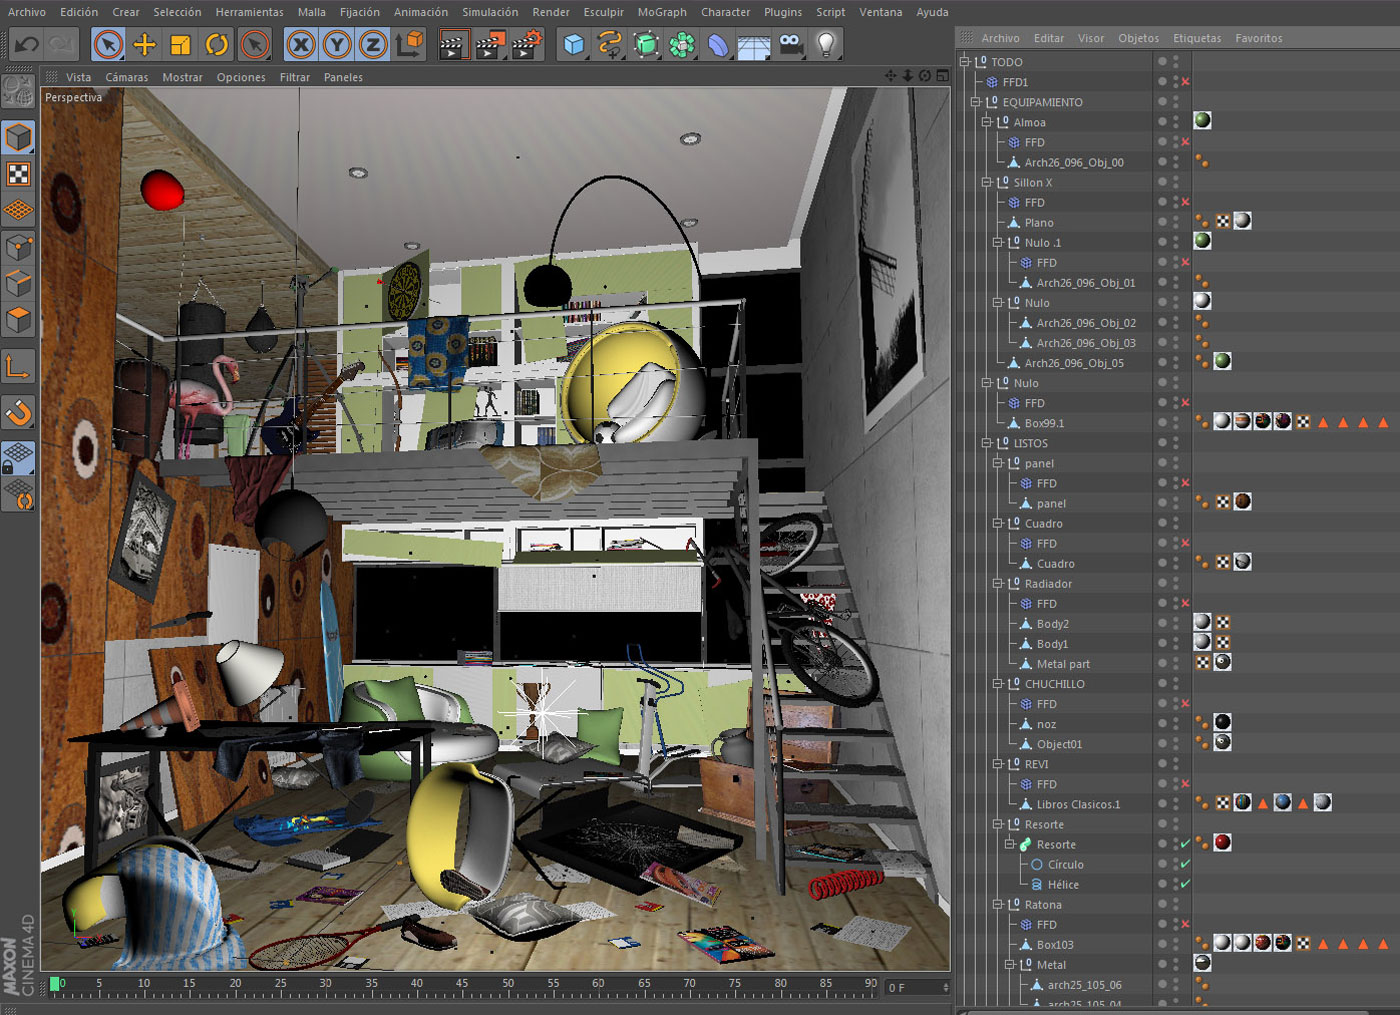
In the following screenshot all materials were applied.
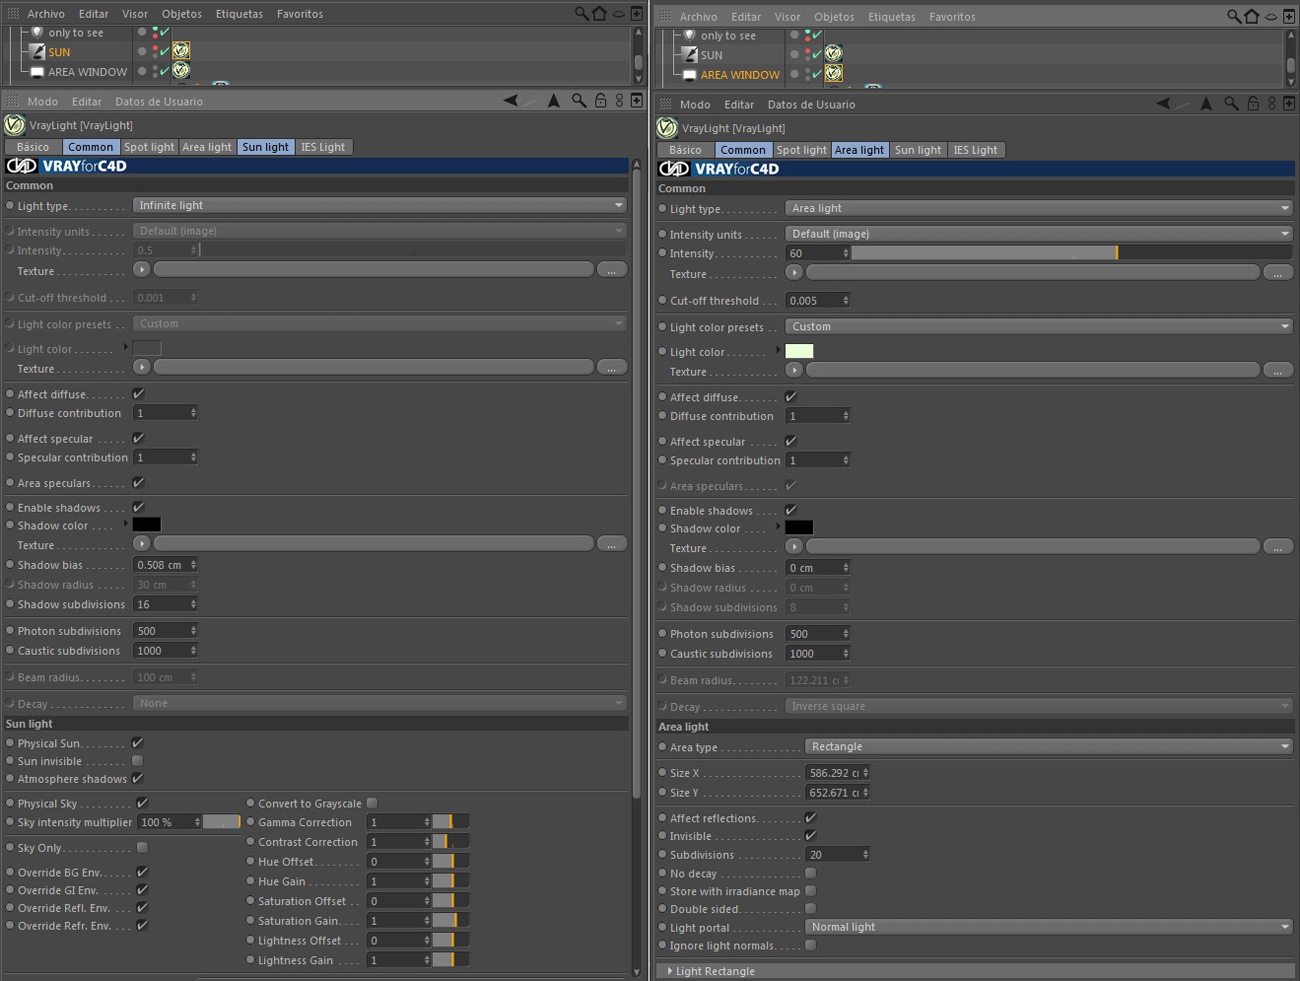
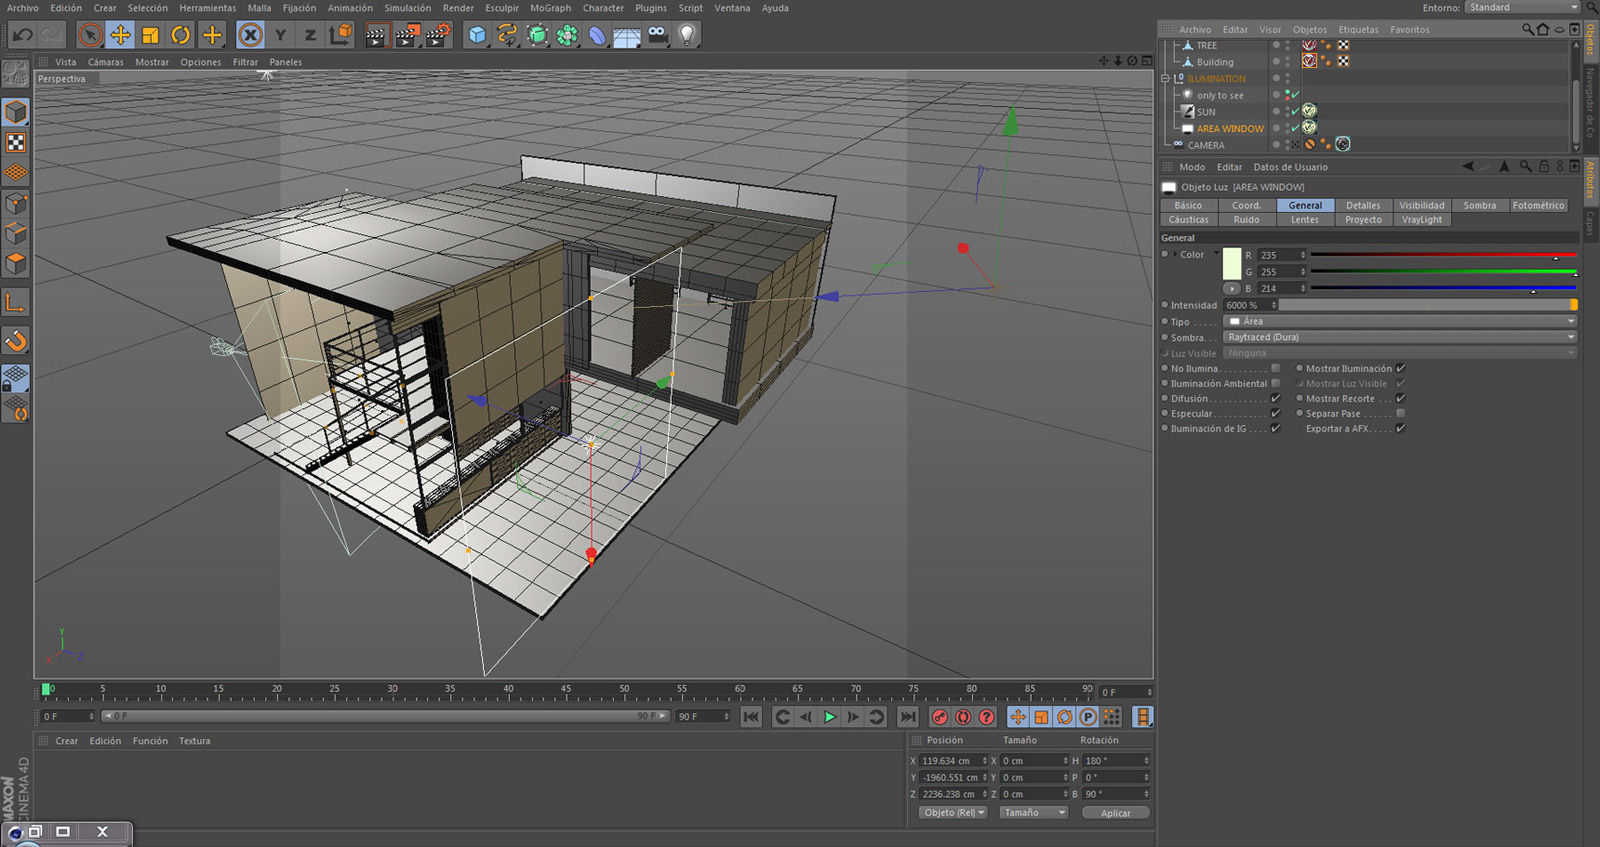
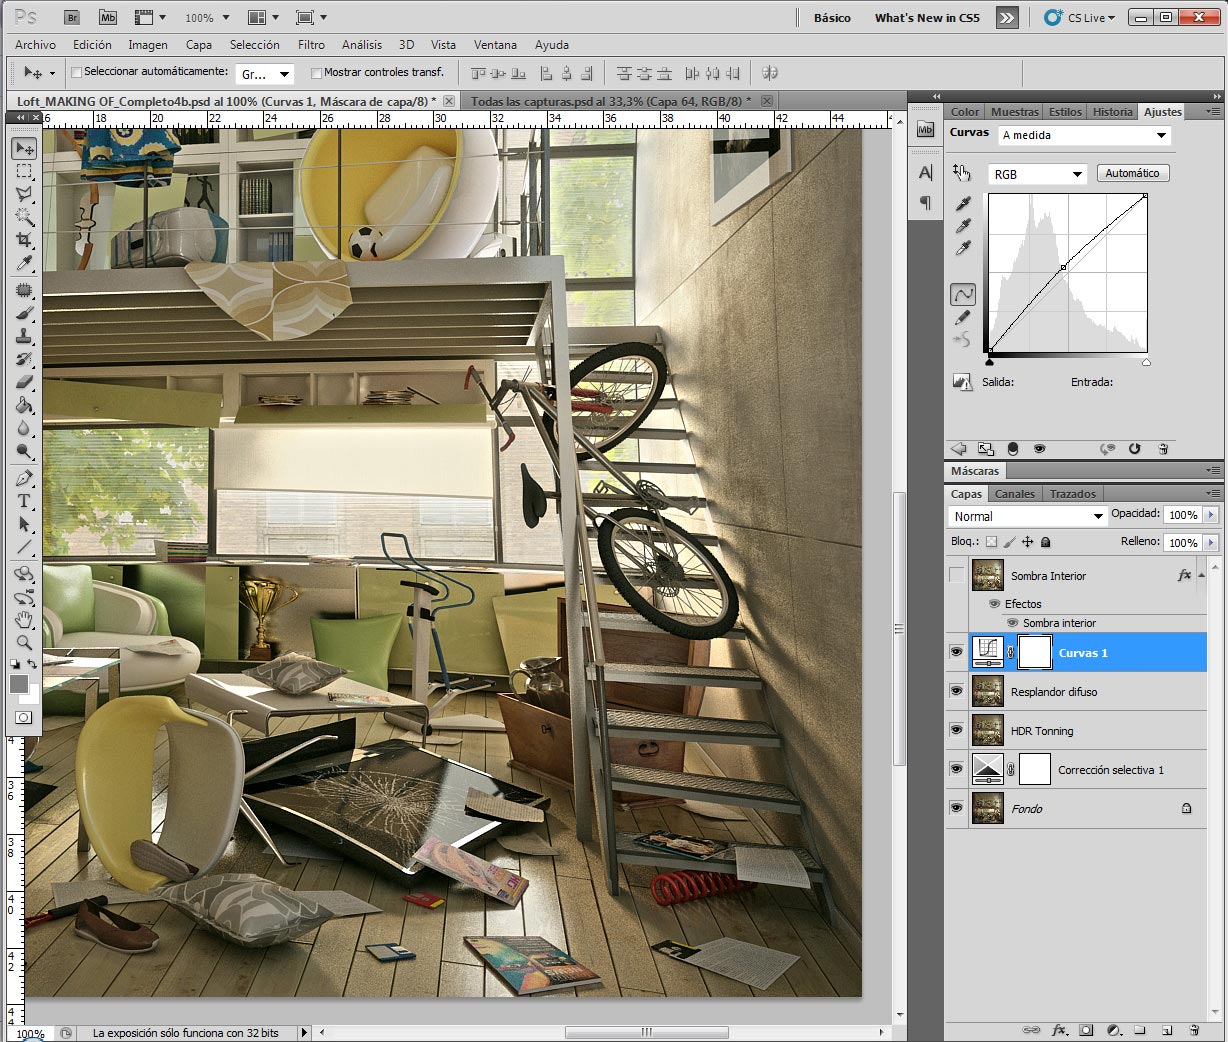
To illuminate the scene, I've only used two lights. An infinite light for Physical Sun & Sky and a Vray area light located near the window.
For the VrayPhysical Camera, I just modified the exposure parameters.

DMC sampler: I increased the "Global Subdiv multiplier" with a value of 2, to improve general render quality.
Indirect Ilumination (GI): I have used the first preset of the list (Default Universal Preset Stefan), without make any changes.
Color Mapping: I have change some parameters, as you can see on screenshot.

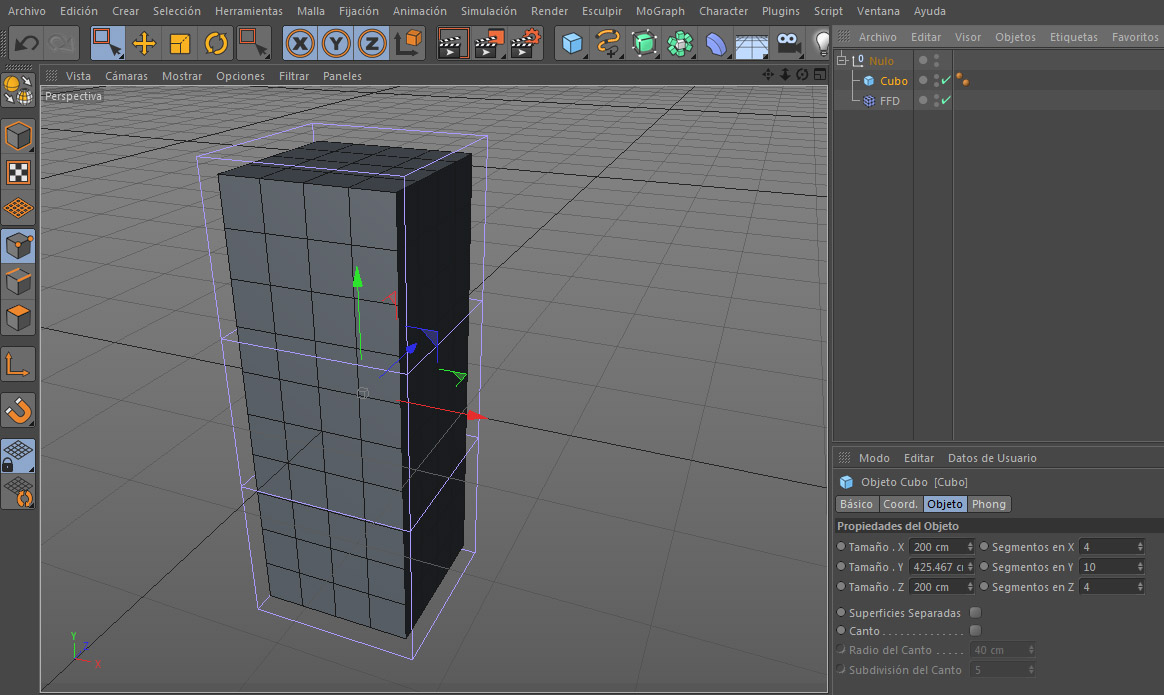
In this scene I always used the FFD deformer. It works in a very simple way. It is a parallelepiped with subdivisions (violet color), like the Cinema 4d native cube (in the image below, the cube appears in orange color). Every object inside the FFD, could be deformed.

For example, in the following screenshot, there is a native cube, with 4 subd in X, 10 subdiv in Y, and 4 in Z. The cube is inside de FFD deformer, (violet color).
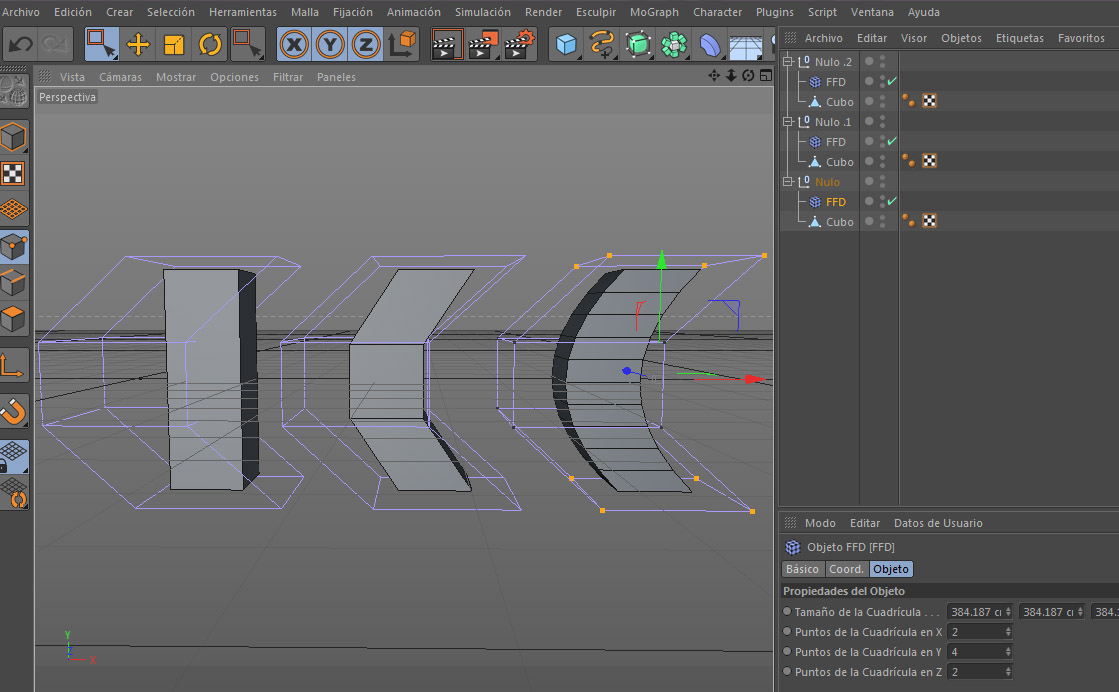
In the imagen below, there is 3 examples. The FFD deformer is exactly the same. Only changes the cube subdivisions. When the number of subdiv increase, better the detail and quality of the deformation.
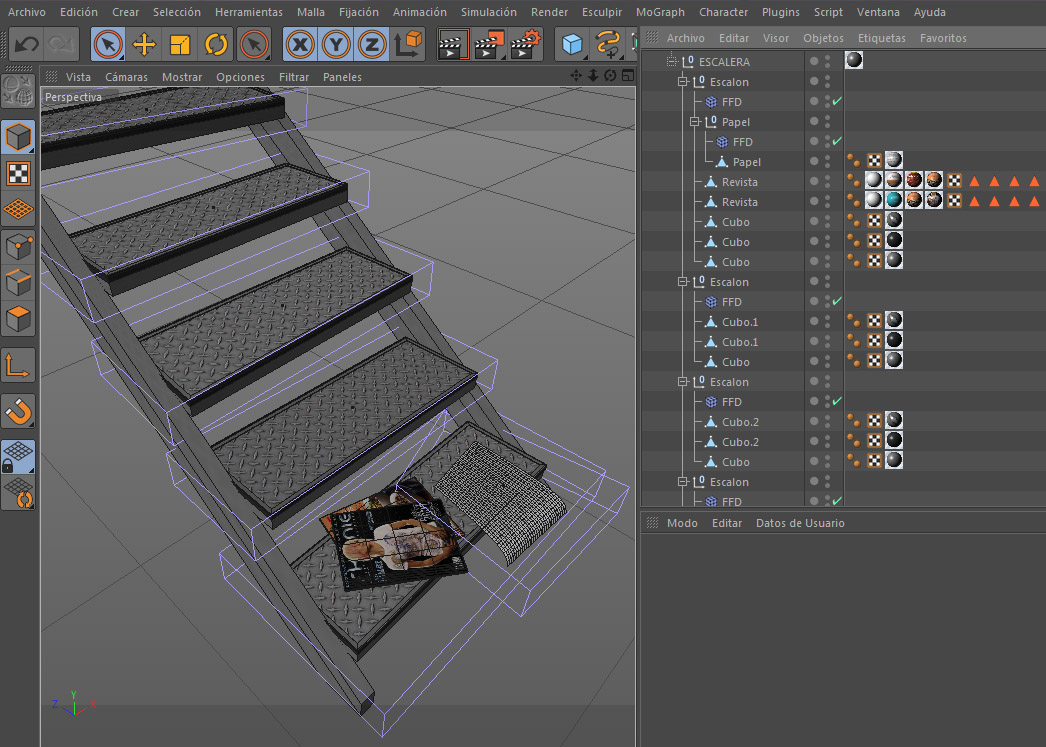
For that reason, all the objetcs on the scene have subdivisions. Once the object we want to deform, is within the deformer, select the FFD and the points tool. To generate the deformation, we only need to select the desired points of the deformer, and move them.
In the same way in which we select the points of a common polygon. To make the deformation work, the FFD and the object that you want to bend, should be inside a null object.
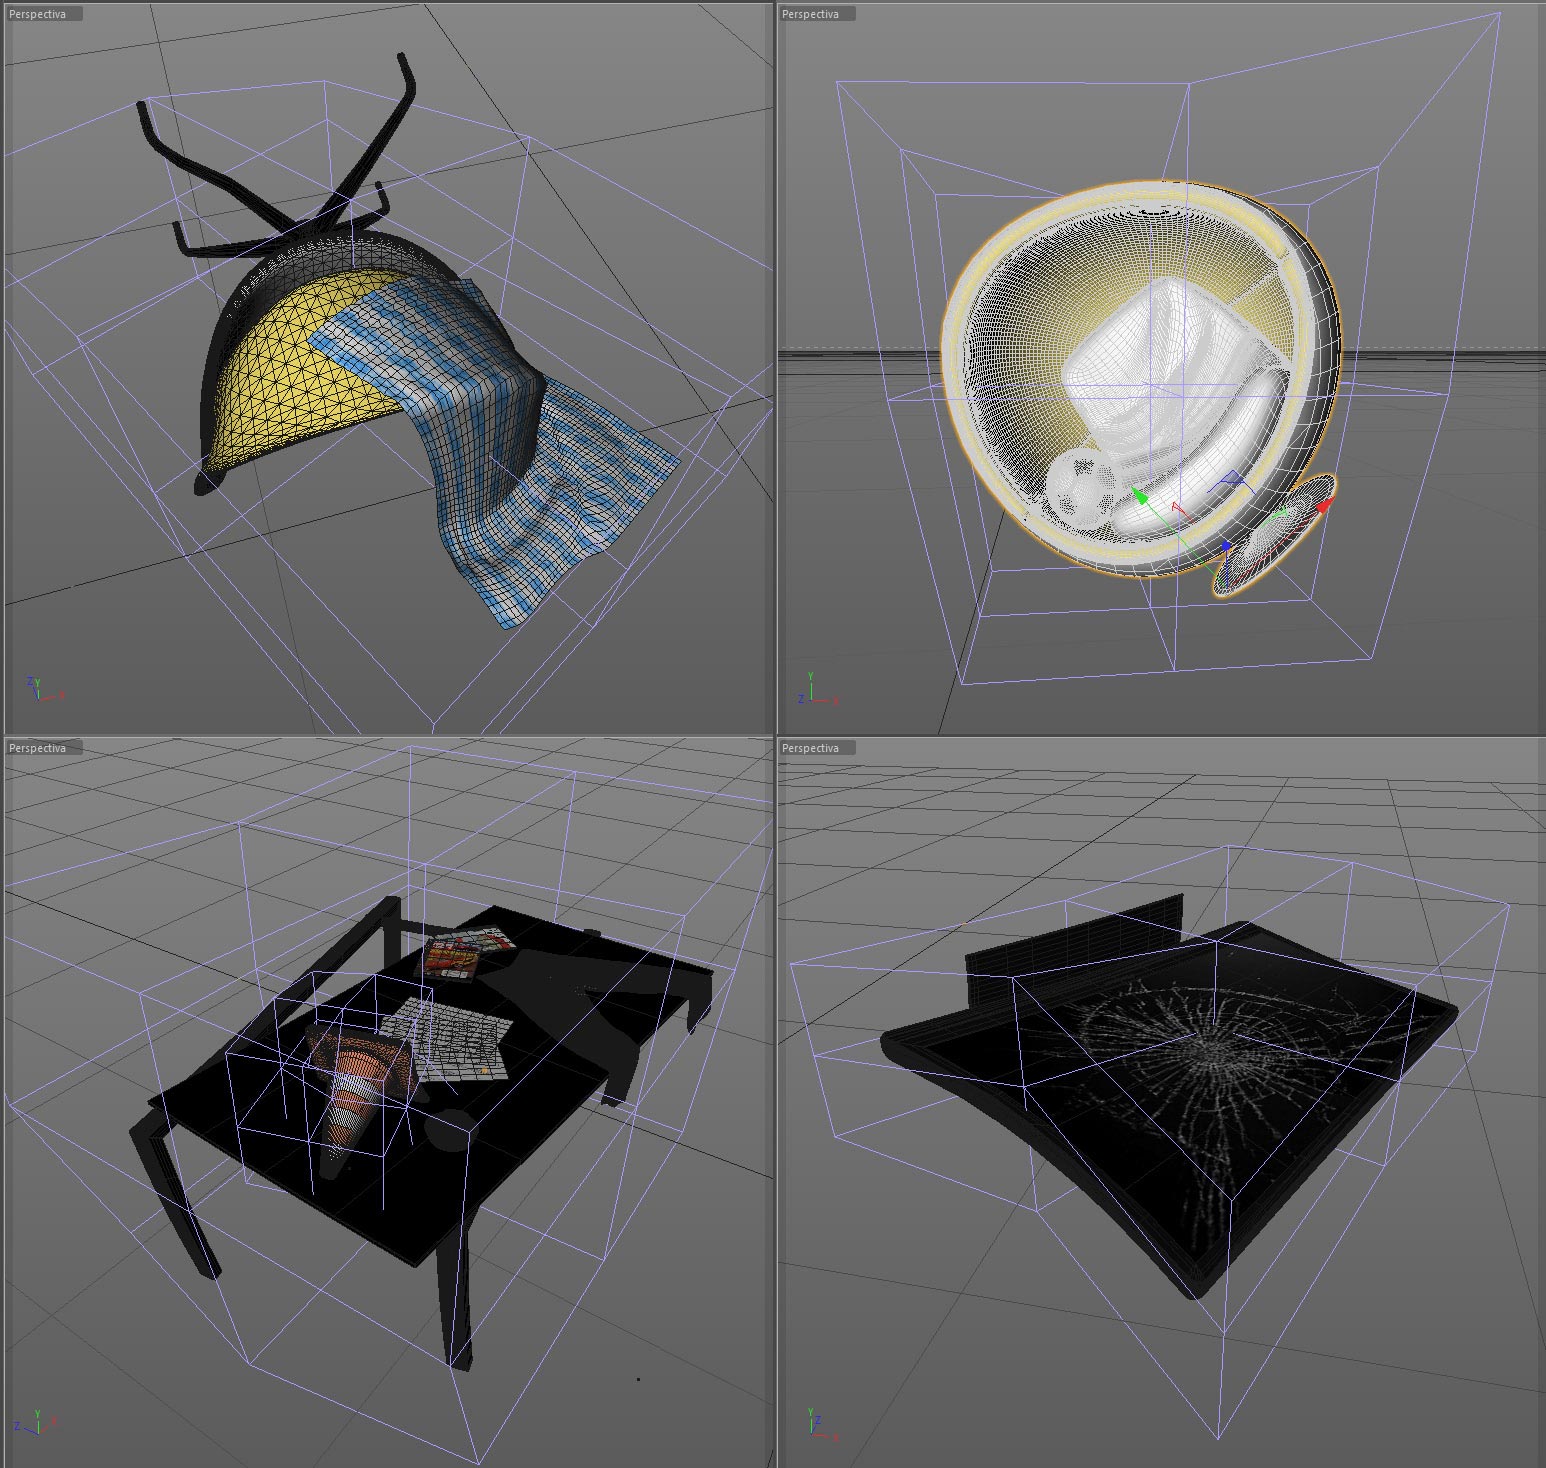
Below, there are some objects from the scene, with their own deformers. In some cases (glass table) there is a deformer, inside other deformer.
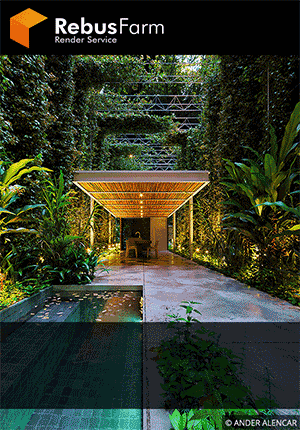
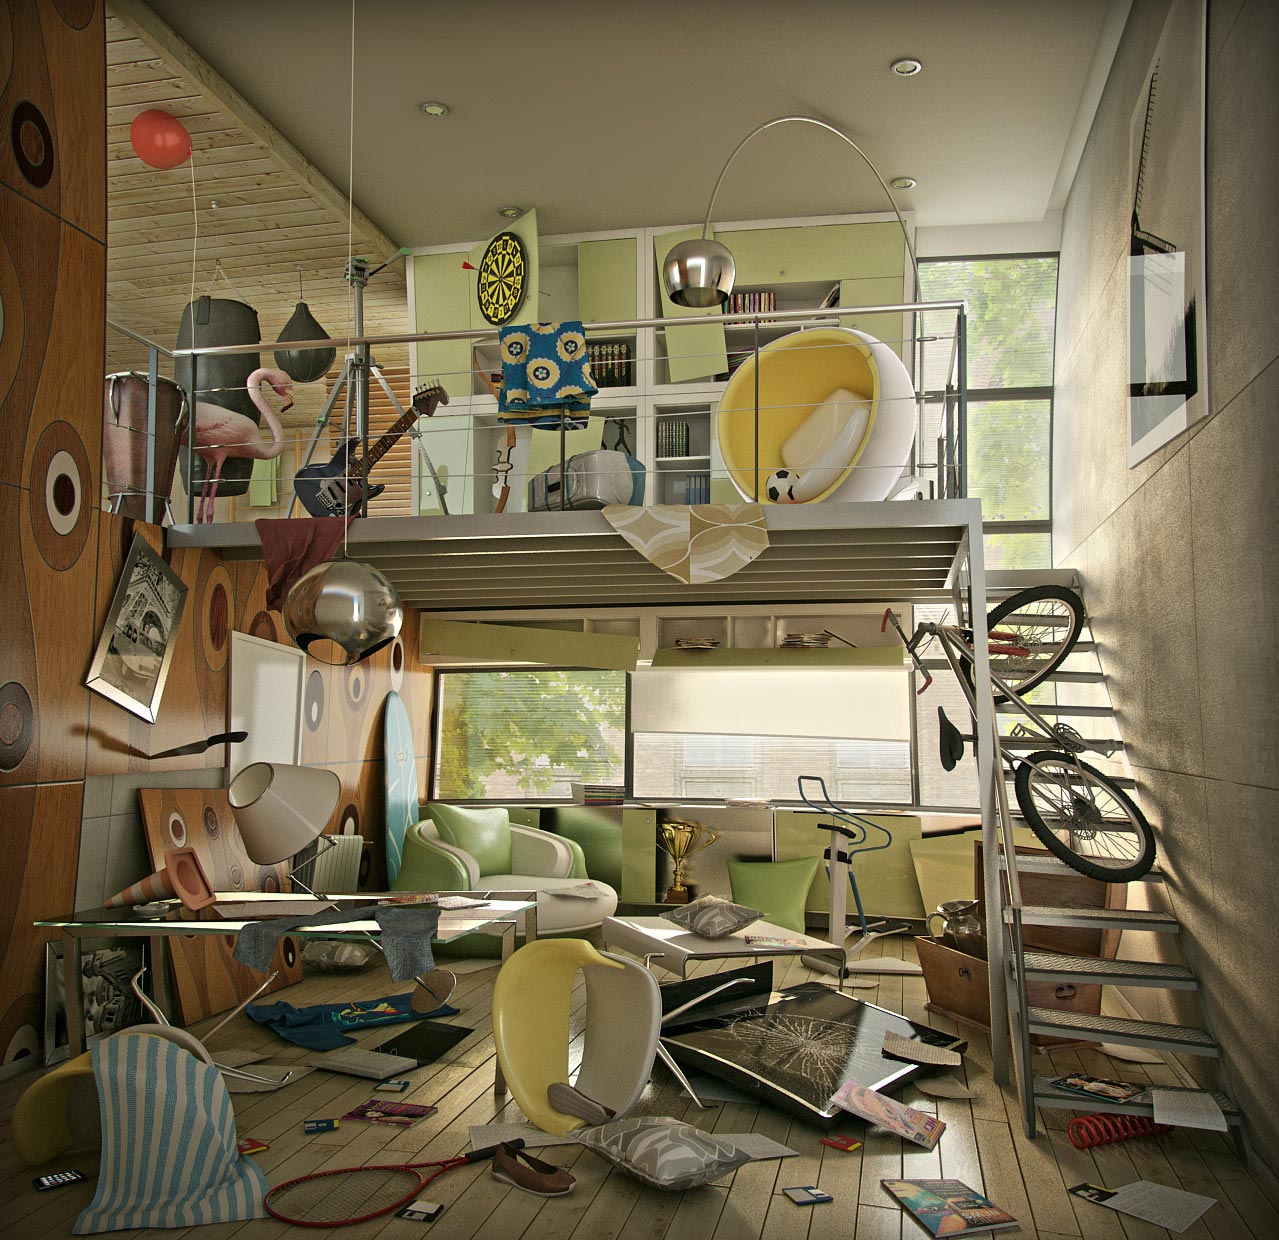
Here is the final scene, with all the deformers enabled, materials and lighting.

The final render is an RGB image (no multipass used).
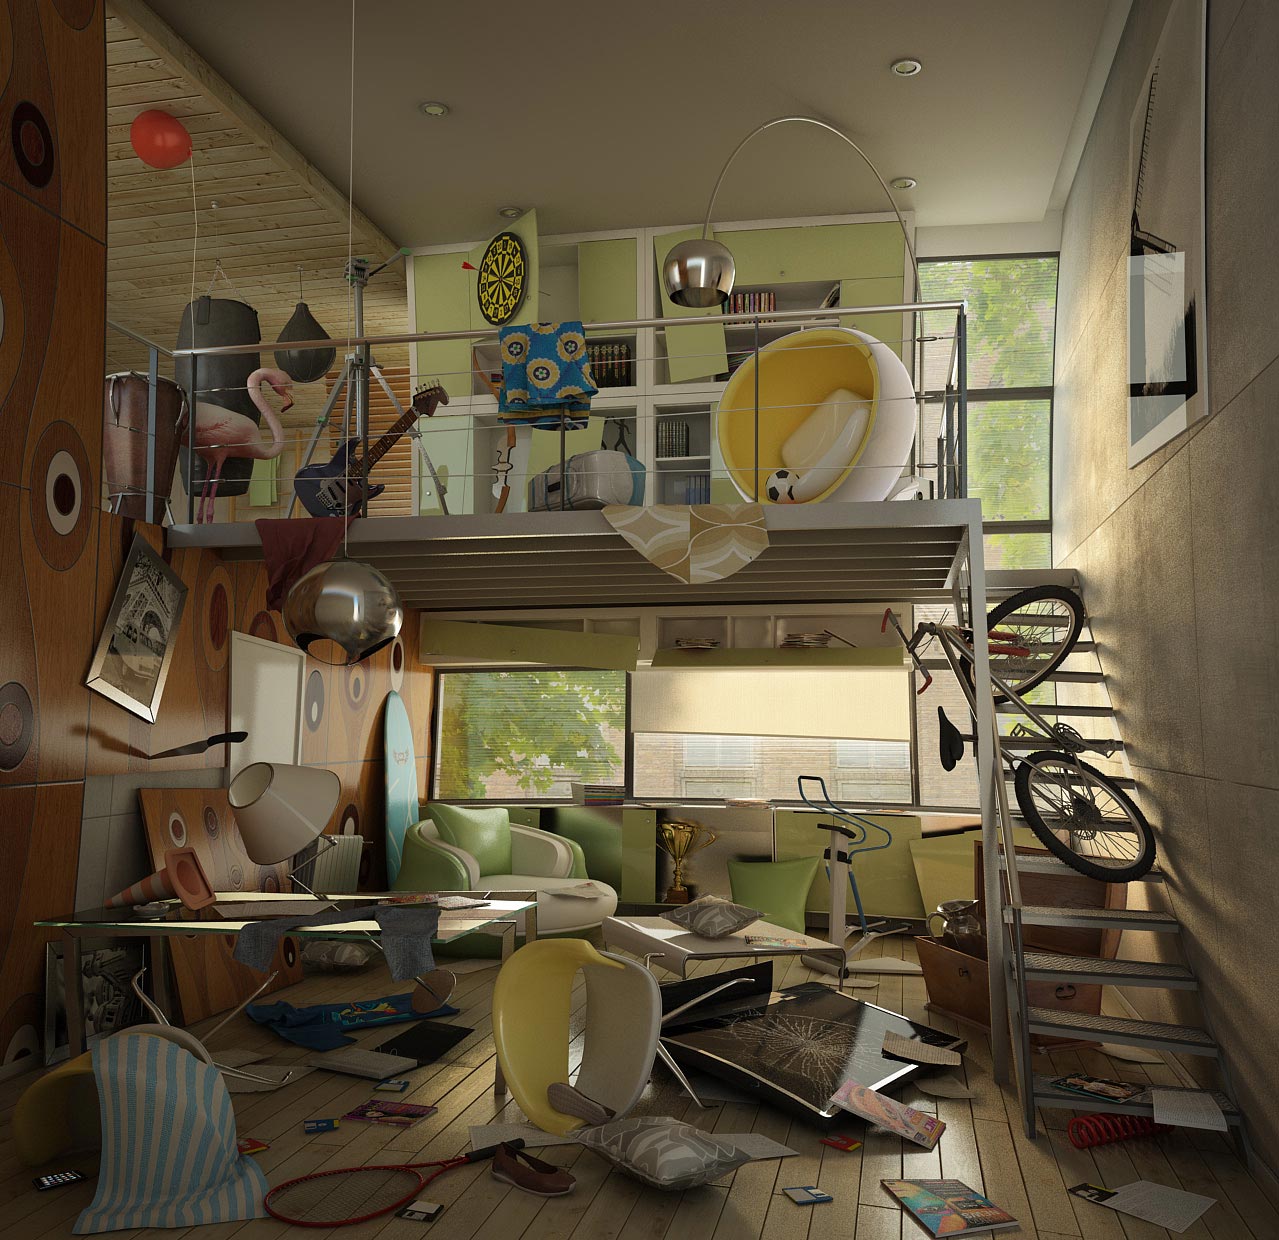

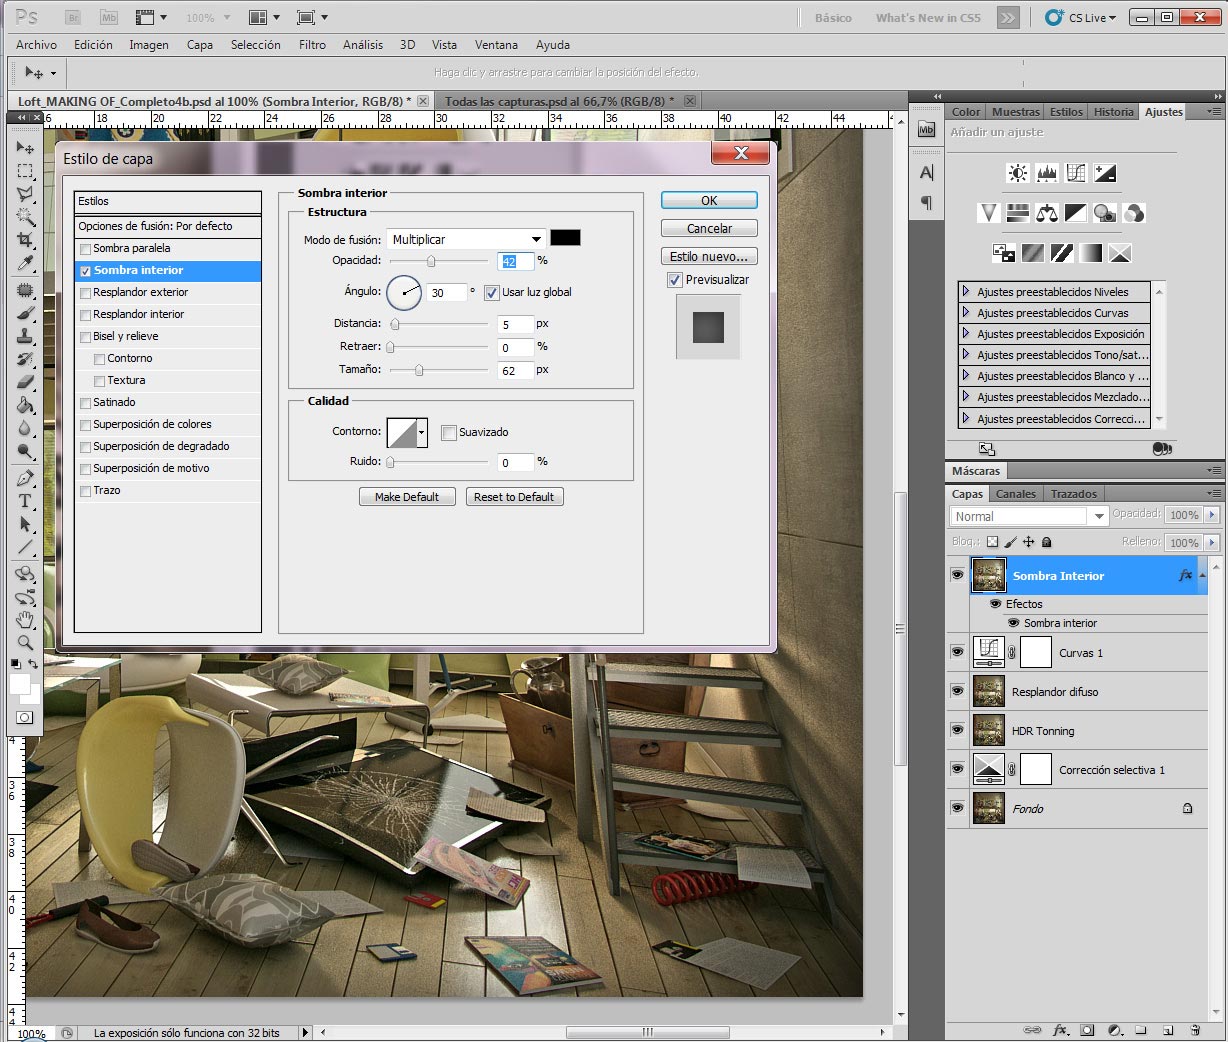
Final render with post production.
Thats all! I hope it was useful. Greetings!