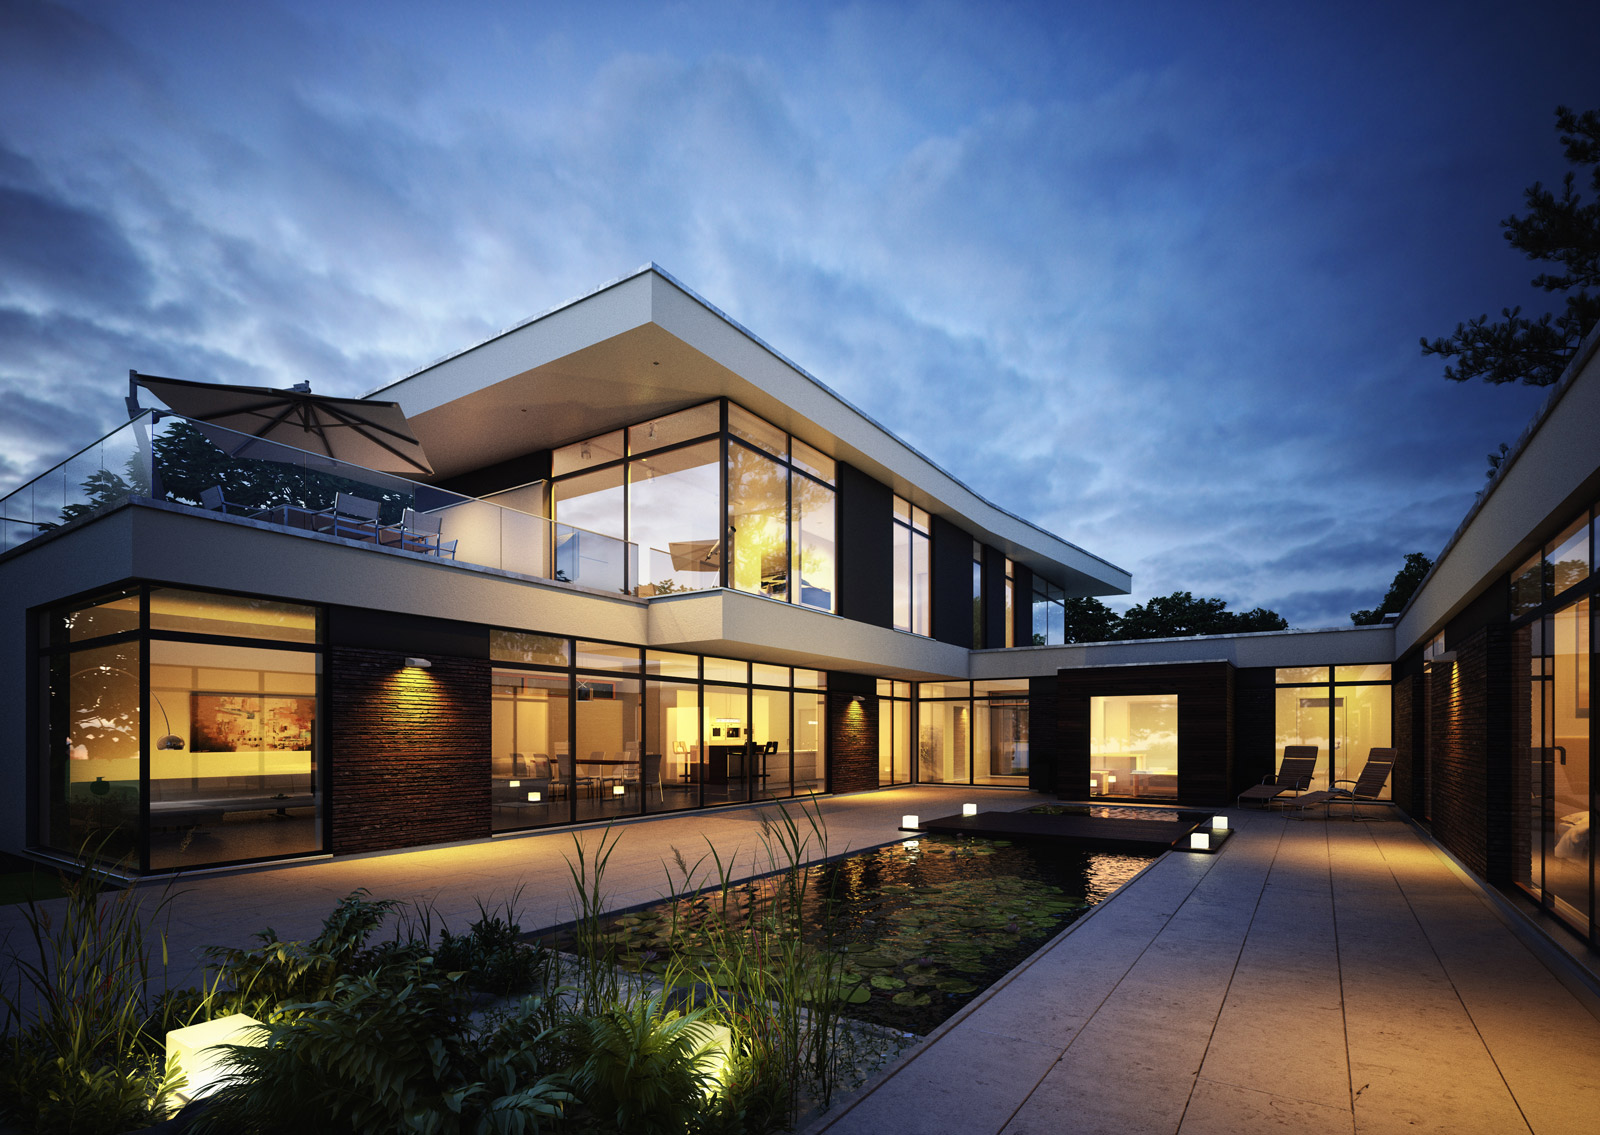
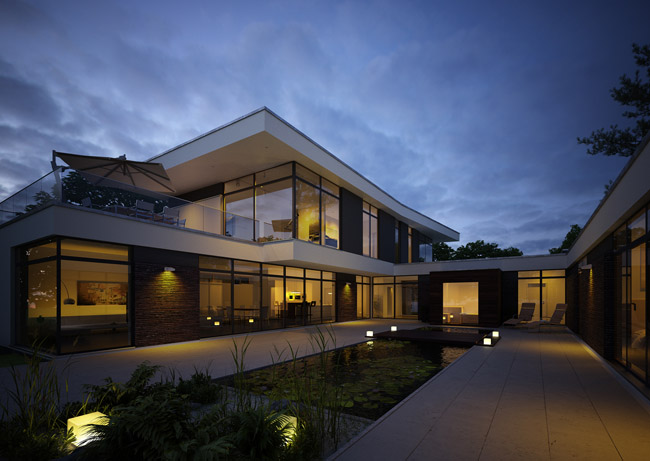
Peter Oldorf from Lichtecht won the Vray World Award of December 2012 for the best ArchViz image. We asked him to write this Making of in which he describes his workflow and some useful tips. One of the best points in this shot is the real warm lighting coming from the building. Enjoy it!
My name is Peter Oldorf and I studied graphics-design in Rostock, Germany. There I made my first experience with 3D design and it became obvious to me that I want to do it professionally. In November 2008 I started working for the lichtecht company in Hamburg, Germany. There I had my first experience about 3d-modeling, animation, simulation, texturing and architectures. Thanks for all the know-how to the whole lichtecht team!
We always try to find new ways to make our renderings look more realistic and search for new solutions to work more efficiently. That´s the most exciting part about working as a 3D artist: it´s all about learning and walking new ways every day. Next to client projects I´m experimenting with simulation, sculpting, tracking and environment software like Realflow, ZBrush, Boujou and Ozone. We´re also working with augmented reality techniques to combine 3D with real-time camera footage of cell phones and tablet-PC´s. My inspiration sources are Blogs, show-reels, photos, movies or sometimes simply music.
Mainly we´re working with 3ds max, Photoshop and After effects next to hundreds of plug-ins, scripts etc...
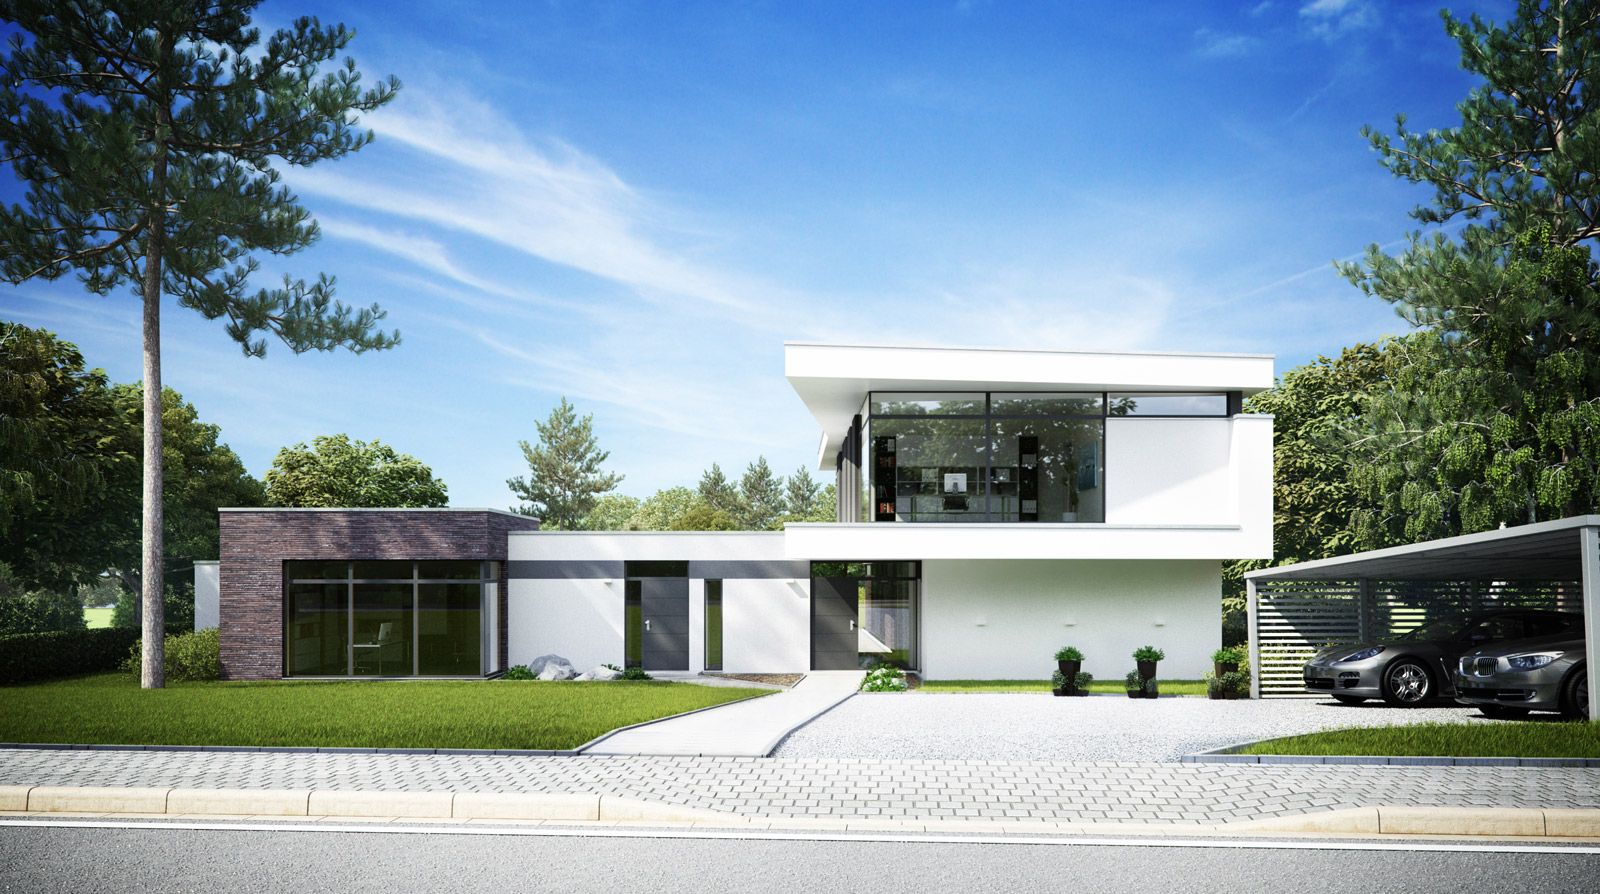
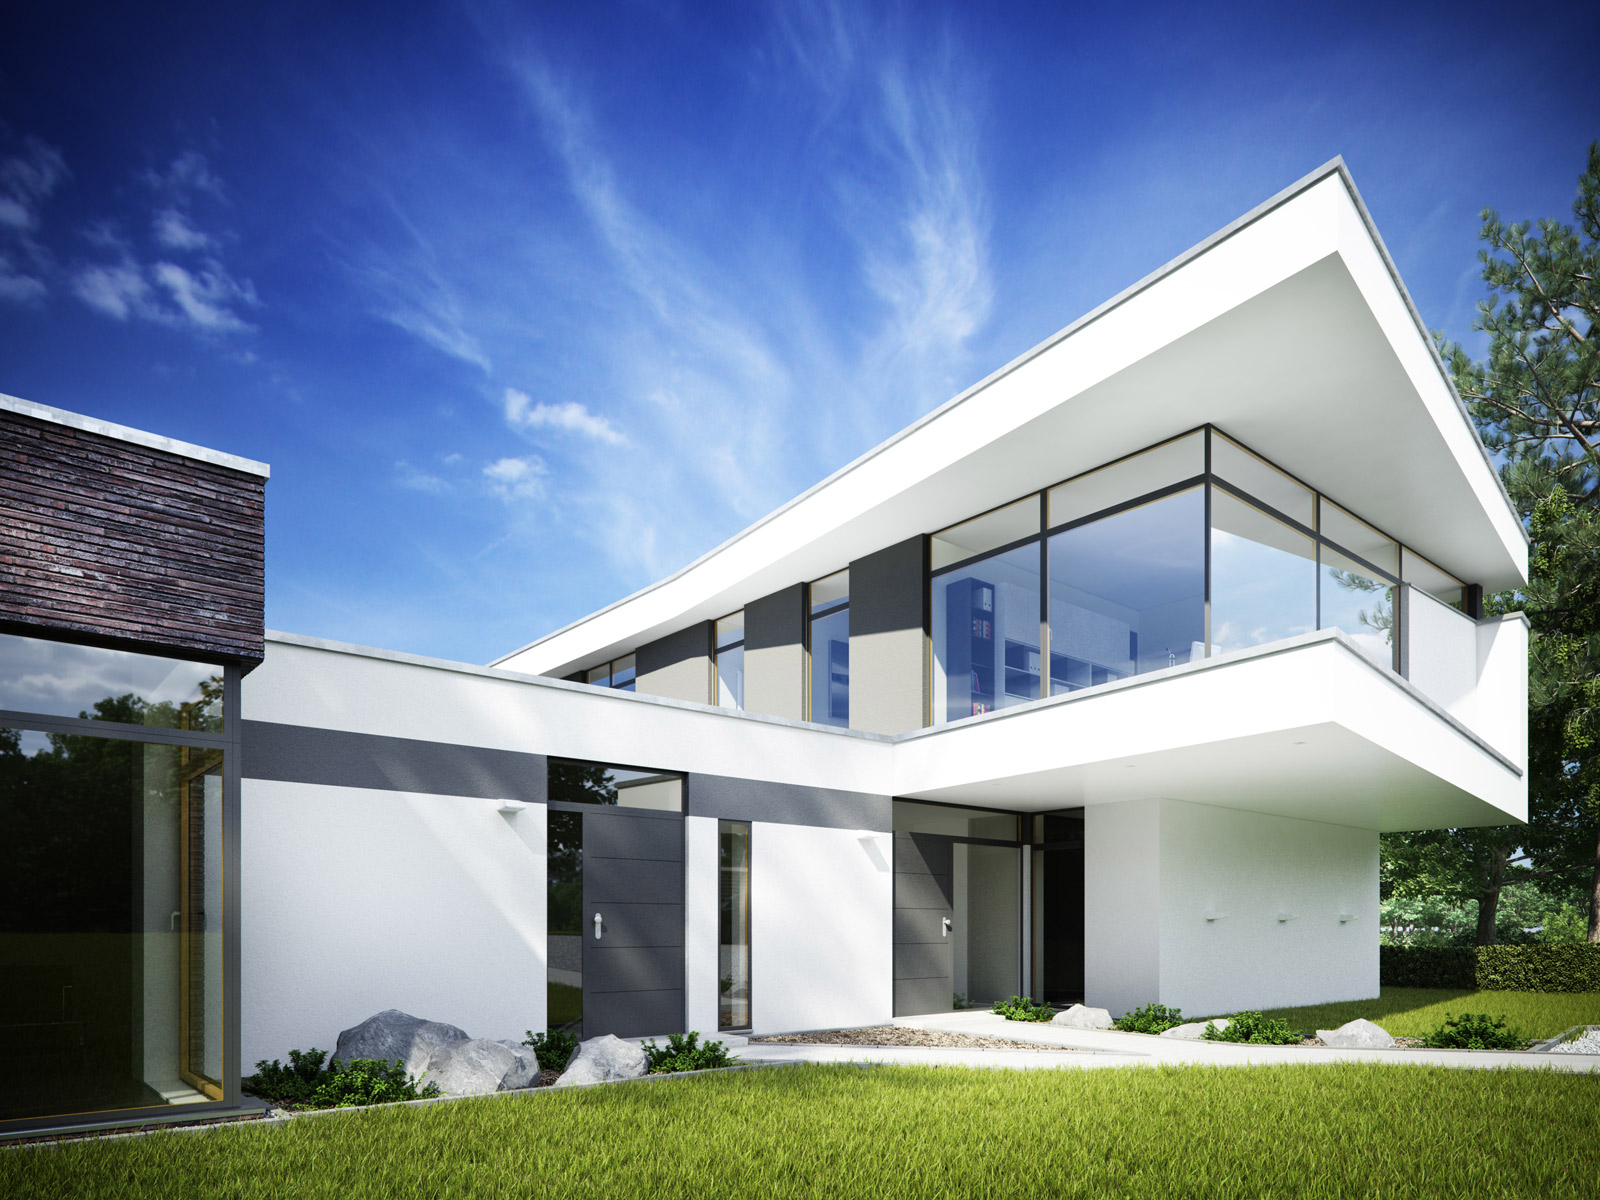

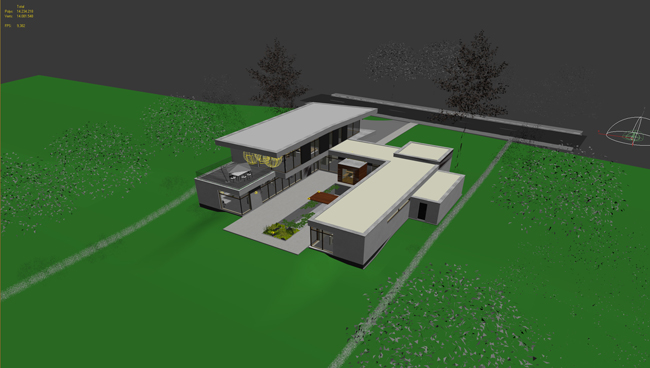
The architecture, materials, details and surroundings were already set by the client, so I just had to base my work on the plans I got. I tried to fix most parts directly in 3d to save time for post work and make it easier according to the clients’ wishes.
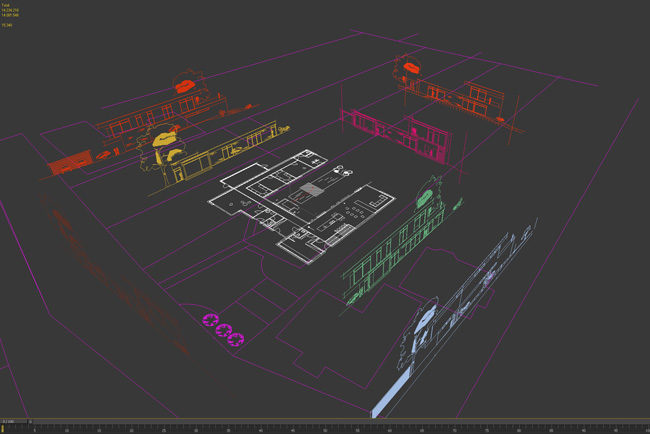
At first I arranged the plans inside 3ds-max 2012. My Unit setup is set to "metric" and "meters". It´s important to check the measure of the plans to get the right scaling (otherwise the house is about 150 meters long) and to weld the nearby vertices in each plan. Sometimes there are 60 000 useless vertices in the plan which just slow down the viewport.
I also built some details, bridge the windows and put them in. I also build some details like metal plates on the roof and wood planks on some walls and it was done.

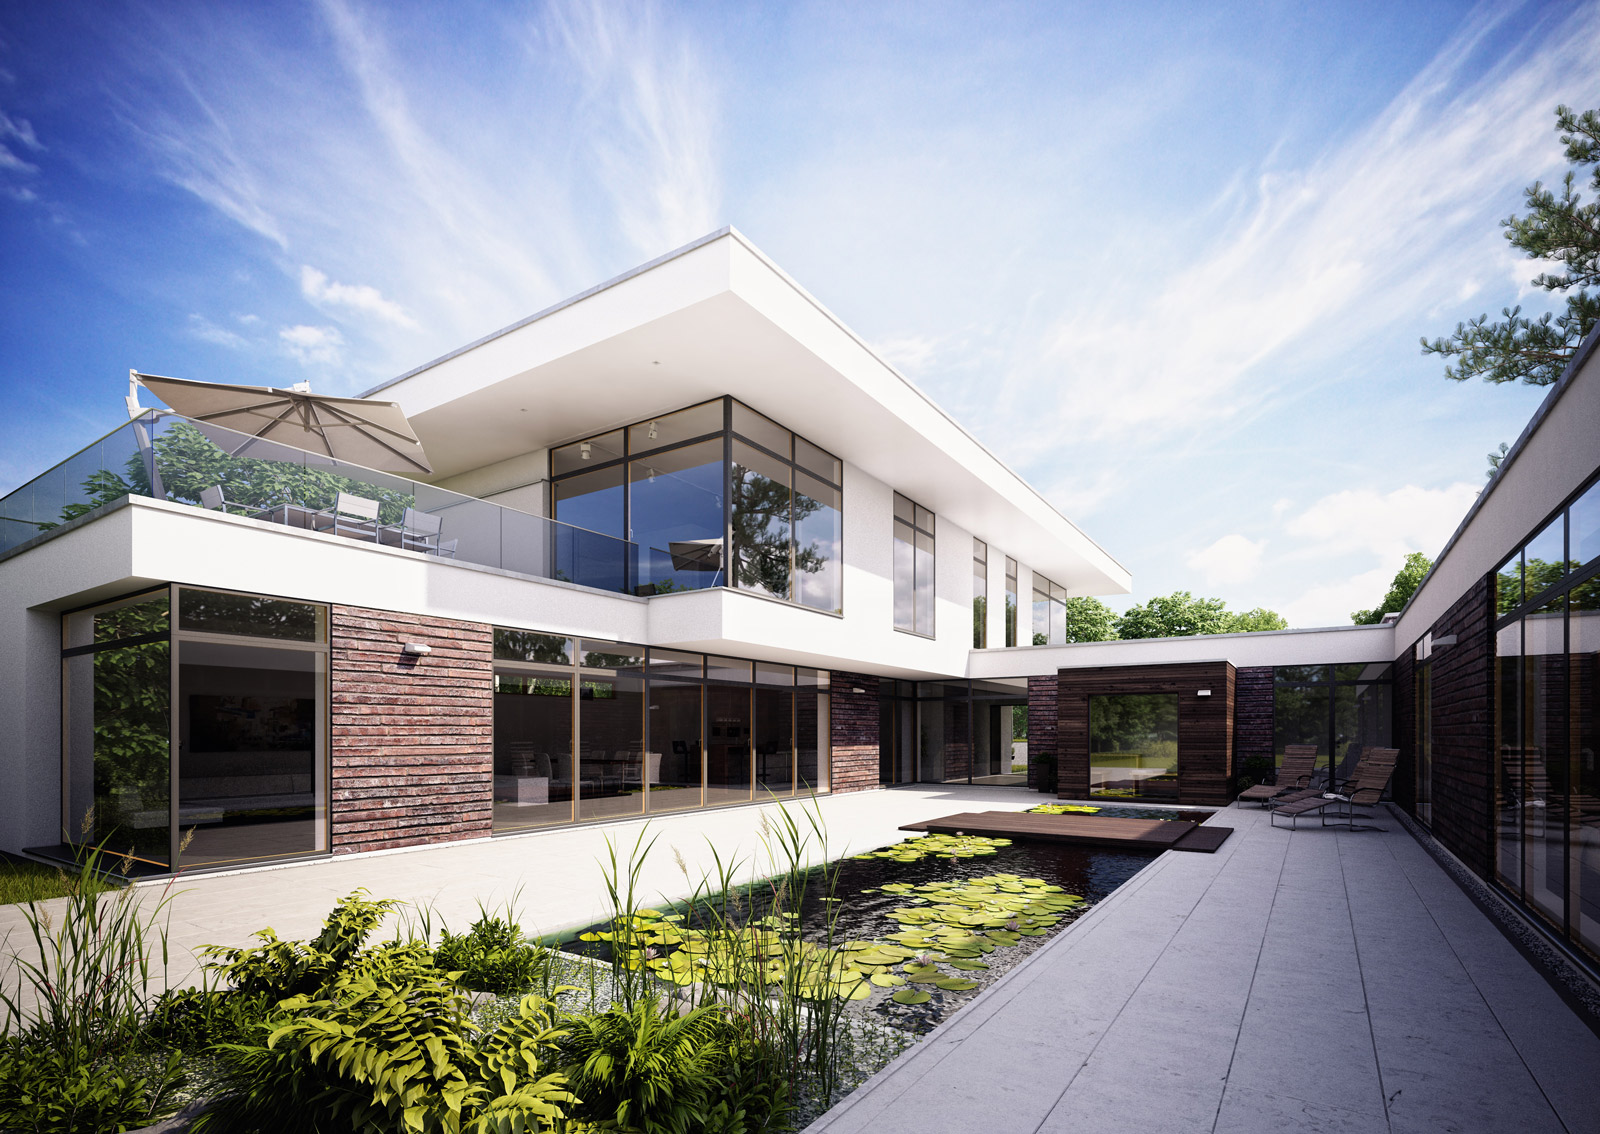
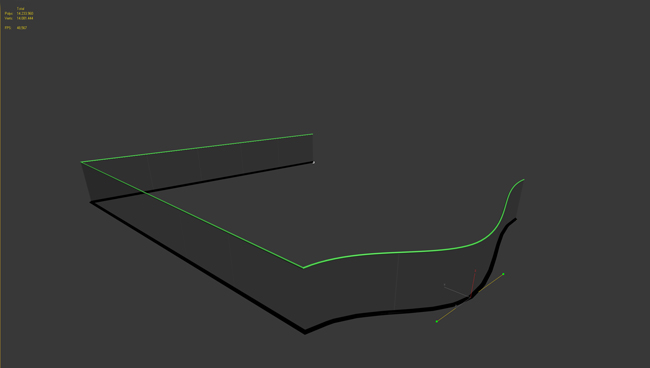
For the glass-railings on the balcony I used the very helpful and time-saving plug-in "Railclone".
Just create a spline, attach your geometry and after some tests you get a procedural mesh everywhere you want. Awesome for late changes by clients!
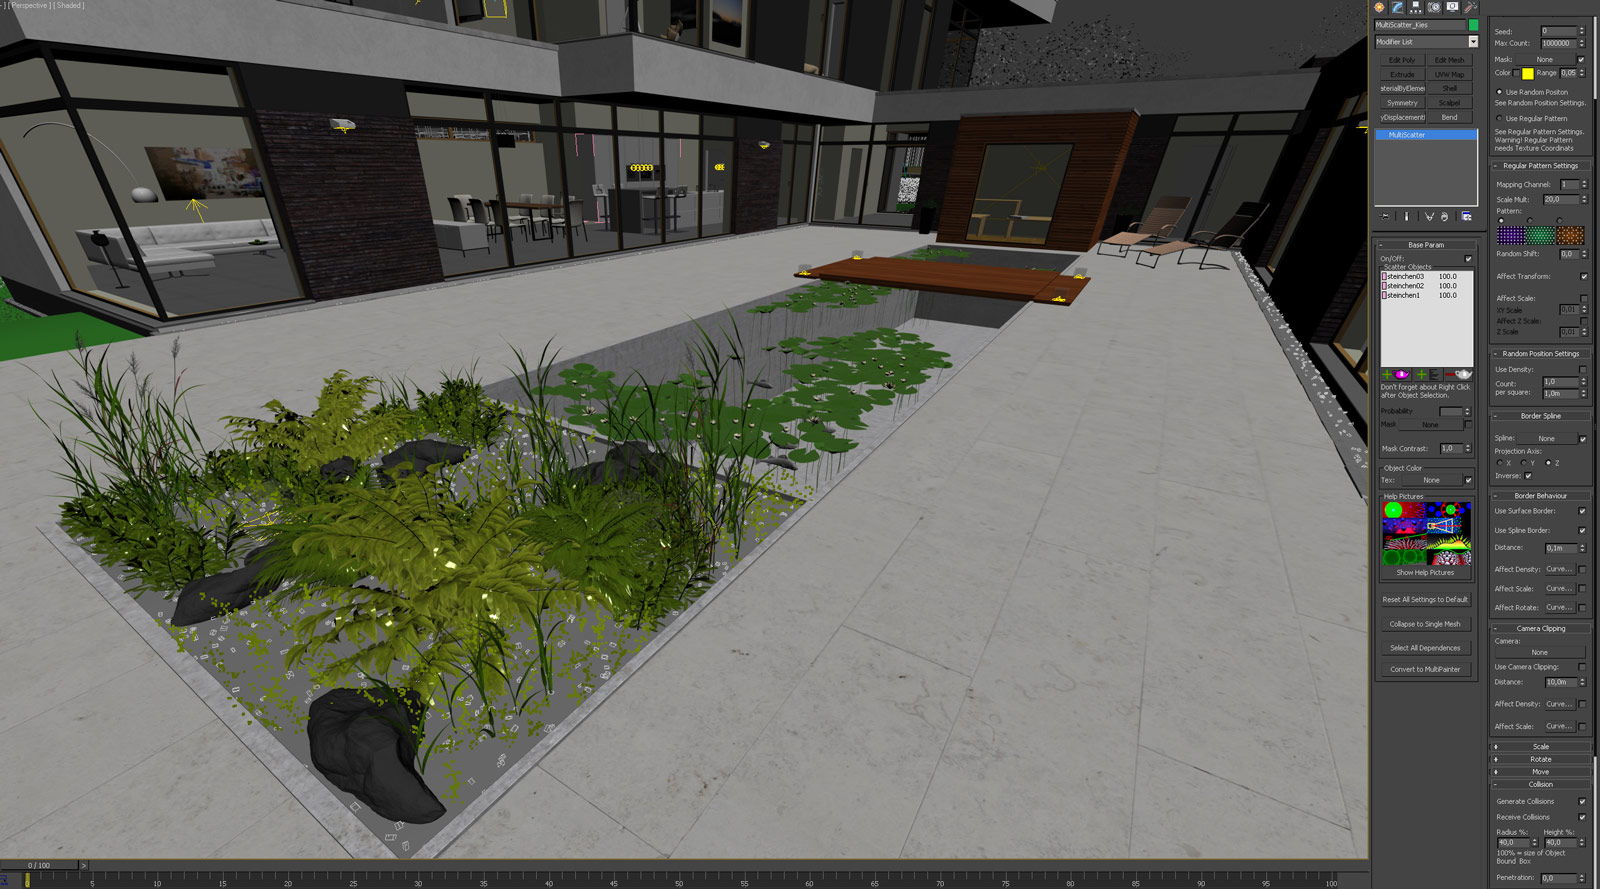
The little pond is just a plane with a noise modifier and water material. Under this "waterplane" I just put some plants and low poly fishes. The plants in the front are standing on hundreds of little stones, which I made with the tool "Multiscatter". For this powerful tool it´s very easy to crash the scene if the scattered geometry isn´t set up with collisions. Otherwise, too many stones are colliding with each other and you can get an "unhandled exception". The plants in the scene are mainly proxies. There are trees in the background and some bushes around for reflection. Only the plants in the front are still meshes. All plant I used are made by Evermotion, and Icube.
The scene is quite simple. Just a domelight with an HDR-texture from "www.viz-people.com" for global lighting, which makes a good diffuse look and awesome reflections.
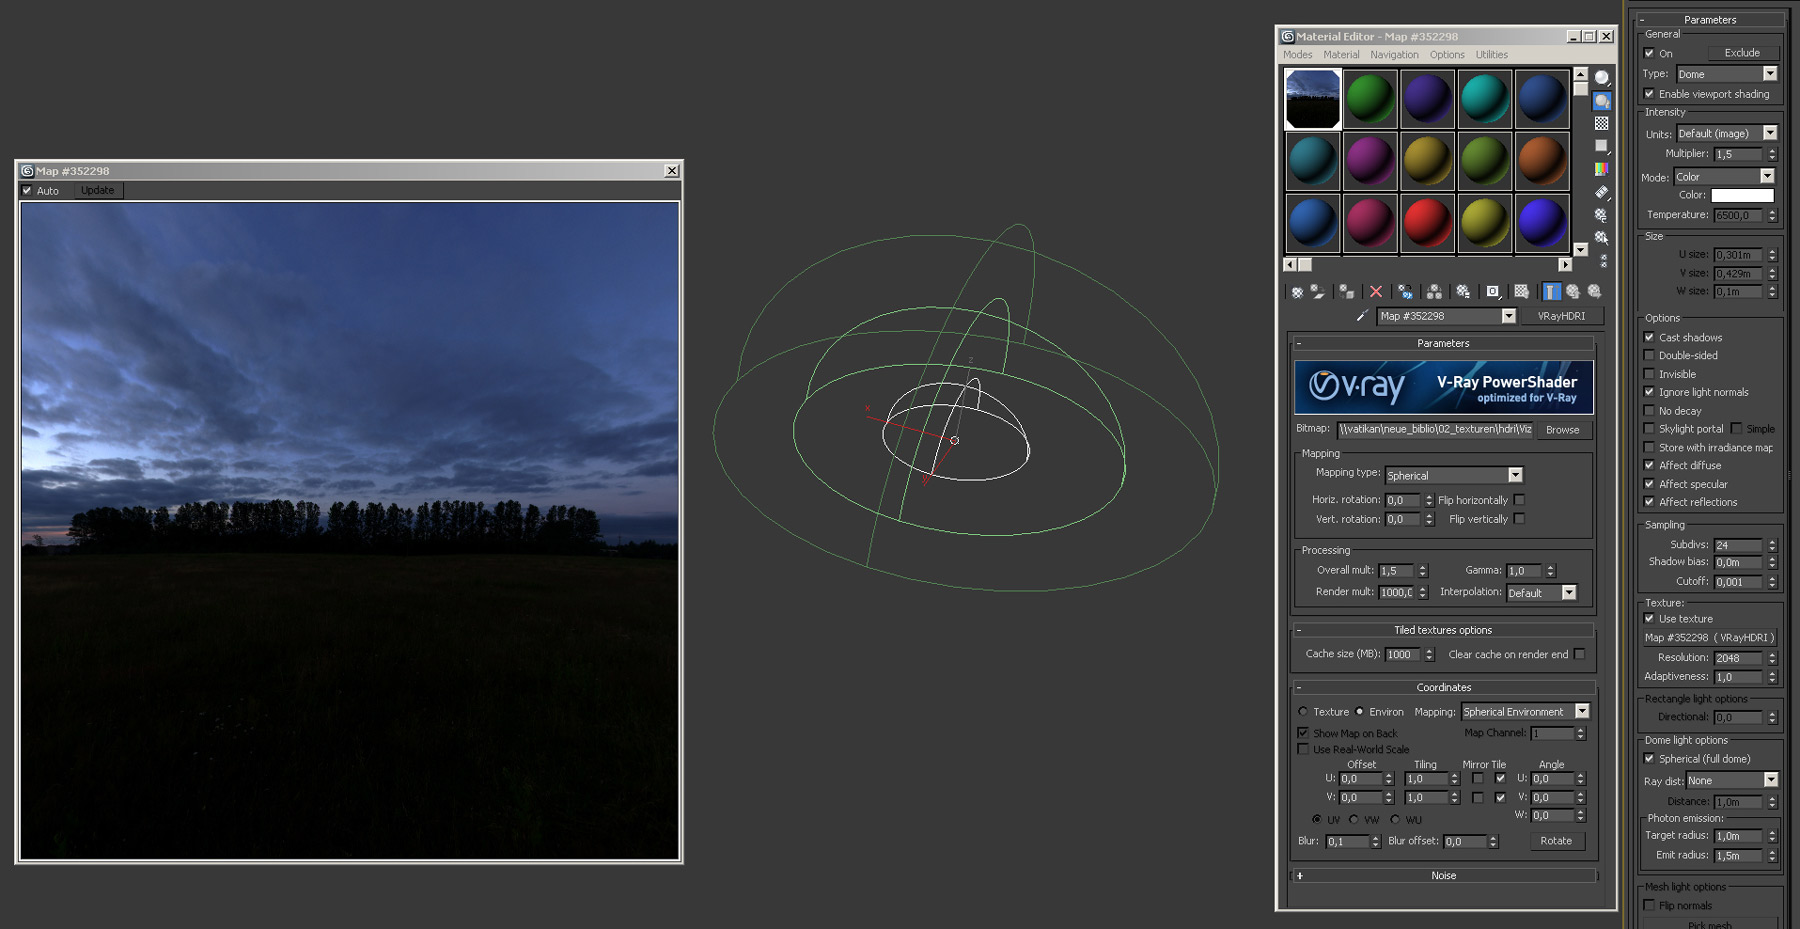
The rest of the light is set by vray lights and the camera. The lights are deep orange and the camera white balance is set to a bit of yellowish white. That creates a good contrast of blue and yellow in the pure rendering.
The "light cubes" are simple boxes with milky glass material and a Vray-light inside.


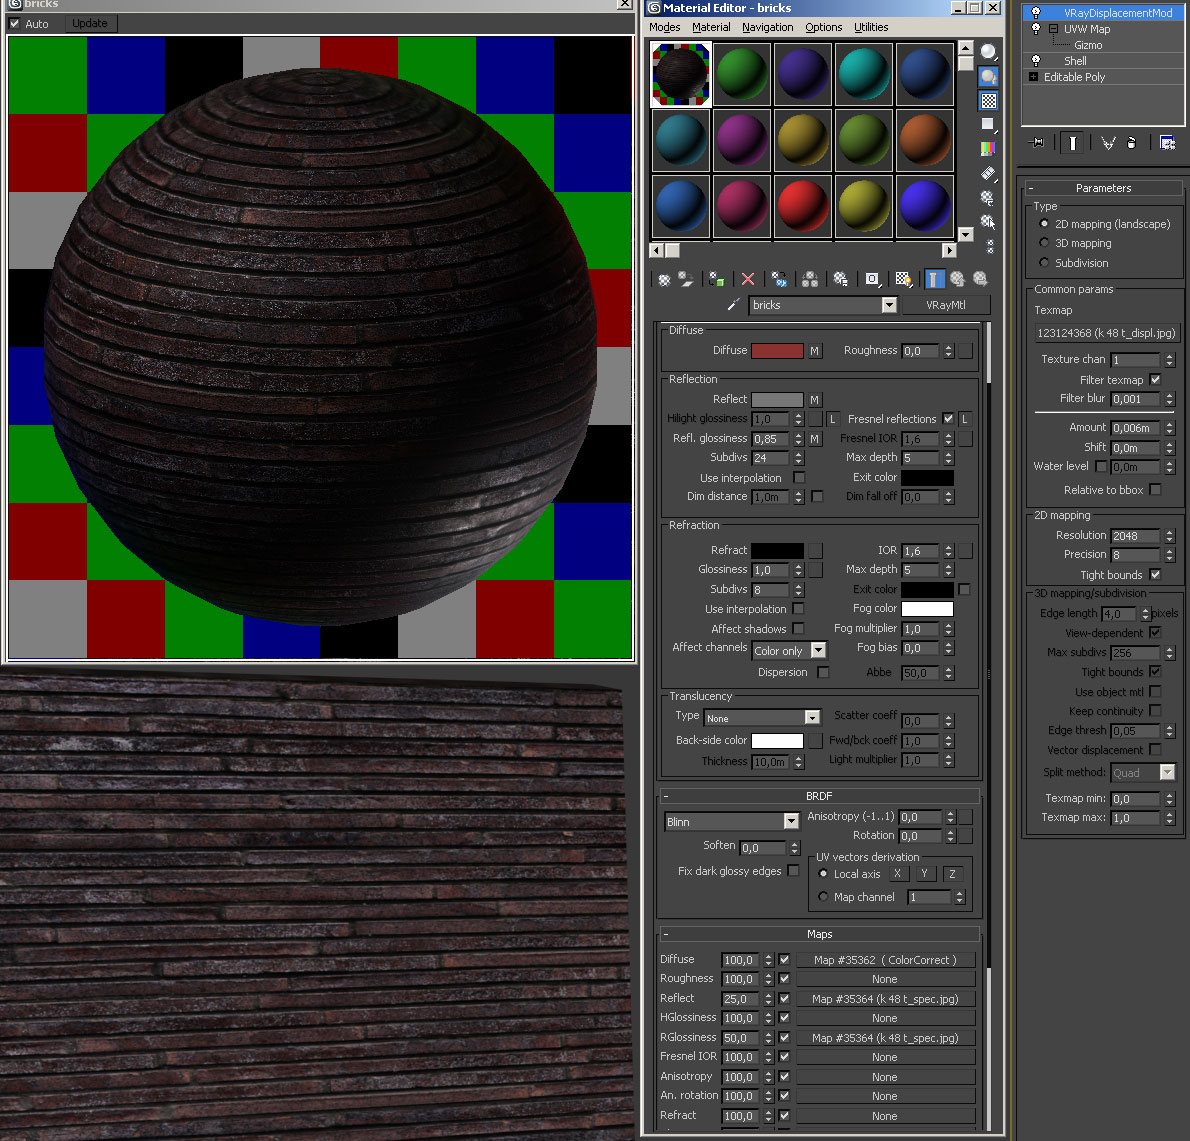
Mainly the materials are quite simple. Inside the house I tried to use low quality textures or just diffuse colors to save rendertime. The only high resolution textures I used are for the ground, a 6k Arroway-concrete and for the bricks on the wall, with a map from Cg-textures . Both are displaced with the 2D vray-displacement-modifier. Here I used filter-blur instead of the diffuse-map. This makes the edges softer and it doesn’t look too sharp. The quality of this modifier highly depends on the resolution of the map and the factor resolution on the modifier. I think in this case 2048 is a good value, everything higher doesn´t have a big effect.
For the bricks-map I needed a good displacement- and reflection map. So I used the program "PixPlant". It´s very easy to create normal and reflection maps that way. Usually I try to use normal maps for better render times, but in this case I needed displacement to get the deep effect of light and shadows under the lights. The water is based on a plane with a simple noise modifier. The Material has a simple noise in the bump-channel and a bit of green fog. I never set the refraction to pure white to get a better fog-effect.


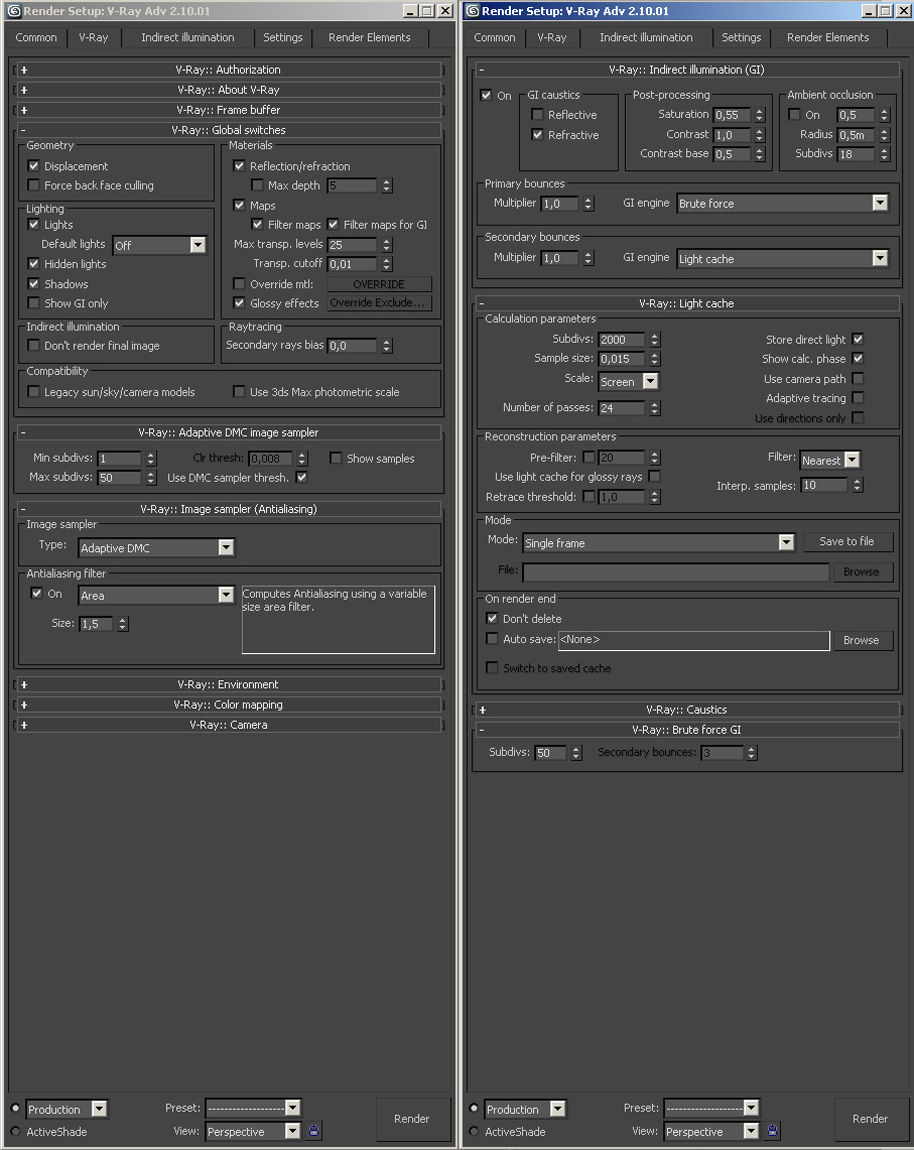
We usually render with irradiance map and light cache to save a lot of render time.
But in this case I had the time to render it with brute force. Especially for night shots brute force is awesome. Everything looks good, clean corners, soft shadows and of course no ugly spots.
For this shot one 24core Mac calculated over 17 hours. That´s really too long :)
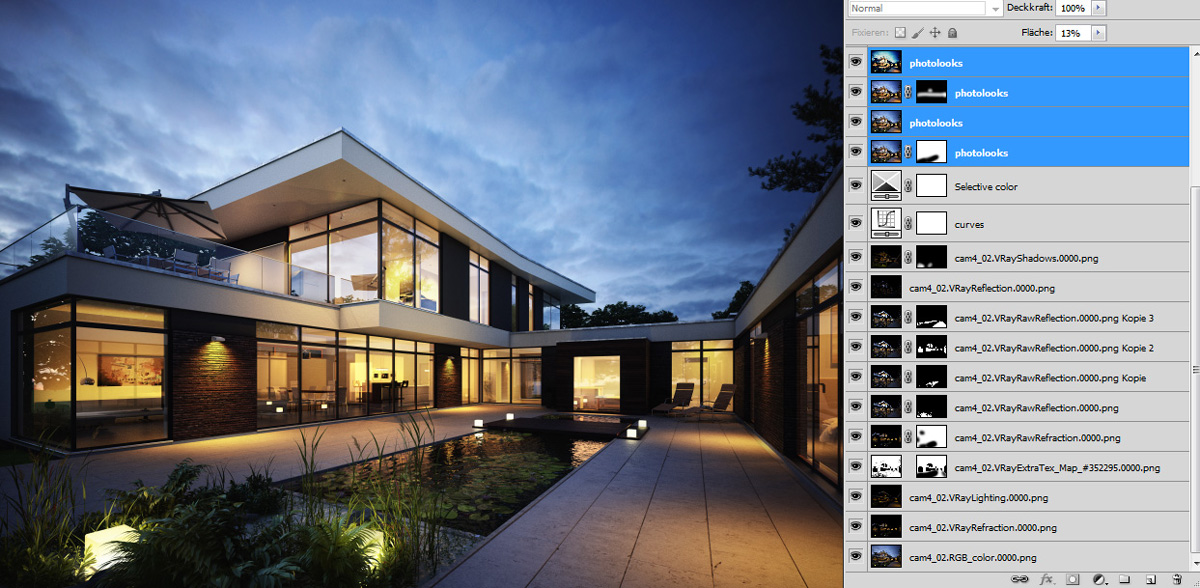
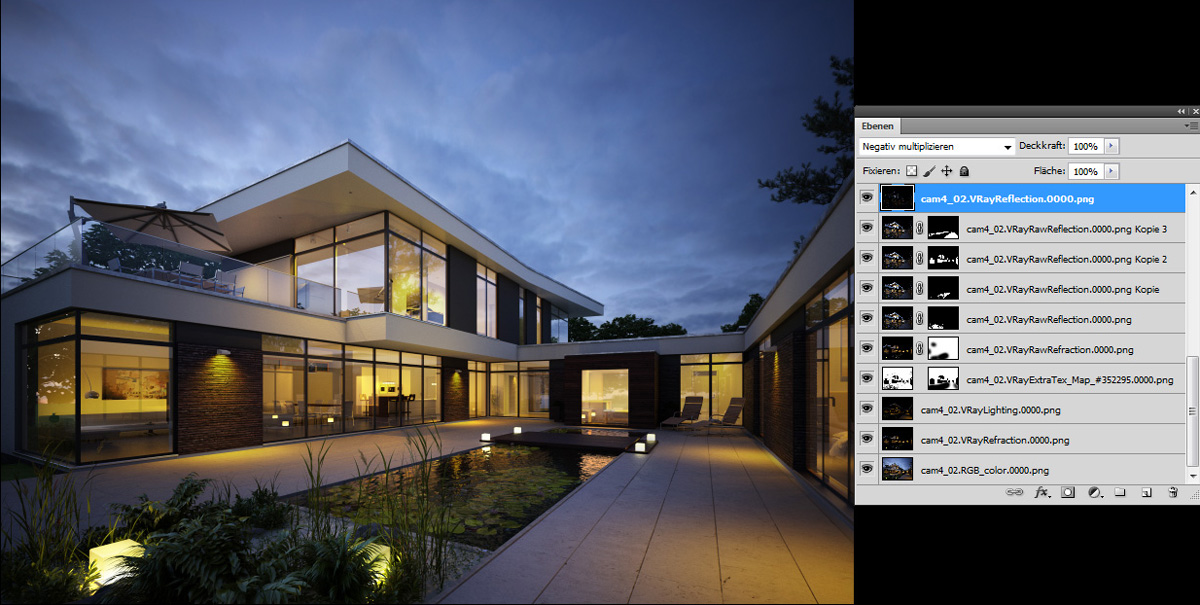
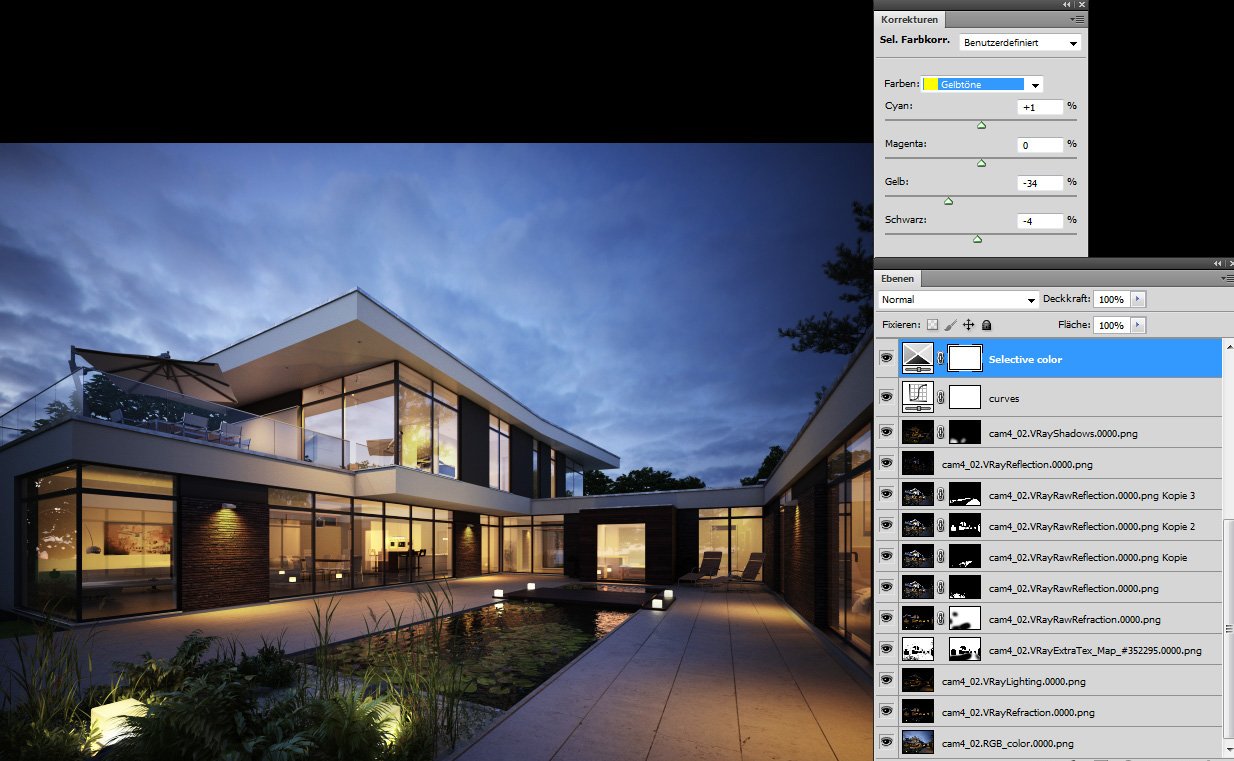
I mostly enjoy this step. It´s great fun working with passes and make the picture more atmospheric. In Photoshop I used the render-channels to tune up the colors, contrast and lights. We´re using the "German" Photoshop, but I hope my screenshots will show the main items as well.
Here is the pure rendering:
Mostly I use screen mode on "lighting", "raw-refraction" and "reflection", but always experiment with the different modes for each channel to get the result I´m looking for.
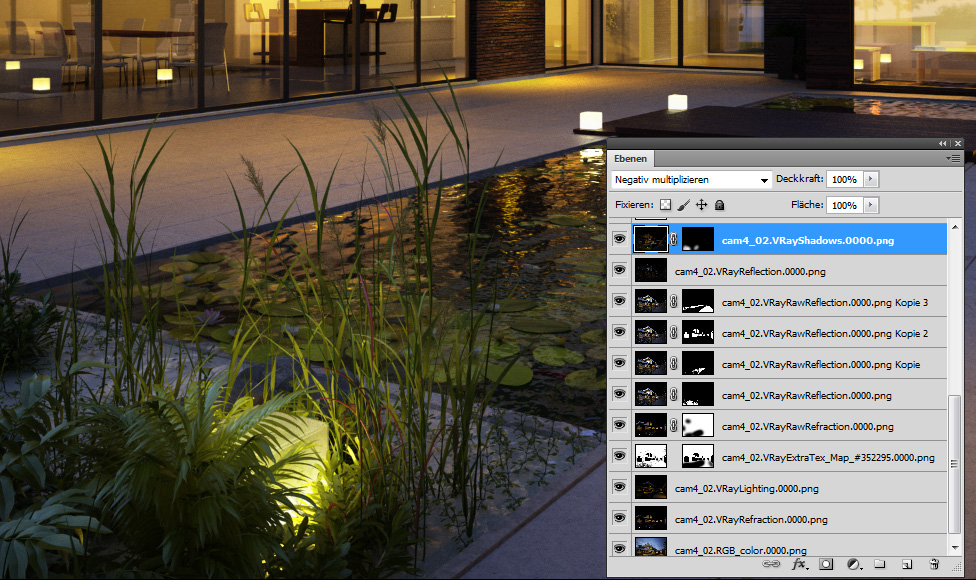
For some more reflections on the glass I used a bit of "raw-reflection" and what I really love is the effect around the light cubes which stand in the plants. I painted the "vray-shadows"-path with a mask around the cubes, using the mode screen. Now it looks like the light shines through the green leaves.
Then I gave it some more contrast with a curve and used "selective color correction" to make the yellow more discreet and orange.
In the end I used "Photo looks" from "Magic Bullet". It´s a tool to add better contrast, vignetting and intensive color boosts. I always try to use it carefully, because it’s very easy to make too much and the picture doesn´t look real anymore. Here´s the final image, it takes about 2 Days for the whole work.