Hello everyone! My name is Andreas Petropoulos. I am an architect and founder of BLANKWALL Arch-Viz Studio which is located in Greece. Vasilis contacted me in order to write a ‘Making of’ on this small project that I have created. I would like to thank Vray World for the invitation and for giving me the opportunity to introduce a part of my work.

To begin with, the White Form was a small project that I created in my free time. This was a simple render with a lot of post-production work. So here is the process that I followed.
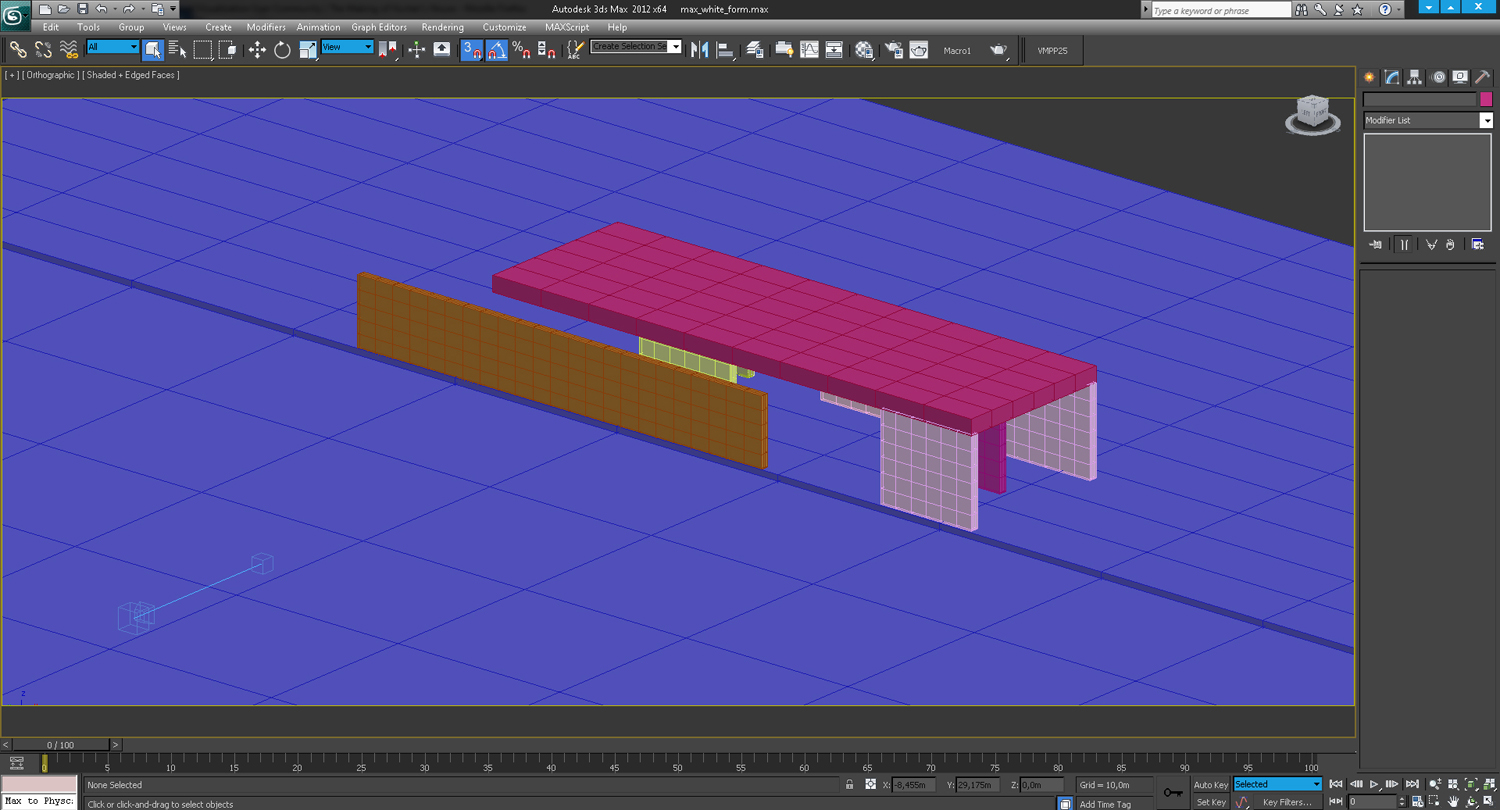
As you can see the modelling was quite simple. Just some extruded boxes and planes.

For the illumination of the scene I used the Vray light dome where I assigned a Vray Hdri in the texture slot. The Hdri that I used here was by Peter Guthrie.


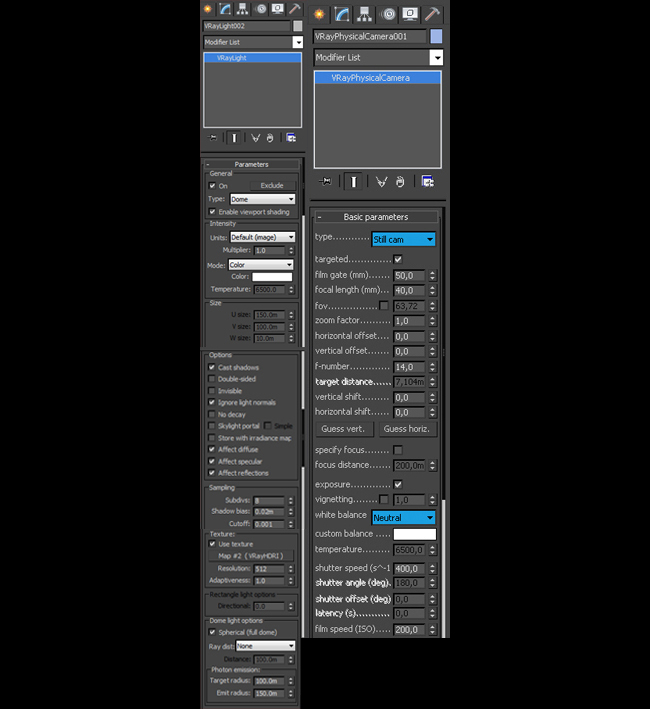
Concerning the camera, I’ve used a Vray physical camera and made adjustments to the F number, ISO and Shutter Speed. I’ve set the colour balance to neutral and unchecked the vignette effect because the goal was to create it later in Post Production.
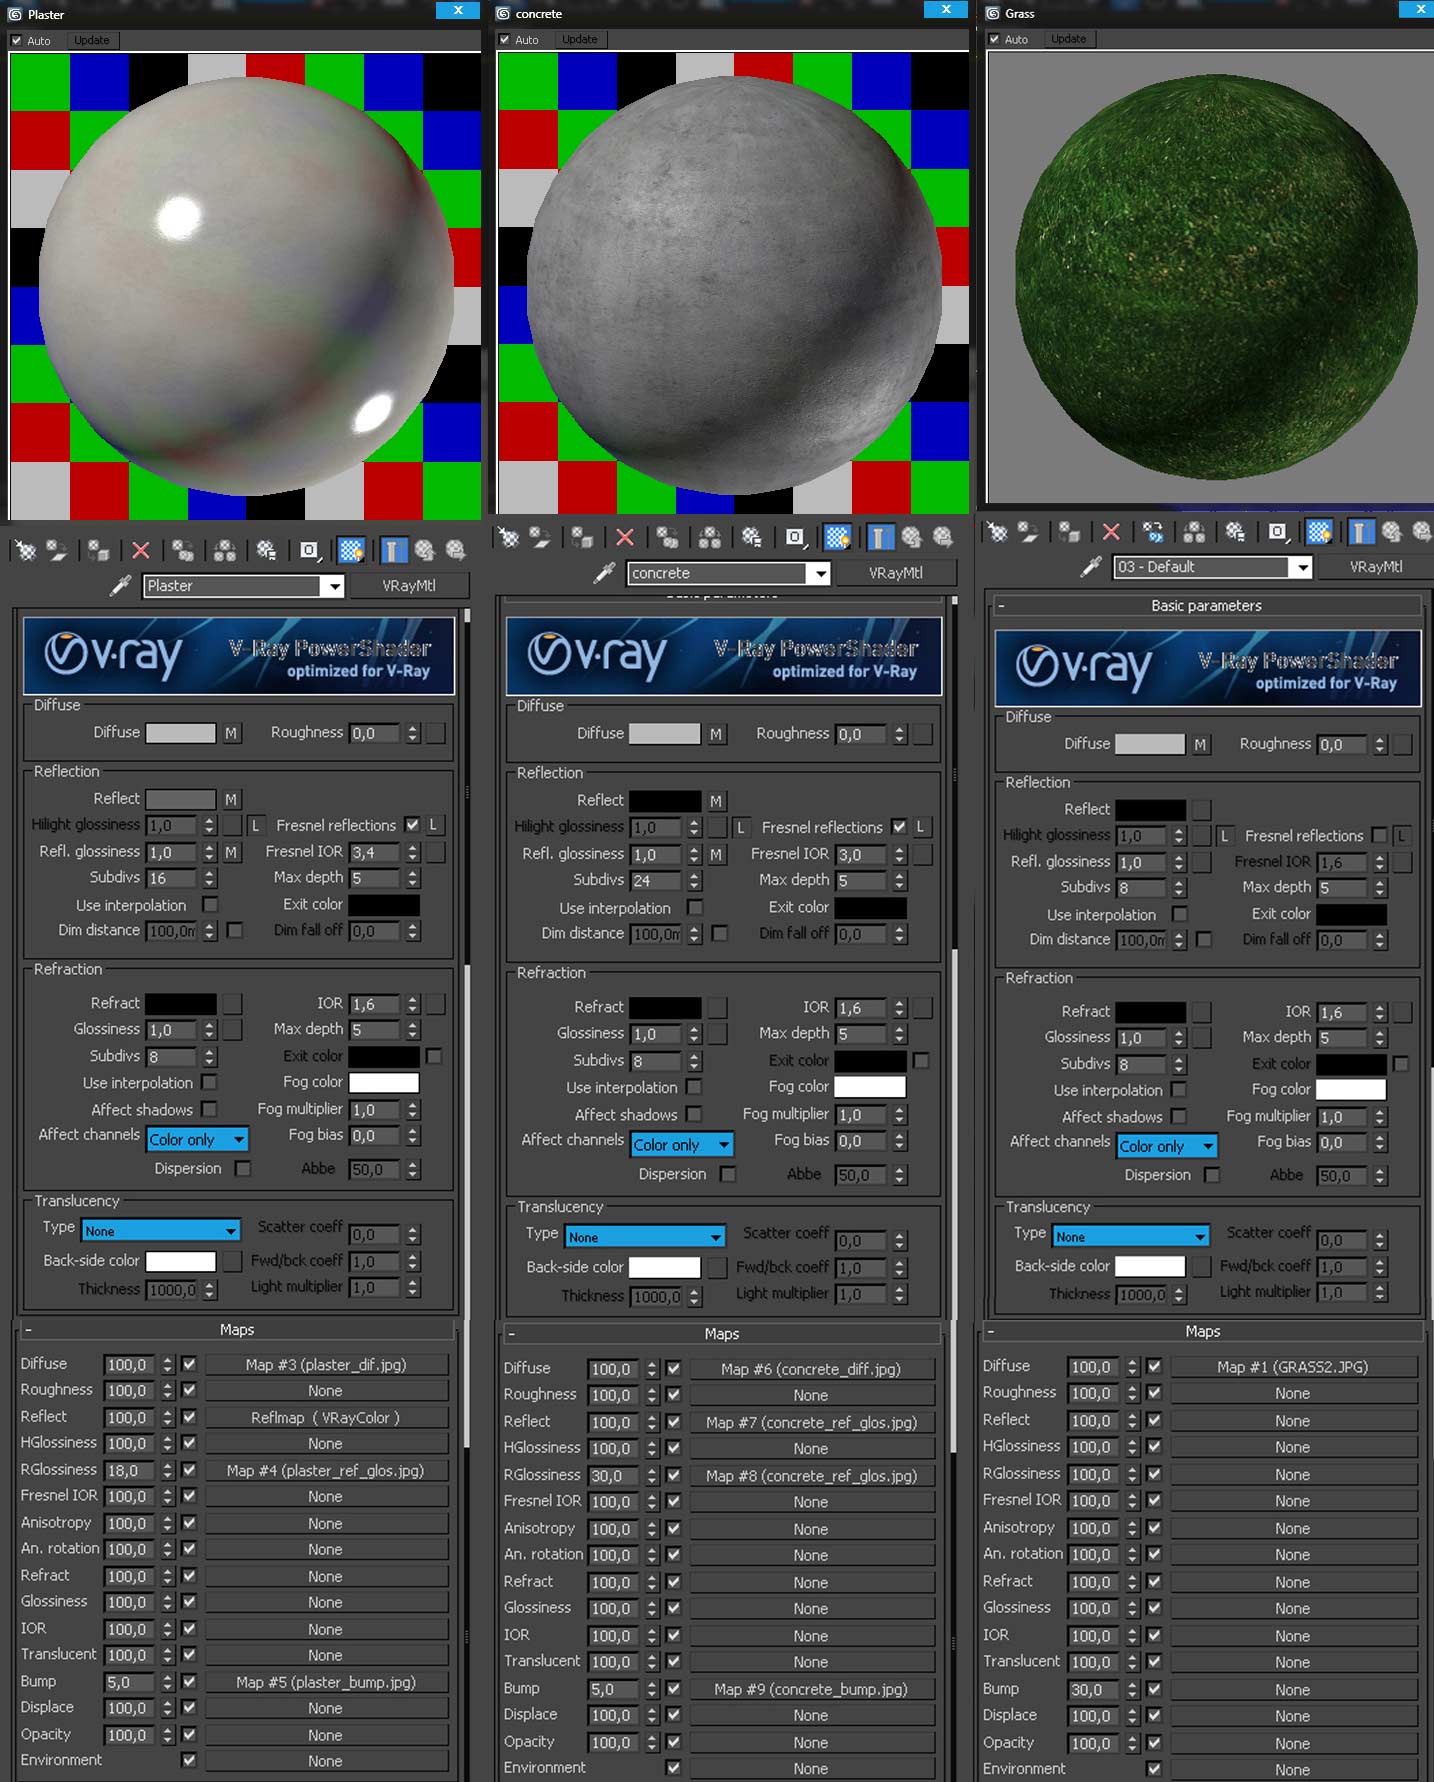
The materials used areplaster, concrete and simple bitmap grass.
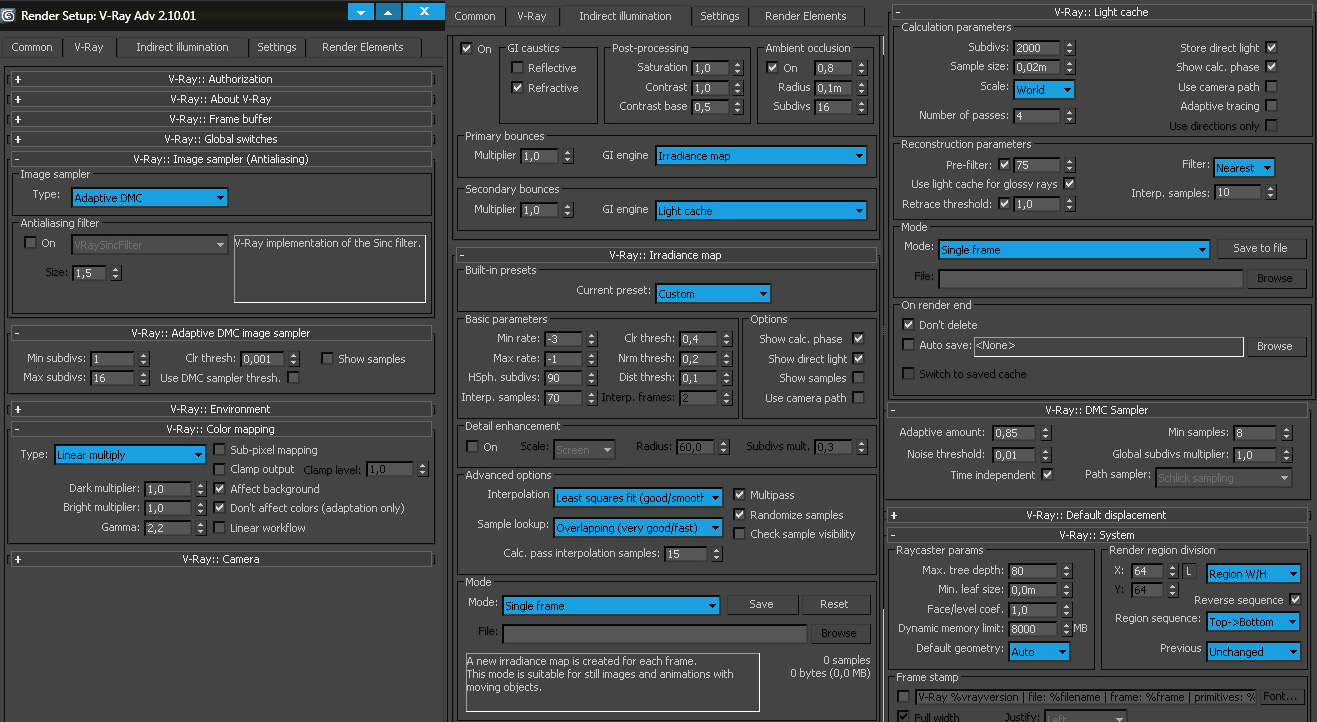
I worked with Linear Workflow and setup the Gamma on 2.2. Here are the settings that I used.
The Post Production was the creative part for me and the part that I enjoyedthe most. Here is the raw render. It’s just a simple well-illuminated scene. Duringthe Post Production process I used render elements like Object ID, Vray Diffuse, Raw Reflection,etc.
I made some adjustments to the levels and curves to enhance the contrast but they were very subtle.

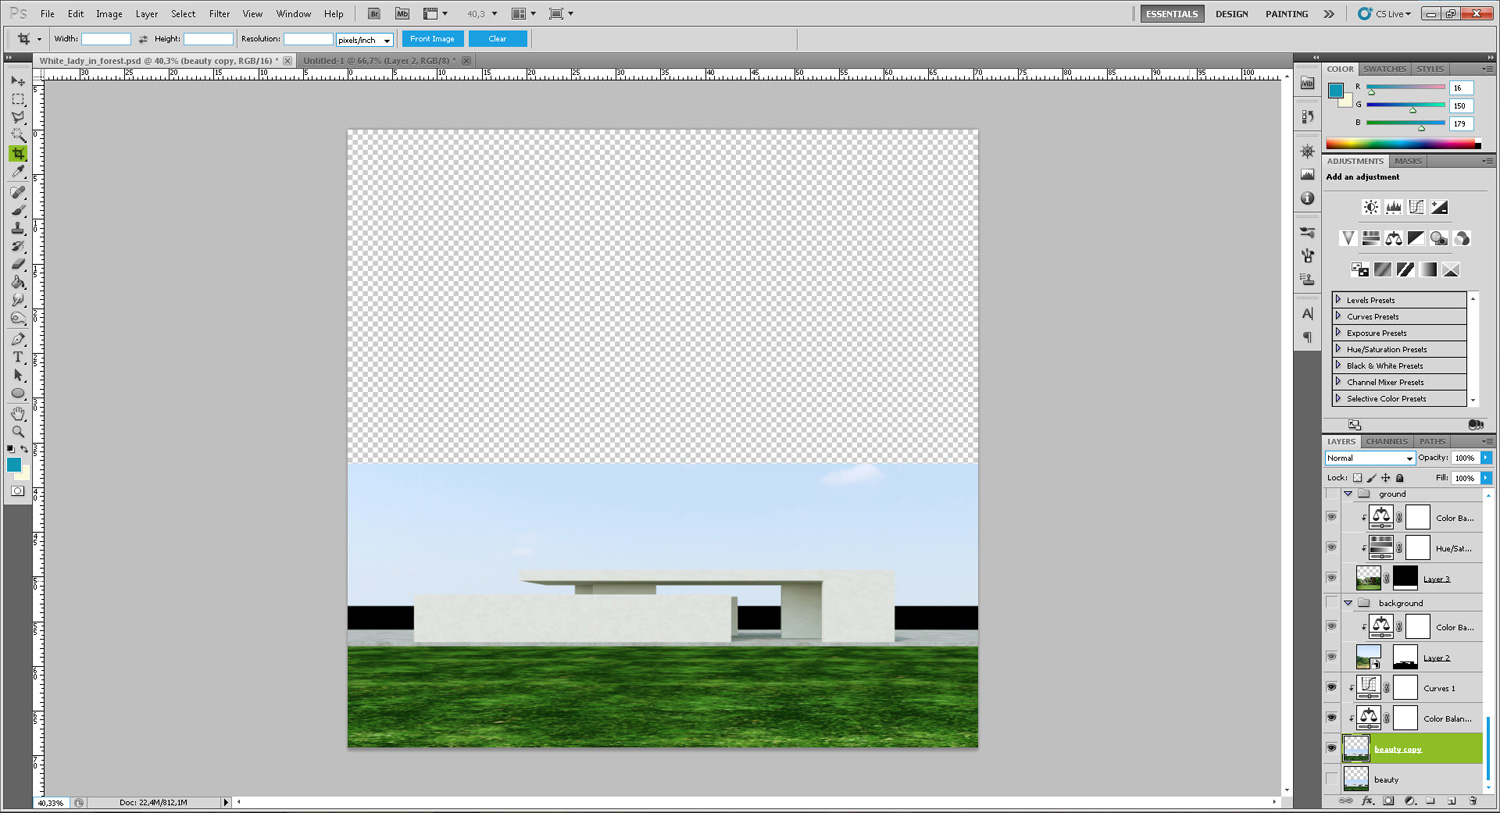
I set an image with plenty of treesas a background and I also changed the grass surface. I made some colour corrections to the grass layer and the background together with some adjustments to the saturation.
The original image is that of a sunny day, but in this case I decided to change the atmosphere and create a cloudier mood which I thought would be more interesting. Here is the part where we see how flexible Adobe Photoshop really is. It is not required to render the image again with cloudy HDRI so all I did was use some adjustments in PS to achieve this effect.
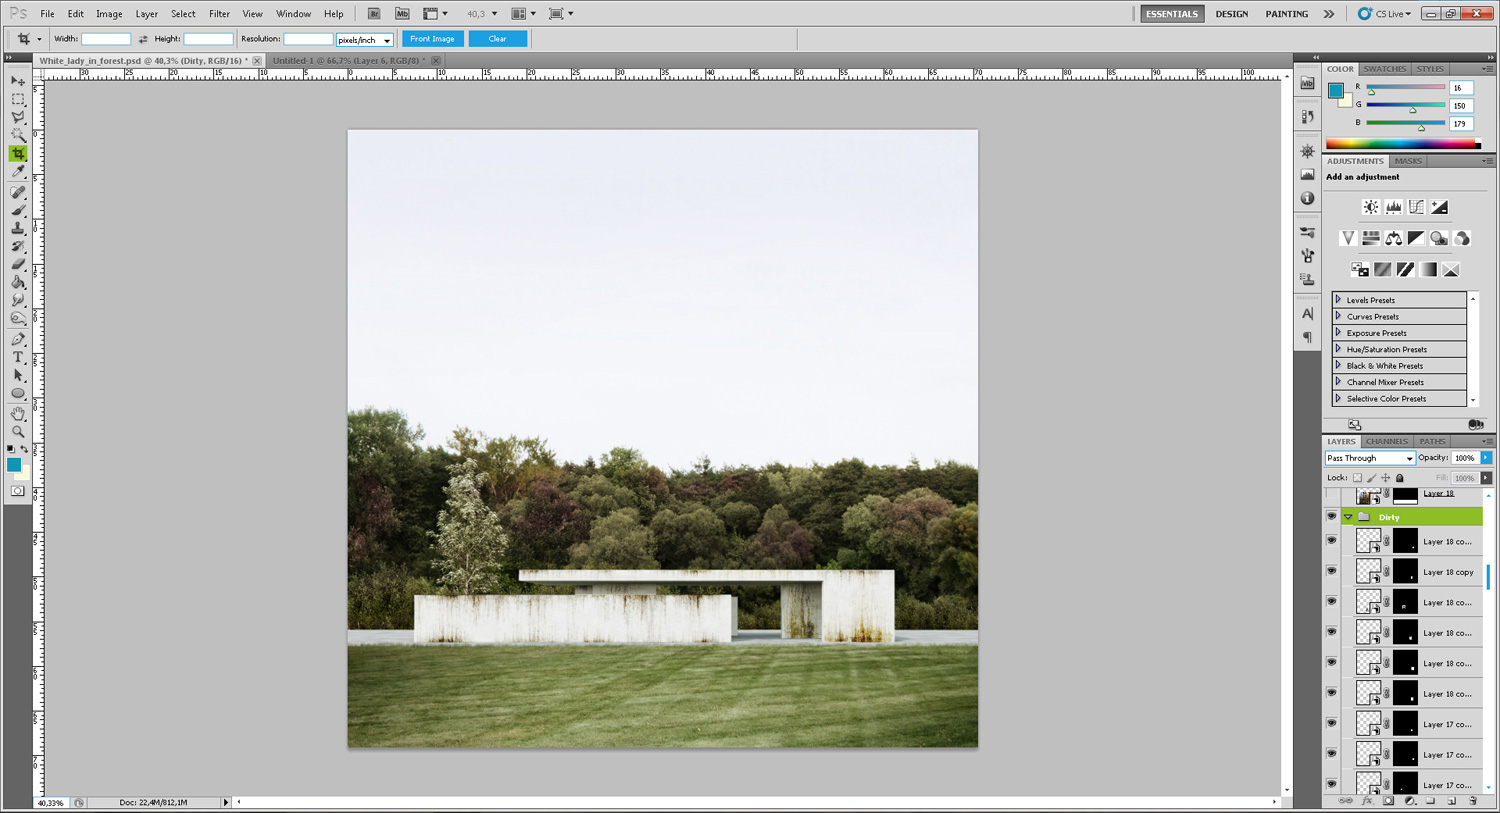

First of all I desaturated the sky to achieve the grey mood. To add some variation to the background I painted the trees in different colours, using a basic brush. I’ve also used some leeks and set them to blending mode (colour burn). In a subtle way, I increased the contrast a little bit using levels and curves. Also, I added an extra tree to the left of the house.
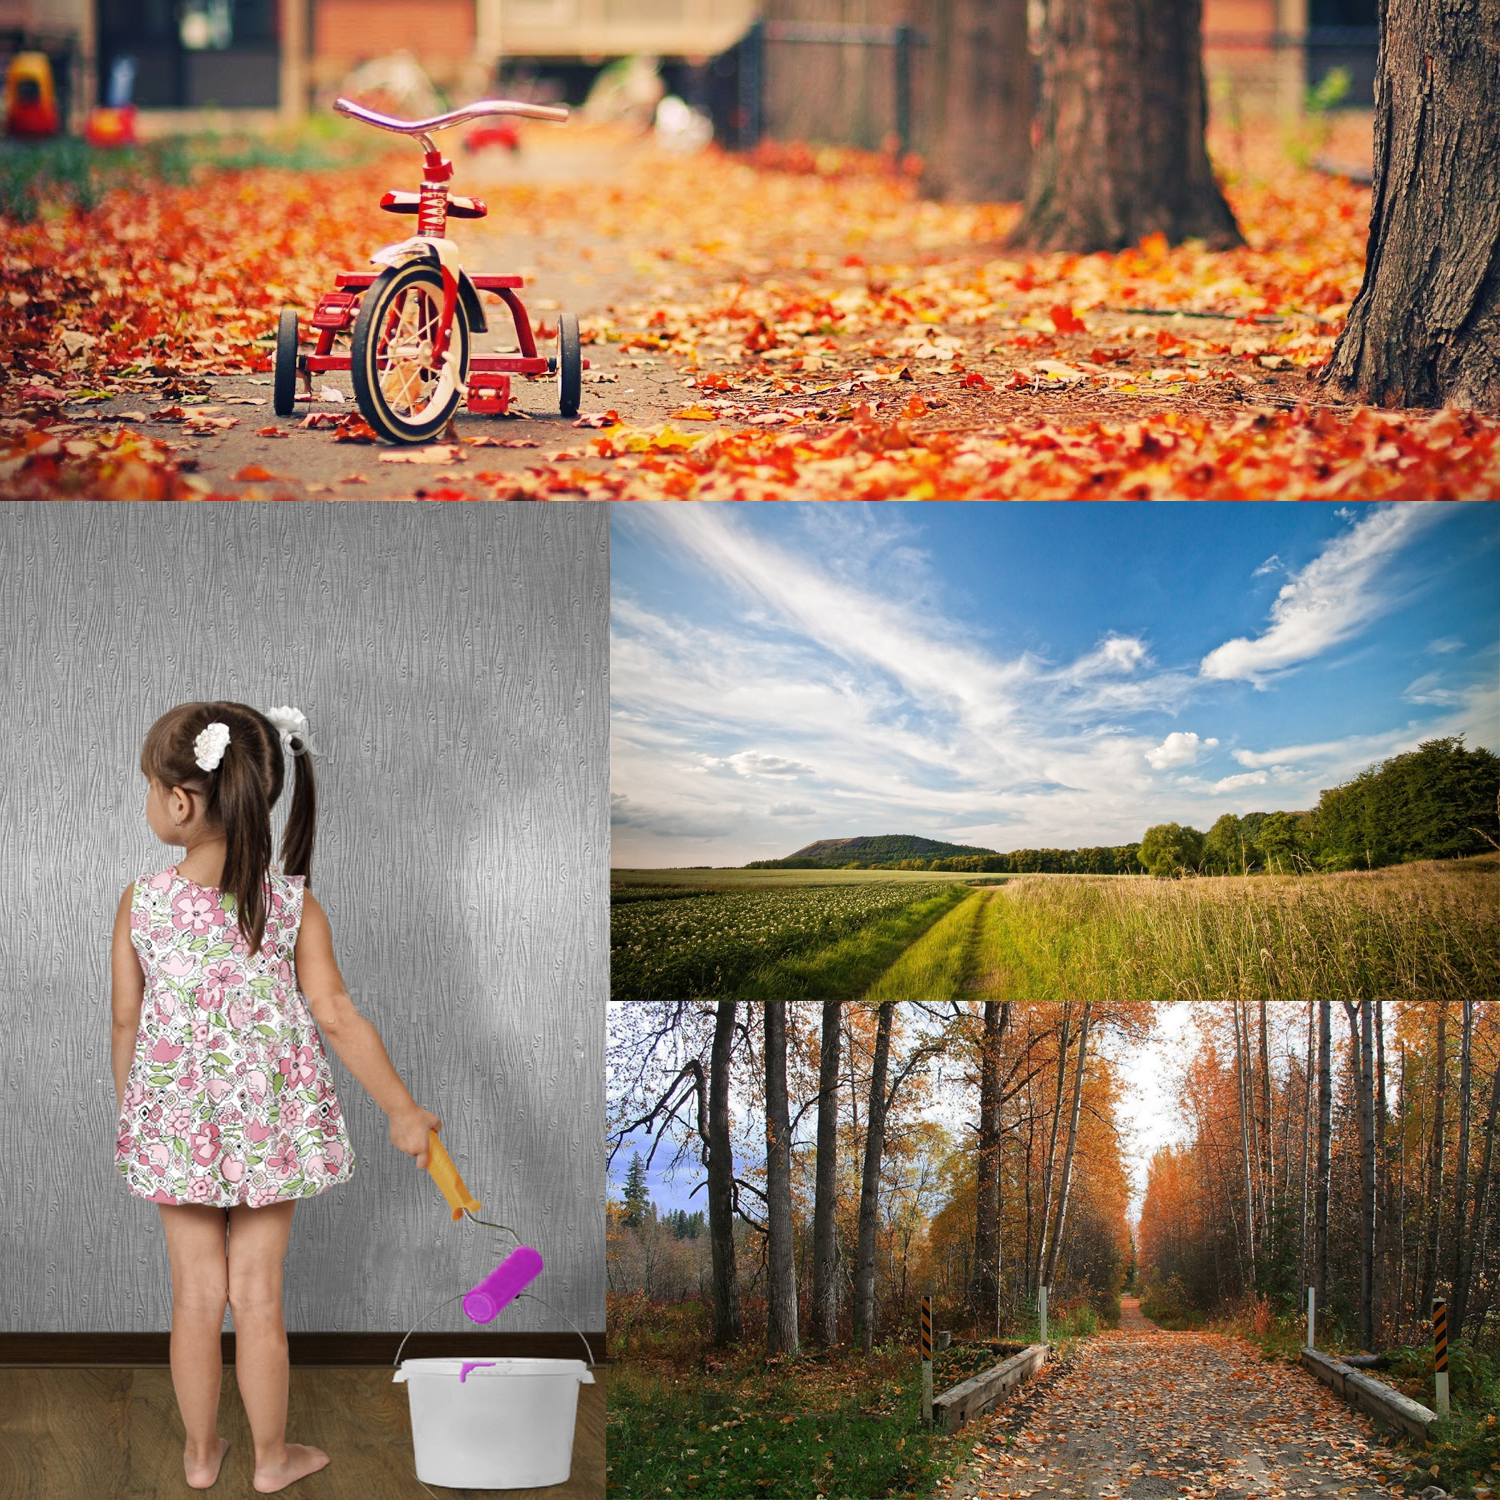
Here is the palette of the pictures that I used. All the photos were found on Google Images. It is very important to find the right photos for your image. You really have to search a lot but in the end your work will be rewarded.
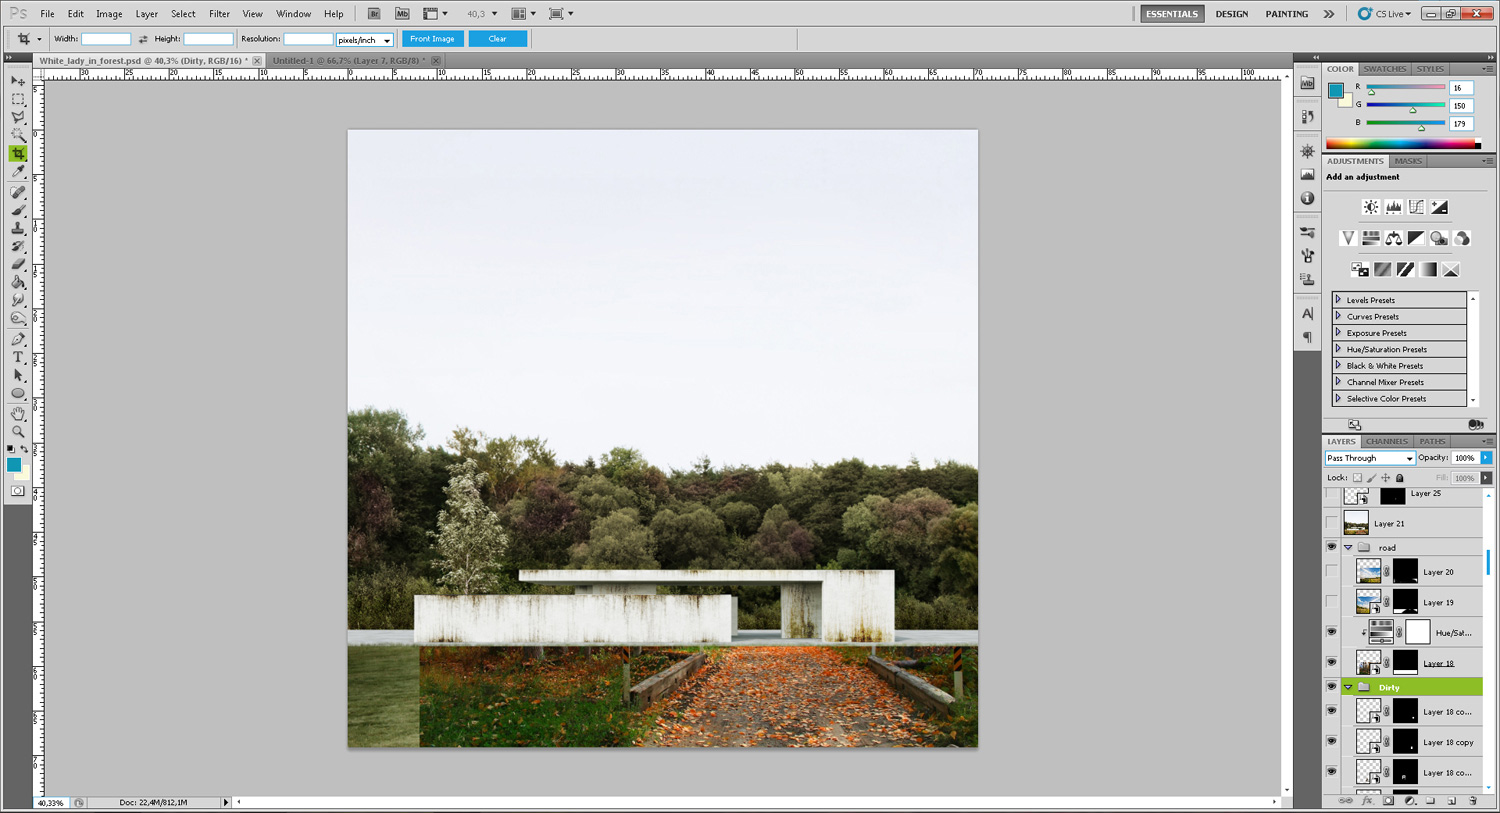
So, I placed the path on the right side, I masked it and erased all the elements that I didn’t wish to appear.
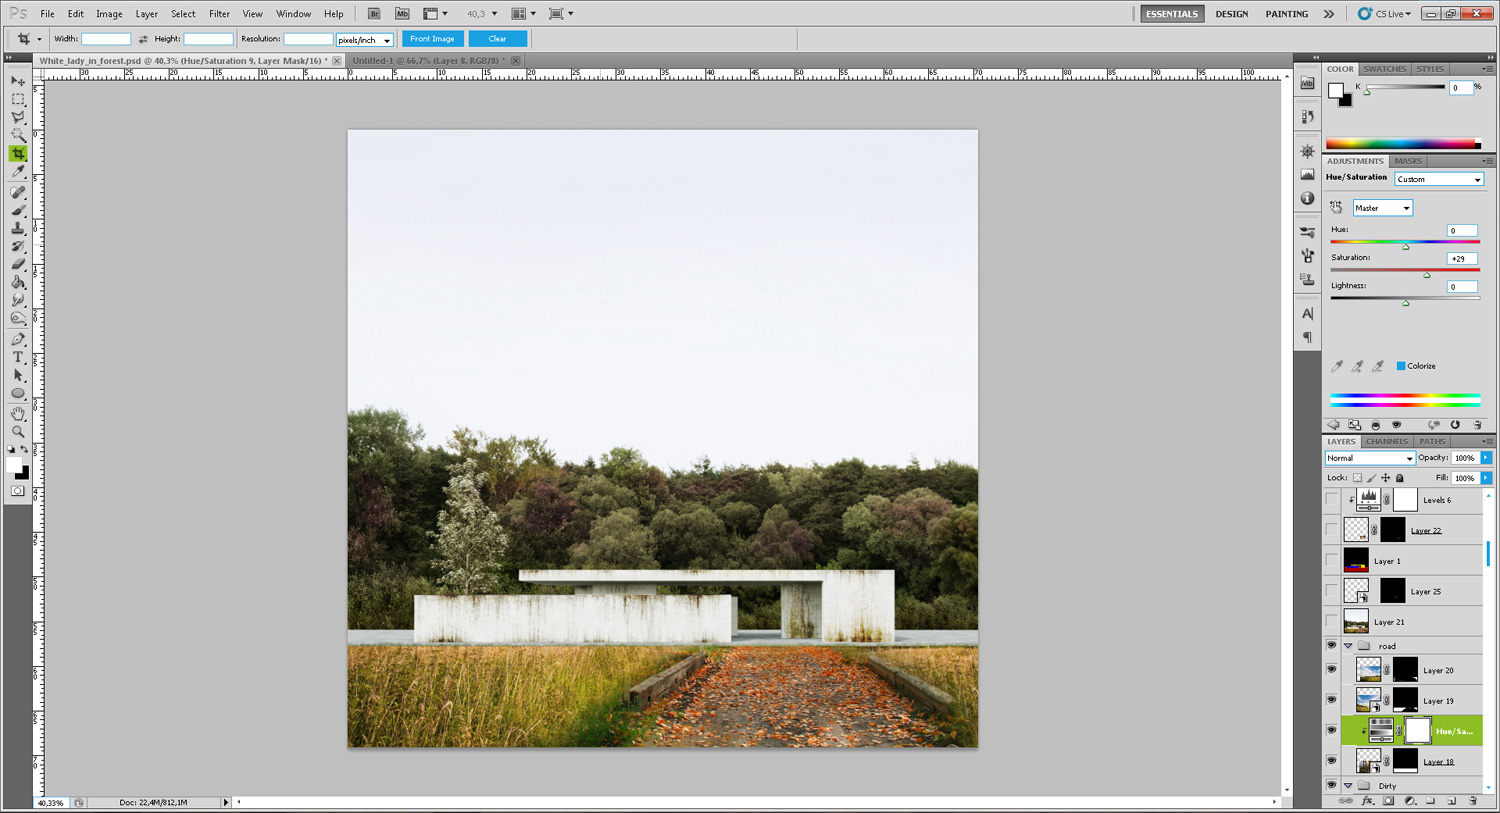
I added two more pictures on the left and on the right of the path with another layer of vegetation and I made some adjustments on colour correction, hue and saturation.
Here I used the clone stamp tool and a grass shaped brush to enrich the vegetation a little bit.

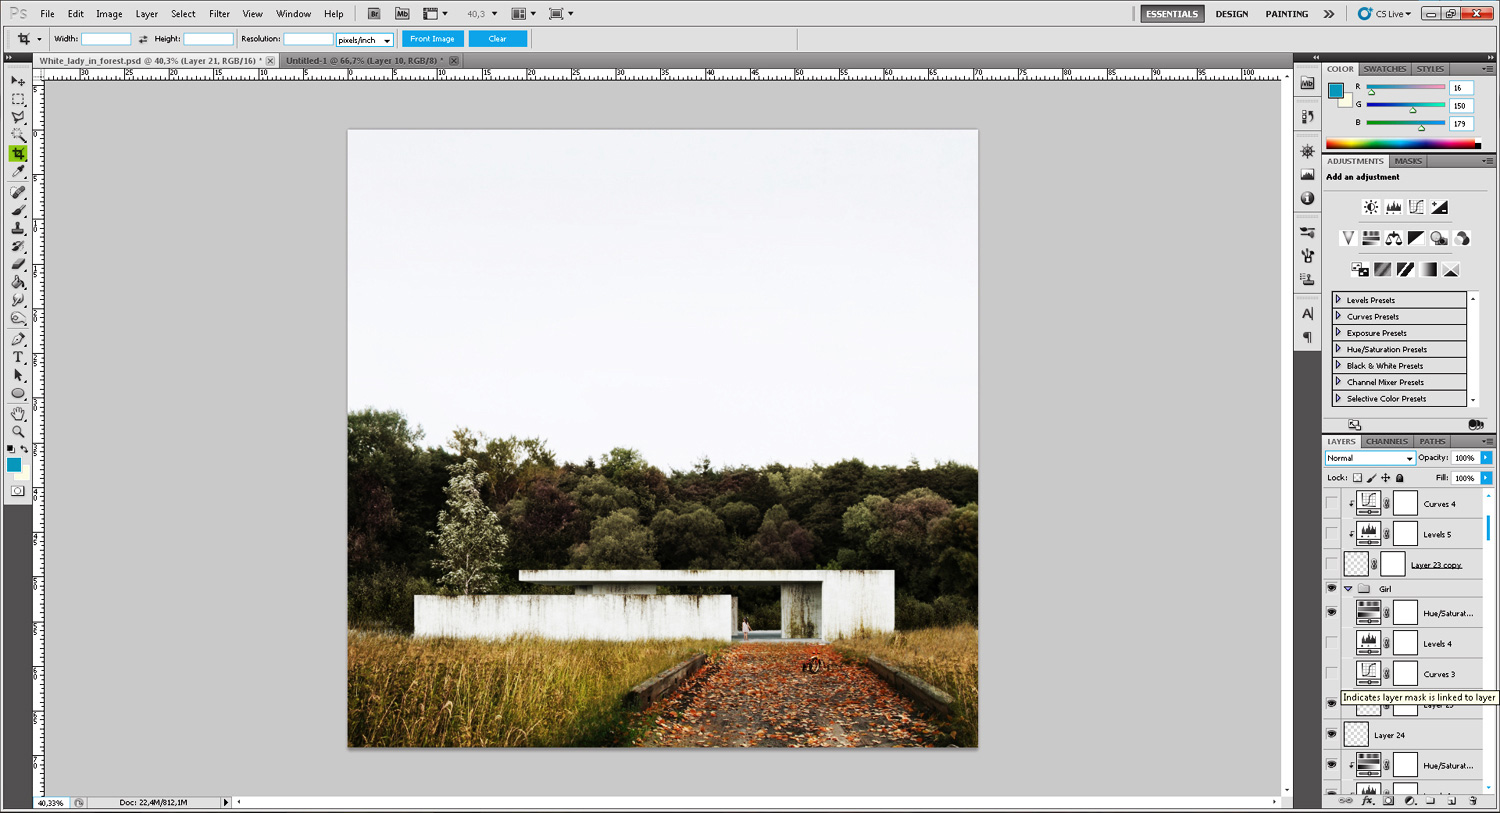
I consider it very important that we try and work on finding a great story behind our images. In this case, the building is the primary character. With my next step, I introduced the second character of the image, a little girl,who accidentally discovers the place while riding her bicycle, and she is about to explore the White Form.
I increased the contrast of the image together with levels and that was my last change on brightness and contrast.
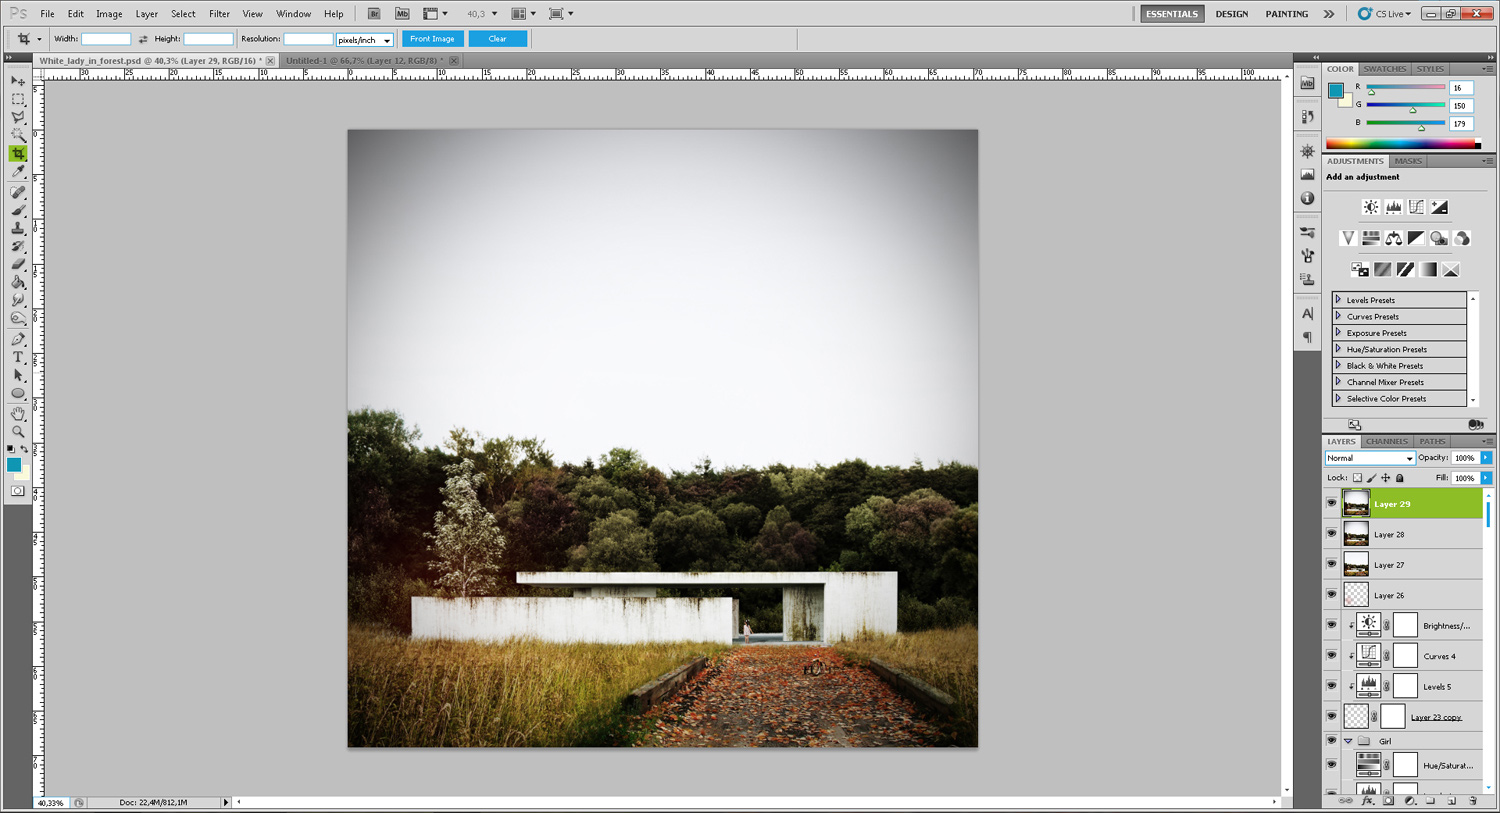
And here it is: the final product with its last adjustments. I used a basic brush to create a red spot and changed the blending mode to screen. I also reduced the opacity a bit.The final touch was the lens correction used to achieve the Vignette effect.
That was the end of the ‘Making of’ the White Form. I hope that you enjoyed it and found it useful.
Thanks for reading!