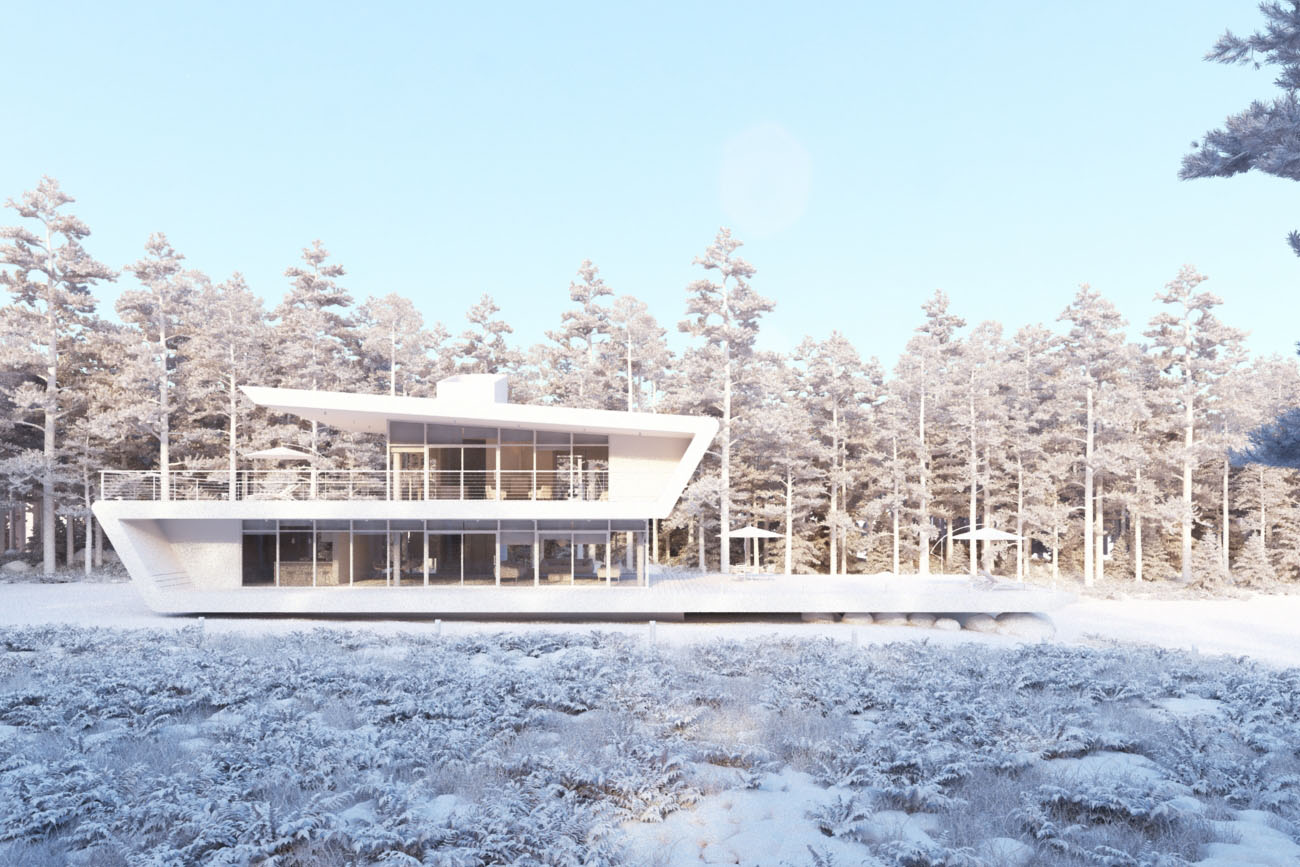
Guilherme was nominated for our award "Best ArchViz Project" for the month of April 2014 presenting the Z House as a personal project. The photo-realistic level of this project is amazing, that's why we asked him to share with us his workflow. A really great & detailed making of article was born. Enjoy it!

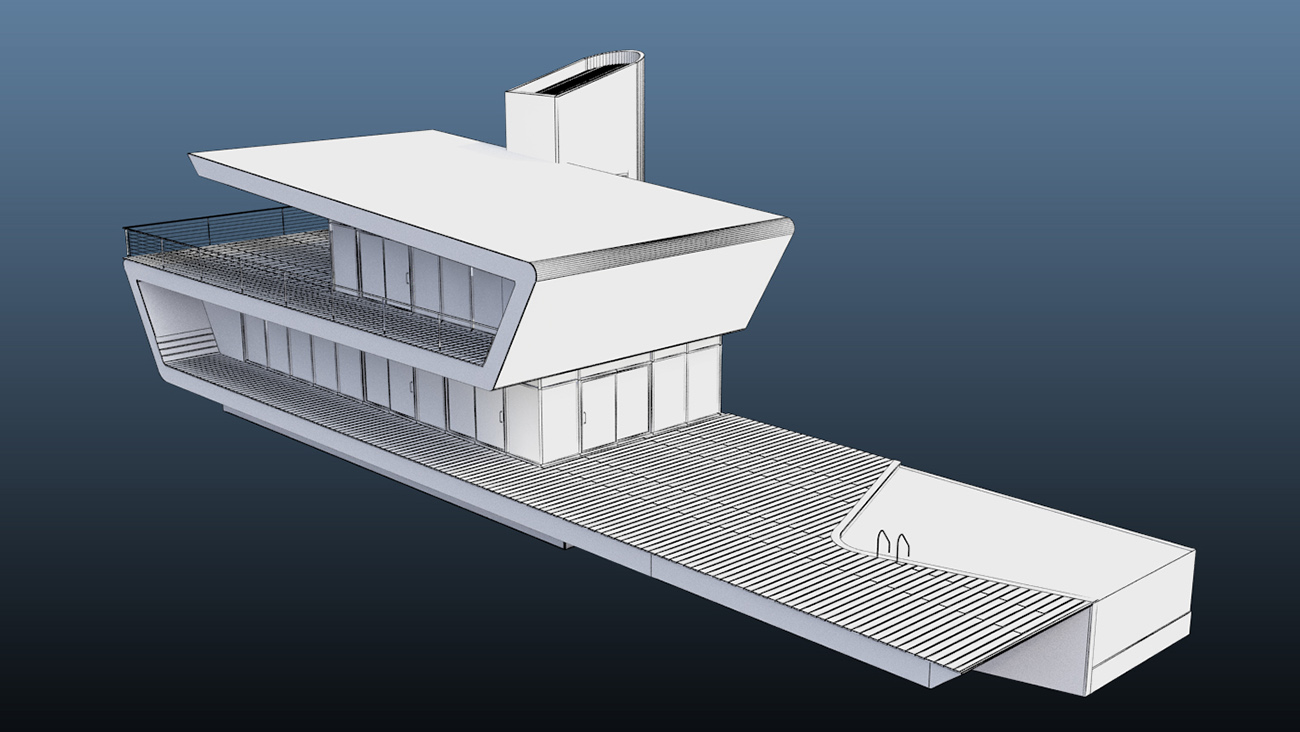
Hello everyone! First of all, thank you for taking the time to read this article and a Big thank you to VRAY WORLD for inviting me to write it. I´m Guilherme Pinheiro, an architect and 3d artist from Fortaleza, Brazil. When I have free time, I always like to practise and improve my skills and this is how the “Z House” project was created. It is a noncommercial project and I´ve decided to create a set with all rooms from scratch. I spent about 6 months to finish it, because I had to have some fun in my free time too and I didn’t want to hurry. I made 25 images for the project; you can see here the best ones.
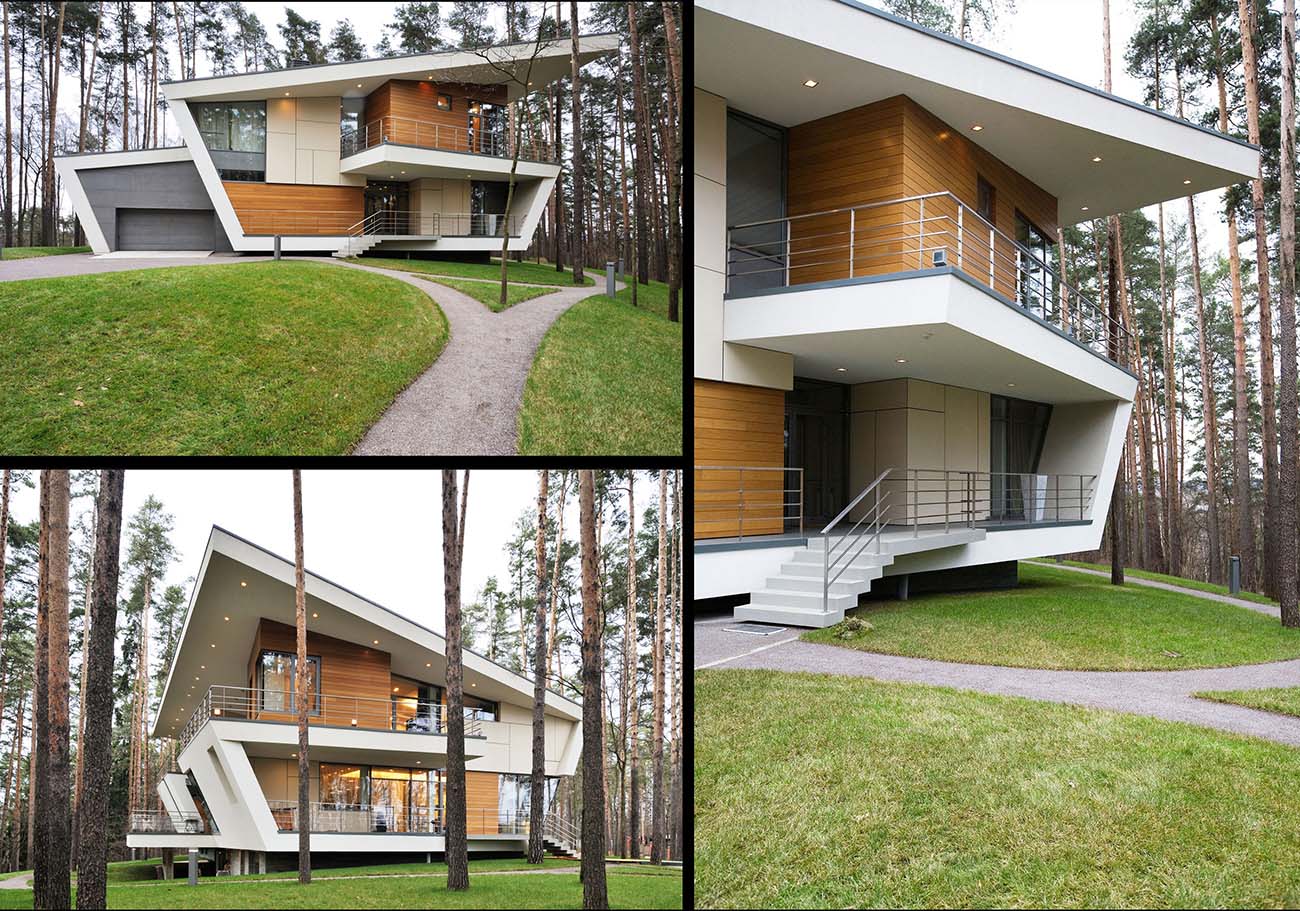
As an architect I made it the way I wanted, trying to create something different, but the shape concept and the most important reference was by the Gorki house, Architects: Atrium, as you see above.
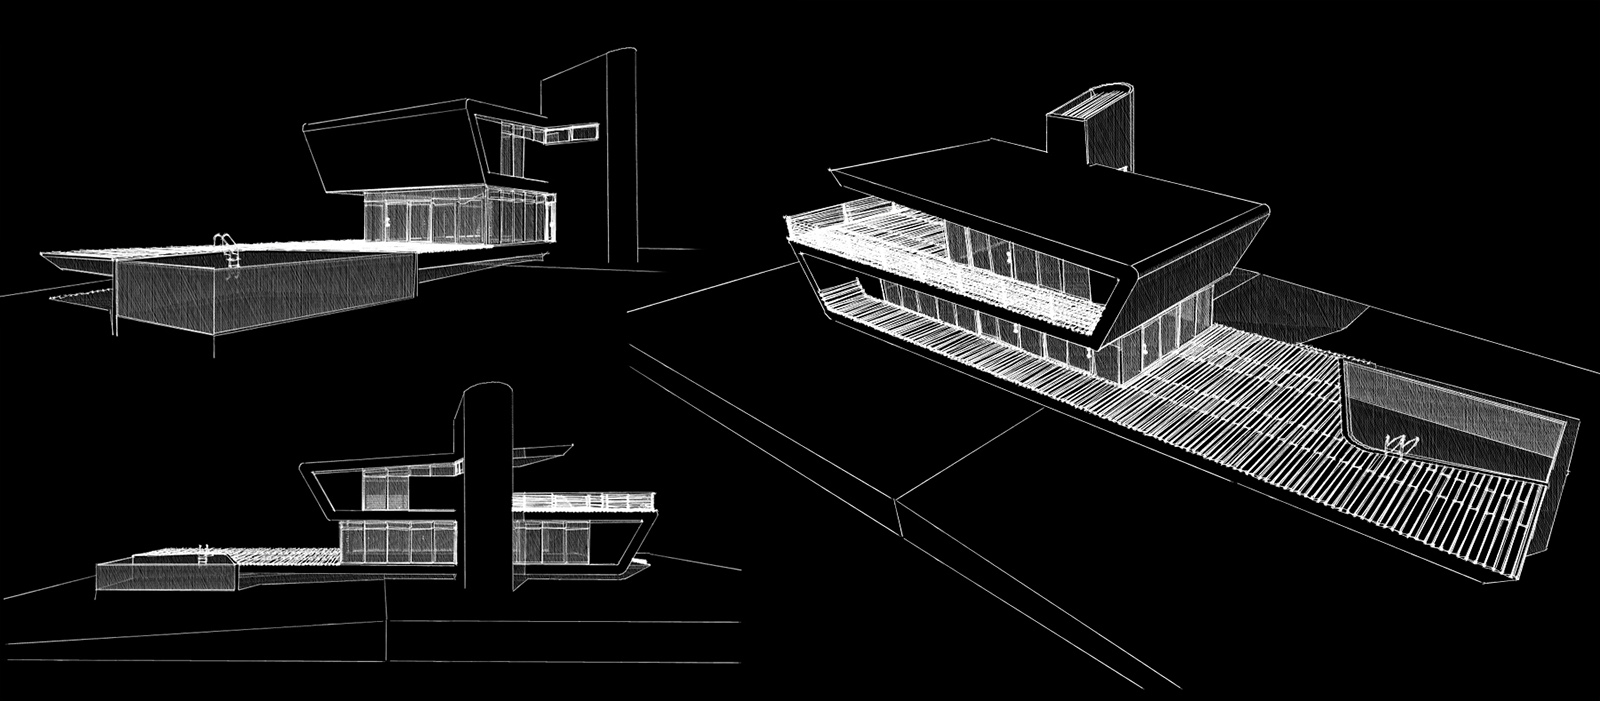
Here are some sketches I made in Archicad while drawing the concept.
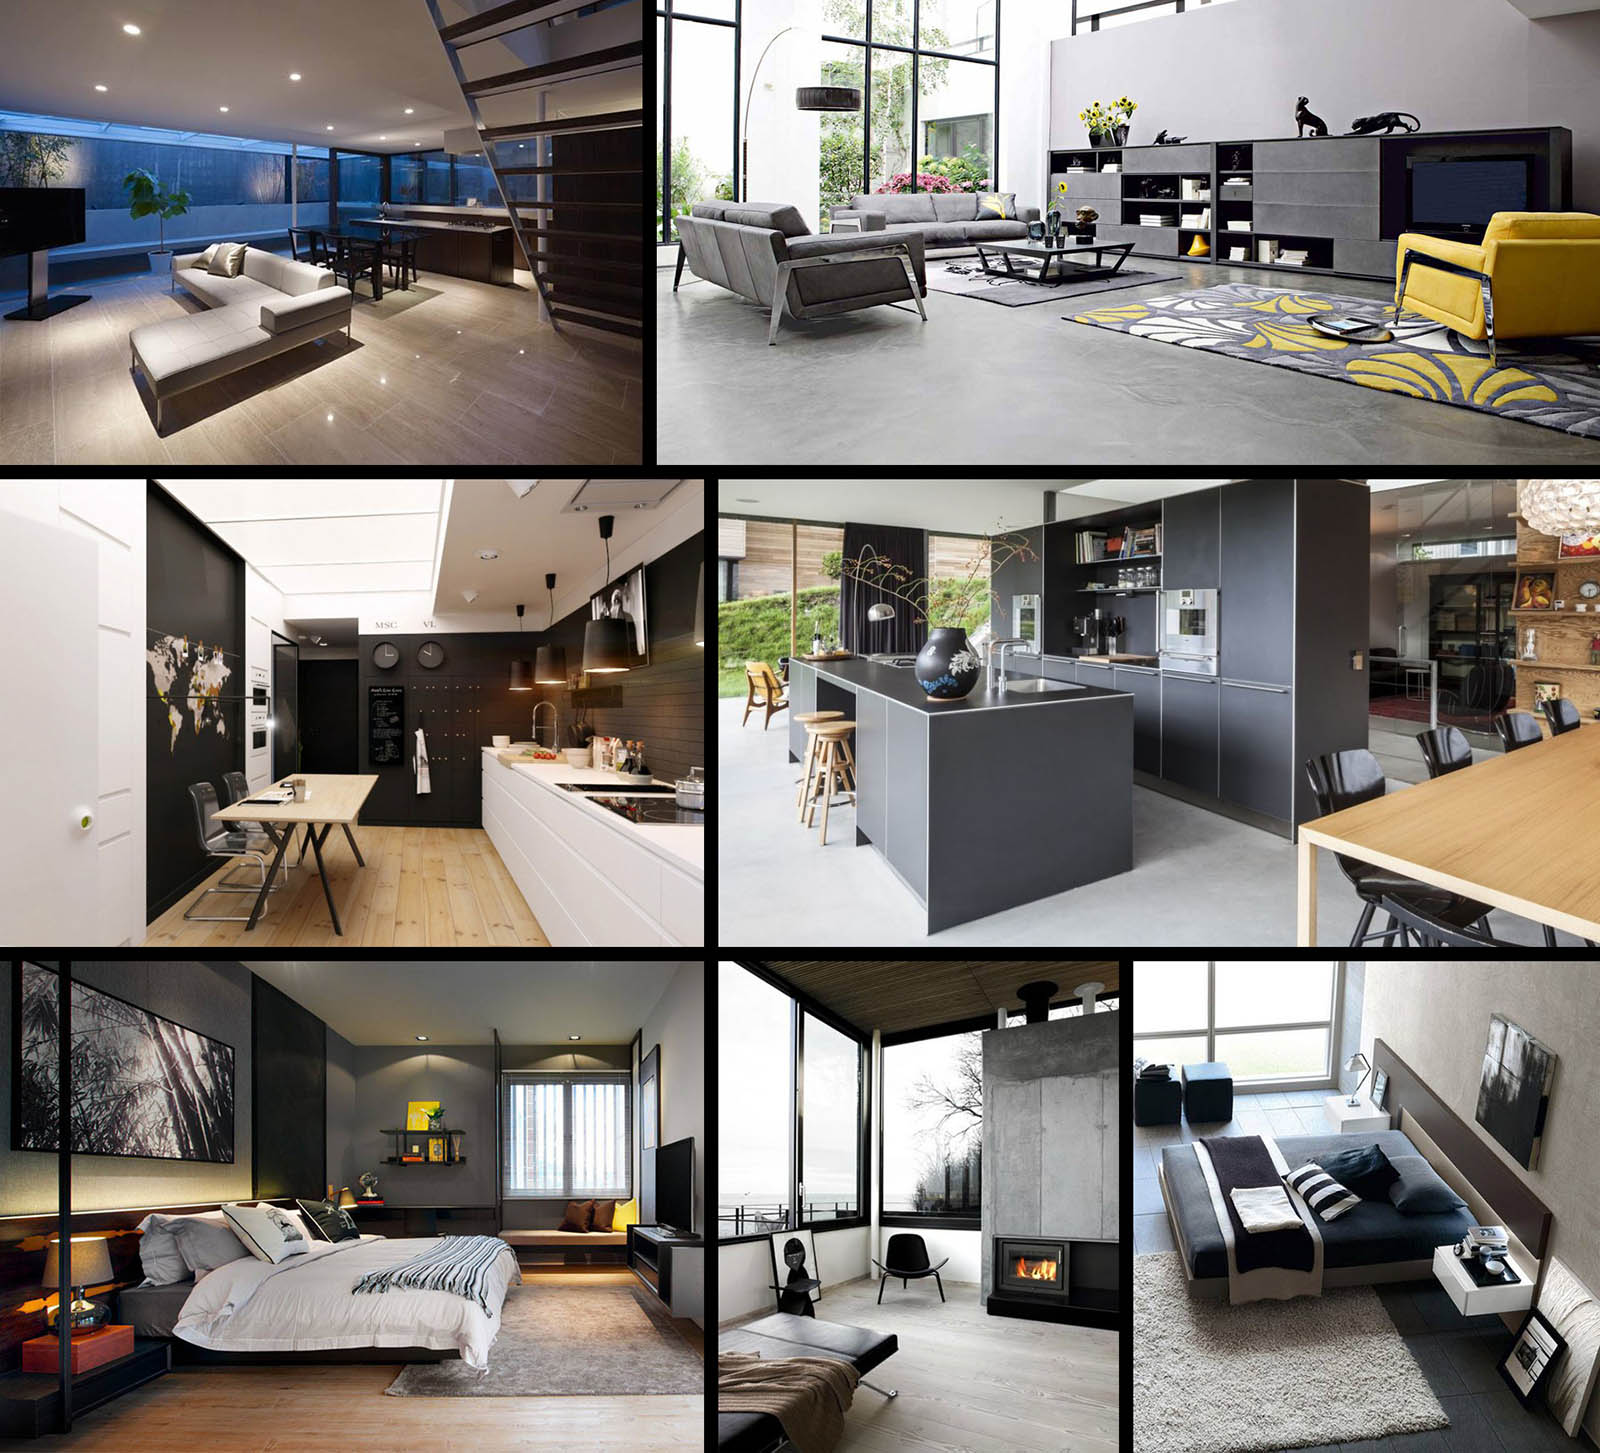
I strongly suggest you collect a lot of references before starting any job and thus you’ll train your eyes more every time and you’ll begin to feel better and better about light, composition, materials and finally you’ll make a database for that. Here are some references for the interiors.
Nothing special to say about this modeling; the base model of the house was done in archicad and exported to 3d max to add details like chamfer in the corners.
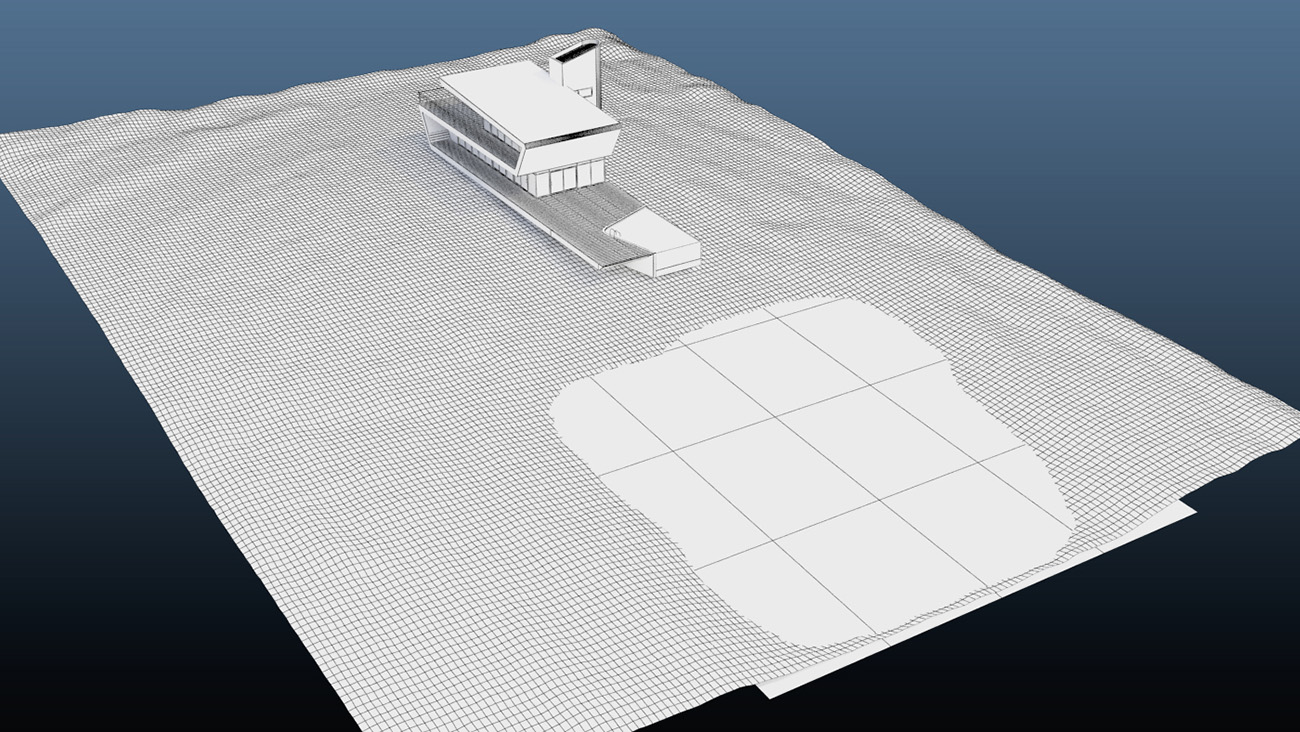
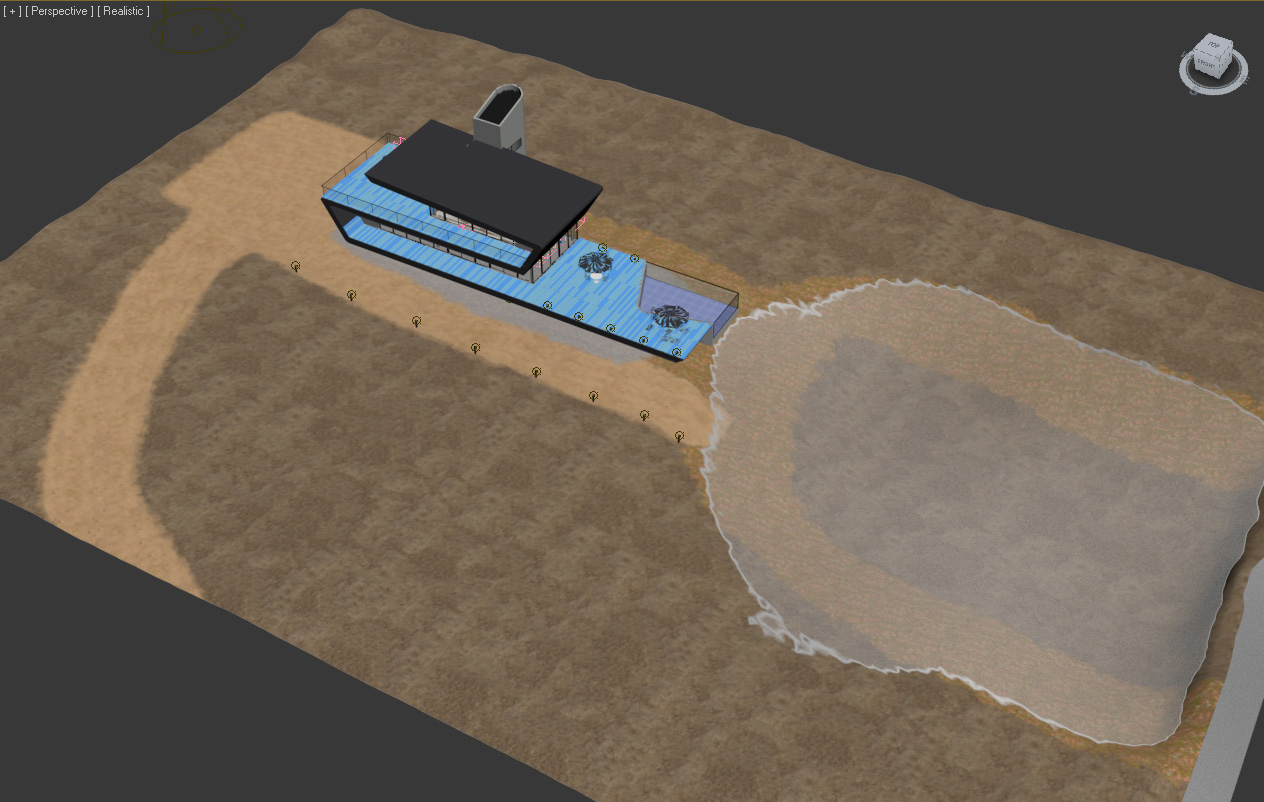
For the Terrain, I began with a simple plane, subdividing it to use “pain deformation” to push/pull or relax and then I played a “turbosmooth” modifier. I used a simple plane for the lake.
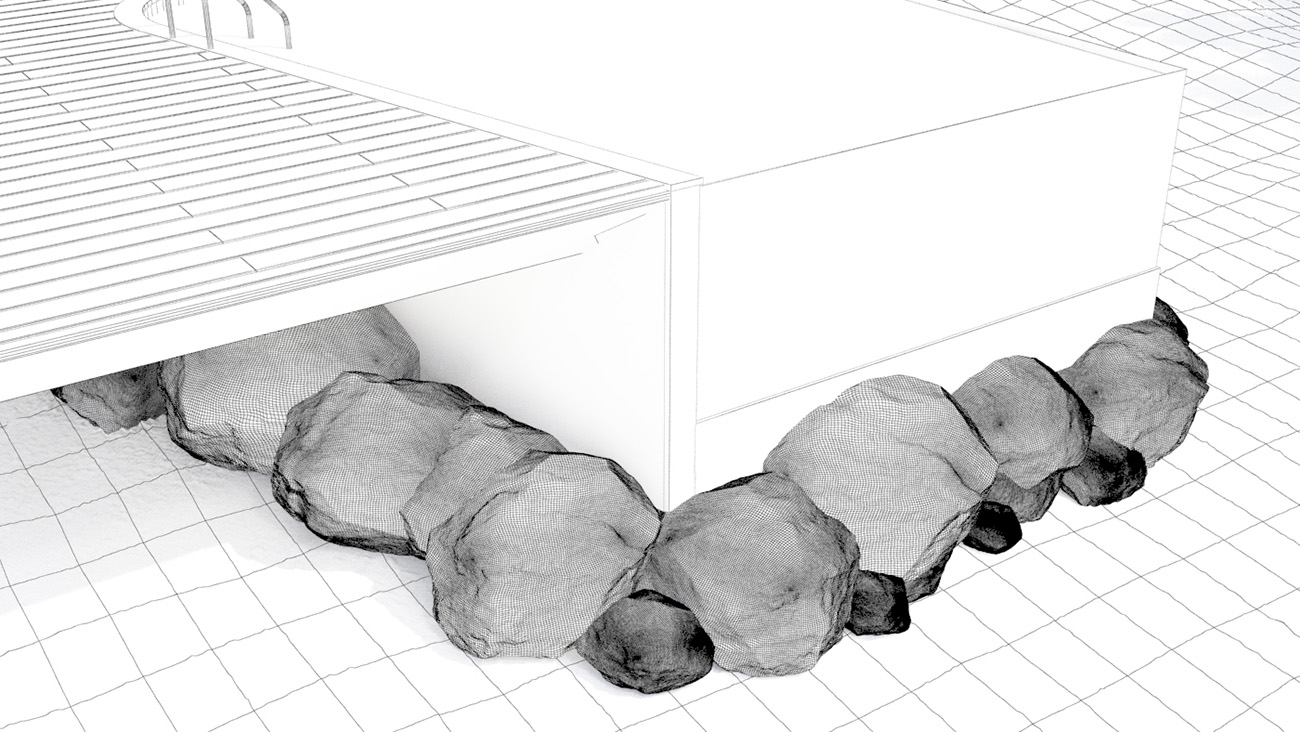
Rocks were made with the help of “Rock Generator” script (free). And it is distributed with “advanced painter” script (free). In this article "Scripts & Plugins for 3d environment creation" written by VW Team you could also find several tools, both commercial & free, which will help you to create your own environment!
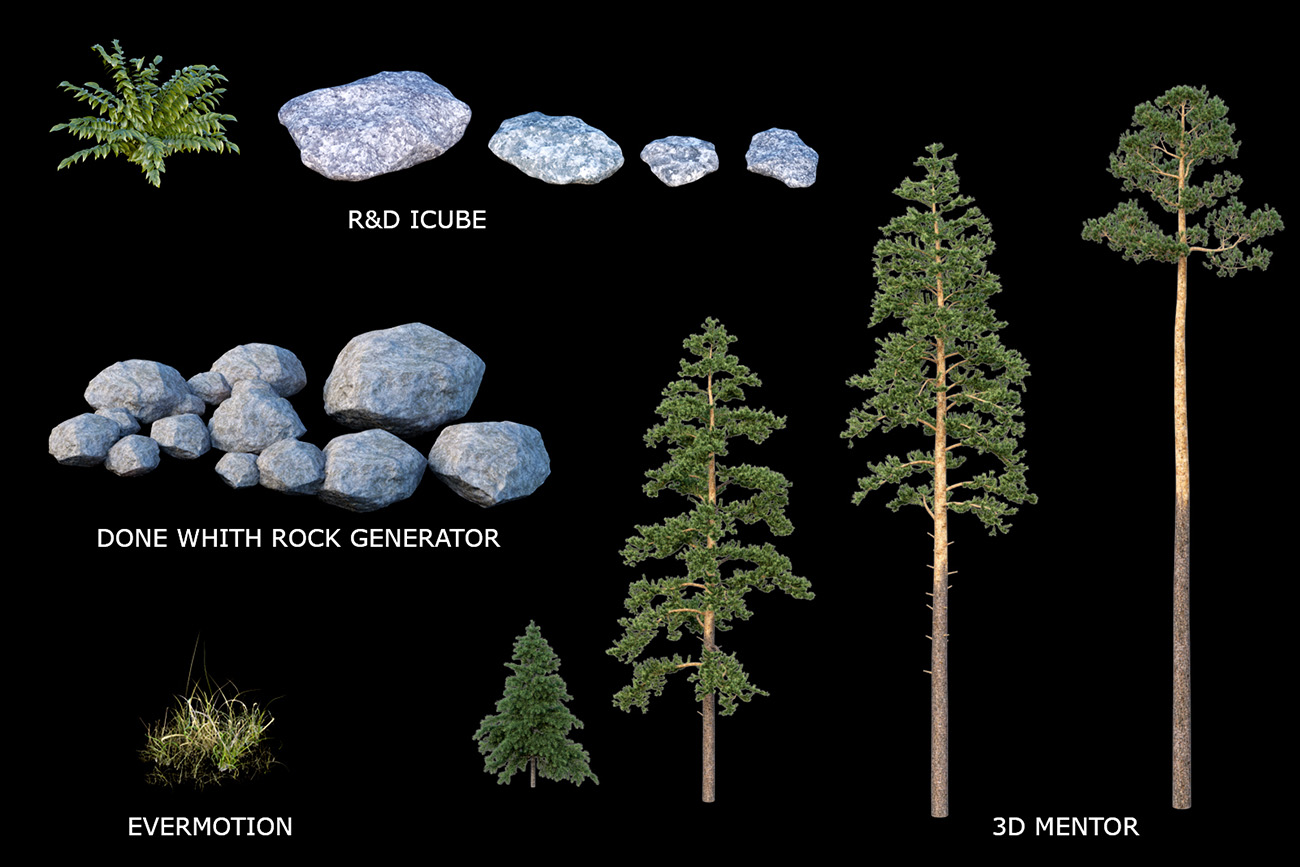
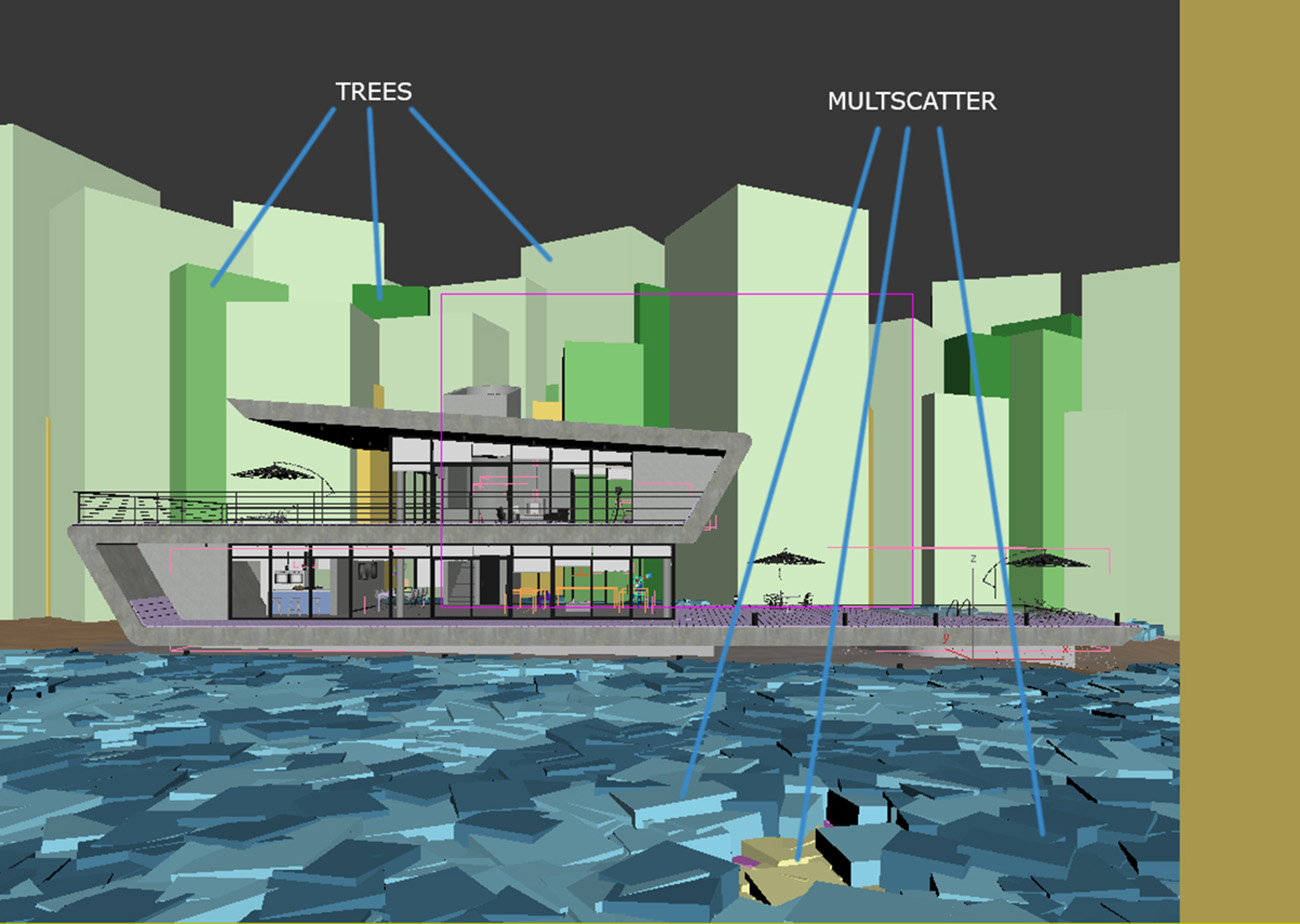
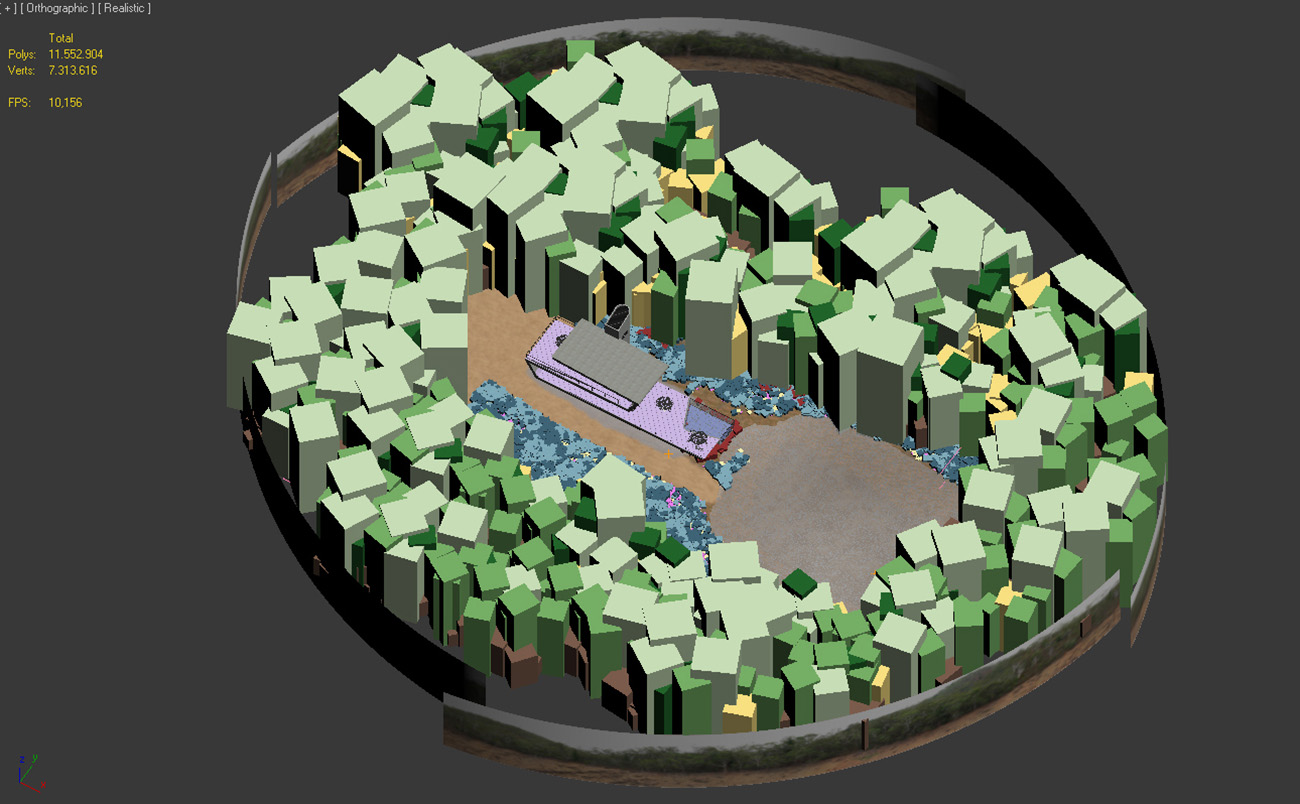
Again with the help of advanced painter I spread all the trees and rocks and for the bushes I used Multiscatter plug-in from R&D. You can find some good tutorials on the internet (important: all models are Proxies). After all models were placed, the scene was heavy and still missing some trees in the background, so I put some planes around with bend modifier and I played some material to cover that but I'll explain this better later. Here are the models and the viewport comes afterwards.
For almost all the models I've just used the good old simple poly modeling. The floor was made with Floor Generator script and the rest is from my database. I will not focus on that too much, as there are many articles about that topic. Below there are some examples of the poly-modeling.
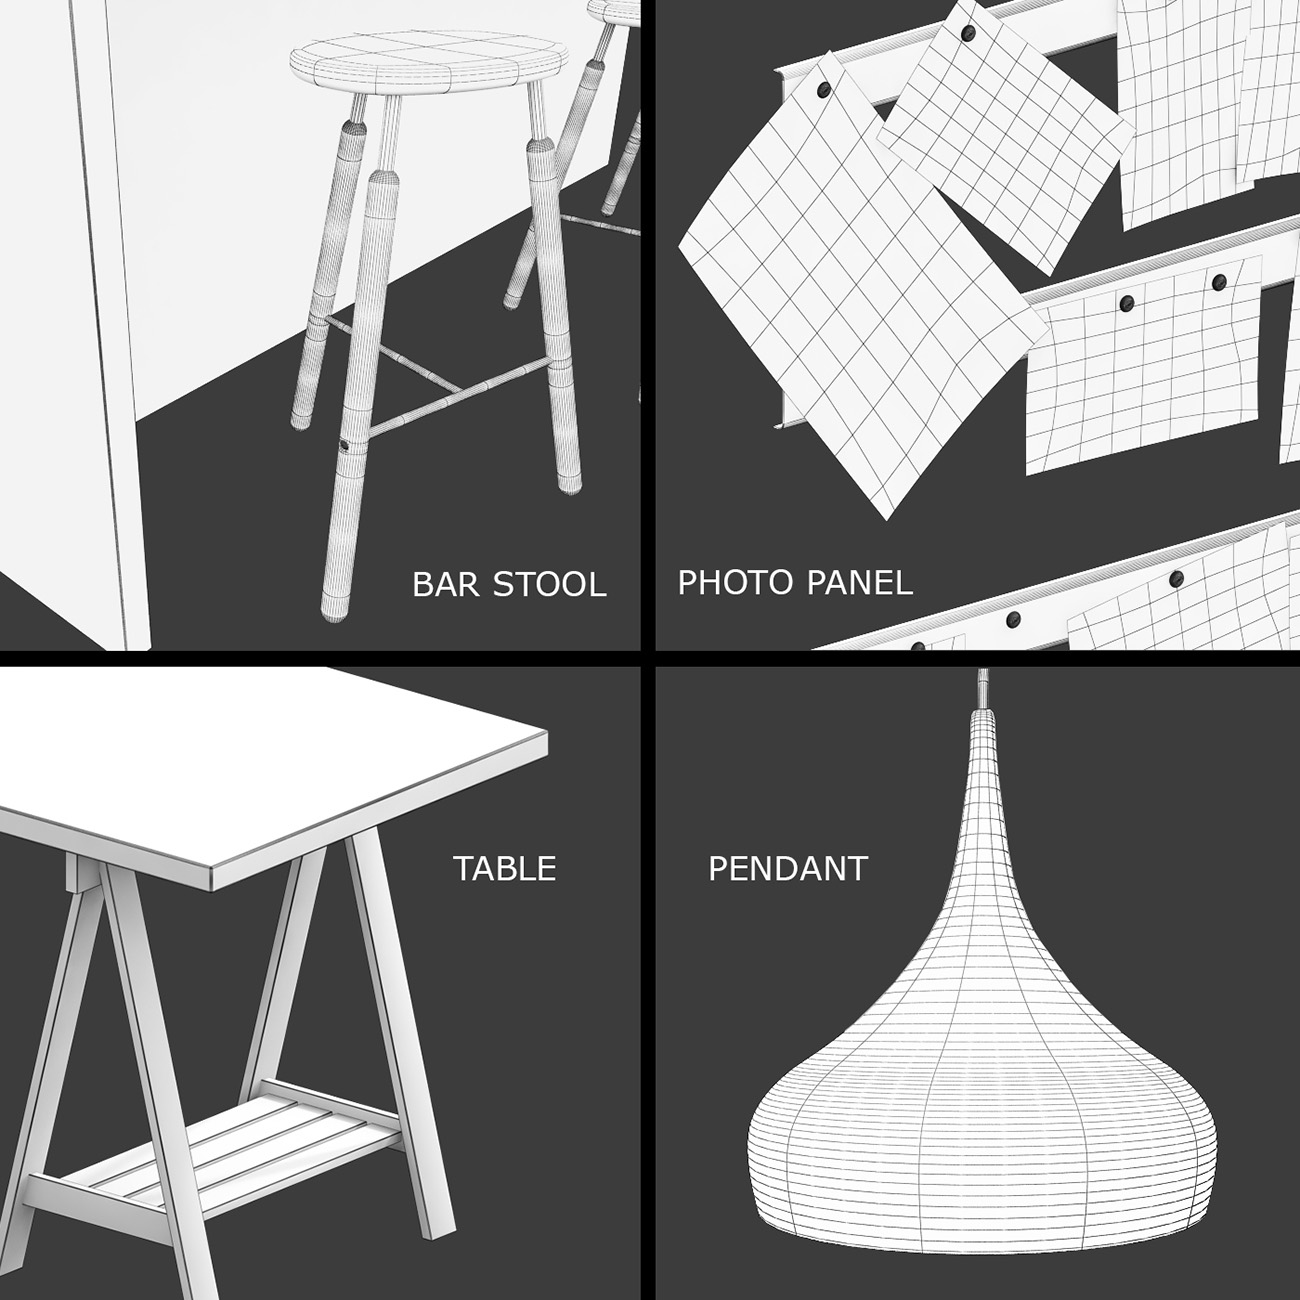
Here are the models (pre made) from my database. You can download some of them from here fritzhansen and here linxvision.

I would just like to show you the process to create the bed. Before I did it I had read this amazing tutorial from Viscorbel, teaching every step and even the optimization in Zbrush which is a very important thing to do for a clean model. I just made a few changes, enjoy it here link. After you see it, I'm sure you can do better than me. The quilt of the mattress.
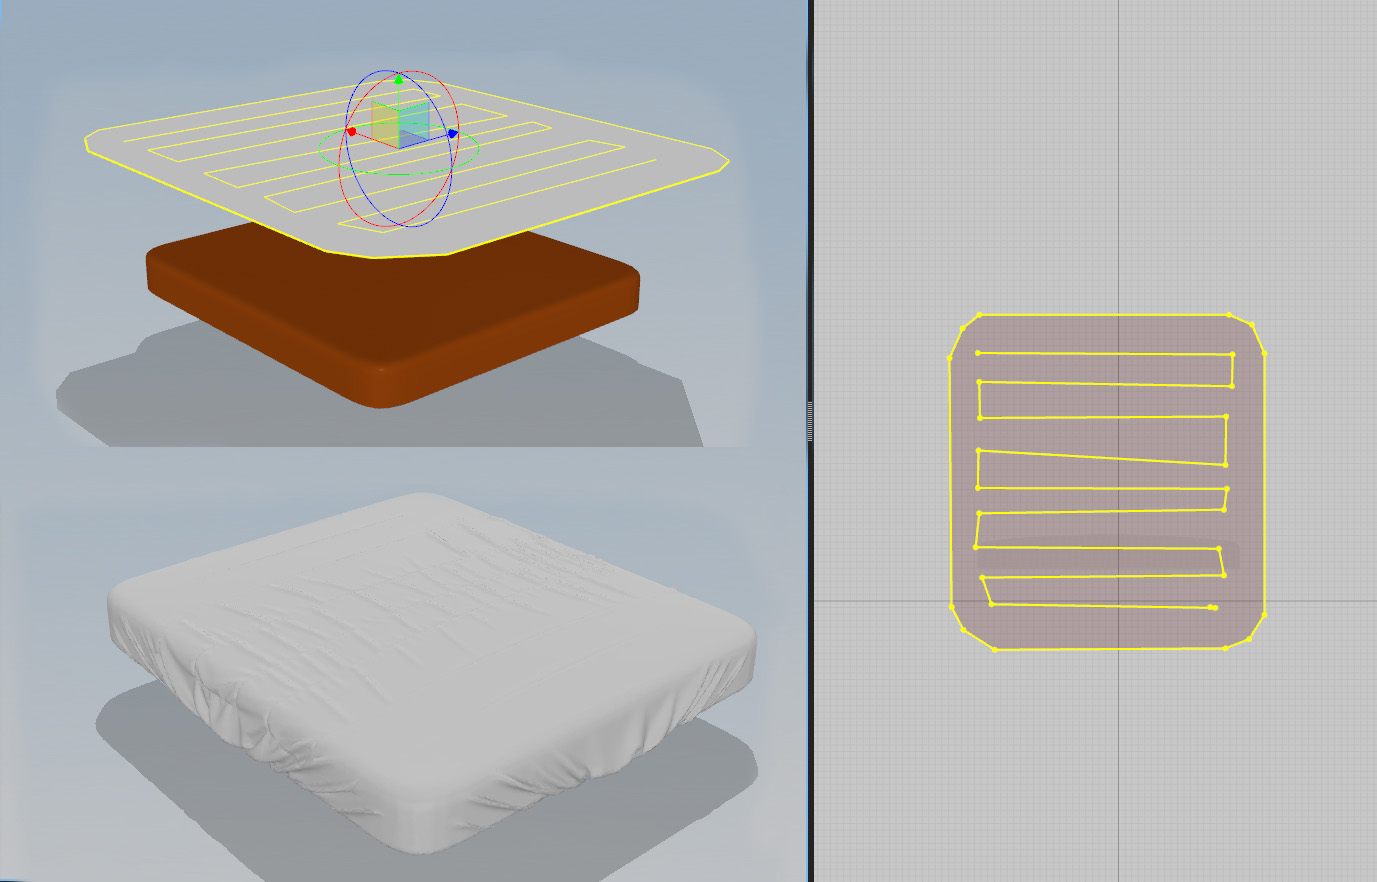
The blanket
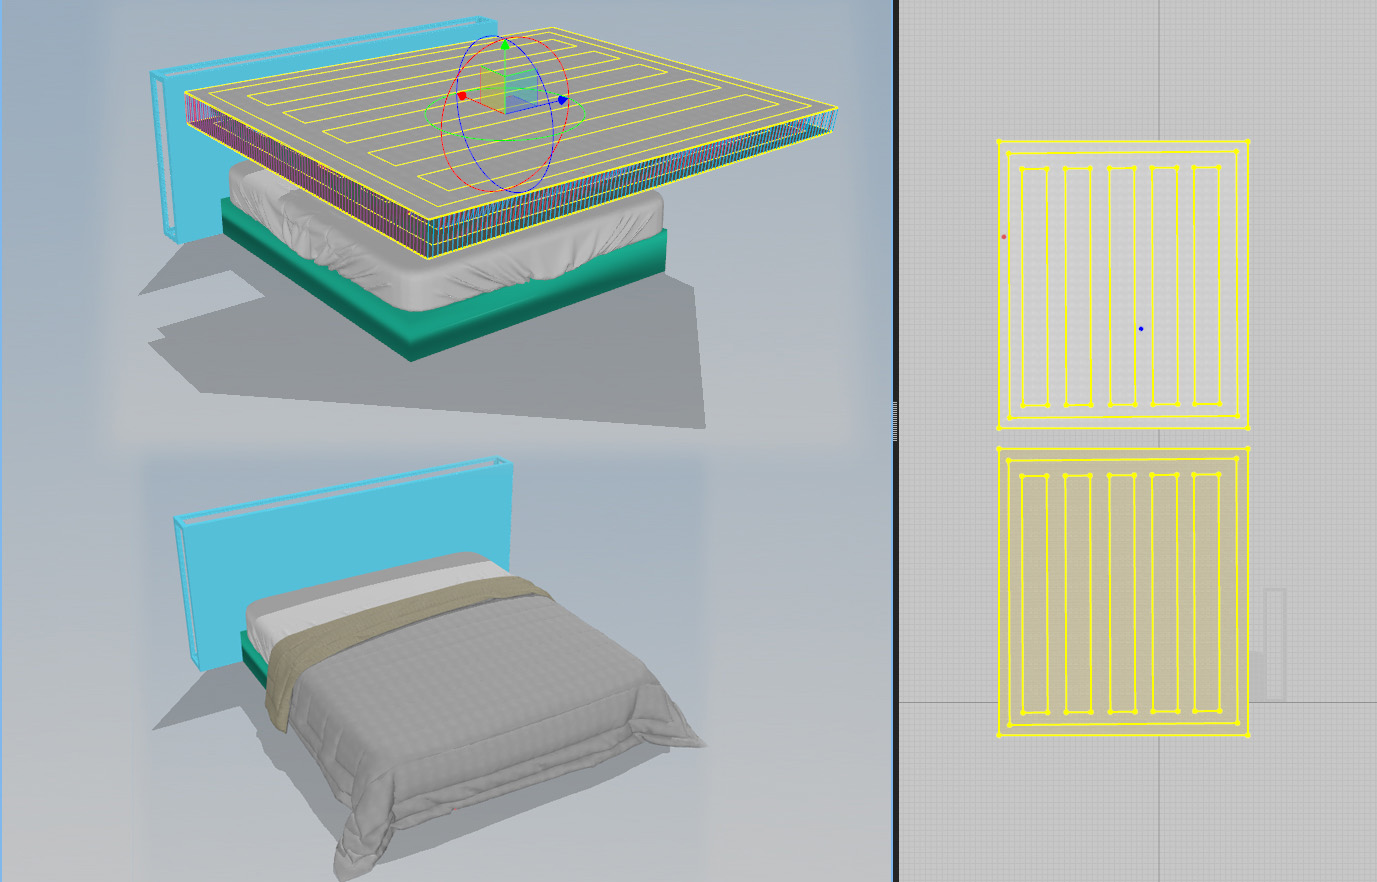
The pillows
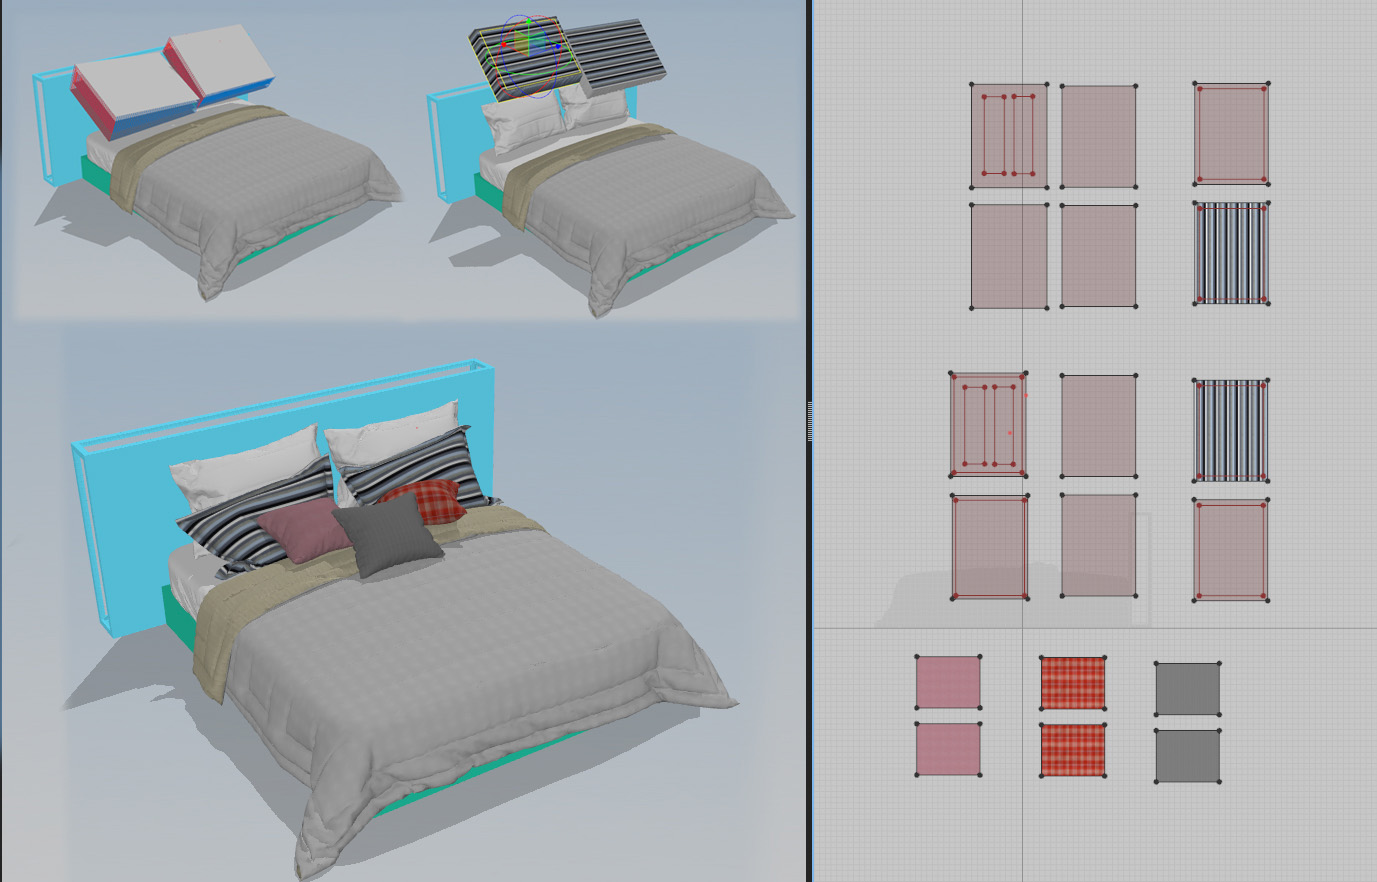
The final result.

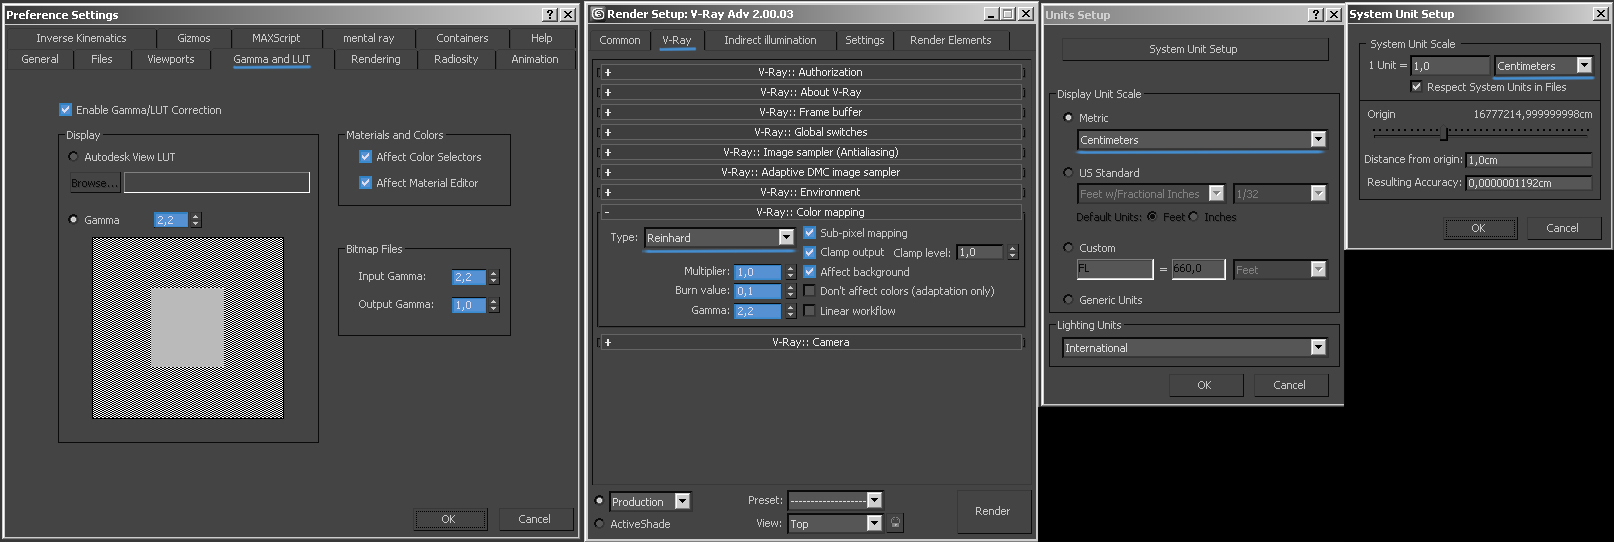
The basic setup I use is LWF Gamma 2.2, as you see here.
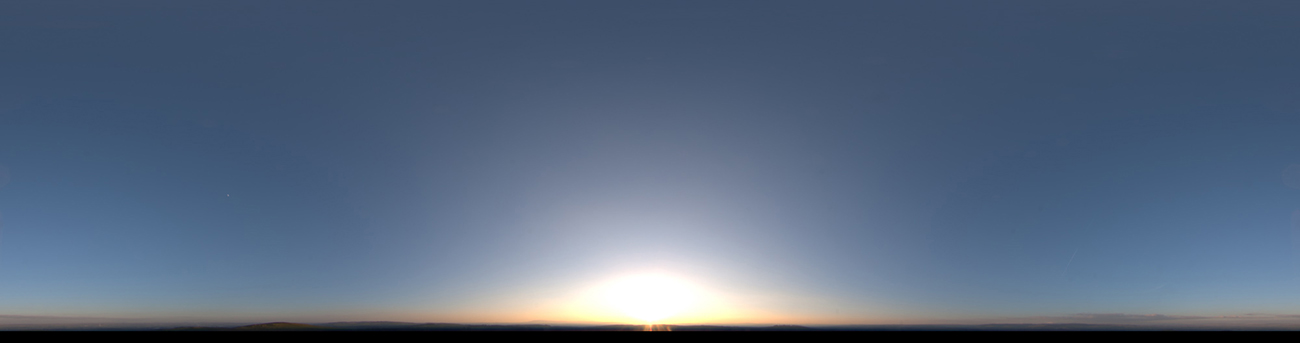
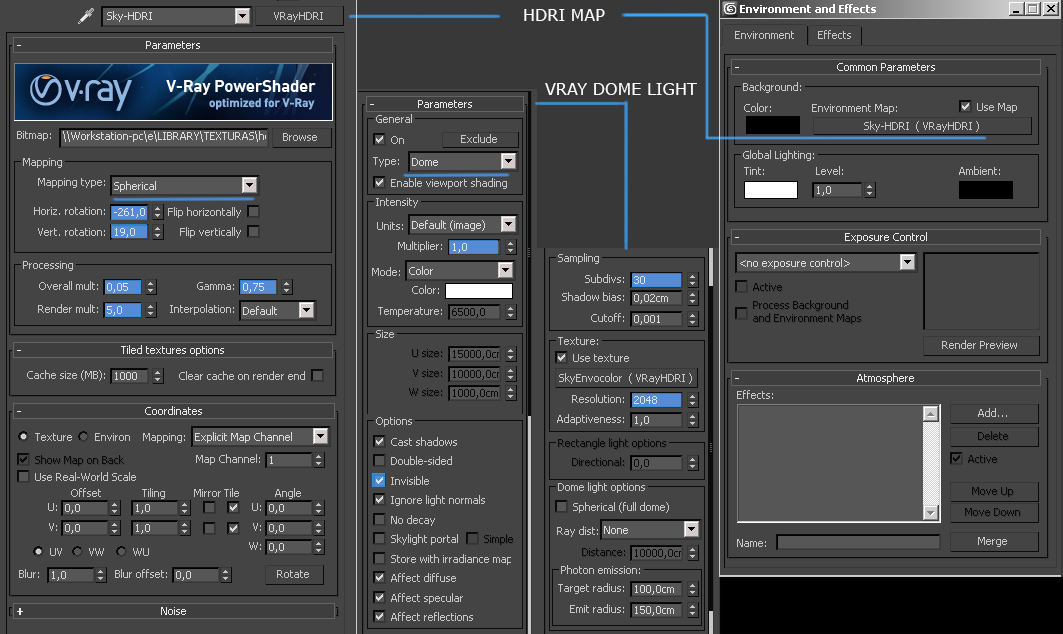
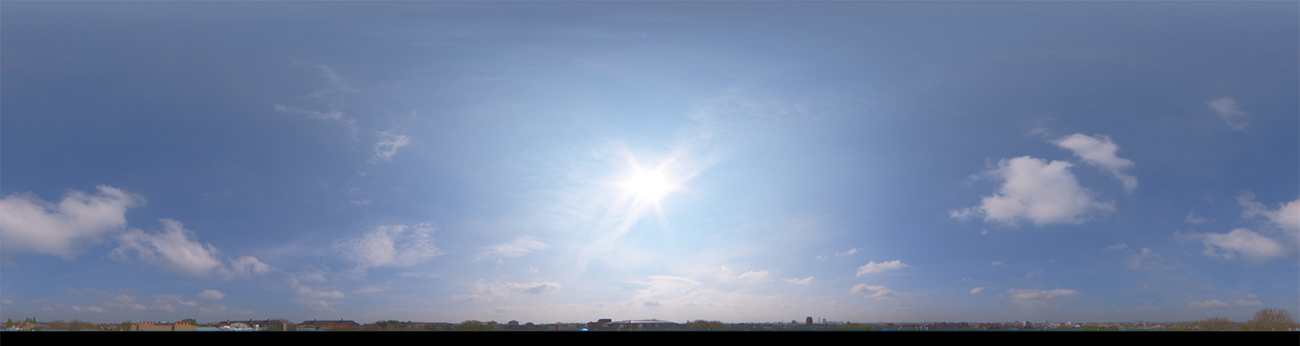
That's the part I like the most. I´ll explain 3 different types of lighting; day, evening and night. For the evening I used the image based lighting setup with HDRI inside the Dome light and I used V-Ray Plane light for the interior; nothing more. The first thing I always do before texturing, is light the scene with a standard Vray mtl on all objects, which comes with RGB 128, gray scale and then I go to Vray global switches and apply it in "Override mtl" and in the "Override exclude" I pick my glass object (windows) because I don't want to affect them and the light come inside. I think this step is very important, cool and saves time. The evening was done with the HDRI from Peter Guthrie - 1554, as seen below.
Here the Lighting test is done.
In the HDRI settings, I changed the horizontal rotation to get the sun at the back of my camera and the vertical rotation to leave the sun a little higher. I've changed the gamma for more contrast, in the Vray Dome I checked “invisible” to use the alpha channel to change the sky in post production, but to continue seeing the sky I put it in the environment slot as instance.
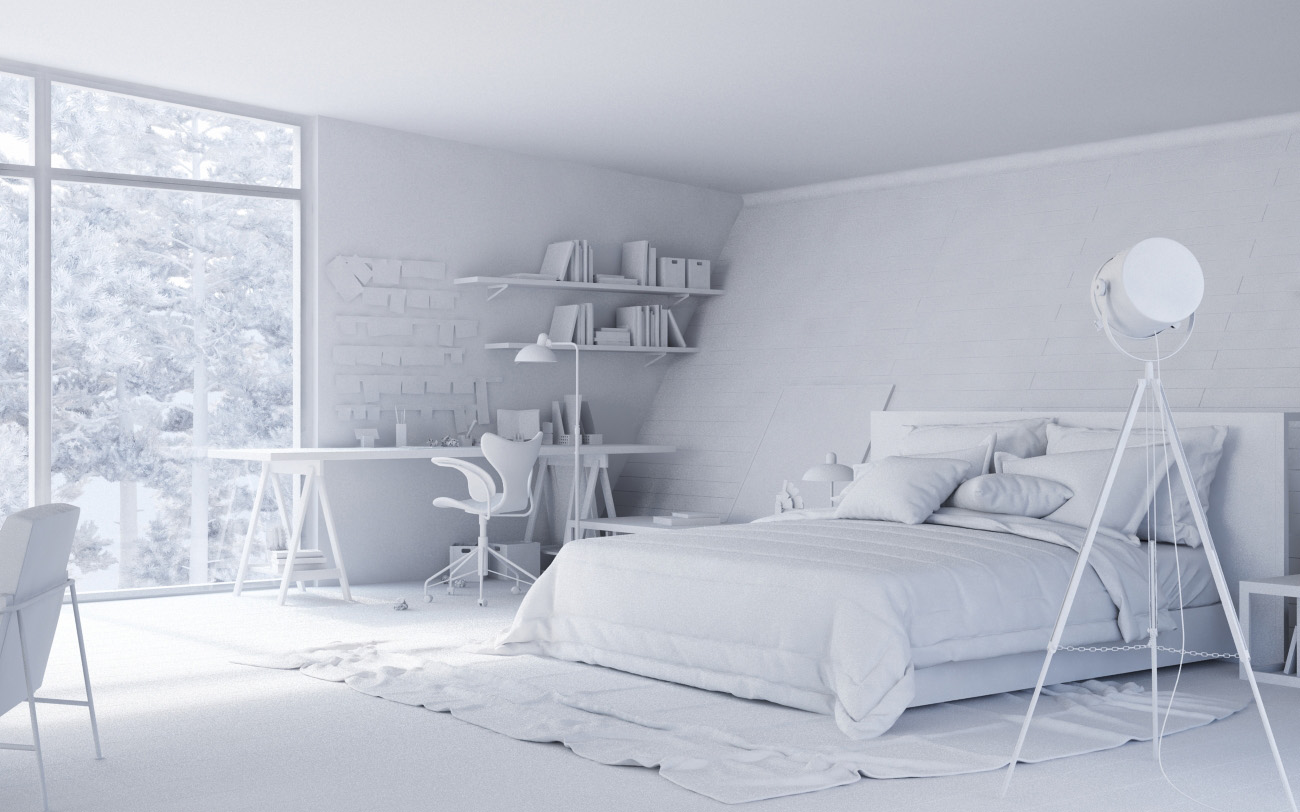
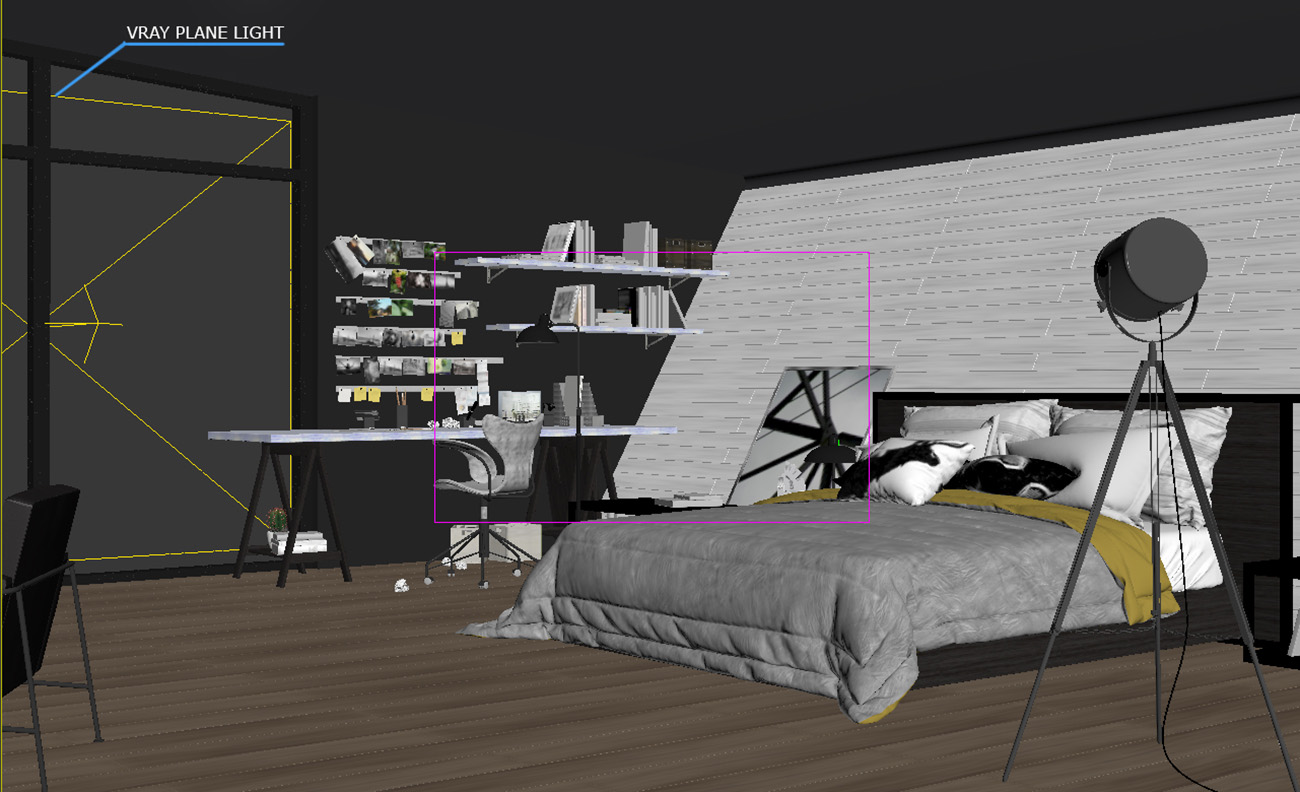
For all day light interiors I used the same HDRI again from Peter Guthrie -1103, inthe same way you saw above but this time with Vray plane lights outside the windows. In this example below though, the Bedroom, I just put it in the window where the sun is coming to get more contrast and in some cases I played with dark walls behind the camera for even more contrast. I used the “Rule of thirds” to help composing.

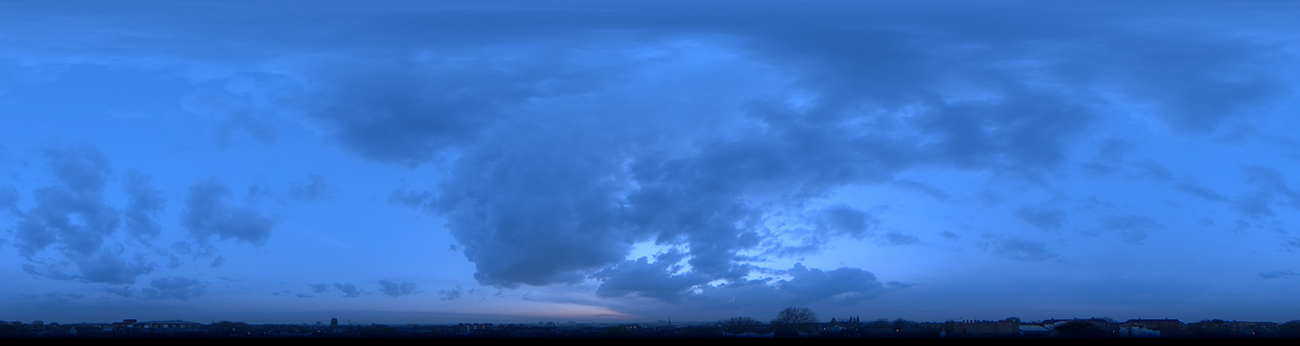
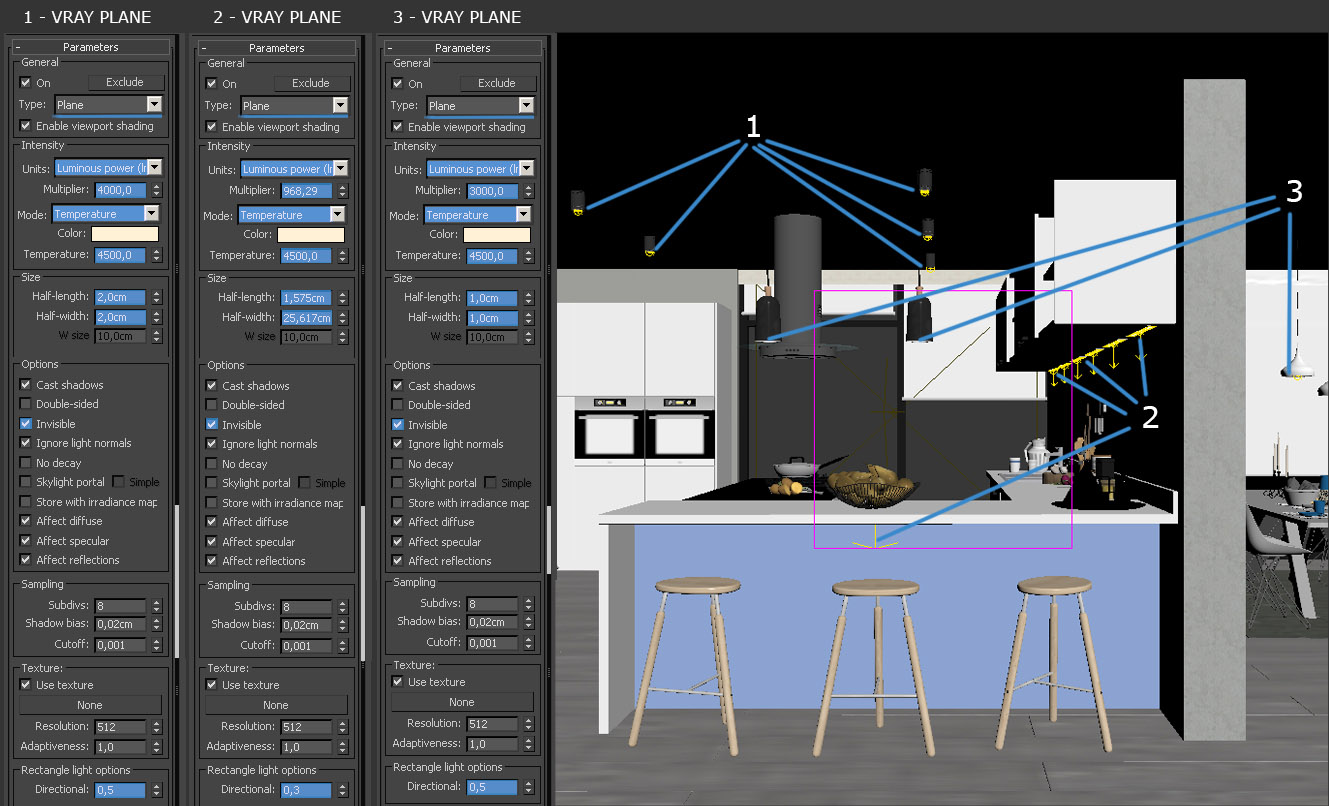
And finally, for the night scene I chose to describe the kitchen. I used, as with the others, HDRI - 2003 from PG for all night scenes and for the interior lights Vray plane, as you see below.
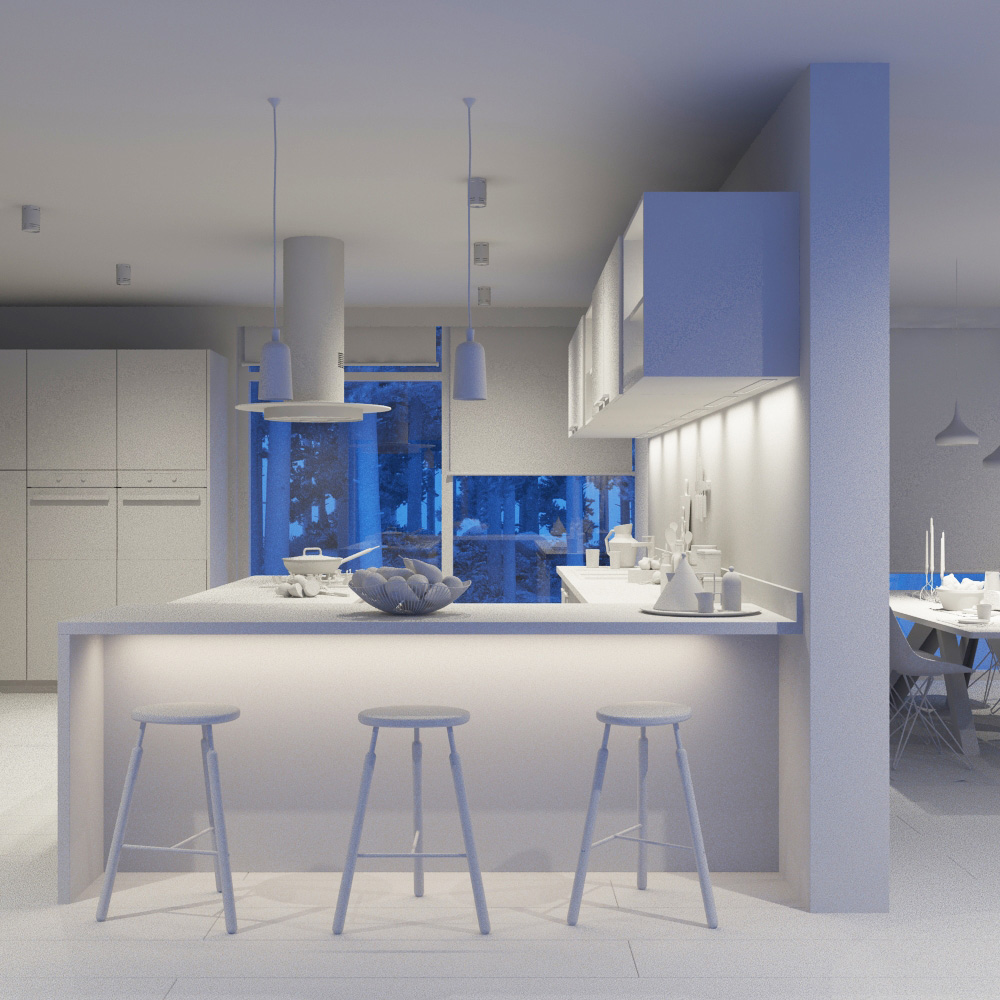
In this case I just used vray plane lights because i did not want to design light shapes, so I played with the size, intensity and for the simple shape I used the “Rectangular light options - Directional” as you see here.
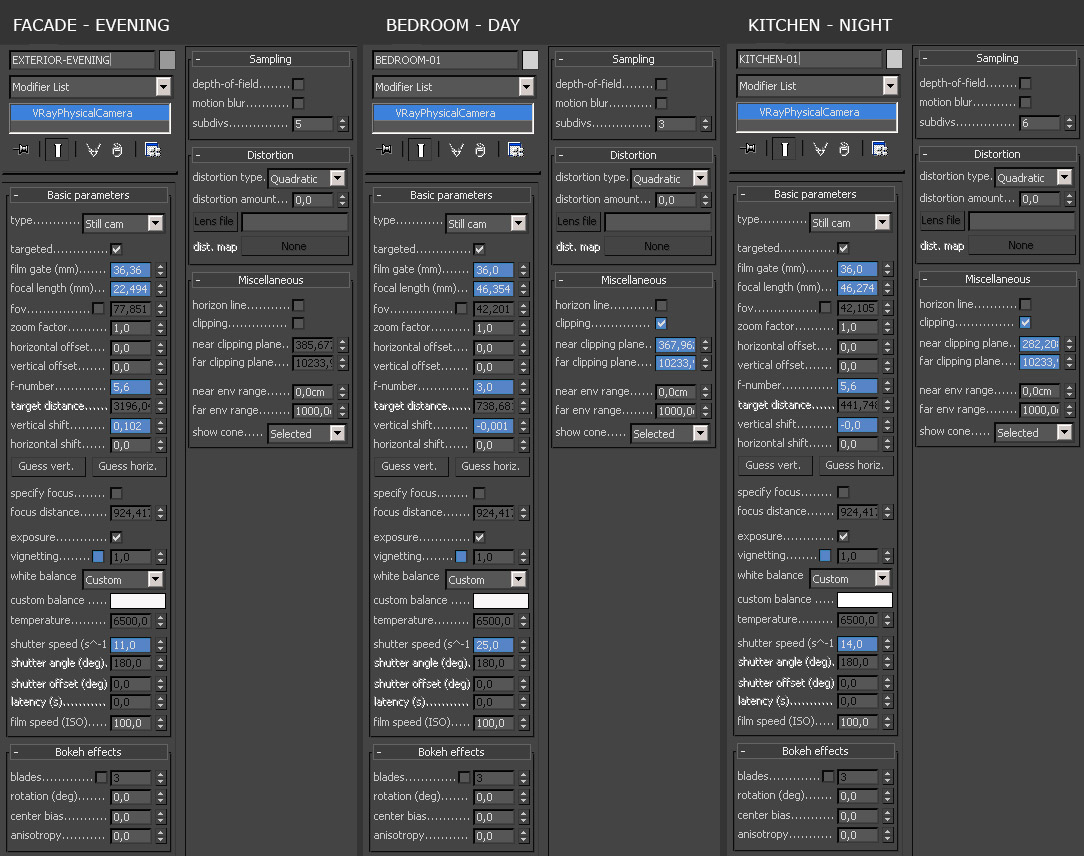
Here are the camera settings I´ve used to each view above.
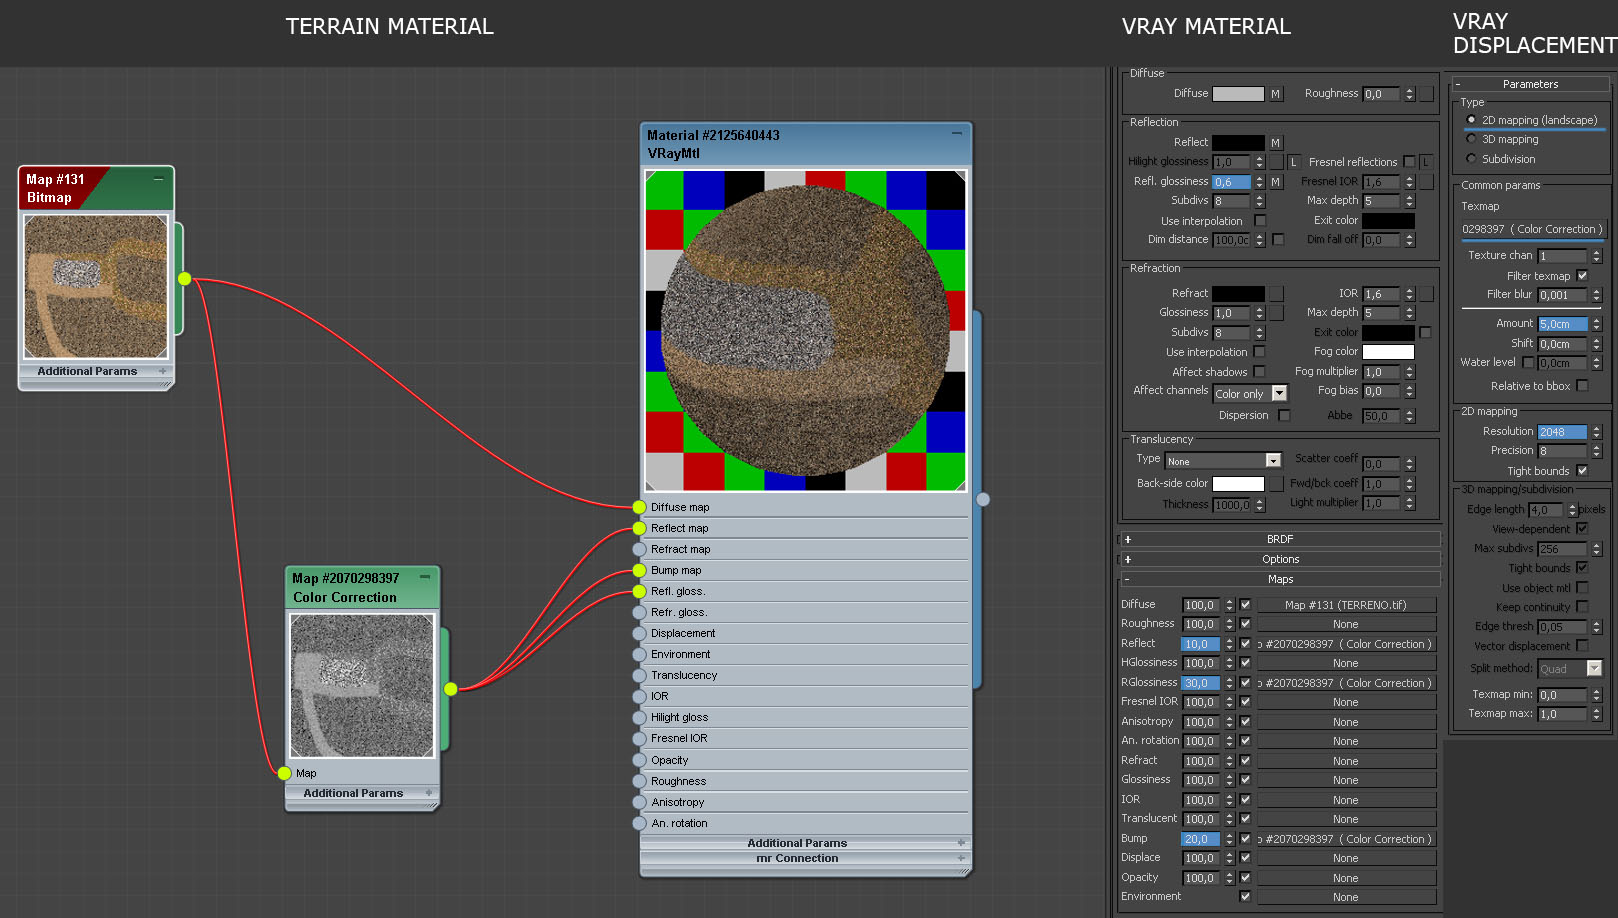
About texturing, I would like to show the texture I painted for the terrain map. I chose four different textures and manually drawn it in PS. I was not thinking about close-ups but in the end I tried and my 10.000 pixels texture was not enough, so I had to improve it. Here is my diffuse texture and viewport. It’s simple because I know I´ll cover it with vegetation. I made the bump, reflect and displace maps playing with the “color correction” Map upon the diffuse.

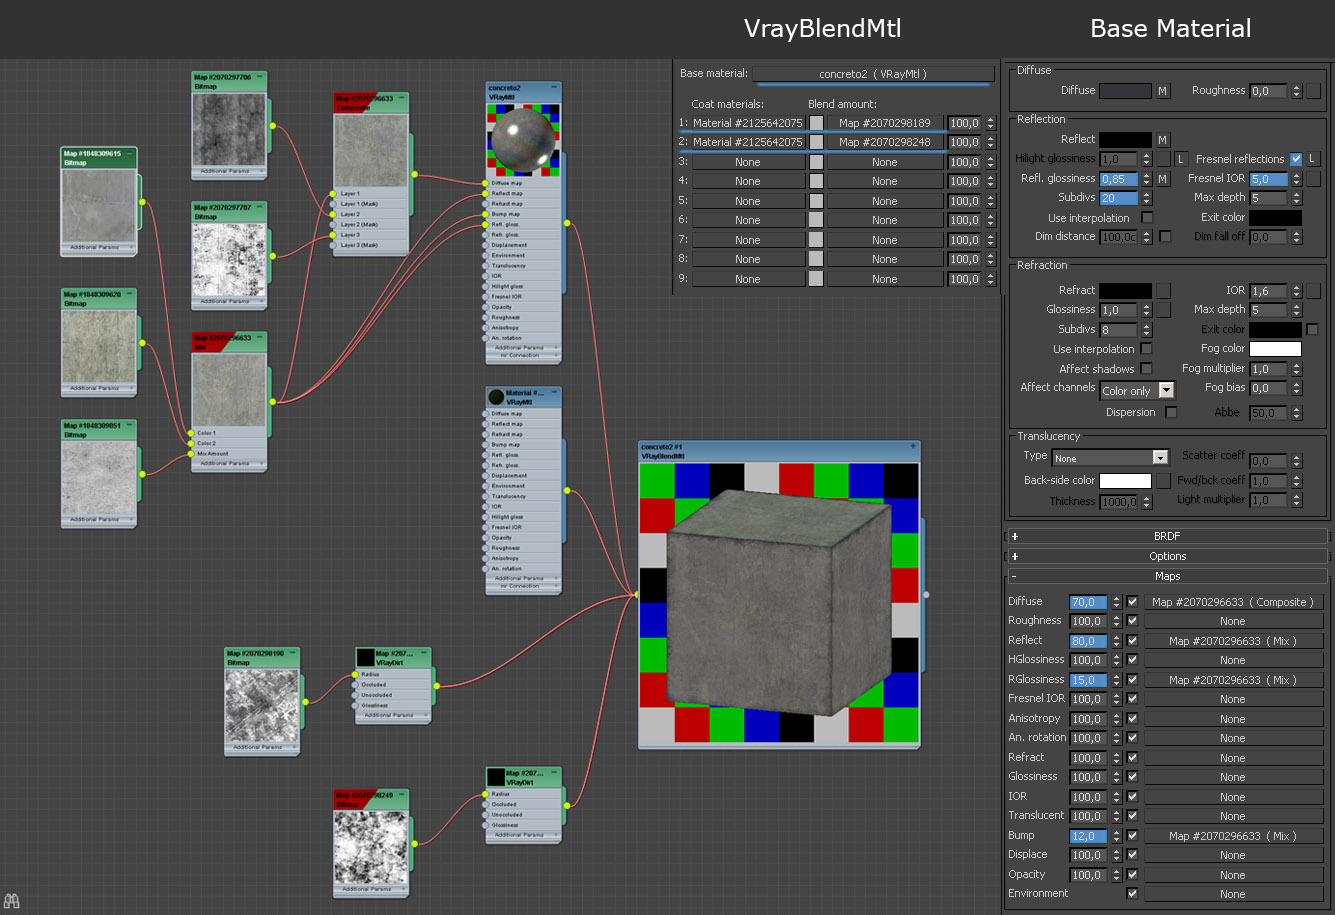
The exterior concrete material was difficult. I did not find a seamless texture which I liked, so I made mixes of three textures and I used a Vray blen Material for the Dirt, the coat material darkened and the masks are Vray Dirt Maps with a texture in the radius Slot.
I like using brute force for my non-commercial work because I have time for it and for each render I spent 15 to 25 hours in my I7 2600, 32 Ram, 4000 pixels larger side images. Here are the settings.
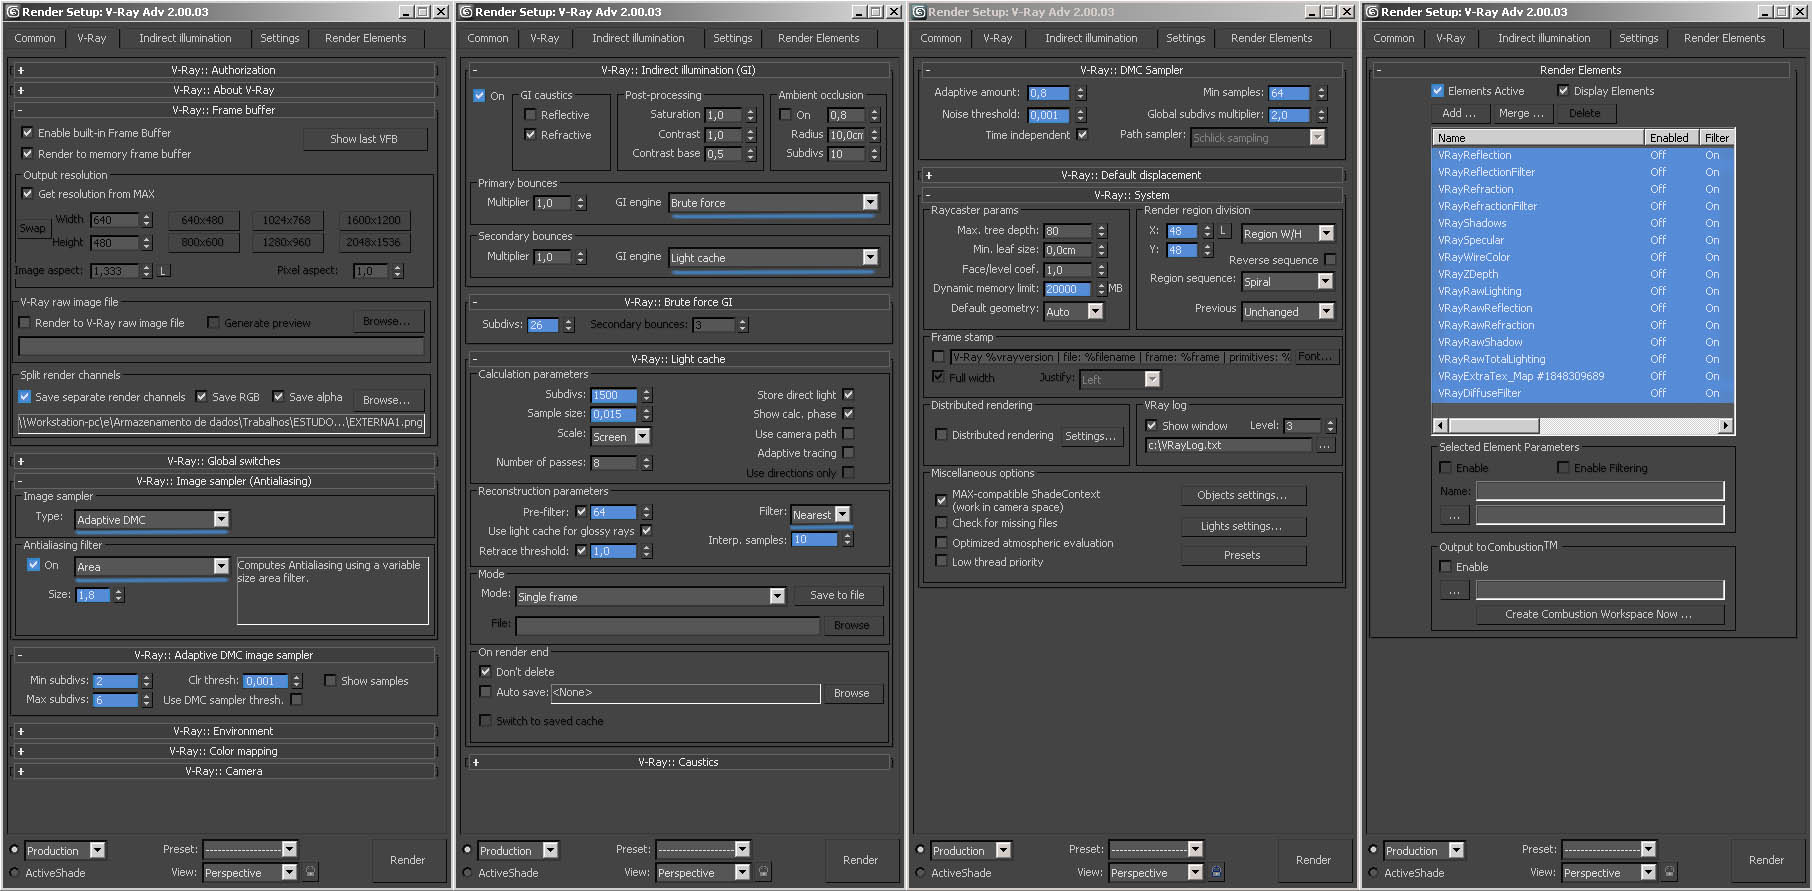
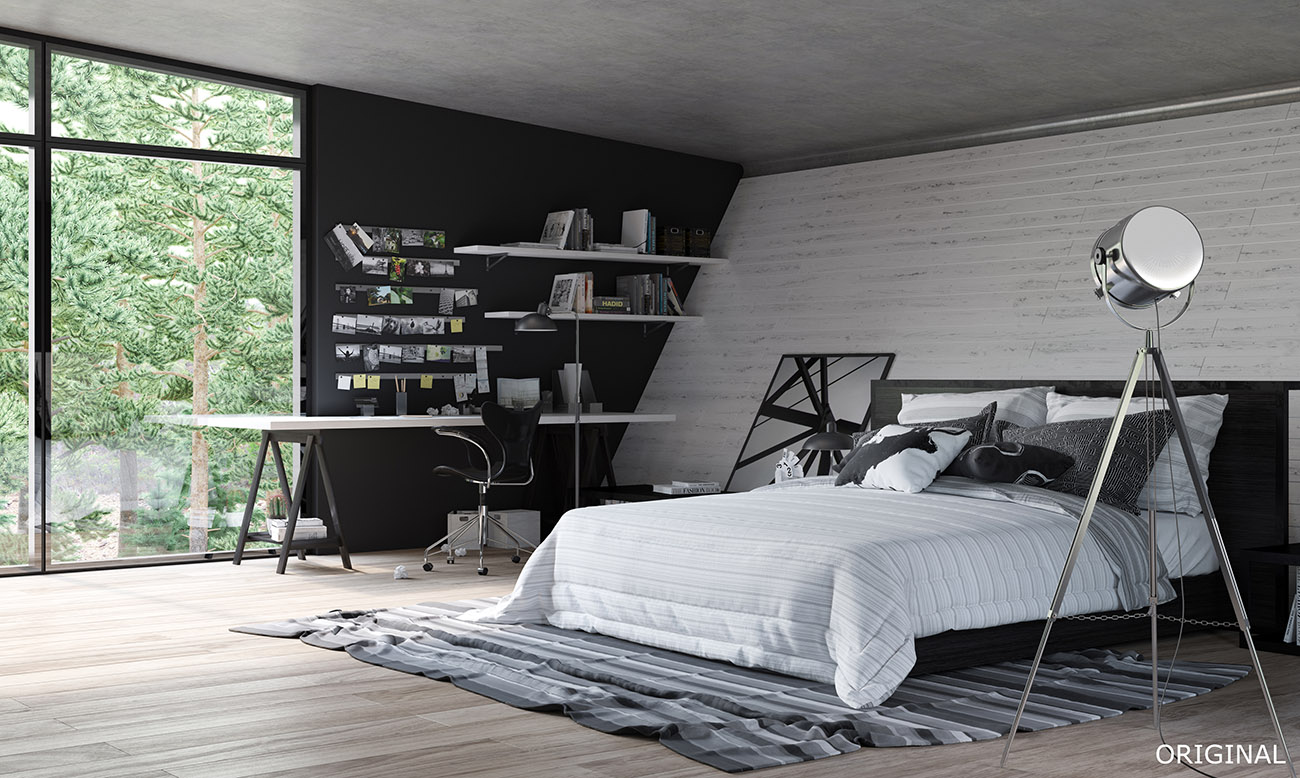
I tried to make everything in 3D in my projects and with the help of “Vray Frame Buffer” i did the colour corrections first before the last adjustments in Photoshop. As you see above I´ve saved a lot of render elements but i just used some of them depending on the image needs, so I´ll show the Bedroom, since the others are very similar. See below the Origal and Post.
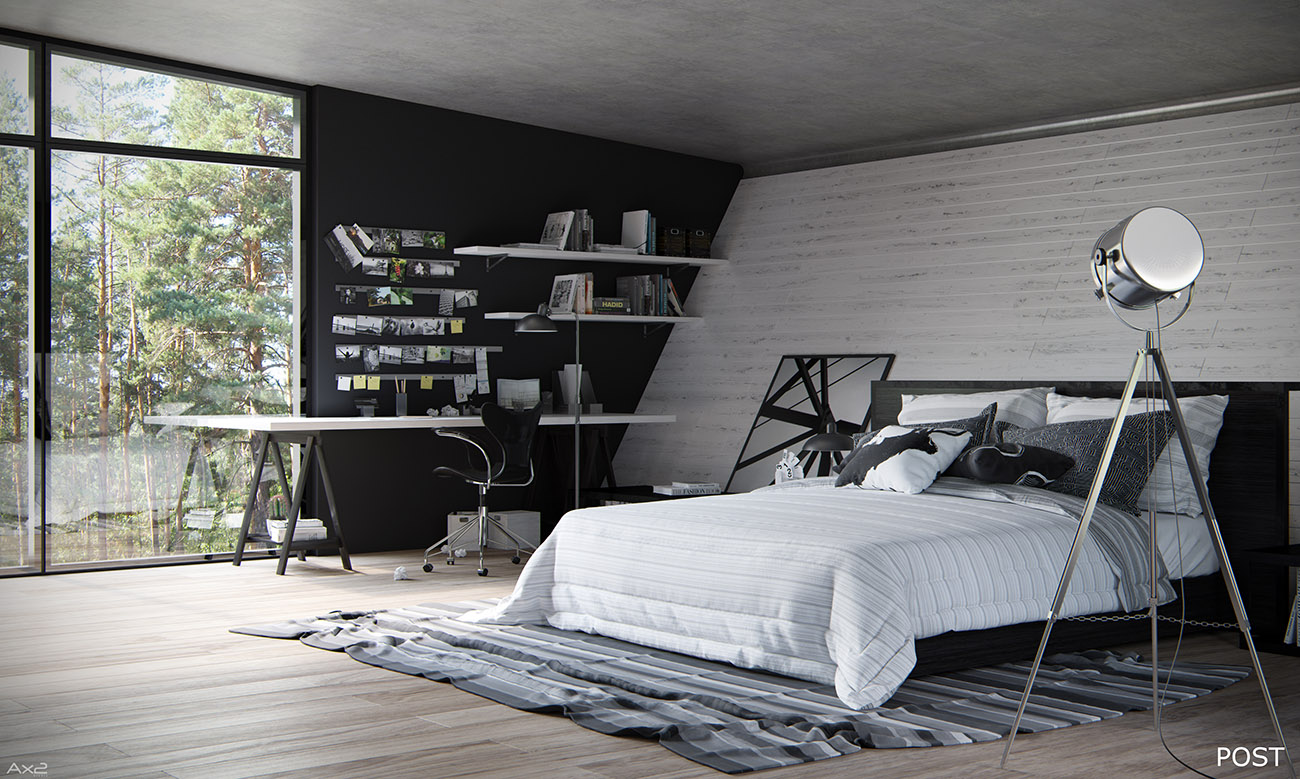
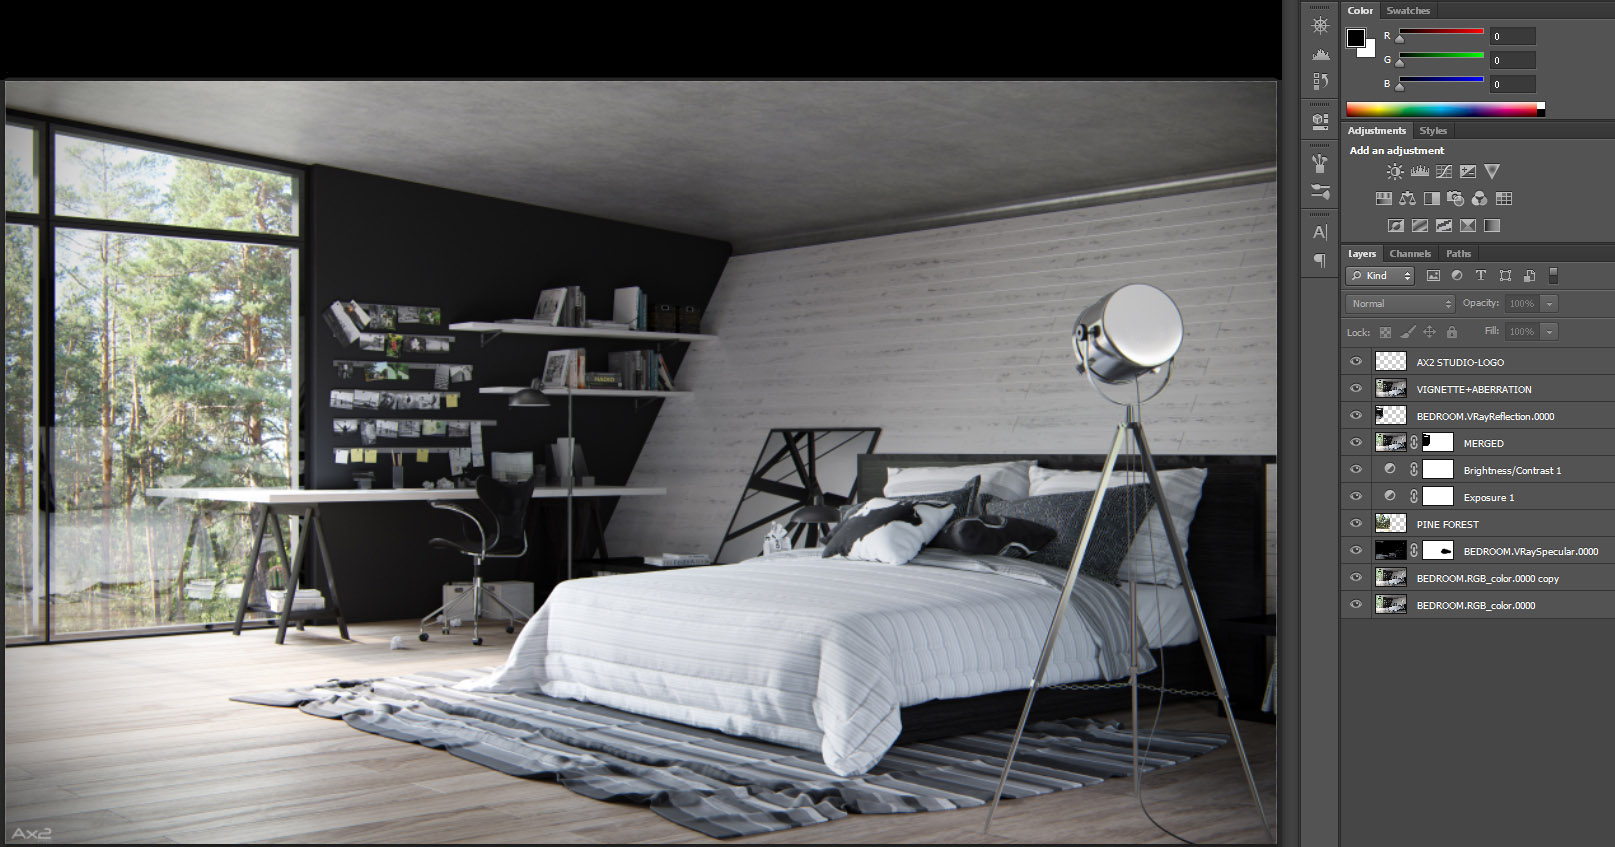
As you see, there are a few changes, the biggest being the background Forest. I was not really satisfied with the original from 3d and unable to make it better in post I spent a lot of time searching in Google for a high resolution image which matches with the scene, and in the end I liked the result. Let’s see the PSD and the adjustments.
Here are the Render Elements I’ve used.

After the adjustments with the elements and the addition of the background I put some Vignette and Chromatic Aberration inside photoshop and that’s it. I did the same for the other images, just few adjustments and I changed the background.
That’s it! Thank you very much for your time! I hope you’ll find this article helpful and feel free to make any comments, ask any questions about it or even critique. I appreciate it and I will try to answer as soon as possible.
Best Regards,
Guilherme Pinheiro.