What I like about working in this field, is the fact I still learn something new every day. I'm sharing a few tips for Vray renderer which I think aren't so well known and they can be useful for VW *Members.
In one click you can apply matte shadow settings through the V-Ray object Properties on the selected object(s).
You can exclude a specific object from being reflected on another specific object/s using this feature. Adding lights the list used to be doable in older versions of V-Ray using Maxscript but not any more so I will skip it for now.
I find that useful especially for moving cars where with the default settings the wheels look very strange. You can adjust that globally under VRay settings but I prefer to increase the samples only where needed.
This is a small but useful one. If you want VRay to start rendering from a specific point (so that it doesn't get stuck forever there at the end) and you want to work on something else like post-production in PS for example.
This one can be applied with any renderer but usually, I apply it to the Vraysun and/or the background, so I can focus on the scene every time I hit Z in the keyboard instead of zooming out too far : )).
Using a simple box with Vray scatter volume material you can add fog to a specific area.
This one is simple but might be useful for someone. For more materials, tips check this amazing VIDEO from Ludvík Koutny.
This is my favorite one! Just make sure you have the pivot for the object in 0.0.0 or you will find issues with this setup. If that's not possible you can use morpher or any other workaround to fix it.
This is useful for working with interiors where the client insists to see the whole space (Low FL ) and objects start to look strange (look at the door on the left) CHECK IT OUT.

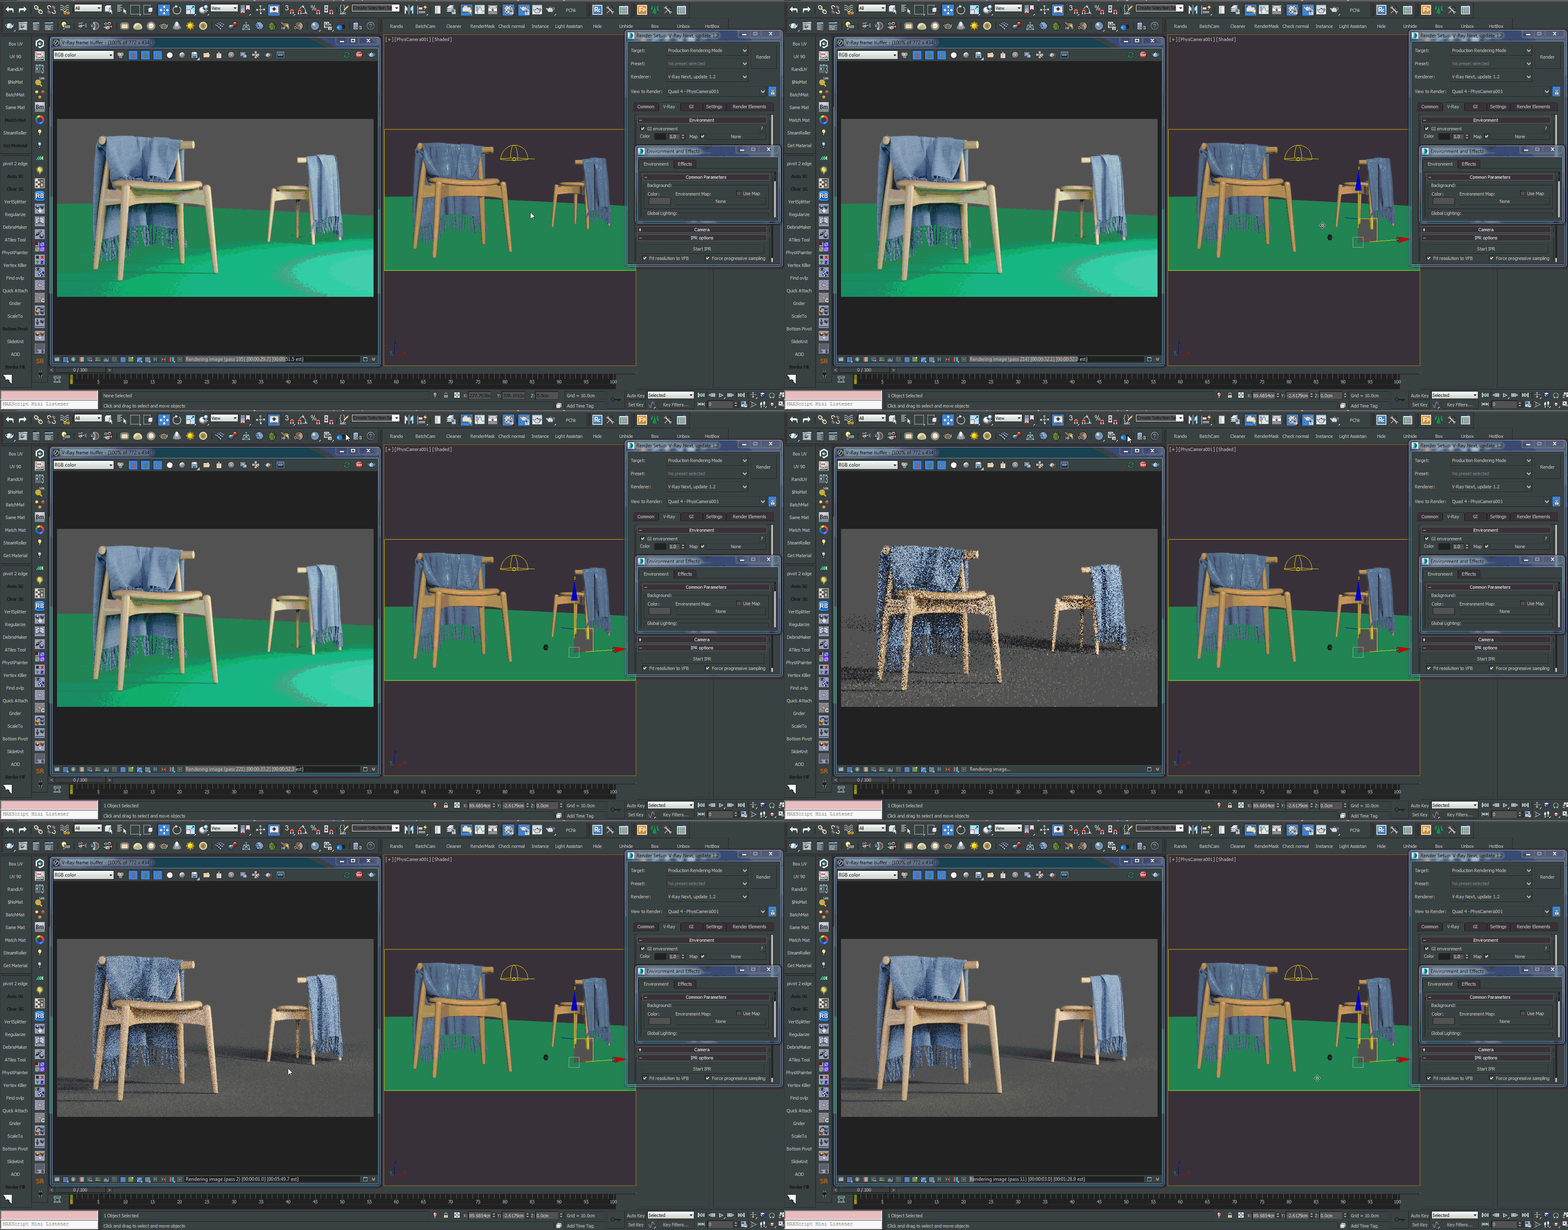
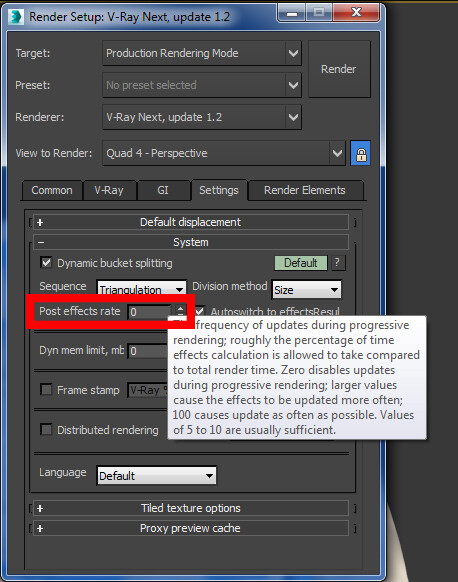
I set this to 0 for the final when I use lens effect and or/denoiser otherwise, VRay will try to calculate those every few seconds which will affect the rendering speed (unless you want to check the denoised render for some reason).
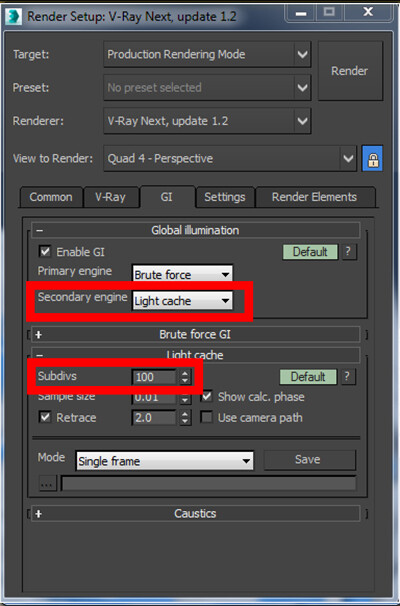
IPR in Next U1 is very fast, but you still can boost the speed by lowering the light cache subdivs or -for exteriors/ studio lighting scenarios- use Brute force for the secondary engine. (Next GPU is using BF+BF for IPR by default).
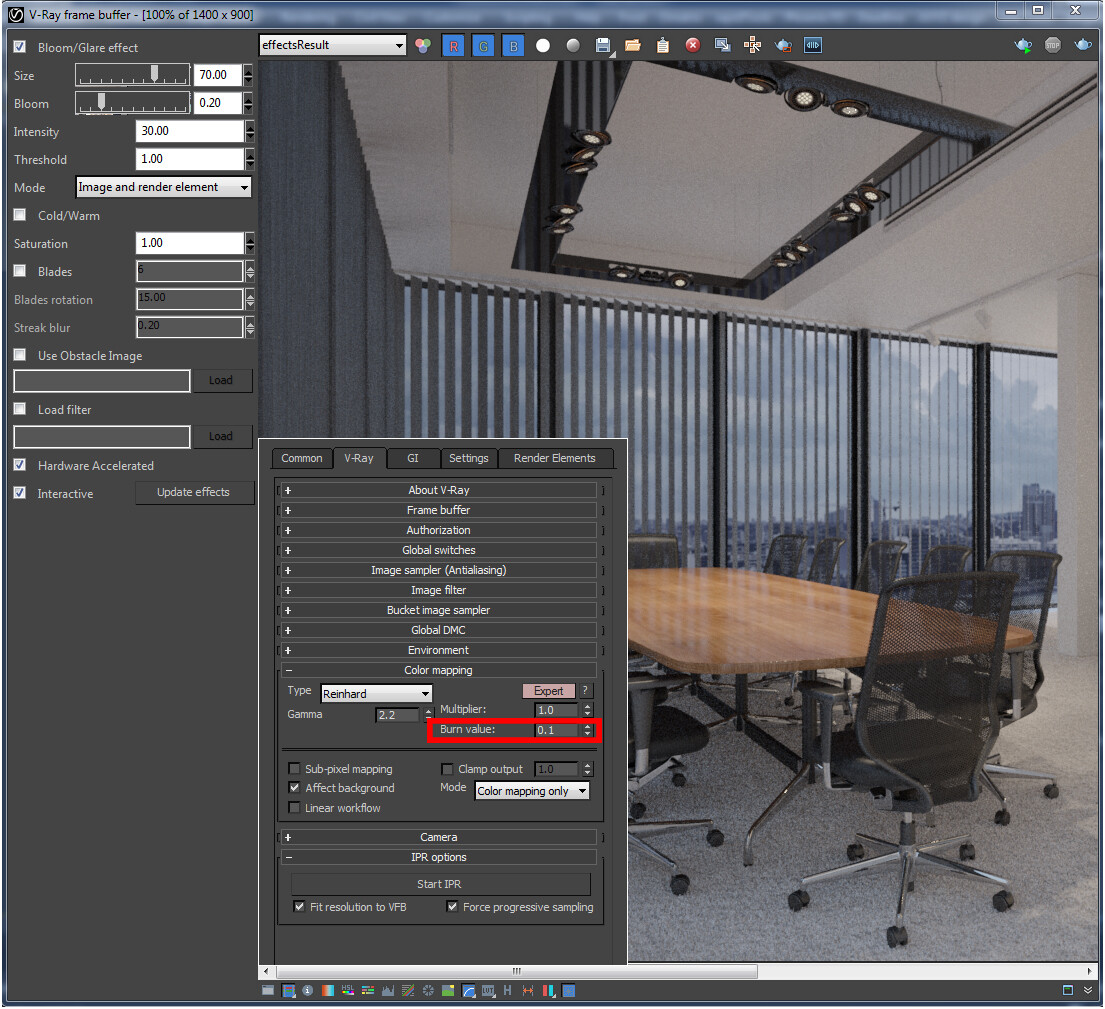
In recent updates, V-Ray change how V-Ray lens effect work and to get the proper effect you need to avoid playing with the dynamic range. Here in this image, I'm using 1.0 in burn value.
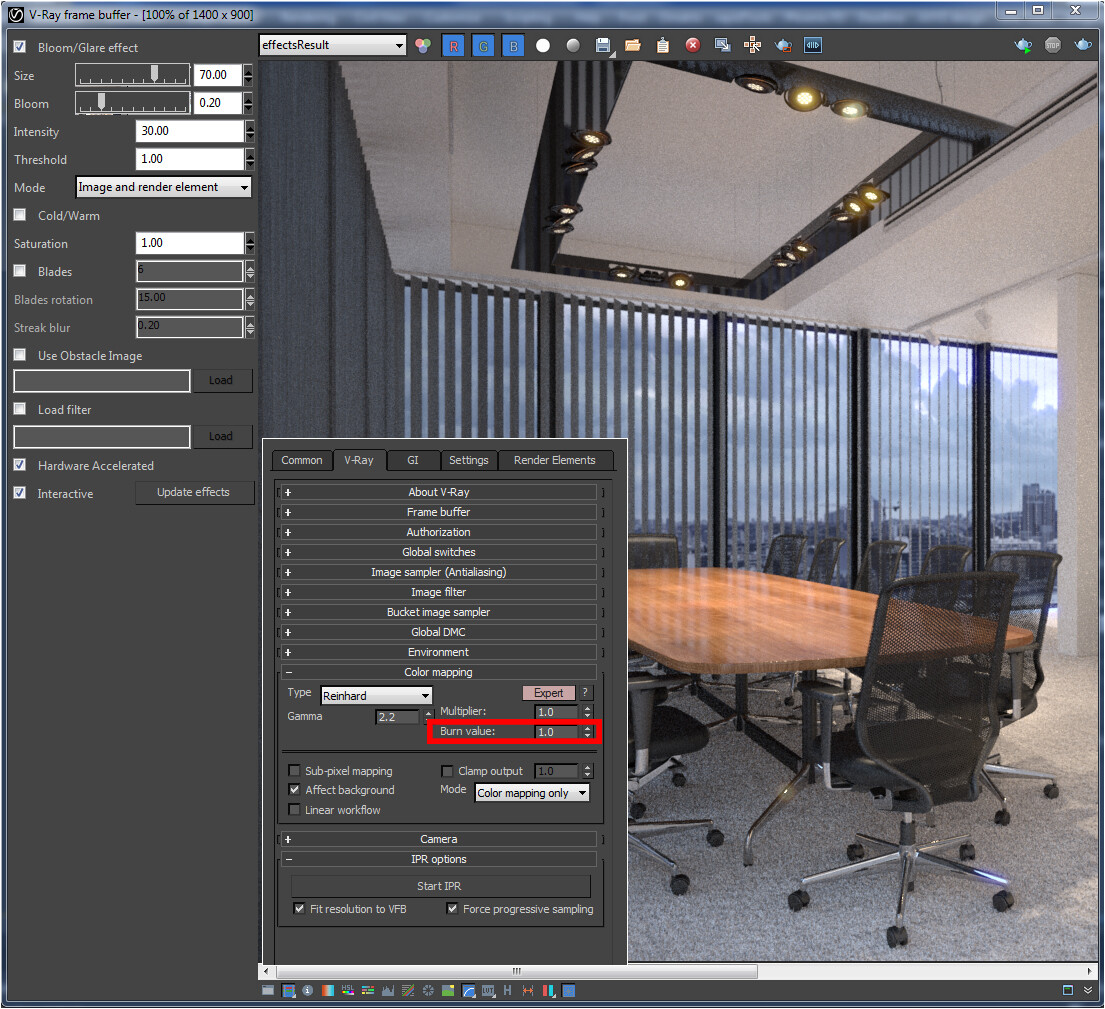
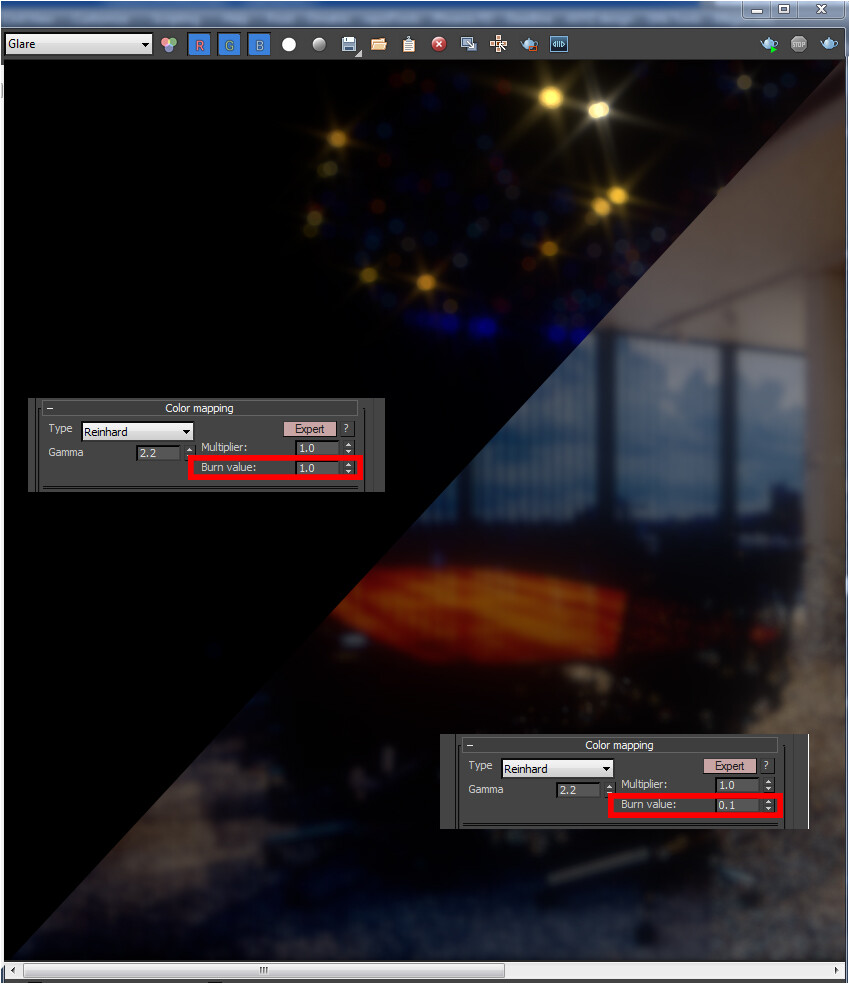
And here I'm using 0.1 for the burn value. Notice how the glare is gone.
Here is a comparison for only the glare to show the difference.
you will find color correction in the VFB working better too now ( highlight burn -contrast .e.tc) CHECK IT OUT.
That's it!
I hope you found the tips useful :)
Kind regards,
Nawras Ryhan